
Instruction Manual
Page 1
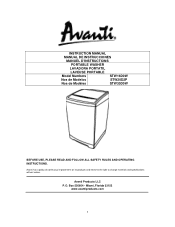
Avanti Products LLC P.O. INSTRUCTION MANUAL MANUAL DE INSTRUCCIONES MANUEL D'INSTRUCTIONS PORTABLE WASHER LAVADORA PORTATIL LAVEUSE PORTABLE Model Numbers STW16D0W Nos de Modelos STW20D2P Nos de Modèles STW30D0W BEFORE USE, PLEASE READ AND FOLLOW ALL SAFETY RULES AND OPERATING INSTRUCTIONS. Miami, Florida 33152 www.avantiproducts.com 1 Box 520604 - Avanti has a policy of continuous improvement on its products and reserves the right to change materials and specifications without notice.
Avanti Products LLC P.O. INSTRUCTION MANUAL MANUAL DE INSTRUCCIONES MANUEL D'INSTRUCTIONS PORTABLE WASHER LAVADORA PORTATIL LAVEUSE PORTABLE Model Numbers STW16D0W Nos de Modelos STW20D2P Nos de Modèles STW30D0W BEFORE USE, PLEASE READ AND FOLLOW ALL SAFETY RULES AND OPERATING INSTRUCTIONS. Miami, Florida 33152 www.avantiproducts.com 1 Box 520604 - Avanti has a policy of continuous improvement on its products and reserves the right to change materials and specifications without notice.
Instruction Manual
Page 2
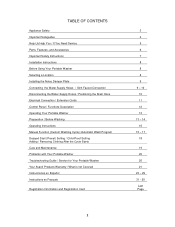
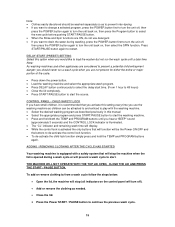
... Selecting a Location Installing the Noise Damper Plate Connecting the Water Supply Hoses / Sink Faucet Connection Disconnecting the Water Supply Hoses / Positioning the Drain Hose Electrical Connection / Extension Cords Control Panel / Functions Description Operating Your Portable Washer Preparation / Before Washing Operating Instructions Manual Function (Custom Washing Cycle) /Automatic Wash Program Delayed Start (Preset) Setting / Child-Proof Setting Adding / Removing Clothing After the Cycle Starts Care and Maintenance Problems with Your Portable Washer Troubleshooting Guide / Service for...
... Selecting a Location Installing the Noise Damper Plate Connecting the Water Supply Hoses / Sink Faucet Connection Disconnecting the Water Supply Hoses / Positioning the Drain Hose Electrical Connection / Extension Cords Control Panel / Functions Description Operating Your Portable Washer Preparation / Before Washing Operating Instructions Manual Function (Custom Washing Cycle) /Automatic Wash Program Delayed Start (Preset) Setting / Child-Proof Setting Adding / Removing Clothing After the Cycle Starts Care and Maintenance Problems with Your Portable Washer Troubleshooting Guide / Service for...
Instruction Manual
Page 4
... operate, play with the National Electrical Code and local codes and ordinances is recommended that cannot be completely unobstructed. All other servicing should be 15 amperes. It is used, it . Never allow children to make sure the power line of high heat. The appliance must be turned off by a switch or pull chain. Never clean appliance parts with temperatures...
... operate, play with the National Electrical Code and local codes and ordinances is recommended that cannot be completely unobstructed. All other servicing should be 15 amperes. It is used, it . Never allow children to make sure the power line of high heat. The appliance must be turned off by a switch or pull chain. Never clean appliance parts with temperatures...
Instruction Manual
Page 5
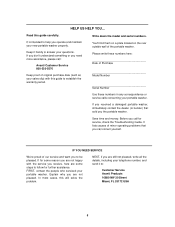
... wall of minor operating problems that sold you are not pleased. IF YOU NEED SERVICE We're proud of Purchase Model Number Serial Number Use these numbers here Date of our service and want you can correct yourself. HELP US HELP YOU... It lists causes of the portable washer. Write down the model and serial numbers. Save time and money. In most cases, this guide carefully. If for further...
... wall of minor operating problems that sold you are not pleased. IF YOU NEED SERVICE We're proud of Purchase Model Number Serial Number Use these numbers here Date of our service and want you can correct yourself. HELP US HELP YOU... It lists causes of the portable washer. Write down the model and serial numbers. Save time and money. In most cases, this guide carefully. If for further...
Instruction Manual
Page 7
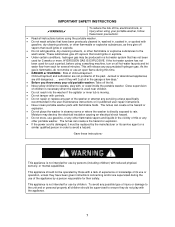
... not place the washer in a hot-water system that has not been used near children. Do not reach into the washer if the agitator or inner tub is moving. Do not tamper with controls. Do not repair or replace any part of the washer or attempt any servicing unless specifically recommended in the user-maintenance instructions or in the vicinity of this time. DANGER...
... not place the washer in a hot-water system that has not been used near children. Do not reach into the washer if the agitator or inner tub is moving. Do not tamper with controls. Do not repair or replace any part of the washer or attempt any servicing unless specifically recommended in the user-maintenance instructions or in the vicinity of this time. DANGER...

Instruction Manual
Page 8
... Authorized Avanti Products service center. SELECTING A LOCATION Before you install the portable washer, select a location with lukewarm water using a soft cloth. Allow 2 inches of space between the back and sides of the following parts: 2 Inlet Hoses 1 Faucet Adapter 1 Noise Proof Plate With Screws 1 Drain Hose Assembly 1 Water Inlet Plug SCREWDRIVER WRENCH PLIERS Remove shipping brace. Make sure that the washing machine does not stand on its power cord...
... Authorized Avanti Products service center. SELECTING A LOCATION Before you install the portable washer, select a location with lukewarm water using a soft cloth. Allow 2 inches of space between the back and sides of the following parts: 2 Inlet Hoses 1 Faucet Adapter 1 Noise Proof Plate With Screws 1 Drain Hose Assembly 1 Water Inlet Plug SCREWDRIVER WRENCH PLIERS Remove shipping brace. Make sure that the washing machine does not stand on its power cord...

Instruction Manual
Page 9
... COLD WATER CONNECTOR If you do not wish to hot. 1. CONNECTING NUT CONNECTING NUT HOT WATER CONNECTOR WATER INLET HOSE CONNECTING NUT WATER INLET HOSE Be sure the rubber rings are available, use the faucet adapter provided. INSTALLING THE NOISE DAMPER PLATE Affix the noise proof plate by turning the connecting nuts. 2. If the hose is inside the connecting nuts. COLD WATER CONNECTOR 9 Rubber ring seal 2. Unscrew the lid of hot water connector in water mixing valve...
... COLD WATER CONNECTOR If you do not wish to hot. 1. CONNECTING NUT CONNECTING NUT HOT WATER CONNECTOR WATER INLET HOSE CONNECTING NUT WATER INLET HOSE Be sure the rubber rings are available, use the faucet adapter provided. INSTALLING THE NOISE DAMPER PLATE Affix the noise proof plate by turning the connecting nuts. 2. If the hose is inside the connecting nuts. COLD WATER CONNECTOR 9 Rubber ring seal 2. Unscrew the lid of hot water connector in water mixing valve...

Instruction Manual
Page 10
... the height of the drain hose must be fixed tightly. Turn on the power and let the machine run for about 5 seconds then turn it off. Remove the connecting nuts from faucet connection or washer connection, turn off . DISCONNECTING THE WATER SUPPLY HOSES Dismantling the hose directly may require you to insert the rubber ring enclosed. Make sure to also use the inlet hose with cold water inlet. Note: Some faucets...
... the height of the drain hose must be fixed tightly. Turn on the power and let the machine run for about 5 seconds then turn it off. Remove the connecting nuts from faucet connection or washer connection, turn off . DISCONNECTING THE WATER SUPPLY HOSES Dismantling the hose directly may require you to insert the rubber ring enclosed. Make sure to also use the inlet hose with cold water inlet. Note: Some faucets...
Instruction Manual
Page 11
... careful not to operate. Damages due to power surges are very susceptible to have any circumstances cut or remove the third ground prong from the receptacle. When a standard 2-prong wall outlet is encountered, it is absolutely necessary that could be a UL/CUL-Listed, 3-wire grounding type appliance extension cord having a grounding type plug and outlet and that you do not use a cord...
... careful not to operate. Damages due to power surges are very susceptible to have any circumstances cut or remove the third ground prong from the receptacle. When a standard 2-prong wall outlet is encountered, it is absolutely necessary that could be a UL/CUL-Listed, 3-wire grounding type appliance extension cord having a grounding type plug and outlet and that you do not use a cord...

Instruction Manual
Page 12
CONTROL PANEL 1 POWER ON / OFF BUTTON 2 START / PAUSE BUTTON 3 EXTRA RINSE OPTION SELECTOR BUTTON 4 AUTOMATIC WASH PROGRAM SELECTOR BUTTON NORMAL / QUICK / HEAVY BULKY / DELICATE / SPIN ONLY 5 CONTROL PANEL LOCK (PRESS AND HOLD TEMP AND PROGRAM BUTTONS SIMULTANEOUSLY) 6 WASH TEMPERATURE SELECTOR BUTTON HOT / WARM / COLD 7 LOAD SIZE SELECTOR BUTTON LARGE / MEDIUM / SMALL 8 DELAY WASH PROGRAM SELECTOR BUTTON 9 ELECTRONIC DISPLAY WINDOW 10 FUNCTION (CYCLE) SELECTOR BUTTON SOAK / WASH / RINSE / SPIN 12
CONTROL PANEL 1 POWER ON / OFF BUTTON 2 START / PAUSE BUTTON 3 EXTRA RINSE OPTION SELECTOR BUTTON 4 AUTOMATIC WASH PROGRAM SELECTOR BUTTON NORMAL / QUICK / HEAVY BULKY / DELICATE / SPIN ONLY 5 CONTROL PANEL LOCK (PRESS AND HOLD TEMP AND PROGRAM BUTTONS SIMULTANEOUSLY) 6 WASH TEMPERATURE SELECTOR BUTTON HOT / WARM / COLD 7 LOAD SIZE SELECTOR BUTTON LARGE / MEDIUM / SMALL 8 DELAY WASH PROGRAM SELECTOR BUTTON 9 ELECTRONIC DISPLAY WINDOW 10 FUNCTION (CYCLE) SELECTOR BUTTON SOAK / WASH / RINSE / SPIN 12

Instruction Manual
Page 13
... plug into the tub evenly. 7. BEFORE WASHING Prepare the wash load. Right WWAATTEERRLELVEEVLEL Wrong 13 Put the wash load into the to the water faucet. Overloading the inner tub can result in or wrap them. For safety the plug switch on the power if the should rollover, sink and then reappear. Close the lid. Otherwise the detergent into the detergent washer will sound. Small load will use lower water levels. The water level...
... plug into the tub evenly. 7. BEFORE WASHING Prepare the wash load. Right WWAATTEERRLELVEEVLEL Wrong 13 Put the wash load into the to the water faucet. Overloading the inner tub can result in or wrap them. For safety the plug switch on the power if the should rollover, sink and then reappear. Close the lid. Otherwise the detergent into the detergent washer will sound. Small load will use lower water levels. The water level...
Instruction Manual
Page 15
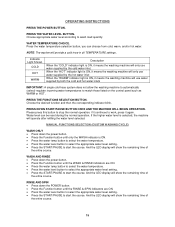
... washing machine to automatically (select) regulate incoming water temperatures to work, press it means the washing machine will only use water supplied by the cold water inlet. And the LED display will provide a cold rinse in all TEMPERATURE settings. PRESS THE WATER LEVEL BUTTON. Please press this button to stop the normal operation, if it means the washing machine will operate after refilling the water level selected. Press the water temperature selection button, you can be reset during the normal operation. NOTE: The washer will show the remaining time...
... washing machine to automatically (select) regulate incoming water temperatures to work, press it means the washing machine will only use water supplied by the cold water inlet. And the LED display will provide a cold rinse in all TEMPERATURE settings. PRESS THE WATER LEVEL BUTTON. Please press this button to stop the normal operation, if it means the washing machine will operate after refilling the water level selected. Press the water temperature selection button, you can be reset during the normal operation. NOTE: The washer will show the remaining time...
Instruction Manual
Page 16
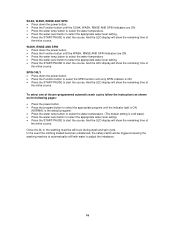
... the washing machine to automatically refill with water to start the course. And the LED display will buzz during wash and spin cycle. WASH, RINSE AND SPIN Press down the power button. Press the Function button until the WASH, RINSE AND SPIN indicators are ON. Press the water temp button to select the water temperature. Press the water level button to select the appropriate water level setting. Press the START/PAUSE to start the...
... the washing machine to automatically refill with water to start the course. And the LED display will buzz during wash and spin cycle. WASH, RINSE AND SPIN Press down the power button. Press the Function button until the WASH, RINSE AND SPIN indicators are ON. Press the water temp button to select the water temperature. Press the water level button to select the appropriate water level setting. Press the START/PAUSE to start the...
Instruction Manual
Page 19
... setting every time you use detergent. If you want to drain the water during a wash cycle or will prevent a wash cycle to restart. ADDING / REMOVING CLOTHING AFTER THE CYCLE HAS STARTED Your washing machine is equipped with the washing machine. Select the desired washing program as described previously in this option when you would like to load the washer but not run a wash cycle when you want to change a selected program, press the POWER button...
... setting every time you use detergent. If you want to drain the water during a wash cycle or will prevent a wash cycle to restart. ADDING / REMOVING CLOTHING AFTER THE CYCLE HAS STARTED Your washing machine is equipped with the washing machine. Select the desired washing program as described previously in this option when you would like to load the washer but not run a wash cycle when you want to change a selected program, press the POWER button...

Instruction Manual
Page 20
... power cord. Clean the surface of your portable washer regularly with soft fabric. Clean the inner tub regularly, especially immediately after washing starched or bleached laundry. Clean the lint filter. Remove the inlet hose and clean the filter with a brush. Clean the inner tub regularly, especially after starch or bleach operation. Clean the filter in the inlet valve or inlet hose regularly in order to remove the Clean and rinse it from clogging. PGuelnl tulyppwuasrhdtthoerteamb odovewnthe laliinnnttdffioillttueetrwr. CARE AND MAINTENANCE CLEANING...
... power cord. Clean the surface of your portable washer regularly with soft fabric. Clean the inner tub regularly, especially immediately after washing starched or bleached laundry. Clean the lint filter. Remove the inlet hose and clean the filter with a brush. Clean the inner tub regularly, especially after starch or bleach operation. Clean the filter in the inlet valve or inlet hose regularly in order to remove the Clean and rinse it from clogging. PGuelnl tulyppwuasrhdtthoerteamb odovewnthe laliinnnttdffioillttueetrwr. CARE AND MAINTENANCE CLEANING...
Instruction Manual
Page 21
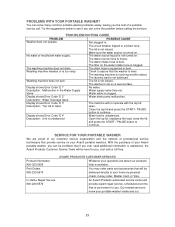
... washing machine is frozen. The washer is not turned on a level surface. Display shows Error Code "E 1" No water, Description: Malfunction in . Display shows Error Code "E 2" Water drain pump malfunction. Close the top lid and press the START / PAUSE button to continue. Our trained servicers know your home by personal check, money order, Master Card, or Visa. TROUBLESHOOTING GUIDE PROBLEM POSSIBLE CAUSE Washer does not operate. The circuit breaker tripped or a blown fuse. Washing machine vibrates or is not balanced. The laundry load...
... washing machine is frozen. The washer is not turned on a level surface. Display shows Error Code "E 1" No water, Description: Malfunction in . Display shows Error Code "E 2" Water drain pump malfunction. Close the top lid and press the START / PAUSE button to continue. Our trained servicers know your home by personal check, money order, Master Card, or Visa. TROUBLESHOOTING GUIDE PROBLEM POSSIBLE CAUSE Washer does not operate. The circuit breaker tripped or a blown fuse. Washing machine vibrates or is not balanced. The laundry load...
Instruction Manual
Page 22
... of installation problems (you with any concessions, including repairs, pro-rates, or product replacement, once this period Avanti Products will provide you are not the direct fault of God. Shipping and handling costs associated with the written instructions in the warranty document. The foregoing timeline begins to install the product in material or workmanship under warranty. such as the resetting of purchase by the original owner, Avanti products will...
... of installation problems (you with any concessions, including repairs, pro-rates, or product replacement, once this period Avanti Products will provide you are not the direct fault of God. Shipping and handling costs associated with the written instructions in the warranty document. The foregoing timeline begins to install the product in material or workmanship under warranty. such as the resetting of purchase by the original owner, Avanti products will...

Instruction Manual
Page 37
... les chiffres ci-dessous. Connect the water inlet hose to the faucets by turning the connecting nut. Rubber ring seal 2. Ne pas étirer le tuyau d'alimentation en eau. COLD WATER CONNECTOR 37 Unscrew the lid of hot water connector in water mixing valve, and then connect the other end of water inlet hoses to the cold connector in water mixing valve by turning the connecting nut. Raccordement des tuyaux...
... les chiffres ci-dessous. Connect the water inlet hose to the faucets by turning the connecting nut. Rubber ring seal 2. Ne pas étirer le tuyau d'alimentation en eau. COLD WATER CONNECTOR 37 Unscrew the lid of hot water connector in water mixing valve, and then connect the other end of water inlet hoses to the cold connector in water mixing valve by turning the connecting nut. Raccordement des tuyaux...
Instruction Manual
Page 55
... to purchase this product: Price Product Features Avanti Reputation Product Quality Salesperson Recommendation Other Friend / Relative Recommendation Warranty Other Comments: Model # Serial # Date Purchased Store...Product Used In The: Home Business How Did You Learn About This Product: Advertising In-Store Demo Personal Demo 55 detach here Avanti Registration Card Name Address City State Zip Area Code Phone Number Did You Purchase An Additional Warranty...
... to purchase this product: Price Product Features Avanti Reputation Product Quality Salesperson Recommendation Other Friend / Relative Recommendation Warranty Other Comments: Model # Serial # Date Purchased Store...Product Used In The: Home Business How Did You Learn About This Product: Advertising In-Store Demo Personal Demo 55 detach here Avanti Registration Card Name Address City State Zip Area Code Phone Number Did You Purchase An Additional Warranty...
Parts and Accessories
Page 2
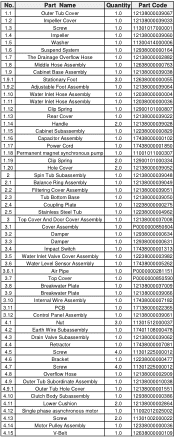
... Hole Cover 2.0 12138000039052 2 Spin Tub Subassembly 1.0 12138000039048 2.1 Balance Ring Assembly 1.0 12138000039049 2.2 Filtering Cover Assembly 1.0 12138000039051 2.3 Tub Bottom Base 1.0 12138000039050 2.4 Coupling Plate 1.0 12238000000275 2.5 Stainless Steel Tub 1.0 12238000004962 3 Top Cover And Door Cover Assembly 1.0 12138000037008 3.1 Cover Assembly 1.0 P0000000850604 3.2 Damper 1.0 12938000000634 3.3 Damper 1.0 12938000000631 3.4 Impact Switch 1.0 17438000001313 3.5 Water Inlet Valve Cover Assembly 1.0 12238000003982 3.6 Water Level Sensor Assembly...
... Hole Cover 2.0 12138000039052 2 Spin Tub Subassembly 1.0 12138000039048 2.1 Balance Ring Assembly 1.0 12138000039049 2.2 Filtering Cover Assembly 1.0 12138000039051 2.3 Tub Bottom Base 1.0 12138000039050 2.4 Coupling Plate 1.0 12238000000275 2.5 Stainless Steel Tub 1.0 12238000004962 3 Top Cover And Door Cover Assembly 1.0 12138000037008 3.1 Cover Assembly 1.0 P0000000850604 3.2 Damper 1.0 12938000000634 3.3 Damper 1.0 12938000000631 3.4 Impact Switch 1.0 17438000001313 3.5 Water Inlet Valve Cover Assembly 1.0 12238000003982 3.6 Water Level Sensor Assembly...

