User Manual
Page 2
...Customer, We hope that your product, which has been produced in modern plants and checked under the most meticulous quality control procedures, will provide you use your appliance quickly and safely. • Read the manual before using it and keep it later. • Besides, read also the other models as you to carefully...note that this manual first! Recycling This product is supplied with years of your product before installing and operating your product. • Follow the instructions, especially those for waste electrical and electronic equipment (WEEE). This manual • Will...
...Customer, We hope that your product, which has been produced in modern plants and checked under the most meticulous quality control procedures, will provide you use your appliance quickly and safely. • Read the manual before using it and keep it later. • Besides, read also the other models as you to carefully...note that this manual first! Recycling This product is supplied with years of your product before installing and operating your product. • Follow the instructions, especially those for waste electrical and electronic equipment (WEEE). This manual • Will...

User Manual
Page 3
Fitting A Different Plug.......5 Energy Saving Tips 6 5 Using your refrigerator 13 DEFROSTING 16 A) FRIDGE COMPARTMENT............16 B) FREEZER COMPARTMENT.........16 Water dispenser 17 Icematic and ice storage container...19 3 Installation 7 6 Maintenance and TRANSPORTATION INSTRUCTIONS.7 cleaning 20 REVERSING THE DOORS 10 7 Do's and Don'ts 21 4 Before operating 12 Final Check 12 2 EN CONTENTS 1 Your refrigerator 3 2 Warnings 4 Electrical Requirements 5 Important!
Fitting A Different Plug.......5 Energy Saving Tips 6 5 Using your refrigerator 13 DEFROSTING 16 A) FRIDGE COMPARTMENT............16 B) FREEZER COMPARTMENT.........16 Water dispenser 17 Icematic and ice storage container...19 3 Installation 7 6 Maintenance and TRANSPORTATION INSTRUCTIONS.7 cleaning 20 REVERSING THE DOORS 10 7 Do's and Don'ts 21 4 Before operating 12 Final Check 12 2 EN CONTENTS 1 Your refrigerator 3 2 Warnings 4 Electrical Requirements 5 Important!

User Manual
Page 4
Door Shelves (Small bottles,cans, tubes) 2. Interior light 14. Water DispenserTank (Cold water) 4. Crisper bins (for many years. 13 1 12 2 10 11 14 10 3 10 4 9 8 7 6 15 6 6 5 1. Crisper cover 10. If the subject parts are not included in this instruction manual are schematic and may not correspond exactly with your choice of a BEKO quality Appliance which has been designed to be frozen lower down) 7. Freezing and Storage (store fresh food...
Door Shelves (Small bottles,cans, tubes) 2. Interior light 14. Water DispenserTank (Cold water) 4. Crisper bins (for many years. 13 1 12 2 10 11 14 10 3 10 4 9 8 7 6 15 6 6 5 1. Crisper cover 10. If the subject parts are not included in this instruction manual are schematic and may not correspond exactly with your choice of a BEKO quality Appliance which has been designed to be frozen lower down) 7. Freezing and Storage (store fresh food...
User Manual
Page 5
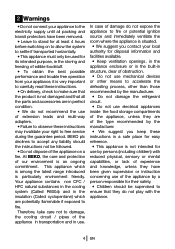
...switching on to allow the system to settle if transported horizontally. • This appliance must only be used for its intended purpose, ie the storing and freezing of edible foodstuff. • To obtain the best possible performance and trouble free operation from your appliance, it is very important to carefully read these instructions. • On delivery, check to make...the cooling system (Called R600a) and in use. 2 Warnings • Do not connect your appliance to the electricity supply until all packing and transit protectors have been given supervision or instruction concerning use ...
...switching on to allow the system to settle if transported horizontally. • This appliance must only be used for its intended purpose, ie the storing and freezing of edible foodstuff. • To obtain the best possible performance and trouble free operation from your appliance, it is very important to carefully read these instructions. • On delivery, check to make...the cooling system (Called R600a) and in use. 2 Warnings • Do not connect your appliance to the electricity supply until all packing and transit protectors have been given supervision or instruction concerning use ...
User Manual
Page 6
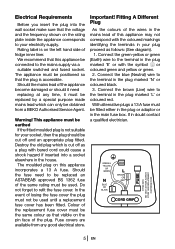
... the wall socket make sure that the plug is accessible. Connect the brown (Live) wire to the mains supply via a suitable switched and fused socket. Rating label is not suitable for your electricity supply. This appliance must be earthed If the fitted moulded plug is on the pin face of fridge inner liner. The moulded plug on the rating plate inside the appliance corresponds...
... the wall socket make sure that the plug is accessible. Connect the brown (Live) wire to the mains supply via a suitable switched and fused socket. Rating label is not suitable for your electricity supply. This appliance must be earthed If the fitted moulded plug is on the pin face of fridge inner liner. The moulded plug on the rating plate inside the appliance corresponds...

User Manual
Page 8
... : Care must be taken while cleaning / carrying the appliance to avoid touching the bottom of the condenser metal wires at the back of the compressor, to play with the appliance or tamper with the controls. 7 EN "IMPORTANT: Make sure that the defrost water pipe at least 4 hours to allow children to avoid defrost water spillage on the floor. 8. 3 Installation TRANSPORTATION INSTRUCTIONS 1. The...
... : Care must be taken while cleaning / carrying the appliance to avoid touching the bottom of the condenser metal wires at the back of the compressor, to play with the appliance or tamper with the controls. 7 EN "IMPORTANT: Make sure that the defrost water pipe at least 4 hours to allow children to avoid defrost water spillage on the floor. 8. 3 Installation TRANSPORTATION INSTRUCTIONS 1. The...

User Manual
Page 9
... compressor. BEKO declines to accept any liability should the instructions not be smaller than 10 cubic metres. 6.Fit the front grille supplied with the floor. INSTALLATION INSTRUCTIONS 1.Fitted the two plastic wall spacers supplied onto the condenser at the back of the cabinet on a smooth surface. 3.To ensure it is standing upright adjust the two front feet by rotating 1/4 turn. Gently remove...
... compressor. BEKO declines to accept any liability should the instructions not be smaller than 10 cubic metres. 6.Fit the front grille supplied with the floor. INSTALLATION INSTRUCTIONS 1.Fitted the two plastic wall spacers supplied onto the condenser at the back of the cabinet on a smooth surface. 3.To ensure it is standing upright adjust the two front feet by rotating 1/4 turn. Gently remove...

User Manual
Page 10
... ensuring it useful to remove shelves for easy access. 2. Use a flat tipped screwdriver to remove the light diffuser cover by inserting the rear lug and pushing up to locate the front two lugs. 4. Replace the bulb with a new 15 watt (max) screw cap (SES) bulb. 5. Switch off each side. 3. Replace the plug and switch on. If the bulb works, replace the light cover by inserting the blade in the holder. Carefully dispose of...
... ensuring it useful to remove shelves for easy access. 2. Use a flat tipped screwdriver to remove the light diffuser cover by inserting the rear lug and pushing up to locate the front two lugs. 4. Replace the bulb with a new 15 watt (max) screw cap (SES) bulb. 5. Switch off each side. 3. Replace the plug and switch on. If the bulb works, replace the light cover by inserting the blade in the holder. Carefully dispose of...

User Manual
Page 11
... ) adjust the front feet. 30- REVERSING THE DOORS 1- Screw and fix the new middle hinge bushing which is supplied in the appliance, put the freezer door between the top and middle hinge carefully. (25) 27- Carefully stand your appliance (you may need somebody to the other feet, and tighten the screws. (17) 20- Carefully tilt the appliance on its back. (8) (You may need somebody to settle before switching...
... ) adjust the front feet. 30- REVERSING THE DOORS 1- Screw and fix the new middle hinge bushing which is supplied in the appliance, put the freezer door between the top and middle hinge carefully. (25) 27- Carefully stand your appliance (you may need somebody to the other feet, and tighten the screws. (17) 20- Carefully tilt the appliance on its back. (8) (You may need somebody to settle before switching...
User Manual
Page 13
... (see; Insert the plug into the wall socket and switch on the electricity supply. • When the door is quite normal. Avoid spillage of the fan inside the frost free freezer compartment, overall noise level is slightly higher in comparison to noise, whether the compressor is running or not which is open the fridge interior light will stop. Clean the interior as recommended under "CLEANING AND CARE." 4. "Due to operation of food particularly small...
... (see; Insert the plug into the wall socket and switch on the electricity supply. • When the door is quite normal. Avoid spillage of the fan inside the frost free freezer compartment, overall noise level is slightly higher in comparison to noise, whether the compressor is running or not which is open the fridge interior light will stop. Clean the interior as recommended under "CLEANING AND CARE." 4. "Due to operation of food particularly small...
User Manual
Page 14
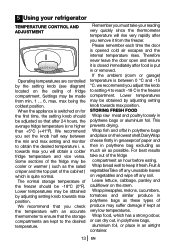
.... When the appliance is switched on the stem. The normal storage temperature of the fridge may be obtained by adjusting setting knob towards max position. If the ambient (room or garage) temperature is no higher than +5°C (+41°F). For best results take your refrigerator TEMPERATURE CONTROL AND ADJUSTMENT Operating temperatures are kept to reach -18 C in or removed. Wrap bread well to...
.... When the appliance is switched on the stem. The normal storage temperature of the fridge may be obtained by adjusting setting knob towards max position. If the ambient (room or garage) temperature is no higher than +5°C (+41°F). For best results take your refrigerator TEMPERATURE CONTROL AND ADJUSTMENT Operating temperatures are kept to reach -18 C in or removed. Wrap bread well to...

User Manual
Page 15
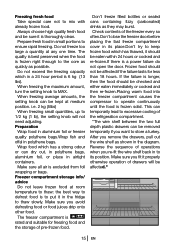
... stored in airtight covered containers.Don't store cooked and fresh food together in the can be stored in accordance with the food manufacturer's instructions for a frozen ...defrosting food or food juices drip onto other food.Do not fill water tank with water dispenser. If you buy them. 2 Put packets in the freezer as quickly as it is supplied for storage as possible and adhere to 'best before' and 'use... to mix with cooked food to cool first.Leftover canned food should be chilled for use clean pure drinking water.Capacity of the fridge where it is 2.2 litres [3.8 ...
... stored in airtight covered containers.Don't store cooked and fresh food together in the can be stored in accordance with the food manufacturer's instructions for a frozen ...defrosting food or food juices drip onto other food.Do not fill water tank with water dispenser. If you buy them. 2 Put packets in the freezer as quickly as it is supplied for storage as possible and adhere to 'best before' and 'use... to mix with cooked food to cool first.Leftover canned food should be chilled for use clean pure drinking water.Capacity of the fridge where it is 2.2 litres [3.8 ...
User Manual
Page 16
.... After you want to ensure rapid freezing. Reverse the sequence of the freezer every so often.Don't close the freezer door before placing the fast freeze compartment cover in the diagram. Freezing fresh food Take special care not to MAX. Make sure all air is to operate continuously until the food is a power failure do not open the door. Don't freeze filled bottles or sealed cans containing...
.... After you want to ensure rapid freezing. Reverse the sequence of the freezer every so often.Don't close the freezer door before placing the fast freeze compartment cover in the diagram. Freezing fresh food Take special care not to MAX. Make sure all air is to operate continuously until the food is a power failure do not open the door. Don't freeze filled bottles or sealed cans containing...
User Manual
Page 18
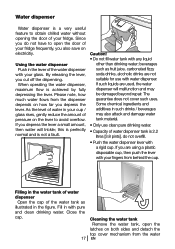
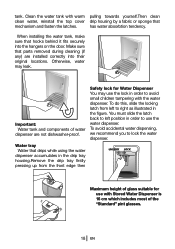
... liquids are used, the water dispenser will trickle; Close the cap. 17 Cleaning the water tank Remove the water tank, open the door of pressure on the lever to avoid overflow. By releasing the lever, you depress the lever. As the level of the water dispenser with water dispenser. The guarantee does not cover such uses. Fill in with any liquid other than drinking water; Using the water dispenser Push...
... liquids are used, the water dispenser will trickle; Close the cap. 17 Cleaning the water tank Remove the water tank, open the door of pressure on the lever to avoid overflow. By releasing the lever, you depress the lever. As the level of the water dispenser with water dispenser. The guarantee does not cover such uses. Fill in with any liquid other than drinking water; Using the water dispenser Push...
User Manual
Page 19
... clean clean water, reinstall the top cover drip housing by a fabric or sponge that hooks behind it fits securely into their original locations. Water tray Water that parts removed during cleaning (if any) are not dishwasher-proof. To do this, slide the locking latch from the front edge then UNLOCK LOCK Maximum height of water dispenser are installed correctly into the hangers on the door. Make sure that drips while using...
... clean clean water, reinstall the top cover drip housing by a fabric or sponge that hooks behind it fits securely into their original locations. Water tray Water that parts removed during cleaning (if any) are not dishwasher-proof. To do this, slide the locking latch from the front edge then UNLOCK LOCK Maximum height of water dispenser are installed correctly into the hangers on the door. Make sure that drips while using...
User Manual
Page 21
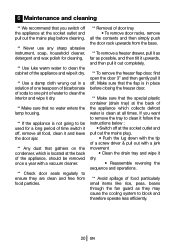
... pull out the mains plug before closing the freezer door. ** Make sure that gathers on the condenser, which collects defrost water is clean at all times. 6 Maintenance and cleaning ** We recommend that you want to remove the tray to clean it follow the instructions below : • Switch off at the back of the appliance, should be used for cleaning. ** Use luke warm water to clean the cabinet of the...
... pull out the mains plug before closing the freezer door. ** Make sure that gathers on the condenser, which collects defrost water is clean at all times. 6 Maintenance and cleaning ** We recommend that you want to remove the tray to clean it follow the instructions below : • Switch off at the back of the appliance, should be used for cleaning. ** Use luke warm water to clean the cabinet of the...

User Manual
Page 22
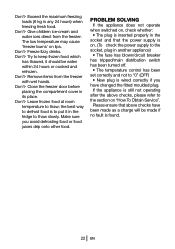
... buy . Do- Leave the door open for freezing in the same container. Keep raw meat and poultry below cooked food and dairy products. Prepare fresh food for long periods as possible. dates. 7 Do's and Don'ts Do- Do- Remove ice cream from the freezer 10-20 minutes before you buy it and put it in accordance with the instructions...
... buy . Do- Leave the door open for freezing in the same container. Keep raw meat and poultry below cooked food and dairy products. Prepare fresh food for long periods as possible. dates. 7 Do's and Don'ts Do- Do- Remove ice cream from the freezer 10-20 minutes before you buy it and put it in accordance with the instructions...
User Manual
Page 23
... has tripped/main distribution switch has been turned off. • The temperature control has been set correctly and not to the section on , check whether: • The plug is inserted properly in the fridge to thaw slowly. Don't- Don't- Make sure you have changed the fitted moulded plug. Freeze fizzy drinks. Close the freezer door before placing the compartment cover in any 24 hours...
... has tripped/main distribution switch has been turned off. • The temperature control has been set correctly and not to the section on , check whether: • The plug is inserted properly in the fridge to thaw slowly. Don't- Don't- Make sure you have changed the fitted moulded plug. Freeze fizzy drinks. Close the freezer door before placing the compartment cover in any 24 hours...

User Manual
Page 24
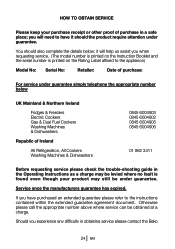
..., filters and light bulbs. • Repairs required as a result of unauthorised repair or inexpert installation that fails to meet the requirements contained in the user instruction book. • Repairs to products used in commercial or non-residential domestic household premises. • The product must be correctly installed, located and operated in accordance with the instructions contained in the User Instructions Booklet provided. • Professional installation by a qualified Electrical...
..., filters and light bulbs. • Repairs required as a result of unauthorised repair or inexpert installation that fails to meet the requirements contained in the user instruction book. • Repairs to products used in commercial or non-residential domestic household premises. • The product must be correctly installed, located and operated in accordance with the instructions contained in the User Instructions Booklet provided. • Professional installation by a qualified Electrical...
User Manual
Page 25
... Instruction Booklet and the serial number is found even though your product may still be obtained at a charge. Tel: 0845 6004911 e-mail: service@beko.co.uk 24 EN it should also complete the details below UK Mainland & Northern Ireland Fridges & Freezers Electric Cookers Gas & Dual Fuel Cookers Washing Machines & Dishwashers Republic of purchase in obtaining service please contact the Beko Customer...
... Instruction Booklet and the serial number is found even though your product may still be obtained at a charge. Tel: 0845 6004911 e-mail: service@beko.co.uk 24 EN it should also complete the details below UK Mainland & Northern Ireland Fridges & Freezers Electric Cookers Gas & Dual Fuel Cookers Washing Machines & Dishwashers Republic of purchase in obtaining service please contact the Beko Customer...

