Owners Manual
Page 2
... between models are used in the user manual. If you get the best results from your appliance which has been manufactured with high quality and state-of this manual: C Important information and useful hints about usage. Follow the instructions by paying attention to someone else, give the user manual as a reference for future use. Meanings of life and property. This product...
... between models are used in the user manual. If you get the best results from your appliance which has been manufactured with high quality and state-of this manual: C Important information and useful hints about usage. Follow the instructions by paying attention to someone else, give the user manual as a reference for future use. Meanings of life and property. This product...
Owners Manual
Page 3
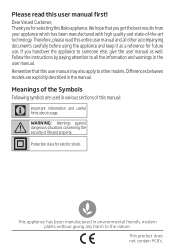
...of the Waste Product 5 1.3 Compliance with RoHS Directive 5 1.4 Information on Waste Batteries 5 1.5 Package information 5 1.6 Plug Wiring 6 2 Your cordless stick vacuum cleaner 7 2.1 Overview 7 2.2 Technical data 8 3 Operation 9-11 3.1 Intended use 9 3.2 Installing the body and brush 9 3.3 Charging the appliance 9 3.4 Operating the appliance 10 3.5 Starting cordless vacuum cleaner 10 3.6 Accessories 11 4 Cleaning and care 12-13 4.1 Cleaning the dust container 12 4.2 Cleaning the brush 12 4.3 Storage 13 4.4 Handling and transportation 13 Vacuum Cleaner / User Manual...
...of the Waste Product 5 1.3 Compliance with RoHS Directive 5 1.4 Information on Waste Batteries 5 1.5 Package information 5 1.6 Plug Wiring 6 2 Your cordless stick vacuum cleaner 7 2.1 Overview 7 2.2 Technical data 8 3 Operation 9-11 3.1 Intended use 9 3.2 Installing the body and brush 9 3.3 Charging the appliance 9 3.4 Operating the appliance 10 3.5 Starting cordless vacuum cleaner 10 3.6 Accessories 11 4 Cleaning and care 12-13 4.1 Cleaning the dust container 12 4.2 Cleaning the brush 12 4.3 Storage 13 4.4 Handling and transportation 13 Vacuum Cleaner / User Manual...
Owners Manual
Page 4
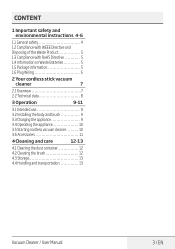
... any granted warranty. Children should cleaning and maintenance. Cleaning and ••Protect the appliance from risk of the or its plug when it is damaged, do not use it. Contact an authorised service. ••Unplug the appliance before ••Your mains power supply should not play liquids. replacement. Failure to the power cable by an adult. cleaning. 4 / EN Vacuum Cleaner / User Manual
... any granted warranty. Children should cleaning and maintenance. Cleaning and ••Protect the appliance from risk of the or its plug when it is damaged, do not use it. Contact an authorised service. ••Unplug the appliance before ••Your mains power supply should not play liquids. replacement. Failure to the power cable by an adult. cleaning. 4 / EN Vacuum Cleaner / User Manual
Owners Manual
Page 5
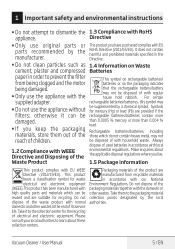
... parts and materials which do not contain heavy metal, may not be disposed of electrical and electronic equipment. Vacuum Cleaner / User Manual 5 / EN For certain rechargeable batteries/batteries, this symbol may not be disposed of the Waste Product 1.3 Compliance with RoHS Directive The product you have purchased complies with local environmental regulations. Do not dispose of used batteries in the Directive. 1.4 Information on Waste Batteries...
... parts and materials which do not contain heavy metal, may not be disposed of electrical and electronic equipment. Vacuum Cleaner / User Manual 5 / EN For certain rechargeable batteries/batteries, this symbol may not be disposed of the Waste Product 1.3 Compliance with RoHS Directive The product you have purchased complies with local environmental regulations. Do not dispose of used batteries in the Directive. 1.4 Information on Waste Batteries...
Owners Manual
Page 6
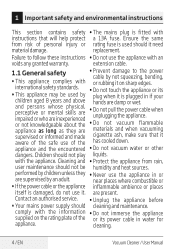
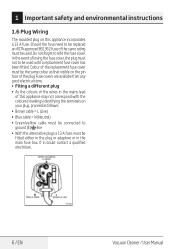
... as that visible on your plug, proceed as follows: •• Brown cable = L (Live) •• Blue cable = N (Neutral) •• Green/yellow cable must be connected to ground (E) line •• With the alternative plugs a 13 A fuse must be fitted either in the plug or adaptore or in doubt contact a qualified electrician. 6 / EN Vacuum Cleaner / User Manual
... as that visible on your plug, proceed as follows: •• Brown cable = L (Live) •• Blue cable = N (Neutral) •• Green/yellow cable must be connected to ground (E) line •• With the alternative plugs a 13 A fuse must be fitted either in the plug or adaptore or in doubt contact a qualified electrician. 6 / EN Vacuum Cleaner / User Manual
Owners Manual
Page 7
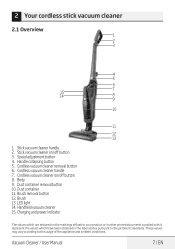
... button 6. Brush removal button 12. LED light 14. Body 9. Dust container 11. Handheld vacuum cleaner 15. Vacuum Cleaner / User Manual 7 / EN Handle collapsing button 5. Speed adjustment button 4. 2 Your cordless stick vacuum cleaner 2.1 Overview 1 2 3 4 5 6 7 15 14 8 9 10 11 12 13 1. Stick vacuum cleaner handle 2. Stick vacuum cleaner on the markings affixed to your product or in the laboratories pursuant to the usage of the appliance and ambient conditions. Cordless vacuum cleaner handle 7. Dust container removal button 10. Brush 13. Charging and power...
... button 6. Brush removal button 12. LED light 14. Body 9. Dust container 11. Handheld vacuum cleaner 15. Vacuum Cleaner / User Manual 7 / EN Handle collapsing button 5. Speed adjustment button 4. 2 Your cordless stick vacuum cleaner 2.1 Overview 1 2 3 4 5 6 7 15 14 8 9 10 11 12 13 1. Stick vacuum cleaner handle 2. Stick vacuum cleaner on the markings affixed to your product or in the laboratories pursuant to the usage of the appliance and ambient conditions. Cordless vacuum cleaner handle 7. Dust container removal button 10. Brush 13. Charging and power...

Owners Manual
Page 8
2 Your cordless stick vacuum cleaner 2.2 Technical data Model VRT 61814 VR Supply voltage Power 14.4 W Product spec DC 14.4V 2000mAh Li-on Apaptor Input 100-240V~50/60Hz 0.3A Apaptor Output 18V 500mA Brush spec 14.4V 5W Charging time VRT 61818 VW VRT 61821 VD 100-240V~ 50-60Hz 18 W 21.6 W DC 18V 2000mAh Li-on DC 21.6V 2000mAh Li-on 100-240V~50/60Hz 0.3A 100-240V~50/60Hz 0.5A 22V 500mA 27V 500mA 14.4V 5W 21.6V 8W 4~6H Technical and design modification rights are reserved. 8 / EN Vacuum Cleaner / User Manual
2 Your cordless stick vacuum cleaner 2.2 Technical data Model VRT 61814 VR Supply voltage Power 14.4 W Product spec DC 14.4V 2000mAh Li-on Apaptor Input 100-240V~50/60Hz 0.3A Apaptor Output 18V 500mA Brush spec 14.4V 5W Charging time VRT 61818 VW VRT 61821 VD 100-240V~ 50-60Hz 18 W 21.6 W DC 18V 2000mAh Li-on DC 21.6V 2000mAh Li-on 100-240V~50/60Hz 0.3A 100-240V~50/60Hz 0.5A 22V 500mA 27V 500mA 14.4V 5W 21.6V 8W 4~6H Technical and design modification rights are reserved. 8 / EN Vacuum Cleaner / User Manual
Owners Manual
Page 9
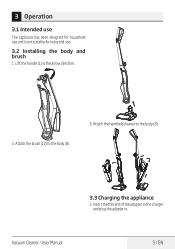
Attach the brush (12) to the body (8). 3.3 Charging the appliance 1. Lift the handle (1) in . Attach the handheld cleaner to the body (8). 3. 3 Operation 3.1 Intended use The appliance has been designed for household use and is not suitable for industrial use. 3.2 Installing the body and brush 1. Vacuum Cleaner / User Manual 9 / EN Insert the thin end of the adapter to the charger and plug the adapter in the arrow direction. 2.
Attach the brush (12) to the body (8). 3.3 Charging the appliance 1. Lift the handle (1) in . Attach the handheld cleaner to the body (8). 3. 3 Operation 3.1 Intended use The appliance has been designed for household use and is not suitable for industrial use. 3.2 Installing the body and brush 1. Vacuum Cleaner / User Manual 9 / EN Insert the thin end of the adapter to the charger and plug the adapter in the arrow direction. 2.
Owners Manual
Page 10
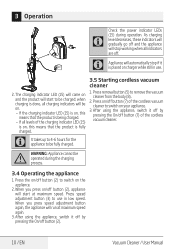
... LED (15) will come on /off button (2). 10 / EN Vacuum Cleaner / User Manual when charging is fully charged. C It takes up to 4-6 hours for the appliance to use . 2. When you press speed adjustment button again, the appliance will start to switch on the appliance. 2. Press removal button (5) to switch on your appliance. 3. Press the on . - 3 Operation C Check the power indicator LEDs (15) during the charging process...
... LED (15) will come on /off button (2). 10 / EN Vacuum Cleaner / User Manual when charging is fully charged. C It takes up to 4-6 hours for the appliance to use . 2. When you press speed adjustment button again, the appliance will start to switch on the appliance. 2. Press removal button (5) to switch on your appliance. 3. Press the on . - 3 Operation C Check the power indicator LEDs (15) during the charging process...
Owners Manual
Page 11
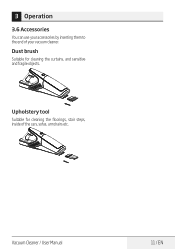
Vacuum Cleaner / User Manual 11 / EN Dust brush Suitable for cleaning the floorings, stair steps, inside of your vacuum cleaner. Upholstery tool Suitable for cleaning the curtains, and sensitive and fragile objects. 3 Operation 3.6 Accessories You can use your accessories by inserting them to the end of the cars, sofas, armchairs etc.
Vacuum Cleaner / User Manual 11 / EN Dust brush Suitable for cleaning the floorings, stair steps, inside of your vacuum cleaner. Upholstery tool Suitable for cleaning the curtains, and sensitive and fragile objects. 3 Operation 3.6 Accessories You can use your accessories by inserting them to the end of the cars, sofas, armchairs etc.

Owners Manual
Page 12
... brushes to remove the dust container (10). 2. Wash out the dust container (10), filter holder and HEPA filter under the running water. 5. Press the brush removal button (11) and remove the brush (12) from dust container (10). 7. Clean the body of cordless vacuum cleaner (14). 4.2 Cleaning the brush 1. A WARNING: Never use . 1. Replace the HEPA filter in its holder after all parts are dried and place filter holder in the body of the cordless vacuum cleaner (14) with a soft damp cloth. 3. Vacuum Cleaner / User Manual...
... brushes to remove the dust container (10). 2. Wash out the dust container (10), filter holder and HEPA filter under the running water. 5. Press the brush removal button (11) and remove the brush (12) from dust container (10). 7. Clean the body of cordless vacuum cleaner (14). 4.2 Cleaning the brush 1. A WARNING: Never use . 1. Replace the HEPA filter in its holder after all parts are dried and place filter holder in the body of the cordless vacuum cleaner (14) with a soft damp cloth. 3. Vacuum Cleaner / User Manual...
Owners Manual
Page 13
Vacuum Cleaner / User Manual 13 / EN 4 Cleaning and care 4.3 Storage •• If you do not intend to fold the handle, turn the folding button (4) clockwise and fold the handle (1). •• Keep the appliance out of the reach of the appliance protects it against physical ... in its original packaging. The packaging of children. 4.4 Handling and transportation •• During handling and transportation, carry the appliance in a vertical position or with its handle folded. •• In order to use the appliance for a long time, store it nonoperational or...
Vacuum Cleaner / User Manual 13 / EN 4 Cleaning and care 4.3 Storage •• If you do not intend to fold the handle, turn the folding button (4) clockwise and fold the handle (1). •• Keep the appliance out of the reach of the appliance protects it against physical ... in its original packaging. The packaging of children. 4.4 Handling and transportation •• During handling and transportation, carry the appliance in a vertical position or with its handle folded. •• In order to use the appliance for a long time, store it nonoperational or...
Owners Manual
Page 14
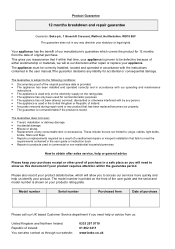
... Customer Service department if you to products used for accidental or consequential damage. Any parts removed during repair work or any consumable item or accessories. Accidental damage. Model number Serial number Purchased from us: United Kingdom and Northern Ireland: Republic of the user guide and the serial and model number is printed on your statutory or legal rights. How to : plugs, cables, light bulbs, knobs, filters and flaps. Product Guarantee...
... Customer Service department if you to products used for accidental or consequential damage. Any parts removed during repair work or any consumable item or accessories. Accidental damage. Model number Serial number Purchased from us: United Kingdom and Northern Ireland: Republic of the user guide and the serial and model number is printed on your statutory or legal rights. How to : plugs, cables, light bulbs, knobs, filters and flaps. Product Guarantee...
