User Manual in English
Page 2
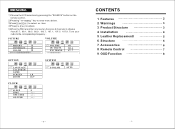
TFT MENU 1. Features 2 CH+ CH- 2. Product Structure 3 5)When the FM transmitter is turned on,there are 8 channels to the corresponding frequency . 5. Remote Control 7 9. OFF-TIME --: - Structure 6 J J BRIGHT 75 VOLUME 40 7. Tune your 4. Leather Replacementl 5 PICTURE VOLUME 6. OSD Function 8 OPTION SYSTEM J J LANGUAGE CALENDAR GAME SCREEN ZOOM LR 16:9 CLOCK S-COLOR AUTO J SLEEP 0 TIME --: - V+ 3. IR-A COLOR 30 FM TRANS. 87.7 8. ON-TIME --: - 8 1 Installation 4 radio to choose From:87.7、88.1、88...
TFT MENU 1. Features 2 CH+ CH- 2. Product Structure 3 5)When the FM transmitter is turned on,there are 8 channels to the corresponding frequency . 5. Remote Control 7 9. OFF-TIME --: - Structure 6 J J BRIGHT 75 VOLUME 40 7. Tune your 4. Leather Replacementl 5 PICTURE VOLUME 6. OSD Function 8 OPTION SYSTEM J J LANGUAGE CALENDAR GAME SCREEN ZOOM LR 16:9 CLOCK S-COLOR AUTO J SLEEP 0 TIME --: - V+ 3. IR-A COLOR 30 FM TRANS. 87.7 8. ON-TIME --: - 8 1 Installation 4 radio to choose From:87.7、88.1、88...
User Manual in English
Page 3
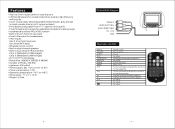
No effect Switch AV mode Main menu To the next higher program (the cursor is moved upwards) To the next lower program (the cursor is moved downwards) Volume increase (submenu adjust) Volume decrease (submenu adjust) No effect No effect No effect 7 MUTE on/off Power switch Sleep No effect Setting picture display dimension. Features High resolution digital panel for superb picture NTSC 8 800 480 2 MUTE ON/OFF SLEEP SYS VIEWMODE SEARCH MODE MENU CH+ CH- V+ V0~9 -/--
No effect Switch AV mode Main menu To the next higher program (the cursor is moved upwards) To the next lower program (the cursor is moved downwards) Volume increase (submenu adjust) Volume decrease (submenu adjust) No effect No effect No effect 7 MUTE on/off Power switch Sleep No effect Setting picture display dimension. Features High resolution digital panel for superb picture NTSC 8 800 480 2 MUTE ON/OFF SLEEP SYS VIEWMODE SEARCH MODE MENU CH+ CH- V+ V0~9 -/--

User Manual in English
Page 4
Direction Buttons Plastic Casing 8PCS 6 3
Direction Buttons Plastic Casing 8PCS 6 3
User Manual in English
Page 5
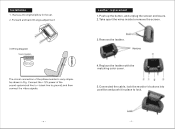
Installation 3 4 Leather replacement 1.Push up the button, and unplug the screen enclosure. 2.Take apart the wires inside to remove the screen. 3.Remove the leather. 4.Replace the leather with the matching color cover. 5.Connected the cable, lock the monitor's buttons into position and push it in place to lock. 5
Installation 3 4 Leather replacement 1.Push up the button, and unplug the screen enclosure. 2.Take apart the wires inside to remove the screen. 3.Remove the leather. 4.Replace the leather with the matching color cover. 5.Connected the cable, lock the monitor's buttons into position and push it in place to lock. 5


