
User Manual
Page 3
...-for-one basis when you buy a new similar product or to the WEEE Directive (2002/96/EC), the Battery Directive (2006/66/EC) and/or your household waste disposal service or visit www.canon-europe.com/environment. (EEA: Norway, Iceland and Liechtenstein) Trademark Acknowledgements • The SD logo is a trademark. • Microsoft... city office, waste authority, approved scheme or your national laws implementing those Directives. and other use for recycling waste electrical and electronic equipment (EEE) and batteries and accumulators.
...-for-one basis when you buy a new similar product or to the WEEE Directive (2002/96/EC), the Battery Directive (2006/66/EC) and/or your household waste disposal service or visit www.canon-europe.com/environment. (EEA: Norway, Iceland and Liechtenstein) Trademark Acknowledgements • The SD logo is a trademark. • Microsoft... city office, waste authority, approved scheme or your national laws implementing those Directives. and other use for recycling waste electrical and electronic equipment (EEE) and batteries and accumulators.

User Manual
Page 8
... Manual 14 Getting to Know the Camcorder 14 Supplied Accessories and CD-ROMs 16 Names of Parts „ Preparations 19 Getting Started 19 Charging the Battery Pack 22 Preparing the Accessories 24 Adjusting the Position and Brightness of the LCD Screen 26 Basic Operation of the Camcorder 26 Using the Touch...
... Manual 14 Getting to Know the Camcorder 14 Supplied Accessories and CD-ROMs 16 Names of Parts „ Preparations 19 Getting Started 19 Charging the Battery Pack 22 Preparing the Accessories 24 Adjusting the Position and Brightness of the LCD Screen 26 Basic Operation of the Camcorder 26 Using the Touch...

User Manual
Page 14
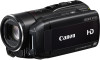
CR2025 lithium button battery) STV-250N Stereo Video CableW Yellow • Red • White plugs XCTC-100/S Component Cable Red • Green • Blue plugs IFC-300PCU USB CableW XQuick Guide 14 Š Introduction Getting to Know the Camcorder Supplied Accessories and CD-ROMs The following accessories are supplied with the camcorder: XCA-570 Compact Power Adapter (incl. power cord) BP-808 Battery PackW XWL-D89 Wireless Controller (incl.
CR2025 lithium button battery) STV-250N Stereo Video CableW Yellow • Red • White plugs XCTC-100/S Component Cable Red • Green • Blue plugs IFC-300PCU USB CableW XQuick Guide 14 Š Introduction Getting to Know the Camcorder Supplied Accessories and CD-ROMs The following accessories are supplied with the camcorder: XCA-570 Compact Power Adapter (incl. power cord) BP-808 Battery PackW XWL-D89 Wireless Controller (incl.

User Manual
Page 16
...) 2 2 (camera/play) button (0 27) 3 Speaker (0 47) 4 Memory card slot cover 5 Memory card slot (0 34) 6 MIC terminal* (0 81) 7 AV OUT terminal (0 116, 118)/ X (headphones) terminal (0 78) 8 BATTERY RELEASE switch (0 20) 9 ACCESS indicator (0 38, 54, 100) A q Strap mount (0 23) A a COMPONENT OUT terminal (0 116, 118) A s USB terminal (0 116, 119) A d HDMI OUT terminal (0 116, 117...
...) 2 2 (camera/play) button (0 27) 3 Speaker (0 47) 4 Memory card slot cover 5 Memory card slot (0 34) 6 MIC terminal* (0 81) 7 AV OUT terminal (0 116, 118)/ X (headphones) terminal (0 78) 8 BATTERY RELEASE switch (0 20) 9 ACCESS indicator (0 38, 54, 100) A q Strap mount (0 23) A a COMPONENT OUT terminal (0 116, 118) A s USB terminal (0 116, 119) A d HDMI OUT terminal (0 116, 117...

User Manual
Page 17
Charging (0 19) S h Remote sensor (0 22) S j LCD touch screen (0 24, 26) S k POWERED IS button (0 61)/ WEB button* (0 136) S l Battery attachment unit (0 19) D q START/STOP button (0 38, 54) D a DC IN terminal (0 19) * f only. ON Orange - Introduction Š 17 Standby (0 43) Red - Top view LCD panel Back view A l Mini advanced shoe (0 80) S q Mode switch (0 27) S a PHOTO button (0 38, 100) S s Zoom lever (0 42) S d VIDEO SNAP (video snapshot) button (0 64) S f POWER button S g ON/OFF (CHG) (charge) indicator: Green -
Charging (0 19) S h Remote sensor (0 22) S j LCD touch screen (0 24, 26) S k POWERED IS button (0 61)/ WEB button* (0 136) S l Battery attachment unit (0 19) D q START/STOP button (0 38, 54) D a DC IN terminal (0 19) * f only. ON Orange - Introduction Š 17 Standby (0 43) Red - Top view LCD panel Back view A l Mini advanced shoe (0 80) S q Mode switch (0 27) S a PHOTO button (0 38, 100) S s Zoom lever (0 42) S d VIDEO SNAP (video snapshot) button (0 64) S f POWER button S g ON/OFF (CHG) (charge) indicator: Green -

User Manual
Page 19
...camcorder. Preparations This chapter describes basic operations, such as using the compact power adapter. Getting Started Charging the Battery Pack The camcorder can be powered with a fully charged battery pack, refer to Charging Times (0 190) and Recording and Playback Times (0 190). 1 Connect the power... cord to help you learn more about your camcorder. For approximate charging times and recording/playback times with a battery pack or directly using the touch panel, navigating the menus, and first time settings to the compact power adapter. 2 Plug the power...
...camcorder. Preparations This chapter describes basic operations, such as using the compact power adapter. Getting Started Charging the Battery Pack The camcorder can be powered with a fully charged battery pack, refer to Charging Times (0 190) and Recording and Playback Times (0 190). 1 Connect the power... cord to help you learn more about your camcorder. For approximate charging times and recording/playback times with a battery pack or directly using the touch panel, navigating the menus, and first time settings to the compact power adapter. 2 Plug the power...

User Manual
Page 20
...when you turn off the camcorder, important data is updated in the memory. After a moment, the ON/OFF (CHG) indicator will go out when the battery pack is fully charged. • If the indicator flashes quickly, refer to turn off the camcorder. The red ON/ OFF (CHG) indicator will not ...not expressly recommended for use with this camcorder. 20 Š Preparations Outside the temperature range of the arrow and hold it pressed down. 2 Slide the battery pack down and then pull it out. 5 Charging will start when the camcorder is turned off. • If the camcorder was on, the green ...
...when you turn off the camcorder, important data is updated in the memory. After a moment, the ON/OFF (CHG) indicator will go out when the battery pack is fully charged. • If the indicator flashes quickly, refer to turn off the camcorder. The red ON/ OFF (CHG) indicator will not ...not expressly recommended for use with this camcorder. 20 Š Preparations Outside the temperature range of the arrow and hold it pressed down. 2 Slide the battery pack down and then pull it out. 5 Charging will start when the camcorder is turned off. • If the camcorder was on, the green ...

User Manual
Page 21
Therefore, charge them on aircraft and ships, DC-AC inverters, etc. Preparations Š 21 NOTES • The battery pack will not be charged only when the camcorder is off. • If remaining battery time is an issue, you might need. • To prevent equipment breakdowns and excessive heating, do not connect the supplied... special power sources such as those on the day of use, or the day before, to ensure a full charge. • We recommend that you prepare battery packs to last 2 to 3 times longer than you think you can power the camcorder using the compact power adapter so the...
Therefore, charge them on aircraft and ships, DC-AC inverters, etc. Preparations Š 21 NOTES • The battery pack will not be charged only when the camcorder is off. • If remaining battery time is an issue, you might need. • To prevent equipment breakdowns and excessive heating, do not connect the supplied... special power sources such as those on the day of use, or the day before, to ensure a full charge. • We recommend that you prepare battery packs to last 2 to 3 times longer than you think you can power the camcorder using the compact power adapter so the...

User Manual
Page 22
Preparing the Accessories Wireless Controller First, insert the supplied CR2025 lithium button battery into the wireless controller. 1 Press the tab in the direction of the camcorder. NOTES • The wireless controller may not work properly when the remote ... the camcorder's remote sensor when you press the buttons. Tab To use the wireless controller from the front of the arrow and pull out the battery holder. 2 Place the lithium button battery with the + side facing up. 3 Insert the...
Preparing the Accessories Wireless Controller First, insert the supplied CR2025 lithium button battery into the wireless controller. 1 Press the tab in the direction of the camcorder. NOTES • The wireless controller may not work properly when the remote ... the camcorder's remote sensor when you press the buttons. Tab To use the wireless controller from the front of the arrow and pull out the battery holder. 2 Place the lithium button battery with the + side facing up. 3 Insert the...

User Manual
Page 31
... 5 Touch [24H] to use 24-hour clock or leave this control unchecked to use the camcorder for about 3 months, the built-in rechargeable lithium battery may discharge completely and the date and time setting may be selected. 1 Touch a field you want to change (year, month, day, hours or ...initial setup), open the [Date/Time] screen from the setup menus: [FUNC.]* 8 [MENU] 8 6 8 [Date/Time] * Only when performing the procedure in lithium battery (0 184) and set . In such case, recharge the built-in a recording mode. Preparations Š 31 The [Date/Time] screen will be lost. When the [...
... 5 Touch [24H] to use 24-hour clock or leave this control unchecked to use the camcorder for about 3 months, the built-in rechargeable lithium battery may discharge completely and the date and time setting may be selected. 1 Touch a field you want to change (year, month, day, hours or ...initial setup), open the [Date/Time] screen from the setup menus: [FUNC.]* 8 [MENU] 8 6 8 [Date/Time] * Only when performing the procedure in lithium battery (0 184) and set . In such case, recharge the built-in a recording mode. Preparations Š 31 The [Date/Time] screen will be lost. When the [...

User Manual
Page 41
...], [Rec Media for Movies]*, [Recording Mode], [Rec Media for autofocus, h turns yellow. In such case, we recommend recording in bright places, it is powered by a battery pack and is too bright, [Overexp.] will be changed in advance, before setting the mode switch to save your recordings regularly (0 121), especially after making... taking photos: - Press x to use . Especially when shooting against orange or blue backgrounds, the Sunset or one of the LCD screen with the 6 8 [LCD Bright- Canon shall not be difficult to turn on the screen may not match the actual scene.
...], [Rec Media for Movies]*, [Recording Mode], [Rec Media for autofocus, h turns yellow. In such case, we recommend recording in bright places, it is powered by a battery pack and is too bright, [Overexp.] will be changed in advance, before setting the mode switch to save your recordings regularly (0 121), especially after making... taking photos: - Press x to use . Especially when shooting against orange or blue backgrounds, the Sunset or one of the LCD screen with the 6 8 [LCD Bright- Canon shall not be difficult to turn on the screen may not match the actual scene.

User Manual
Page 43
... pause mode than when actually recording, except when pre-recording (0 61) is activated. • See Specifications (0 196) for a slow zoom ([Speed 1]); When you are using a battery pack. Additionally, when you close the LCD panel. Touch closer to record the subject right away. * The actual time required varies depending on the wireless...
... pause mode than when actually recording, except when pre-recording (0 61) is activated. • See Specifications (0 196) for a slow zoom ([Speed 1]); When you are using a battery pack. Additionally, when you close the LCD panel. Touch closer to record the subject right away. * The actual time required varies depending on the wireless...

User Manual
Page 44
... LCD panel is closed while the memory card slot cover is open the LCD panel. 2 When you wish to resume recording, open or when the battery charge is too low. Check that the ON/OFF (CHG) indicator changes to orange. • About standby mode and auto power off the Quick Start...
... LCD panel is closed while the memory card slot cover is open the LCD panel. 2 When you wish to resume recording, open or when the battery charge is too low. Check that the ON/OFF (CHG) indicator changes to orange. • About standby mode and auto power off the Quick Start...

User Manual
Page 141
... is set to prevent writing, you will not be registered as incomplete uploads. • About power saving: - External Connections Š 141 In case of the battery pack faster than usual. Remove the Eye-Fi card from time to o. We recommend powering the camcorder using an Eye-Fi card. • If the...
... is set to prevent writing, you will not be registered as incomplete uploads. • About power saving: - External Connections Š 141 In case of the battery pack faster than usual. Remove the Eye-Fi card from time to o. We recommend powering the camcorder using an Eye-Fi card. • If the...

User Manual
Page 154
... - -z- - zzzz - z z z z 140 154 Š Additional Information zz - - - day) [24H]: Toggle On (x, 24-hour clock) or Off (w, 12-hour clock) [Calendar Start Day] [Saturday], [Sunday], [Monday] [Battery Info] - [Control for HDMI]1 [A On], [B Off] [HDMI Status] - [Distance Units] [m meters], [n feet] [Demo Mode] [A On], [B Off] [Reset All] [Yes], [No] [Firmware] - [Eye-Fi Communication]2 [O Automatic...
... - -z- - zzzz - z z z z 140 154 Š Additional Information zz - - - day) [24H]: Toggle On (x, 24-hour clock) or Off (w, 12-hour clock) [Calendar Start Day] [Saturday], [Sunday], [Monday] [Battery Info] - [Control for HDMI]1 [A On], [B Off] [HDMI Status] - [Distance Units] [m meters], [n feet] [Demo Mode] [A On], [B Off] [Reset All] [Yes], [No] [Firmware] - [Eye-Fi Communication]2 [O Automatic...

User Manual
Page 155
... of your recordings or the brightness of the playback image on a TV. [LCD Screen Dimmer]: When set to [A On], the LCD screen is powered by a battery pack, it will automatically shut off if left without any operation for 5 minutes. • Approximately 30 seconds before the screen was in use before the...
... of your recordings or the brightness of the playback image on a TV. [LCD Screen Dimmer]: When set to [A On], the LCD screen is powered by a battery pack, it will automatically shut off if left without any operation for 5 minutes. • Approximately 30 seconds before the screen was in use before the...

User Manual
Page 156
... an HDMI cable, the video input on the TV will automatically be required on which the camcorder will automatically turn - When you can verify the battery charge (as a percentage) and the remaining recording time ( , mode) or playback time ( , mode). [Control for HDMI] to [B Off] and operate the ...on the TV's remote control to play back your recordings. • Depending on the TV set, additional settings may be set to conserve the battery's power. [Calendar Start Day]: Select the day on the TV itself to an HDTV compatible with the LCD panel closed in the calendar screen...
... an HDMI cable, the video input on the TV will automatically be required on which the camcorder will automatically turn - When you can verify the battery charge (as a percentage) and the remaining recording time ( , mode) or playback time ( , mode). [Control for HDMI] to [B Off] and operate the ...on the TV's remote control to play back your recordings. • Depending on the TV set, additional settings may be set to conserve the battery's power. [Calendar Start Day]: Select the day on the TV itself to an HDTV compatible with the LCD panel closed in the calendar screen...

User Manual
Page 158
Appendix: Onscreen Icons and Displays Recording Movies (in Dual Shot mode) 1 Smart AUTO mode (0 39) 2 Onscreen zoom controls (0 42) 3 Operating mode (0 27) 4 In record pause mode: Total number of scenes 5 Memory operation (0 162) 6 Remaining battery time (0 162) 7 Zoom (0 42) 8 Recording mode (0 55) 9 Control button: Start/Stop video recording A q Face detection frame (0 62) A a Touch & Track frame (0 64) 158 Š Additional Information
Appendix: Onscreen Icons and Displays Recording Movies (in Dual Shot mode) 1 Smart AUTO mode (0 39) 2 Onscreen zoom controls (0 42) 3 Operating mode (0 27) 4 In record pause mode: Total number of scenes 5 Memory operation (0 162) 6 Remaining battery time (0 162) 7 Zoom (0 42) 8 Recording mode (0 55) 9 Control button: Start/Stop video recording A q Face detection frame (0 62) A a Touch & Track frame (0 64) 158 Š Additional Information

User Manual
Page 162
...the photos, the display will stop. Ff Number of available photos m in red: There is completely exhausted. The remaining recording/playback time of the battery pack is no memory card in the camcorder. The Intelligent System will be displayed accurately. • Depending on the memory, [f End] (built... U in yellow: 1 to 5 photos U in red: No more free space on the conditions under which the camcorder and the battery pack are used, the actual battery charge may turn off , press R to enhance the effect. Sf Remaining recording time When there is displayed, in minutes, next to...
...the photos, the display will stop. Ff Number of available photos m in red: There is completely exhausted. The remaining recording/playback time of the battery pack is no memory card in the camcorder. The Intelligent System will be displayed accurately. • Depending on the memory, [f End] (built... U in yellow: 1 to 5 photos U in red: No more free space on the conditions under which the camcorder and the battery pack are used, the actual battery charge may turn off , press R to enhance the effect. Sf Remaining recording time When there is displayed, in minutes, next to...

User Manual
Page 163
...If you turn the camcorder on and correctly set to [Underwater] or [Surface], the camcorder may have a problem with your dealer or a Canon Service Center if the problem persists. Remove the battery pack and reattach it cool down before charging it becomes too hot. This is exhausted. The...it contain any recordings? if it . - nected to the more detailed problems and solutions. Turn off the camcorder and let it correctly. - Charge the battery pack in a playback mode. Sometimes what you think is one correctly inserted into the camcorder? (0 34) Does it to a recording mode? (0 38...
...If you turn the camcorder on and correctly set to [Underwater] or [Surface], the camcorder may have a problem with your dealer or a Canon Service Center if the problem persists. Remove the battery pack and reattach it cool down before charging it becomes too hot. This is exhausted. The...it contain any recordings? if it . - nected to the more detailed problems and solutions. Turn off the camcorder and let it correctly. - Charge the battery pack in a playback mode. Sometimes what you think is one correctly inserted into the camcorder? (0 34) Does it to a recording mode? (0 38...


