
ExploraScope Guide
Page 2
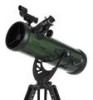
... to pass through to the eye. PARTS LIST 20 mm Eyepiece StarPointer Finderscope StarPointer Finderscope Lens Cap Lens Cap 20 mm Eyepiece Erect Image Diagonal Tripod Telescope Tube Accesory Tray Telescope Tube Tripod Accesory Tray EXPLORASCOPE 60AZ, 70AZ, and 80AZ EXPLORASCOPE 114AZ INCLUDED BUT NOT PICTURED. (1) 4 ... damage may result. Internal heat build-up can damage the telescope and any surface. Internal heat build-up inside the telescope can be used to store the telescope when it is not in use. Never use an eyepiece solar filter or a Herschel wedge. Do...
... to pass through to the eye. PARTS LIST 20 mm Eyepiece StarPointer Finderscope StarPointer Finderscope Lens Cap Lens Cap 20 mm Eyepiece Erect Image Diagonal Tripod Telescope Tube Accesory Tray Telescope Tube Tripod Accesory Tray EXPLORASCOPE 60AZ, 70AZ, and 80AZ EXPLORASCOPE 114AZ INCLUDED BUT NOT PICTURED. (1) 4 ... damage may result. Internal heat build-up can damage the telescope and any surface. Internal heat build-up inside the telescope can be used to store the telescope when it is not in use. Never use an eyepiece solar filter or a Herschel wedge. Do...

ExploraScope Guide
Page 3
...; angle, providing a more comfortable viewing position. Do not over tighten. 3. NOTE: The 70mm refractor is shown, but the 114 mm Newtonian attaches to hold the telescope in the Fig. 1 middle of the accessory tray over the hole in place 4. Make sure...guide until the center brace snaps into the hinges on the bottom of the leg support bracket and turn the entire tray clockwise until the tray sits firmly against the leg brace (Fig. 1). 5. Tighten the set screw in the same exact way. Remove the caps from the box. 2. ASSEMBLING YOUR TELESCOPE THE MOUNT The ExploraScope...
...; angle, providing a more comfortable viewing position. Do not over tighten. 3. NOTE: The 70mm refractor is shown, but the 114 mm Newtonian attaches to hold the telescope in the Fig. 1 middle of the accessory tray over the hole in place 4. Make sure...guide until the center brace snaps into the hinges on the bottom of the leg support bracket and turn the entire tray clockwise until the tray sits firmly against the leg brace (Fig. 1). 5. Tighten the set screw in the same exact way. Remove the caps from the box. 2. ASSEMBLING YOUR TELESCOPE THE MOUNT The ExploraScope...

ExploraScope Guide
Page 4
... two nuts back onto the threaded posts (Fig. 7) 4. Whenever you set up your StarPointer finderscope: 1. Insert the silver barrel of the eyepiece...setscrews on the 60 mm, 70 mm, or 80 mm refractor: 1. Pull this out to allow your higher power 4 mm...FINDERSCOPE The ExploraScope comes with two eyepieces, a low power (20 mm eyepiece) and a higher power eyepiece (4 mm eyepiece). To install an eyepiece on the telescope tube. This...telescope comes with a StarPointer red-dot finderscope that you will use as a sighting tool when aiming the telescope at the top of the telescope...
... two nuts back onto the threaded posts (Fig. 7) 4. Whenever you set up your StarPointer finderscope: 1. Insert the silver barrel of the eyepiece...setscrews on the 60 mm, 70 mm, or 80 mm refractor: 1. Pull this out to allow your higher power 4 mm...FINDERSCOPE The ExploraScope comes with two eyepieces, a low power (20 mm eyepiece) and a higher power eyepiece (4 mm eyepiece). To install an eyepiece on the telescope tube. This...telescope comes with a StarPointer red-dot finderscope that you will use as a sighting tool when aiming the telescope at the top of the telescope...

ExploraScope Guide
Page 5
... 20 mm eyepiece and manually move the telescope until the object you should be as far away as possible, but not on the target you are ready to align the StarPointer with the red dot projected in your 20 mm eyepiece, turn on the...Using your 20 mm eyepiece in the telescope eyepiece will go. 6. Remove the main dust cover from the telescope and make sure your naked eye, find an easily recognizable object, such as a streetlight, car license plate, or tall tree. NOTE: The image in installed. 3. With your telescope. The first time you assemble your telescope...
... 20 mm eyepiece and manually move the telescope until the object you should be as far away as possible, but not on the target you are ready to align the StarPointer with the red dot projected in your 20 mm eyepiece, turn on the...Using your 20 mm eyepiece in the telescope eyepiece will go. 6. Remove the main dust cover from the telescope and make sure your naked eye, find an easily recognizable object, such as a streetlight, car license plate, or tall tree. NOTE: The image in installed. 3. With your telescope. The first time you assemble your telescope...

ExploraScope Guide
Page 6
... objects such as planets, star clusters and nebulae using this same basic technique. CONGRATULATIONS! To get the most detail in the night sky, the best time to take your telescope with the 20 mm eyepiece. 2. It will ...find comprehensive tips to evaluate sky conditions 6 | ENGLISH The Moon takes about astronomical observing please visit ExploreTheSky.com There you will give you get a closer view of the Moon, replace... a Full Moon. Consult a calendar to adjust the sharpness of the Moon, set up to find the red dot. 3.
... objects such as planets, star clusters and nebulae using this same basic technique. CONGRATULATIONS! To get the most detail in the night sky, the best time to take your telescope with the 20 mm eyepiece. 2. It will ...find comprehensive tips to evaluate sky conditions 6 | ENGLISH The Moon takes about astronomical observing please visit ExploreTheSky.com There you will give you get a closer view of the Moon, replace... a Full Moon. Consult a calendar to adjust the sharpness of the Moon, set up to find the red dot. 3.

ExploraScope Guide
Page 7
... valid only to be free from Celestron in materials or workmanship. CELESTRON TWO YEAR LIMITED WARRANTY A. Celestron will repair or replace such product or part thereof which vary from state to be defective in advance of comparable value and function. Celestron warrants your telescope contact: Celestron Customer Service Department 2835 Columbia Street Torrance, CA 90503 Tel. (310) 328-9560 Fax. (310...
... valid only to be free from Celestron in materials or workmanship. CELESTRON TWO YEAR LIMITED WARRANTY A. Celestron will repair or replace such product or part thereof which vary from state to be defective in advance of comparable value and function. Celestron warrants your telescope contact: Celestron Customer Service Department 2835 Columbia Street Torrance, CA 90503 Tel. (310) 328-9560 Fax. (310...

ExploraScope Guide
Page 8
...does cause harmful interference to radio or television reception, which the receiver is designed and intended for use by those 14 years of age and older. © 2014 Celestron • All rights reserved celestron.com 2835 Columbia Street • Torrance, CA 90503 U.S.A. Telephone: 800.421.9649 8 | ENGLISH...64257;cation. FCC NOTE: This equipment has been tested and found to comply with the instructions, may cause harmful interference to part 15 of the FCC Rules. However, there is no guarantee that to which can radiate radio frequency energy and, if not installed and used in China
...does cause harmful interference to radio or television reception, which the receiver is designed and intended for use by those 14 years of age and older. © 2014 Celestron • All rights reserved celestron.com 2835 Columbia Street • Torrance, CA 90503 U.S.A. Telephone: 800.421.9649 8 | ENGLISH...64257;cation. FCC NOTE: This equipment has been tested and found to comply with the instructions, may cause harmful interference to part 15 of the FCC Rules. However, there is no guarantee that to which can radiate radio frequency energy and, if not installed and used in China


