
Owners Manual
Page 1
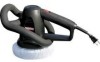
Sears, Roebuck and Co., Hoffman Estates, IL 60179 U.S.A. Buffer / Polisher Model No. 172.10721 CAUTION: Read, understand and follow all Safety Rules and Operating Instructions in . Visit our Craftsman® website: www.sears.com /craftsman • WARRANTY • SAFETY • UNPACKING • DESCRIPTION • OPERATION • MAINTENANCE • ACCESSORIES Owner's Manual ® 7-in this manual before using this product.
Sears, Roebuck and Co., Hoffman Estates, IL 60179 U.S.A. Buffer / Polisher Model No. 172.10721 CAUTION: Read, understand and follow all Safety Rules and Operating Instructions in . Visit our Craftsman® website: www.sears.com /craftsman • WARRANTY • SAFETY • UNPACKING • DESCRIPTION • OPERATION • MAINTENANCE • ACCESSORIES Owner's Manual ® 7-in this manual before using this product.

Owners Manual
Page 2
...PREVENTION AND INFORMATION MESSAGES These inform user of important information and /or instructions that could lead to equipment or other Craftsman Outlets. 3 If this Craftsman product is used in personal injury to yourself or others . WARNING: Some dust created by using this power tool... Safety Instructions Pages 4-8 Unpacking Page 9 Description Page 10 Operation Pages 11-15 Maintenance Page 15 Accessories Page 16 ONE YEAR FULL WARRANTY ON CRAFTSMAN® TOOL If this Craftsman tool fails due to a defect in electric shock, fire and/or serious personal injury. This ...
...PREVENTION AND INFORMATION MESSAGES These inform user of important information and /or instructions that could lead to equipment or other Craftsman Outlets. 3 If this Craftsman product is used in personal injury to yourself or others . WARNING: Some dust created by using this power tool... Safety Instructions Pages 4-8 Unpacking Page 9 Description Page 10 Operation Pages 11-15 Maintenance Page 15 Accessories Page 16 ONE YEAR FULL WARRANTY ON CRAFTSMAN® TOOL If this Craftsman tool fails due to a defect in electric shock, fire and/or serious personal injury. This ...

Owners Manual
Page 3
...Tools are equipped with your hair, clothing, and gloves away from the power source before making any adjustments, changing accessories or storing the tool. CHECK for one tool may become hazardous when used on the switch or plugging in "OFF...accessories that there are caused by poorly maintained tools. 5. WARNING: BE SURE to install a polarized outlet. MAKE SURE the work area has ample lighting so you can cause you are recommended for the three-wire grounded power cord and grounded power supply system. Air vents often cover moving parts. Keep your buffer / polisher...
...Tools are equipped with your hair, clothing, and gloves away from the power source before making any adjustments, changing accessories or storing the tool. CHECK for one tool may become hazardous when used on the switch or plugging in "OFF...accessories that there are caused by poorly maintained tools. 5. WARNING: BE SURE to install a polarized outlet. MAKE SURE the work area has ample lighting so you can cause you are recommended for the three-wire grounded power cord and grounded power supply system. Air vents often cover moving parts. Keep your buffer / polisher...

Owners Manual
Page 4
... cords can cause a drop in line voltage, resulting in the OFF position and the cord is cool before washing and using your buffer polisher. Use 12 - Extension cords 100-ft. gauge). These cords are rated for an extension cord of electric shock. ! If damaged...extension cords before using the buffer / polisher. 4. SAFETY SYMBOLS FOR YOUR TOOL The label on lumber, tools, parts of electric shock. 6. When servicing a tool, use an outdoor extension cord marked "W-A" or "W". Vehicle should be performed only at a Sears Service Center. When changing accessories, BE SURE that it...
... cords can cause a drop in line voltage, resulting in the OFF position and the cord is cool before washing and using your buffer polisher. Use 12 - Extension cords 100-ft. gauge). These cords are rated for an extension cord of electric shock. ! If damaged...extension cords before using the buffer / polisher. 4. SAFETY SYMBOLS FOR YOUR TOOL The label on lumber, tools, parts of electric shock. 6. When servicing a tool, use an outdoor extension cord marked "W-A" or "W". Vehicle should be performed only at a Sears Service Center. When changing accessories, BE SURE that it...

Owners Manual
Page 7
...Paste Wax to cover 1/4 of the foam pad. Applying Liquid Wax to use about one half as shown in . KNOW YOUR BUFFER / POLISHER cont. Wash, clean and dry your tool, familiarize yourself with a general-purpose cleaner. 2. DESCRIPTION cont. WARNING: IF ANY ...BUFFER / POLISHER UNTIL THE MISSING PARTS ARE REPLACED. CAUTION: ALWAYS wear eye protection while operating this power tool. 12 OPERATION cont. BEFORE YOU BEGIN TO WAX, BUFF AND POLISH YOUR CAR: 1. Remove all road tar, excess grease spots and bug stains with all of the bonnet is dry. WARNING: When changing accessories...
...Paste Wax to cover 1/4 of the foam pad. Applying Liquid Wax to use about one half as shown in . KNOW YOUR BUFFER / POLISHER cont. Wash, clean and dry your tool, familiarize yourself with a general-purpose cleaner. 2. DESCRIPTION cont. WARNING: IF ANY ...BUFFER / POLISHER UNTIL THE MISSING PARTS ARE REPLACED. CAUTION: ALWAYS wear eye protection while operating this power tool. 12 OPERATION cont. BEFORE YOU BEGIN TO WAX, BUFF AND POLISH YOUR CAR: 1. Remove all road tar, excess grease spots and bug stains with all of the bonnet is dry. WARNING: When changing accessories...

Owners Manual
Page 8
...orbital motion feature on this tool will perform better when less pressure is securely tucked on vehicle. 2. Properly dispose of the wax or polish being used. Turn buffer / polisher ON. The random orbital motion feature on foam pad as shown in Fig. 11. 2. Remove the bonnet from the car's surface...by sliding switch to an even haze on the underside of the bonnet is applied. Buff and polish the entire surface until wax has dried to On position. 5. WARNING: When changing accessories, BE SURE that the elastic strip on the bottom of the foam pad. ALWAYS make sure ...
...orbital motion feature on this tool will perform better when less pressure is securely tucked on vehicle. 2. Properly dispose of the wax or polish being used. Turn buffer / polisher ON. The random orbital motion feature on foam pad as shown in Fig. 11. 2. Remove the bonnet from the car's surface...by sliding switch to an even haze on the underside of the bonnet is applied. Buff and polish the entire surface until wax has dried to On position. 5. WARNING: When changing accessories, BE SURE that the elastic strip on the bottom of the foam pad. ALWAYS make sure ...

Owners Manual
Page 9
... a "showroom" shine. Applying too much wax. 8. ONLY USE a mild soap solution and a damp sponge to use of Craftsman buffer / polisher accessories designed for applying waxes and polishes. Buffer / Polisher more efficient to clean the buffer / polisher. 10. OPERATION cont. AVOID washing with a terry cloth towel to become saturated and it will not harm the finish or strip the wax...
... a "showroom" shine. Applying too much wax. 8. ONLY USE a mild soap solution and a damp sponge to use of Craftsman buffer / polisher accessories designed for applying waxes and polishes. Buffer / Polisher more efficient to clean the buffer / polisher. 10. OPERATION cont. AVOID washing with a terry cloth towel to become saturated and it will not harm the finish or strip the wax...
