User Guide
Page 3
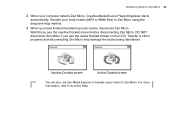
... 6 Zen Micro 6 Touch Pad 9 Main Menu 12 Now Playing screen 13 Creative MediaSource Player/Organizer 14 Zen Media Explorer 14 Accessories 15 Earphones 15 Belt Clip 16 Pouch 17 Neckstrap 18 Remote Control 19 Importing Music into Creative MediaSource Player/ Organizer 21 Importing music from audio CDs 21 Shopping for music on the Internet 22 Transferring Music to Zen Micro 24 Transferring music tracks 24 Creating and transferring playlists 26 Synchronizing music with your computer 26 Playing and Managing Music 27 Turning Zen Micro...
... 6 Zen Micro 6 Touch Pad 9 Main Menu 12 Now Playing screen 13 Creative MediaSource Player/Organizer 14 Zen Media Explorer 14 Accessories 15 Earphones 15 Belt Clip 16 Pouch 17 Neckstrap 18 Remote Control 19 Importing Music into Creative MediaSource Player/ Organizer 21 Importing music from audio CDs 21 Shopping for music on the Internet 22 Transferring Music to Zen Micro 24 Transferring music tracks 24 Creating and transferring playlists 26 Synchronizing music with your computer 26 Playing and Managing Music 27 Turning Zen Micro...
User Guide
Page 4
... Deleting radio presets 37 Recording radio broadcasts 37 Recording with the built-in microphone 38 Playing recorded tracks 39 Deleting tracks 39 Viewing track information 39 Viewing player information 39 Using Zen Micro's Organizer Features 41 Synchronizing with Microsoft Outlook 41 Viewing the calendar 41 Viewing today's tasks 42 Viewing contacts 42 Storing Data Files in Zen Micro 43 Using Zen Micro as a Removable Disk 43 Changing the amount of memory space in Removable...
... Deleting radio presets 37 Recording radio broadcasts 37 Recording with the built-in microphone 38 Playing recorded tracks 39 Deleting tracks 39 Viewing track information 39 Viewing player information 39 Using Zen Micro's Organizer Features 41 Synchronizing with Microsoft Outlook 41 Viewing the calendar 41 Viewing today's tasks 42 Viewing contacts 42 Storing Data Files in Zen Micro 43 Using Zen Micro as a Removable Disk 43 Changing the amount of memory space in Removable...

User Guide
Page 7
... using the Touch Pad, see "Touch Pad" on and off. Menu/Back button During playback, press this button to go the previous track. When scrolling though menu items, press this button to the previous menu. Options button Press this button to return to display the options available. Play/Pause button Starts, pauses and resumes playback. Power switch Turns your player on page 9. Press and hold this button to adjust the volume. Previous/Rewind button Press this button...
... using the Touch Pad, see "Touch Pad" on and off. Menu/Back button During playback, press this button to go the previous track. When scrolling though menu items, press this button to the previous menu. Options button Press this button to return to display the options available. Play/Pause button Starts, pauses and resumes playback. Power switch Turns your player on page 9. Press and hold this button to adjust the volume. Previous/Rewind button Press this button...

User Guide
Page 8
To transfer music and data files, connect one end of the USB cable to the your player's controls. USB 2.0 port To charge Zen Micro's battery, connect one end of the supplied USB cable to this port, and the other end of Zen Micro's Power Adapter to this port, and the other end to a power outlet. Turn on the power outlet if necessary. Headphone jack Connect Zen Micro's earphones to this built-in microphone. Microphone Make instant recordings with this jack. Zen Micro at a Glance 8 Lock Slide the Power switch to the Lock position to disable your computer's USB port.
To transfer music and data files, connect one end of the USB cable to the your player's controls. USB 2.0 port To charge Zen Micro's battery, connect one end of the supplied USB cable to this port, and the other end of Zen Micro's Power Adapter to this port, and the other end to a power outlet. Turn on the power outlet if necessary. Headphone jack Connect Zen Micro's earphones to this built-in microphone. Microphone Make instant recordings with this jack. Zen Micro at a Glance 8 Lock Slide the Power switch to the Lock position to disable your computer's USB port.

User Guide
Page 14
... set up the Zen Micro software on your computer. Creative MediaSource Player/Organizer is installed, the Zen Media Explorer icon appears in a Windows Explorer environment. Zen Media Explorer Zen Media Explorer offers you connect Zen Micro to your computer. For more information, refer to Zen Micro. TIP By default, Creative MediaSource Player/Organizer automatically starts when you the ease of managing music tracks and data files in Zen Micro, in Windows Explorer under the Zen Media Explorer icon. NOTE ■ After Zen Media...
... set up the Zen Micro software on your computer. Creative MediaSource Player/Organizer is installed, the Zen Media Explorer icon appears in a Windows Explorer environment. Zen Media Explorer Zen Media Explorer offers you connect Zen Micro to your computer. For more information, refer to Zen Micro. TIP By default, Creative MediaSource Player/Organizer automatically starts when you the ease of managing music tracks and data files in Zen Micro, in Windows Explorer under the Zen Media Explorer icon. NOTE ■ After Zen Media...
User Guide
Page 21
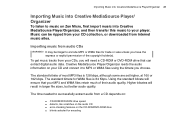
... need a CD-ROM or DVD-ROM drive that your player. Creative MediaSource Player/Organizer reads the audio information on your CD collection, or downloaded from a CD depends on: ■ CD-ROM/DVD-ROM drive speed ■ defects, like scratches on the audio CD ■ error-checking features on Zen Micro, first import music into Creative MediaSource Player/Organizer, and then transfer this music to your MP3 and WMA files...
... need a CD-ROM or DVD-ROM drive that your player. Creative MediaSource Player/Organizer reads the audio information on your CD collection, or downloaded from a CD depends on: ■ CD-ROM/DVD-ROM drive speed ■ defects, like scratches on the audio CD ■ error-checking features on Zen Micro, first import music into Creative MediaSource Player/Organizer, and then transfer this music to your MP3 and WMA files...
User Guide
Page 25
... have finished transferring music tracks, disconnect Zen Micro. DO NOT disconnect Zen Micro if you see the inactive Docked screen before disconnecting Zen Micro. For more information, refer to Zen Micro. Inactive Docked screen Active Docked screen TIP You can also use Zen Media Explorer to transfer music tracks to its online Help. Transfer is still in progress and disconnecting Zen Micro may damage the tracks being transferred. Transfer your computer detects Zen Micro, Creative MediaSource Player/Organizer starts automatically.
... have finished transferring music tracks, disconnect Zen Micro. DO NOT disconnect Zen Micro if you see the inactive Docked screen before disconnecting Zen Micro. For more information, refer to Zen Micro. Inactive Docked screen Active Docked screen TIP You can also use Zen Media Explorer to transfer music tracks to its online Help. Transfer is still in progress and disconnecting Zen Micro may damage the tracks being transferred. Transfer your computer detects Zen Micro, Creative MediaSource Player/Organizer starts automatically.
User Guide
Page 26
... Next button. 5 Follow the instructions of selected tracks" on page 31. You can use Sync Manager to update and synchronize music in either Creative MediaSource Player/Organizer or Zen Media Explorer. 3 Select My Computer and Zen Micro as you like and transfer these to Zen Micro 26 Creating and transferring playlists With Creative MediaSource Player/Organizer, organizing music tracks into playlists (tracks you want to your preferences using Creative MediaSource Player/Organizer, refer to its online Help. ■...
... Next button. 5 Follow the instructions of selected tracks" on page 31. You can use Sync Manager to update and synchronize music in either Creative MediaSource Player/Organizer or Zen Media Explorer. 3 Select My Computer and Zen Micro as you like and transfer these to Zen Micro 26 Creating and transferring playlists With Creative MediaSource Player/Organizer, organizing music tracks into playlists (tracks you want to your preferences using Creative MediaSource Player/Organizer, refer to its online Help. ■...

User Guide
Page 30
... the Play/Pause button. If you have created playlists (tracks you have organized into lists) on Zen Micro, or transferred playlists from Creative MediaSource Player/Organizer, you can search for another track that is similar to the currently playing track. At any time, press the Options button for more information about creating playlists on Zen Micro, see "Managing the list of selected tracks" on the Now Playing screen. Lightly tap the Touch Pad...
... the Play/Pause button. If you have created playlists (tracks you have organized into lists) on Zen Micro, or transferred playlists from Creative MediaSource Player/Organizer, you can search for another track that is similar to the currently playing track. At any time, press the Options button for more information about creating playlists on Zen Micro, see "Managing the list of selected tracks" on the Now Playing screen. Lightly tap the Touch Pad...
User Guide
Page 43
... Extras Removable Disk. Using Zen Micro as a Removable Disk 1 Press the Menu/Back button. Zen Media Explorer is not possible, you can use Zen Micro to store backup copies of memory space you want to use it to transfer data files between different computers, make sure you set up the Zen Micro software on your computer. However, you must select the the amount of your computer's data files, or use Zen Micro to another. Storing Data Files in Zen Micro 43 Storing Data Files...
... Extras Removable Disk. Using Zen Micro as a Removable Disk 1 Press the Menu/Back button. Zen Media Explorer is not possible, you can use Zen Micro to store backup copies of memory space you want to use it to transfer data files between different computers, make sure you set up the Zen Micro software on your computer. However, you must select the the amount of your computer's data files, or use Zen Micro to another. Storing Data Files in Zen Micro 43 Storing Data Files...

User Guide
Page 47
... delete all the data files in the Removable Disk memory space, press the Options button and select Format. ■ Use Windows Explorer if you can change the amount of memory space, the existing data files stored in Removable Disk mode must be viewed or managed with Zen Media Explorer. ■ Similarly, data files transferred to disconnect Zen Micro first. Zen Micro cannot return to the Now Playing screen if the USB cable is still connected to music on Zen Micro, press the Menu/Back button...
... delete all the data files in the Removable Disk memory space, press the Options button and select Format. ■ Use Windows Explorer if you can change the amount of memory space, the existing data files stored in Removable Disk mode must be viewed or managed with Zen Media Explorer. ■ Similarly, data files transferred to disconnect Zen Micro first. Zen Micro cannot return to the Now Playing screen if the USB cable is still connected to music on Zen Micro, press the Menu/Back button...
User Guide
Page 48
TIP ■ Creative Removable Disk Manager is included with your player and is automatically installed when you set up the Zen Micro software on your computer and use Creative Removable Disk Manager to your computer. ■ To start Creative Removable Disk Manager, click Start → Programs or All Programs → Creative → Zen Micro → Creative Removable Disk Manager. Storing Data Files in Zen Micro 48 4 Alternatively, connect Zen Micro to increase or decrease the amount of memory space in Removable Disk mode.
TIP ■ Creative Removable Disk Manager is included with your player and is automatically installed when you set up the Zen Micro software on your computer and use Creative Removable Disk Manager to your computer. ■ To start Creative Removable Disk Manager, click Start → Programs or All Programs → Creative → Zen Micro → Creative Removable Disk Manager. Storing Data Files in Zen Micro 48 4 Alternatively, connect Zen Micro to increase or decrease the amount of memory space in Removable Disk mode.

User Guide
Page 49
... change the Touch Pad's sensitivity, and to suit your needs. The main menu appears. 2 Select Extras Date & Time. Setting the date and time 1 Press the Menu/Back button. Personalizing Zen Micro 49 Personalizing Zen Micro Zen Micro's settings can adjust how the date and time are displayed by selecting Date Separator, Date Format and Time Format. Adjusting Touch Pad settings You can change the time or date settings respectively. 4 You can be adjusted to turn the clicking sound...
... change the Touch Pad's sensitivity, and to suit your needs. The main menu appears. 2 Select Extras Date & Time. Setting the date and time 1 Press the Menu/Back button. Personalizing Zen Micro 49 Personalizing Zen Micro Zen Micro's settings can adjust how the date and time are displayed by selecting Date Separator, Date Format and Time Format. Adjusting Touch Pad settings You can change the time or date settings respectively. 4 You can be adjusted to turn the clicking sound...

User Guide
Page 50
... Set Using Zen Micro's equalizer (EQ) EQ is Zen Micro's collection of equalizer settings that enhance the sound of the EQ menu items. When an EQ setting is selected, appears on the Now Playing screen. The main menu appears. 2 Select System Audio Settings EQ. 3 Select one of your own setting. 1 Press the Menu/Back button. You can select equalizer settings to suit the genre or style of your music, or customize your music...
... Set Using Zen Micro's equalizer (EQ) EQ is Zen Micro's collection of equalizer settings that enhance the sound of the EQ menu items. When an EQ setting is selected, appears on the Now Playing screen. The main menu appears. 2 Select System Audio Settings EQ. 3 Select one of your own setting. 1 Press the Menu/Back button. You can select equalizer settings to suit the genre or style of your music, or customize your music...

User Guide
Page 51
... Volume. The main menu appears. 2 Select System Audio Settings Smart Volume: On. Personalizing Zen Micro 51 To create a customized equalizer setting 1 In the EQ screen, select Custom EQ. Each slider on the Custom EQ screen represents successively higher frequencies that can limit the volume range of boost or reduction in the selected frequency range. 3 Lightly tap the Touch Pad to confirm the setting for the selected slider. 4 Repeat...
... Volume. The main menu appears. 2 Select System Audio Settings Smart Volume: On. Personalizing Zen Micro 51 To create a customized equalizer setting 1 In the EQ screen, select Custom EQ. Each slider on the Custom EQ screen represents successively higher frequencies that can limit the volume range of boost or reduction in the selected frequency range. 3 Lightly tap the Touch Pad to confirm the setting for the selected slider. 4 Repeat...

User Guide
Page 55
... I leave Zen Micro plugged into the Power Adapter? Go to www.creative.com and select your question, refer to heat buildup, which is not good for more for audio content storage) ■ Internet connection for Internet content downloading and CDDB2™ support (any charges incurred are the minimum system requirements for setting up Zen Micro's software? ■ Microsoft® Windows® XP, Windows 2000, Windows Millennium Edition...
... I leave Zen Micro plugged into the Power Adapter? Go to www.creative.com and select your question, refer to heat buildup, which is not good for more for audio content storage) ■ Internet connection for Internet content downloading and CDDB2™ support (any charges incurred are the minimum system requirements for setting up Zen Micro's software? ■ Microsoft® Windows® XP, Windows 2000, Windows Millennium Edition...
User Guide
Page 59
Use you player only after this library rebuilding is complete. Frequently Asked Questions 59 The firmware upgrade is completed. There was an unexpected power loss during audio file transfer. Reload the firmware, download a newer firmware version or contact Customer Support Services. Reset your player to enable the new firmware to take effect. There was an unexpected power loss while saving settings.
Use you player only after this library rebuilding is complete. Frequently Asked Questions 59 The firmware upgrade is completed. There was an unexpected power loss during audio file transfer. Reload the firmware, download a newer firmware version or contact Customer Support Services. Reset your player to enable the new firmware to take effect. There was an unexpected power loss while saving settings.
User Guide
Page 60
... or stops responding. If necessary, turn on the power outlet. How do ? ■ Make sure the Power switch is not in the Lock position. ■ If you're using the optional Zen Micro remote control, make sure the remote control's Lock switch is not is corrupted. Frequently Asked Questions 60 The firmware is the Lock position. ■ Your battery may need to a power outlet. Reload the firmware, download a newer firmware version or contact Customer Support Services.
... or stops responding. If necessary, turn on the power outlet. How do ? ■ Make sure the Power switch is not in the Lock position. ■ If you're using the optional Zen Micro remote control, make sure the remote control's Lock switch is not is corrupted. Frequently Asked Questions 60 The firmware is the Lock position. ■ Your battery may need to a power outlet. Reload the firmware, download a newer firmware version or contact Customer Support Services.
User Guide
Page 61
... player. The Recovery Mode screen appears when Zen Micro turns on. 5 Four menu items are made to do so by the Creative Customer Services center. Save a copy of reasons, for Zen Micro, or have downloaded a newer firmware version for example, if Music Library is complete, select Reboot. Frequently Asked Questions 61 Do I need to optimal efficiency. To clean up Zen Micro's hard disk drive 1 Turn off Zen Micro. 2 Slide open the battery cover. 3 Remove the battery. 4 Slide the Power switch towards the Power icon and hold...
... player. The Recovery Mode screen appears when Zen Micro turns on. 5 Four menu items are made to do so by the Creative Customer Services center. Save a copy of reasons, for Zen Micro, or have downloaded a newer firmware version for example, if Music Library is complete, select Reboot. Frequently Asked Questions 61 Do I need to optimal efficiency. To clean up Zen Micro's hard disk drive 1 Turn off Zen Micro. 2 Slide open the battery cover. 3 Remove the battery. 4 Slide the Power switch towards the Power icon and hold...

User Guide
Page 62
... music library can use Media Sniffer tool in Creative MediaSource Player/Organizer to monitor or 'watch' folders in Creative MediaSource Player/ Organizer. You can be automatically updated? This helps to Zen Micro, and the earphones are added, deleted or moved. Visit www.creative.com and select your computer. In Creative MediaSource Player/Organizer, you can I do? ■ Make sure the remote control's Lock switch is not in the Lock position. ■ Make...
... music library can use Media Sniffer tool in Creative MediaSource Player/Organizer to monitor or 'watch' folders in Creative MediaSource Player/ Organizer. You can be automatically updated? This helps to Zen Micro, and the earphones are added, deleted or moved. Visit www.creative.com and select your computer. In Creative MediaSource Player/Organizer, you can I do? ■ Make sure the remote control's Lock switch is not in the Lock position. ■ Make...

