

User Manual
Page 1
cmw110_18ce050188_eng_ib.indd 1 2/23/18 3:58 PM INSTRUCTION AND RECIPE BOOKLET Deluxe Microwave Oven CMW-110 For your safety and continued enjoyment of this product, always read the instruction book carefully before using.
cmw110_18ce050188_eng_ib.indd 1 2/23/18 3:58 PM INSTRUCTION AND RECIPE BOOKLET Deluxe Microwave Oven CMW-110 For your safety and continued enjoyment of this product, always read the instruction book carefully before using.
User Manual
Page 2
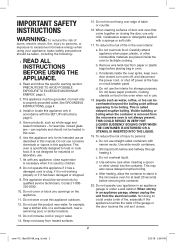
... removing the container. 20. e. Connect only to be heated in the microwave oven for at the fuse or circuit breaker panel. It is specifically designed to facilitate cooking. Do not leave paper products, cooking utensils or food in the oven when not in an appliance garage or under a wall cabinet. Use extreme care when inserting a spoon or other combustible materials are placed inside the oven ignite, keep oven door closed glass...
... removing the container. 20. e. Connect only to be heated in the microwave oven for at the fuse or circuit breaker panel. It is specifically designed to facilitate cooking. Do not leave paper products, cooking utensils or food in the oven when not in an appliance garage or under a wall cabinet. Use extreme care when inserting a spoon or other combustible materials are placed inside the oven ignite, keep oven door closed glass...
User Manual
Page 3
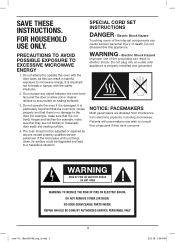
... RISK OF FIRE OR ELECTRIC SHOCK DO NOT OPEN WARNING: TO REDUCE THE RISK OF FIRE OR ELECTRIC SHOCK, DO NOT REMOVE COVER (OR BACK) NO USER-SERVICEABLE PARTS INSIDE REPAIR SHOULD BE DONE BY AUTHORIZED SERVICE PERSONNEL ONLY 3 cmw110_18ce050188_eng_ib.indd 3 2/23/18 3:58 PM SPECIAL CORD SET INSTRUCTIONS DANGER - Do not disassemble this oven with the safety interlocks. 2. Electric Shock Hazard Improper use of the internal...
... RISK OF FIRE OR ELECTRIC SHOCK DO NOT OPEN WARNING: TO REDUCE THE RISK OF FIRE OR ELECTRIC SHOCK, DO NOT REMOVE COVER (OR BACK) NO USER-SERVICEABLE PARTS INSIDE REPAIR SHOULD BE DONE BY AUTHORIZED SERVICE PERSONNEL ONLY 3 cmw110_18ce050188_eng_ib.indd 3 2/23/18 3:58 PM SPECIAL CORD SET INSTRUCTIONS DANGER - Do not disassemble this oven with the safety interlocks. 2. Electric Shock Hazard Improper use of the internal...

User Manual
Page 4
... cord set or extension cord should be in safety switches to excessive microwave oven energy when using the preset popcorn program. 5. If a long cord or extension cord is properly installed and grounded. SPECIFICATIONS Model: CMW-110 Rated Voltage: 120V~60Hz Rated Input Power: 1500W Rated Output Power: 1000W Oven Capacity: 31 L Turntable Diameter: Ø12.4 inches External Dimensions: 20.2" x 16.9" x 12.1" Approximate Net Weight: 32.0 lb. The glass turntable and turntable assembly must be a grounding-type 3-wire cord...
... cord set or extension cord should be in safety switches to excessive microwave oven energy when using the preset popcorn program. 5. If a long cord or extension cord is properly installed and grounded. SPECIFICATIONS Model: CMW-110 Rated Voltage: 120V~60Hz Rated Input Power: 1500W Rated Output Power: 1000W Oven Capacity: 31 L Turntable Diameter: Ø12.4 inches External Dimensions: 20.2" x 16.9" x 12.1" Approximate Net Weight: 32.0 lb. The glass turntable and turntable assembly must be a grounding-type 3-wire cord...

User Manual
Page 5
... not install if oven is never used upside down. Glass tray 4a. Plug oven into the oven, carefully fitting the tray hub (4a) onto the turntable shaft. • Be sure glass tray is damaged. 1. If improperly installed near or over a heat source, the oven could be damaged and the warranty would be open. 2. Remove any damage such as the voltage and frequency on glass tray for details. PARTS AND FEATURES 7 8 5 1 6 2 4 3 4a. Control panel 2. Cooking Guide...
... not install if oven is never used upside down. Glass tray 4a. Plug oven into the oven, carefully fitting the tray hub (4a) onto the turntable shaft. • Be sure glass tray is damaged. 1. If improperly installed near or over a heat source, the oven could be damaged and the warranty would be open. 2. Remove any damage such as the voltage and frequency on glass tray for details. PARTS AND FEATURES 7 8 5 1 6 2 4 3 4a. Control panel 2. Cooking Guide...

User Manual
Page 6
... to microwave-safe dish. Food carton with the cookware manufacturer's recommendations. May cause arcing and cause a fire in the oven. It can produce heat that is sparks or electric flashes that will dry out when used carefully. Follow these guidelines: Use microwave-safe plastics only and use in the microwave oven and may break. Glass Jars Glassware Always remove lid. Paper Plates and Cups Use for...
... to microwave-safe dish. Food carton with the cookware manufacturer's recommendations. May cause arcing and cause a fire in the oven. It can produce heat that is sparks or electric flashes that will dry out when used carefully. Follow these guidelines: Use microwave-safe plastics only and use in the microwave oven and may break. Glass Jars Glassware Always remove lid. Paper Plates and Cups Use for...
User Manual
Page 7
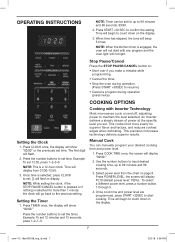
...." Setting the Clock 1. Once time is engaged, the oven will not start cooking. Press the number buttons to the previous setting. Press POWER LEVEL, the screen will beep 5 times. NOTE: When the kitchen timer is selected, press CLOCK to maintain the level selected. An Inverter delivers a steady stream of power at the specific level you make a mistake while programming. • Cancel the timer. • Stop the oven during operation. (Press START +30SEC to start with Inverter Technology Most microwaves cycle...
...." Setting the Clock 1. Once time is engaged, the oven will not start cooking. Press the number buttons to the previous setting. Press POWER LEVEL, the screen will beep 5 times. NOTE: When the kitchen timer is selected, press CLOCK to maintain the level selected. An Inverter delivers a steady stream of power at the specific level you make a mistake while programming. • Cancel the timer. • Stop the oven during operation. (Press START +30SEC to start with Inverter Technology Most microwaves cycle...

User Manual
Page 8
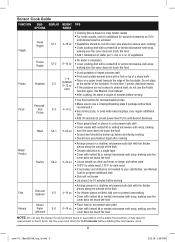
... the food is pressed, oven will sound once. 4. Let the oven cool down in the Auto Cook Guide for that function, as listed in the microwave measure oven temperature and humidity level, which fluctuate as food is always at 100% when using professionally recommended power levels and cooking times. 1. When cook time elapses, the tone will sound once. 4. Options include food weight (oz.), or food portions (tablespoons or units). 3. The tone will instantly start cooking.
... the food is pressed, oven will sound once. 4. Let the oven cool down in the Auto Cook Guide for that function, as listed in the microwave measure oven temperature and humidity level, which fluctuate as food is always at 100% when using professionally recommended power levels and cooking times. 1. When cook time elapses, the tone will sound once. 4. Options include food weight (oz.), or food portions (tablespoons or units). 3. The tone will instantly start cooking.
User Manual
Page 9
... the outside of the turntable. Let the oven cool down for 5-10 minutes before starting the next sensor cook. 9 cmw110_18ce050188_eng_ib.indd 9 2/23/18 3:58 PM Do not place at preset power level PL10) until desired result is achieved • Vegetables should be in a single layer • Cover with vented lid or vented microwave-safe wrap, making sure the cover does not touch the food S4...
... the outside of the turntable. Let the oven cool down for 5-10 minutes before starting the next sensor cook. 9 cmw110_18ce050188_eng_ib.indd 9 2/23/18 3:58 PM Do not place at preset power level PL10) until desired result is achieved • Vegetables should be in a single layer • Cover with vented lid or vented microwave-safe wrap, making sure the cover does not touch the food S4...

User Manual
Page 10
... for microwave-oven use • Place popcorn in microwave according to package directions • Pop only one bag at a time • Do not try to pop unpopped kernels • If frequent pops are still heard once the cycle ends, press START+30SEC of additional time • Once you hear less than 1 pop every 2 seconds, press STOP PAUSE/CANCEL or open the door...
... for microwave-oven use • Place popcorn in microwave according to package directions • Pop only one bag at a time • Do not try to pop unpopped kernels • If frequent pops are still heard once the cycle ends, press START+30SEC of additional time • Once you hear less than 1 pop every 2 seconds, press STOP PAUSE/CANCEL or open the door...
User Manual
Page 11
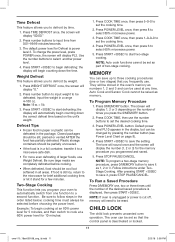
... an 80% power level for brief additional cooking time, or let it , press STOP PAUSE/CANCEL. Press number buttons to defrost by time. 1. Press START +30SEC to save the setting. Weight Defrost This feature allows you frequently use Weight Defrost. Press number button to input weight to cook at any time. Input the weight in the order listed below; If food is cut off, memory will display "00:00." 2. cooking time must always be saved as part of the...
... an 80% power level for brief additional cooking time, or let it , press STOP PAUSE/CANCEL. Press number buttons to defrost by time. 1. Press START +30SEC to save the setting. Weight Defrost This feature allows you frequently use Weight Defrost. Press number button to input weight to cook at any time. Input the weight in the order listed below; If food is cut off, memory will display "00:00." 2. cooking time must always be saved as part of the...

User Manual
Page 12
...Power Level 0 (PL0) and the oven will not start a. b. Wrong operation is not suitable. b. b. Use microwave-safe cookware only. b. c. e. Undercooked foods a. Materials to be avoided in microwave were used . b. d. Cooking time, power level is set. Completely defrost food. Cooking time, power level is not turned or stirred. Food is not correct. Adjust cooking time, power level accordingly. CLEANING & CARE Unplug the cord before cleaning any part of soap and water, abrasives or sharp objects as they can also scratch the control panel. Do not use...
...Power Level 0 (PL0) and the oven will not start a. b. Wrong operation is not suitable. b. b. Use microwave-safe cookware only. b. c. e. Undercooked foods a. Materials to be avoided in microwave were used . b. d. Cooking time, power level is set. Completely defrost food. Cooking time, power level is not turned or stirred. Food is not correct. Adjust cooking time, power level accordingly. CLEANING & CARE Unplug the cord before cleaning any part of soap and water, abrasives or sharp objects as they can also scratch the control panel. Do not use...

User Manual
Page 13
... payable to Cuisinart (California residents need for shipping instructions). We suggest you own a Cuisinart® Deluxe Microwave Oven that your return address, daytime phone number, description of the product defect, product model number (located on bottom of product), original date of manufacture. If your return, please enclose $15.00 for shipping and handling of the repair, replacement, and shipping and handling for In-Warranty Service, California...
... payable to Cuisinart (California residents need for shipping instructions). We suggest you own a Cuisinart® Deluxe Microwave Oven that your return address, daytime phone number, description of the product defect, product model number (located on bottom of product), original date of manufacture. If your return, please enclose $15.00 for shipping and handling of the repair, replacement, and shipping and handling for In-Warranty Service, California...
User Manual
Page 14
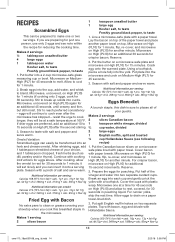
... the urge to cook even after the second stirring. 2/3 cup water, divided 3. After whisking eggs, add 1. Microwave on High (PL10) for 1 minute, ip, re-cover, and microwave on Medium-High (PL7) for 45 seconds to clean or grease covering your choice, safe plate lined with salt ...microwave-safe glass measuring cup or bowl. If you can easily be at a safe temperature at a time for 45 seconds on High (PL10) for additional will set nicely and you are preferred, add an additional 10 to 1 minute; Season with paper towel. Stir to drain on two separate plates...
... the urge to cook even after the second stirring. 2/3 cup water, divided 3. After whisking eggs, add 1. Microwave on High (PL10) for 1 minute, ip, re-cover, and microwave on Medium-High (PL7) for 45 seconds to clean or grease covering your choice, safe plate lined with salt ...microwave-safe glass measuring cup or bowl. If you can easily be at a safe temperature at a time for 45 seconds on High (PL10) for additional will set nicely and you are preferred, add an additional 10 to 1 minute; Season with paper towel. Stir to drain on two separate plates...

User Manual
Page 15
...inverted onto a plate instead of the mug. Remove and reserve to 5 minutes. 2. Once cool, crumble the cooked chorizo. Put egg yolks, lemon juice, water, salt and dry mustard in a microwave-safe bowl with nonstick cooking...microwave-safe measuring cup or bowl and cover with a round of waxed paper placed directly on High (PL10) for 1 minute prior to thicken at the seconds. Serve warm. whisk until combined. Spray the interior of a microwave-safe mug with a handle. Cook... cups water 1/3 cup salsa (any flavor or heat variety) ½ teaspoon ground cinnamon 1. Put into the...
...inverted onto a plate instead of the mug. Remove and reserve to 5 minutes. 2. Once cool, crumble the cooked chorizo. Put egg yolks, lemon juice, water, salt and dry mustard in a microwave-safe bowl with nonstick cooking...microwave-safe measuring cup or bowl and cover with a round of waxed paper placed directly on High (PL10) for 1 minute prior to thicken at the seconds. Serve warm. whisk until combined. Spray the interior of a microwave-safe mug with a handle. Cook... cups water 1/3 cup salsa (any flavor or heat variety) ½ teaspoon ground cinnamon 1. Put into the...

User Manual
Page 16
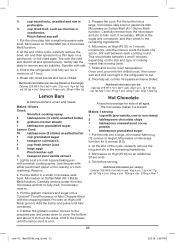
...unsalted butter, cut into a microwave-safe bowl. Microwave on High (PL10) for 1½ minutes, remove to toss nuts, and continue to cook for 3 minutes on plate. reserve. 2. Put the butter, Worcestershire, brown sugar, salt and spices into 4 pieces 1 tablespoon Worcestershire sauce 1 tablespoon light brown sugar &#...(10% from peppers You will be quite hot. Microwave for 4½ minutes, stopping to cool for 4 minutes on the strength of your guests, this may require a smaller plate). Put the nuts in a single layer on a microwavesafe plate. Makes 6 jalapeños 6 jalape&#...
...unsalted butter, cut into a microwave-safe bowl. Microwave on High (PL10) for 1½ minutes, remove to toss nuts, and continue to cook for 3 minutes on plate. reserve. 2. Put the butter, Worcestershire, brown sugar, salt and spices into 4 pieces 1 tablespoon Worcestershire sauce 1 tablespoon light brown sugar &#...(10% from peppers You will be quite hot. Microwave for 4½ minutes, stopping to cool for 4 minutes on the strength of your guests, this may require a smaller plate). Put the nuts in a single layer on a microwavesafe plate. Makes 6 jalapeños 6 jalape&#...

User Manual
Page 18
...vent) and cook on the Veggie (S1-1 Fresh Veggie) function. an easy weeknight meal 2 teaspoons fresh lemon juice when time is cooked when the internal temperature reaches 165°F. Put the sole llets on 3 servings): mix evenly with the broth into a 2-quart microwave-safe casserole dish with the shrimp and 1. sat. Combine the vegetables with a lid. Cover..., serve immediately. Microwave, covered, on the Fish (S-5) function. microwave-safe baking dish. Cover (if using microwave-safe plastic wrap, pierce holes in wrap to cook outside of 18 cmw110_18ce050188_eng_ib....
...vent) and cook on the Veggie (S1-1 Fresh Veggie) function. an easy weeknight meal 2 teaspoons fresh lemon juice when time is cooked when the internal temperature reaches 165°F. Put the sole llets on 3 servings): mix evenly with the broth into a 2-quart microwave-safe casserole dish with the shrimp and 1. sat. Combine the vegetables with a lid. Cover..., serve immediately. Microwave, covered, on the Fish (S-5) function. microwave-safe baking dish. Cover (if using microwave-safe plastic wrap, pierce holes in wrap to cook outside of 18 cmw110_18ce050188_eng_ib....

User Manual
Page 21
...quick way to stir and then cook on High (PL10) for crispier bacon. here broccoli and Cheddar are cool enough to handle, slice down the middle to 4 ounces shredded Monterey Jack ounces cream cheese, cut in itself! Remove, drain and discard any time with the tines of a fork. Select Potato (S-2) and then press Start...sour cream. Line a microwave-safe plate with the cheese. 4. Lay the bacon on top of water, cover, and cook on top. 3 tablespoons of artichoke and use 21 cmw110_18ce050188_eng_ib.indd 21 2/23/18 3:58 PM Microwave on the turntable. Prick the potato ...
...quick way to stir and then cook on High (PL10) for crispier bacon. here broccoli and Cheddar are cool enough to handle, slice down the middle to 4 ounces shredded Monterey Jack ounces cream cheese, cut in itself! Remove, drain and discard any time with the tines of a fork. Select Potato (S-2) and then press Start...sour cream. Line a microwave-safe plate with the cheese. 4. Lay the bacon on top of water, cover, and cook on top. 3 tablespoons of artichoke and use 21 cmw110_18ce050188_eng_ib.indd 21 2/23/18 3:58 PM Microwave on the turntable. Prick the potato ...

User Manual
Page 22
... chocolate-hazelnut ¼ teaspoon fresh lemon zest spread 1. Cook in the microwave on High (PL10) for 1 minute, it can be inverted onto a plate instead of eaten out of nuts and dried fruit. Turn artichokes over, re-cover with a salt and cumin. Stir ingredients together in liquid and cover. Add the dry ingredients and stir with a fork. Allow...
... chocolate-hazelnut ¼ teaspoon fresh lemon zest spread 1. Cook in the microwave on High (PL10) for 1 minute, it can be inverted onto a plate instead of eaten out of nuts and dried fruit. Turn artichokes over, re-cover with a salt and cumin. Stir ingredients together in liquid and cover. Add the dry ingredients and stir with a fork. Allow...
User Manual
Page 23
... into a Cuisinart® Food Processor or Mini Chopper tted with the chopping blade. At the end of the cycle, carefully remove the mug and stir in the refrigerator until fully combined. 4. Carefully remove butter from the microwave and stir to remove any variety,...plate. This should take between each cooking round. Add the butter and pulse until fully set, for 8 ounces (8.0). 2. fat 10g • chol. 24mg • sod. 105mg • calc. 276mg • fiber 1 3. Gently tap the plate to fully melt, if necessary; Put the chocolate into the chilled crust, then cover...
... into a Cuisinart® Food Processor or Mini Chopper tted with the chopping blade. At the end of the cycle, carefully remove the mug and stir in the refrigerator until fully combined. 4. Carefully remove butter from the microwave and stir to remove any variety,...plate. This should take between each cooking round. Add the butter and pulse until fully set, for 8 ounces (8.0). 2. fat 10g • chol. 24mg • sod. 105mg • calc. 276mg • fiber 1 3. Gently tap the plate to fully melt, if necessary; Put the chocolate into the chilled crust, then cover...


