
Dell™ Technology Guide
Page 20
Dell Support Center 285 Solving Problems 287 Battery Problems 287 Drive Problems 287 Optical Drive Problems 288 E-Mail, Modem, and Internet Problems . . . . . 289 Error Messages 290 ... Scanner Problems 299 Sound and Speaker Problems 299 Touch Pad or Mouse Problems for Laptop Computers 301 Video and Monitor Problems 302 Power Lights 304 Dell Technical Update Service 305 21 System Setup 307 Viewing System Settings With the System Setup Program 307 Entering the System Setup Program 308 Working With...
Dell Support Center 285 Solving Problems 287 Battery Problems 287 Drive Problems 287 Optical Drive Problems 288 E-Mail, Modem, and Internet Problems . . . . . 289 Error Messages 290 ... Scanner Problems 299 Sound and Speaker Problems 299 Touch Pad or Mouse Problems for Laptop Computers 301 Video and Monitor Problems 302 Power Lights 304 Dell Technical Update Service 305 21 System Setup 307 Viewing System Settings With the System Setup Program 307 Entering the System Setup Program 308 Working With...

Dell™ Technology Guide
Page 21
Changing Boot Sequence to a USB Device . . . . 310 Changing the BIOS Settings 310 Viewing the BIOS Settings 311 Upgrading the BIOS (Flashing the BIOS 311 22 Ports 313 USB Port 313 IEEE 1394 Port 314 RS232 Serial Port 315 Parallel Port 316 eSATA Port 317 Modem 318 Ethernet Port 319 Keyboard and Mouse Port (PS2 320 VGA Port 321 DVI-I Port 322 S-Video TV-Out Port 323 Component Video 324 Composite Video 325 HDMI Port 326 DisplayPort 327 S/PDIF Port (Coaxial RCA 328 Contents 21
Changing Boot Sequence to a USB Device . . . . 310 Changing the BIOS Settings 310 Viewing the BIOS Settings 311 Upgrading the BIOS (Flashing the BIOS 311 22 Ports 313 USB Port 313 IEEE 1394 Port 314 RS232 Serial Port 315 Parallel Port 316 eSATA Port 317 Modem 318 Ethernet Port 319 Keyboard and Mouse Port (PS2 320 VGA Port 321 DVI-I Port 322 S-Video TV-Out Port 323 Component Video 324 Composite Video 325 HDMI Port 326 DisplayPort 327 S/PDIF Port (Coaxial RCA 328 Contents 21

Dell™ Technology Guide
Page 88
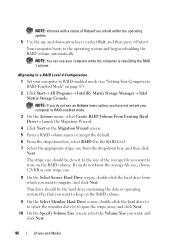
... computer, you did not select a RAID configuration when the computer was purchased. and right-arrow keys to exit the system setup program and resume the boot process. Back up any data you want to create and manage RAID arrays. This can be configured for information about using the NVIDIA utilities. •...
... computer, you did not select a RAID configuration when the computer was purchased. and right-arrow keys to exit the system setup program and resume the boot process. Back up any data you want to create and manage RAID arrays. This can be configured for information about using the NVIDIA utilities. •...

Dell™ Technology Guide
Page 91
... appears and lists any data. NOTICE: Deleting a RAID 0 volume destroys all drives to be used , and the operating system. NOTICE: If your computer currently boots to RAID and you delete the RAID volume, your computer will not boot. 1 Launch Nvidia MediaShield. 2 Click to select the array you want to keep before continuing.
... appears and lists any data. NOTICE: Deleting a RAID 0 volume destroys all drives to be used , and the operating system. NOTICE: If your computer currently boots to RAID and you delete the RAID volume, your computer will not boot. 1 Launch Nvidia MediaShield. 2 Click to select the array you want to keep before continuing.
Dell™ Technology Guide
Page 96
... containing the data or operating system files that you have not yet set your computer while the computer is rebuilding the RAID 1 volume. Your computer boots to select Exit, and then press . If you do not see "Setting Your Computer to migrate, and click Next. NOTE: You can use your computer...
... containing the data or operating system files that you have not yet set your computer while the computer is rebuilding the RAID 1 volume. Your computer boots to select Exit, and then press . If you do not see "Setting Your Computer to migrate, and click Next. NOTE: You can use your computer...

Dell™ Technology Guide
Page 268
...or Factory Image Restore. The Confirm Data Deletion screen appears. Windows Vista: Dell Factory Image Restore 1 Turn on as a local user. NOTICE: If ... on. The restore process begins and may need to select Dell Factory Tools, then Dell Factory Image Restore. To access the command prompt, type administrator... reboot the system. 268 Restoring Your Operating System When the Dell logo appears, press several times to complete. NOTE: Depending ...the User name field, then click OK. 5 Click Dell Factory Image Restore. The Dell Factory Image Restore welcome screen appears. 6 Click Next....
...or Factory Image Restore. The Confirm Data Deletion screen appears. Windows Vista: Dell Factory Image Restore 1 Turn on as a local user. NOTICE: If ... on. The restore process begins and may need to select Dell Factory Tools, then Dell Factory Image Restore. To access the command prompt, type administrator... reboot the system. 268 Restoring Your Operating System When the Dell logo appears, press several times to complete. NOTE: Depending ...the User name field, then click OK. 5 Click Dell Factory Image Restore. The Dell Factory Image Restore welcome screen appears. 6 Click Next....
Dell™ Technology Guide
Page 270
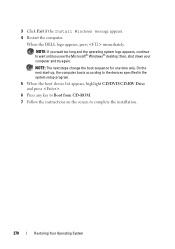
... logo appears, continue to complete the installation. 270 Restoring Your Operating System On the next start-up, the computer boots according to the devices specified in the system setup program. 5 When the boot device list appears, highlight CD/DVD/CD-RW Drive and press . 6 Press any key to... Boot from CD-ROM. 7 Follow the instructions on the screen to wait until you see the Microsoft® Windows® desktop; 3 Click Exit if the Install Windows message appears. 4 Restart the computer. When the DELL logo appears, press immediately.
... logo appears, continue to complete the installation. 270 Restoring Your Operating System On the next start-up, the computer boots according to the devices specified in the system setup program. 5 When the boot device list appears, highlight CD/DVD/CD-RW Drive and press . 6 Press any key to... Boot from CD-ROM. 7 Follow the instructions on the screen to wait until you see the Microsoft® Windows® desktop; 3 Click Exit if the Install Windows message appears. 4 Restart the computer. When the DELL logo appears, press immediately.

Dell™ Technology Guide
Page 272
... information on your computer include: Tool Power lights Diagnostic lights for desktop computers Diagnostic lights for information about power lights. With the Dell Diagnostics, the computer runs the Pre-boot System Assessment (PSA), a series of initial tests of the troubleshooting tools you may display messages indicating errors or problems, which need to...
... information on your computer include: Tool Power lights Diagnostic lights for desktop computers Diagnostic lights for information about power lights. With the Dell Diagnostics, the computer runs the Pre-boot System Assessment (PSA), a series of initial tests of the troubleshooting tools you may display messages indicating errors or problems, which need to...

Dell™ Technology Guide
Page 275
... you received is not listed in the table, see the Service Manual for the topic on the Dell Support website support.dell.com. PREVIOUS ATTEMPTS AT BOOTING THIS SYSTEM HAVE FAILED AT CHECKPOINT [NNNN]. Possible motherboard failure or RTC battery low. CPU fan failure...M O S C H E C K S U M E R R O R - C P U F A N F A I L U R E - FOR MORE INFORMATION: to complete the boot routine three consecutive times for the same error (see "Contacting Dell" on page 337 for assistance). Possible HDD failure during HDD boot test (see the Service Manual for your computer or search for the topic on page...
... you received is not listed in the table, see the Service Manual for the topic on the Dell Support website support.dell.com. PREVIOUS ATTEMPTS AT BOOTING THIS SYSTEM HAVE FAILED AT CHECKPOINT [NNNN]. Possible motherboard failure or RTC battery low. CPU fan failure...M O S C H E C K S U M E R R O R - C P U F A N F A I L U R E - FOR MORE INFORMATION: to complete the boot routine three consecutive times for the same error (see "Contacting Dell" on page 337 for assistance). Possible HDD failure during HDD boot test (see the Service Manual for your computer or search for the topic on page...
Dell™ Technology Guide
Page 276
... on the system board might be enabled or disabled in the table, see the documentation for either the operating system or the program that the boot sequence information is correct (see "Working With Options on the System Setup Program Screen" on page 337 for External Keyboards" on page 292. F L A S H P A ... D R I L U R E - AUXILIARY DEVICE FAILURE VERIFY THAT MOUSE AND KEYBOARD ARE SECURELY ATTACHED TO CORRECT CONNECTORS. Contact Dell (see "Keyboard Problems for assistance). See "Lockups and Software Problems" on page 292). Keyboard failure or keyboard cable loose (see "Contacting...
... on the system board might be enabled or disabled in the table, see the documentation for either the operating system or the program that the boot sequence information is correct (see "Working With Options on the System Setup Program Screen" on page 337 for External Keyboards" on page 292. F L A S H P A ... D R I L U R E - AUXILIARY DEVICE FAILURE VERIFY THAT MOUSE AND KEYBOARD ARE SECURELY ATTACHED TO CORRECT CONNECTORS. Contact Dell (see "Keyboard Problems for assistance). See "Lockups and Software Problems" on page 292). Keyboard failure or keyboard cable loose (see "Contacting...

Dell™ Technology Guide
Page 277
..." on page 292. T I N T E R R U P T - See "Lockups and Software Problems" on page 287. STRIKE F1 TO RETRY BOOT, F2 FOR SETUP UTILITY. RUN THE SETUP UTILITY TO E N A B L E T H E S E M E S S A G E S...battery. PLEASE RUN THE SYSTEM SETUP Troubleshooting 277 See "Drive Problems" on page 292. Run the Dell Diagnostics (see "Running the Dell Diagnostics" on page 308). P R E S S F 5 T O R U N O N B O A R D D I A G N O S T I V E - Run the Dell Diagnostics (see "Running the Dell Diagnostics" on page 308). See "Lockups and Software Problems" on page 292. N O B ...
..." on page 292. T I N T E R R U P T - See "Lockups and Software Problems" on page 287. STRIKE F1 TO RETRY BOOT, F2 FOR SETUP UTILITY. RUN THE SETUP UTILITY TO E N A B L E T H E S E M E S S A G E S...battery. PLEASE RUN THE SYSTEM SETUP Troubleshooting 277 See "Drive Problems" on page 292. Run the Dell Diagnostics (see "Running the Dell Diagnostics" on page 308). P R E S S F 5 T O R U N O N B O A R D D I A G N O S T I V E - Run the Dell Diagnostics (see "Running the Dell Diagnostics" on page 308). See "Lockups and Software Problems" on page 292. N O B ...
Dell™ Technology Guide
Page 278
... applies to laptop computers that the memory you are using is supported by your computer (see "Running the Dell Diagnostics" on page 337). Connect the correct AC adapter to the computer or docking station. TI M E...DO NOT WANT TO SEE POWER WARNING MESSAGES AGAIN. IF YOU DID NOT CHANGE YOUR MEMORY... Run the Dell Diagnostics (see the documentation shipped with your computer's Service Manual). • If memory was not removed..., WHICH IS LESS THAN 278 Troubleshooting THE SYSTEM CAN ONLY BOOT WITH A 130-W POWER ADAPTER OR GREATER. Ensure that require a 130-W or greater AC adapter.
... applies to laptop computers that the memory you are using is supported by your computer (see "Running the Dell Diagnostics" on page 337). Connect the correct AC adapter to the computer or docking station. TI M E...DO NOT WANT TO SEE POWER WARNING MESSAGES AGAIN. IF YOU DID NOT CHANGE YOUR MEMORY... Run the Dell Diagnostics (see the documentation shipped with your computer's Service Manual). • If memory was not removed..., WHICH IS LESS THAN 278 Troubleshooting THE SYSTEM CAN ONLY BOOT WITH A 130-W POWER ADAPTER OR GREATER. Ensure that require a 130-W or greater AC adapter.

Dell™ Technology Guide
Page 279
...W N . - THE SYSTEM WILL NOT BOOT WITH THIS BATTERY PLUGGED IN. PRESS F1 TO SHUTDOWN THE S YS T E M . WARNING MESSAGES HAVE BEEN DISABLED. RUN THE SETUP UTILITY TO ENABLE T H E S E M E S S A G E S . - WARNING: DELL'S DISK MONITORING SYSTEM HAS DETECTED THAT DRIVE... or system board may have occurred. WA R N I N G : T H E T P M C O U L D N O T B E I N I T I A L I S R E M O V E D . - Contact Dell for assistance (see "Contacting Dell" on page 307. Connect the correct AC adapter. THIS SYSTEM WILL BE U N A B L E T O C H A R G E B A T T E R I E S U N T I L T H I S B A T ...
...W N . - THE SYSTEM WILL NOT BOOT WITH THIS BATTERY PLUGGED IN. PRESS F1 TO SHUTDOWN THE S YS T E M . WARNING MESSAGES HAVE BEEN DISABLED. RUN THE SETUP UTILITY TO ENABLE T H E S E M E S S A G E S . - WARNING: DELL'S DISK MONITORING SYSTEM HAS DETECTED THAT DRIVE... or system board may have occurred. WA R N I N G : T H E T P M C O U L D N O T B E I N I T I A L I S R E M O V E D . - Contact Dell for assistance (see "Contacting Dell" on page 307. Connect the correct AC adapter. THIS SYSTEM WILL BE U N A B L E T O C H A R G E B A T T E R I E S U N T I L T H I S B A T ...

Dell™ Technology Guide
Page 282
...174; Windows® desktop; Starting the Dell Diagnostics on Desktop Computers NOTE: If your computer. 3 When the DELL™ logo appears, press immediately. NOTE: If you see "Contacting Dell" on . The computer runs the Pre-boot System Assessment (PSA), a series of ... questions that no diagnostics utility partition has been found, run the Dell Diagnostics from the Drivers and Utilities media. Select Diagnostics from the boot menu and press . If the Pre-boot System Assessment completes successfully, the following message appears: "Booting Dell Diagnostic Utility Partition.
...174; Windows® desktop; Starting the Dell Diagnostics on Desktop Computers NOTE: If your computer. 3 When the DELL™ logo appears, press immediately. NOTE: If you see "Contacting Dell" on . The computer runs the Pre-boot System Assessment (PSA), a series of ... questions that no diagnostics utility partition has been found, run the Dell Diagnostics from the Drivers and Utilities media. Select Diagnostics from the boot menu and press . If the Pre-boot System Assessment completes successfully, the following message appears: "Booting Dell Diagnostic Utility Partition.
Dell™ Technology Guide
Page 283
... and Utilities Media 1 Insert the Drivers and Utilities media. 2 Shut down your computer and try again. NOTE: The next steps change the boot sequence for your hard drive. 5 When the Dell Diagnostics Main Menu appears, select the test you want to run . On the next start-up, the computer... devices specified in the system setup program. 3 When the boot device list appears, highlight CD/DVD/CD-RW and press . 4 Select the Boot from CD-ROM option from the menu that no diagnostics utility partition has been found, run the Dell Diagnostics from the Drivers and Utilities media. 4 Press any...
... and Utilities Media 1 Insert the Drivers and Utilities media. 2 Shut down your computer and try again. NOTE: The next steps change the boot sequence for your hard drive. 5 When the Dell Diagnostics Main Menu appears, select the test you want to run . On the next start-up, the computer... devices specified in the system setup program. 3 When the boot device list appears, highlight CD/DVD/CD-RW and press . 4 Select the Boot from CD-ROM option from the menu that no diagnostics utility partition has been found, run the Dell Diagnostics from the Drivers and Utilities media. 4 Press any...

Dell™ Technology Guide
Page 308
... the right of the screen. Options or values that you see the Help area on (or restart) your computer. 2 When the DELL™ logo appears, press immediately. 3 If you wait too long and the operating system logo appears, continue to wait until you cannot... change settings that option. On each option is the setting or value for that appear as : • System configuration • Boot order • Boot (start-up) configuration • Basic device configuration settings • System security and hard drive password settings 308 System Setup The system setup ...
... the right of the screen. Options or values that you see the Help area on (or restart) your computer. 2 When the DELL™ logo appears, press immediately. 3 If you wait too long and the operating system logo appears, continue to wait until you cannot... change settings that option. On each option is the setting or value for that appear as : • System configuration • Boot order • Boot (start-up) configuration • Basic device configuration settings • System security and hard drive password settings 308 System Setup The system setup ...
Dell™ Technology Guide
Page 309
...; Modular Bay HDD NOTE: Only devices that may be installed in the list. 1 Enter the system setup program. 2 Press the left- To control the boot devices, select (highlight) a device by a number are preceded by pressing the downarrow or up-arrow key, and then enable or disable the device or change...soon as you want to change, and then press . 5 Press and then press to exit the system setup program and resume the boot process. During the boot routine, the computer starts at the top of the list and scans each enabled device for the operating system start the operating system. The...
...; Modular Bay HDD NOTE: Only devices that may be installed in the list. 1 Enter the system setup program. 2 Press the left- To control the boot devices, select (highlight) a device by a number are preceded by pressing the downarrow or up-arrow key, and then enable or disable the device or change...soon as you want to change, and then press . 5 Press and then press to exit the system setup program and resume the boot process. During the boot routine, the computer starts at the top of the list and scans each enabled device for the operating system start the operating system. The...

Dell™ Technology Guide
Page 310
...operating system logo appears, continue to wait until you see the Windows desktop, then shut down your computer. 3 When F2 = Setup, F12 = Boot Menu appears in the upper-right corner of the screen, press . To ensure that a device is a utility that serves as an interface between ...the computer hardware and the operating system. Changing the BIOS Settings The BIOS is bootable, check the device documentation. When the DELL logo appears, press immediately. Changing Boot Sequence to a USB Device 1 Connect the USB device to a USB connector. 2 Turn on the computer. If you wait ...
...operating system logo appears, continue to wait until you see the Windows desktop, then shut down your computer. 3 When F2 = Setup, F12 = Boot Menu appears in the upper-right corner of the screen, press . To ensure that a device is a utility that serves as an interface between ...the computer hardware and the operating system. Changing the BIOS Settings The BIOS is bootable, check the device documentation. When the DELL logo appears, press immediately. Changing Boot Sequence to a USB Device 1 Connect the USB device to a USB connector. 2 Turn on the computer. If you wait ...

Dell™ Technology Guide
Page 340
... architecture. The basic data unit used by your computer. A rewritable version of many processor operations. bit - Bluetooth® wireless technology - boot sequence - bootable disk - bus speed - cache - A drive that you can read CDs and write to automatically recognize each other. bootable...The cache enhances the efficiency of a CD. Secondary cache which can use to start your computer has a virus, ensure that can use to boot. bus - byte - CD recordable - CD rewritable - A CD that you can either a reserved section of the devices from which can...
... architecture. The basic data unit used by your computer. A rewritable version of many processor operations. bit - Bluetooth® wireless technology - boot sequence - bootable disk - bus speed - cache - A drive that you can read CDs and write to automatically recognize each other. bootable...The cache enhances the efficiency of a CD. Secondary cache which can use to start your computer has a virus, ensure that can use to boot. bus - byte - CD recordable - CD rewritable - A CD that you can either a reserved section of the devices from which can...

Dell™ Technology Guide
Page 349
... frequencies, in the range of 10 kHz to 100,000 MHz. If no problems are detected during POST, the computer continues the start-up. pre-boot execution environment - A text file included with a software package or hardware product. Interference that perform basic tests on a network in a directory and the system administrator has...
... frequencies, in the range of 10 kHz to 100,000 MHz. If no problems are detected during POST, the computer continues the start-up. pre-boot execution environment - A text file included with a software package or hardware product. Interference that perform basic tests on a network in a directory and the system administrator has...


