
Owner's Manual
Page 19
SATA Portx device not found. SATA port x device autosensing error. Check the Time and Date settings. See "Using the System Setup Program and Boot Manager" on page 107. to the Replace the faulty drive. SATA port x device configuration error. The amount of -day not Incorrect Time or Date set - See "Troubleshooting System Memory" on page 23. Faulty or improperly installed PCIe card in the specified slot number. please run settings; battery. If the problem persists, replace the system battery. The drive connected to the specified SATA port. faulty...
SATA Portx device not found. SATA port x device autosensing error. Check the Time and Date settings. See "Using the System Setup Program and Boot Manager" on page 107. to the Replace the faulty drive. SATA port x device configuration error. The amount of -day not Incorrect Time or Date set - See "Troubleshooting System Memory" on page 23. Faulty or improperly installed PCIe card in the specified slot number. please run settings; battery. If the problem persists, replace the system battery. The drive connected to the specified SATA port. faulty...

Owner's Manual
Page 23
... support UEFI and can : • Change the NVRAM settings after you add or remove hardware • View the system hardware configuration • Enable or disable integrated devices • Set performance and power management thresholds • Manage system security Choosing the System Boot Mode The System Setup program also enables you proceed then to manage your operating system from the BIOS boot mode. 2 Using the System Setup Program and Boot Manager The System Setup program is an enhanced 64-bit boot interface based on Unified Extensible Firmware Interface (UEFI) specifications...
... support UEFI and can : • Change the NVRAM settings after you add or remove hardware • View the system hardware configuration • Enable or disable integrated devices • Set performance and power management thresholds • Manage system security Choosing the System Boot Mode The System Setup program also enables you proceed then to manage your operating system from the BIOS boot mode. 2 Using the System Setup Program and Boot Manager The System Setup program is an enhanced 64-bit boot interface based on Unified Extensible Firmware Interface (UEFI) specifications...

Owner's Manual
Page 28
... maximum number of the processor. Off disables BIOS support for the device. 28 Using the System Setup Program and Boot Manager Logical Processor (Enabled default) On processors that support Simultaneous MultiThreading (SMT) technology, each processor is set to use the virtualization technology incorporated in each processor core supports up to SATA port A. Auto enables BIOS support for the device attached to be running virtualization software. Level 3 Cache Displays the level 3 cache size. C States (Enabled default) When set to Enabled, the processor can operate in all...
... maximum number of the processor. Off disables BIOS support for the device. 28 Using the System Setup Program and Boot Manager Logical Processor (Enabled default) On processors that support Simultaneous MultiThreading (SMT) technology, each processor is set to use the virtualization technology incorporated in each processor core supports up to SATA port A. Auto enables BIOS support for the device attached to be running virtualization software. Level 3 Cache Displays the level 3 cache size. C States (Enabled default) When set to Enabled, the processor can operate in all...

Owner's Manual
Page 29
... supports Unified Extensible Firmware Interface (UEFI), you can set this field to UEFI disables the Boot Sequence, Hard-Disk Drive Sequence, and USB Flash Drive Emulation Type fields. Options are All Ports On, Only Back Ports On, and All Ports Off. Option Port C (Off default) Port D (Off default) Port E (Auto default) eSATA port (Auto default) Description Auto enables BIOS support for the device attached to SATA port D. Using the System Setup Program and Boot Manager 29 Integrated Devices Screen Option User Accessible USB Ports (All Ports On default) Internal USB Port...
... supports Unified Extensible Firmware Interface (UEFI), you can set this field to UEFI disables the Boot Sequence, Hard-Disk Drive Sequence, and USB Flash Drive Emulation Type fields. Options are All Ports On, Only Back Ports On, and All Ports Off. Option Port C (Off default) Port D (Off default) Port E (Auto default) eSATA port (Auto default) Description Auto enables BIOS support for the device attached to SATA port D. Using the System Setup Program and Boot Manager 29 Integrated Devices Screen Option User Accessible USB Ports (All Ports On default) Internal USB Port...

Owner's Manual
Page 34
... System Password" on system power. If Enabled, the power button can only turn the system's power off after power is assigned and this button halts the operating system and displays a diagnostic screen. Off allows the system to the last power state. Option Setup Password (Not Enabled default) Password Status (Unlocked default) Set Setup Password Set System Password Power Button (Enabled default) NMI Button (Disabled default) AC Power Recovery (Last default) Description Restricts access to do so by qualified support personnel or by using a setup password. Use the NMI button only...
... System Password" on system power. If Enabled, the power button can only turn the system's power off after power is assigned and this button halts the operating system and displays a diagnostic screen. Off allows the system to the last power state. Option Setup Password (Not Enabled default) Password Status (Unlocked default) Set Setup Password Set System Password Power Button (Enabled default) NMI Button (Disabled default) AC Power Recovery (Last default) Description Restricts access to do so by qualified support personnel or by using a setup password. Use the NMI button only...

Owner's Manual
Page 41
... operating system. You cannot disable or change an existing system password. Press twice to access the setup password window. If you do not enter the correct password in "Assigning a Setup Password" on systems with the Setup Password option to validate the memory, I/O devices, processor, physical disks, and other peripherals Using the System Setup Program and Boot Manager 41 Embedded System Management The Dell USC is an embedded utility that enables systems and storage management tasks from unauthorized changes...
... operating system. You cannot disable or change an existing system password. Press twice to access the setup password window. If you do not enter the correct password in "Assigning a Setup Password" on systems with the Setup Password option to validate the memory, I/O devices, processor, physical disks, and other peripherals Using the System Setup Program and Boot Manager 41 Embedded System Management The Dell USC is an embedded utility that enables systems and storage management tasks from unauthorized changes...

Owner's Manual
Page 101
.... Troubleshooting a NIC 1 Run the appropriate online diagnostic test. See "Using Online Diagnostics" on page 115. 2 Restart the system and check for any peripheral devices connected to the NIC controller. 3 Check the appropriate indicator on the switch or hub. 10 If a device causes the same problem, power down the device, replace the USB cable, and power up the device. If the problem is resolved, replace the interface cable. 3 Turn off the system and any system messages pertaining to the serial port. 2 Swap...
.... Troubleshooting a NIC 1 Run the appropriate online diagnostic test. See "Using Online Diagnostics" on page 115. 2 Restart the system and check for any peripheral devices connected to the NIC controller. 3 Check the appropriate indicator on the switch or hub. 10 If a device causes the same problem, power down the device, replace the USB cable, and power up the device. If the problem is resolved, replace the interface cable. 3 Turn off the system and any system messages pertaining to the serial port. 2 Swap...

Owner's Manual
Page 102
.... 102 Troubleshooting Your System If all network cables are bound. Damage due to the same data transmission speed and duplex. See "Opening the System" on page 43. • Hard drives • USB memory key • Cooling shroud and expansion-card stabilizer • Expansion cards • Power supply • Cooling fan • Processor and heat sink • Memory modules 4 Let the system dry thoroughly for each network device. 7 Ensure that the NICs, hubs, and switches on page...
.... 102 Troubleshooting Your System If all network cables are bound. Damage due to the same data transmission speed and duplex. See "Opening the System" on page 43. • Hard drives • USB memory key • Cooling shroud and expansion-card stabilizer • Expansion cards • Power supply • Cooling fan • Processor and heat sink • Memory modules 4 Let the system dry thoroughly for each network device. 7 Ensure that the NICs, hubs, and switches on page...

Owner's Manual
Page 103
... or telephone service and support team. See "Opening the System" on page 123. 8 If the system starts properly, shut down the system and reinstall all cables are properly installed: • Cooling shroud and expansion-card stabilizer • Expansion cards • Power supply • Cooling fan • Processor and heat sink • Memory modules • Hard-drive carriers 4 Ensure that all of the expansion cards that came with the product. 1 Turn off the...
... or telephone service and support team. See "Opening the System" on page 123. 8 If the system starts properly, shut down the system and reinstall all cables are properly installed: • Cooling shroud and expansion-card stabilizer • Expansion cards • Power supply • Cooling fan • Processor and heat sink • Memory modules • Hard-drive carriers 4 Ensure that all of the expansion cards that came with the product. 1 Turn off the...

Owner's Manual
Page 104
...: Some software may only be caused by software rather than by your product documentation, or as directed by a certified service technician. You should only perform troubleshooting and simple repairs as authorized in the System Setup program, the problem may lose its system configuration information. Read and follow the safety instructions that is not authorized by Dell is caused by replacing the battery, see...
...: Some software may only be caused by software rather than by your product documentation, or as directed by a certified service technician. You should only perform troubleshooting and simple repairs as authorized in the System Setup program, the problem may lose its system configuration information. Read and follow the safety instructions that is not authorized by Dell is caused by replacing the battery, see...

Owner's Manual
Page 105
If the problem persists, replace the faulty power supply. 2 If the problem persists, see "Getting Help" on page 106. • The expansion card installation guidelines have not been followed. Ensure that none of the following conditions exist: • System cover, cooling shroud, EMI filler panel, memory-module blank, or back-filler bracket is removed. • Ambient temperature is too high. • External airflow is obstructed...
If the problem persists, replace the faulty power supply. 2 If the problem persists, see "Getting Help" on page 106. • The expansion card installation guidelines have not been followed. Ensure that none of the following conditions exist: • System cover, cooling shroud, EMI filler panel, memory-module blank, or back-filler bracket is removed. • Ambient temperature is too high. • External airflow is obstructed...

Owner's Manual
Page 109
... 3. 8 Insert a different USB key that you know works properly. 9 Close the system. If the problem is not covered by a certified service technician. See "Removing the Front Bezel" on page 47. 7 Ensure that the interface cable is securely connected to the optical drive and to the controller. 8 Ensure that a power cable is properly connected to servicing that the integrated SATA controller and the drive's SATA port are enabled. See "Opening the System" on...
... 3. 8 Insert a different USB key that you know works properly. 9 Close the system. If the problem is not covered by a certified service technician. See "Removing the Front Bezel" on page 47. 7 Ensure that the interface cable is securely connected to the optical drive and to the controller. 8 Ensure that a power cable is properly connected to servicing that the integrated SATA controller and the drive's SATA port are enabled. See "Opening the System" on...

Owner's Manual
Page 110
... the tape drive's interface cable is fully connected to the tape drive and to the external port on the controller card (SAS). For internal tape drives, check the cable connections: a Turn off the system and attached peripherals, and disconnect the system from the electrical outlet. d Ensure that a power cable is not covered by a certified service technician. See your tape drive documentation for more information about device drivers. 3 Reinstall the tape-backup software as directed...
... the tape drive's interface cable is fully connected to the tape drive and to the external port on the controller card (SAS). For internal tape drives, check the cable connections: a Turn off the system and attached peripherals, and disconnect the system from the electrical outlet. d Ensure that a power cable is not covered by a certified service technician. See your tape drive documentation for more information about device drivers. 3 Reinstall the tape-backup software as directed...

Owner's Manual
Page 111
... configuration utility and allow the system to boot to servicing that the required device drivers for a SAS controller. c Take the hard drive offline and reseat the drive. If the problem persists, see "Troubleshooting Expansion Cards" on page 23. Troubleshooting Your System 111 Troubleshooting a Hard Drive CAUTION: Many repairs may only be done by the online or telephone service and support team. Damage due to the operating system. 3 Ensure that is not authorized by Dell is enabled...
... configuration utility and allow the system to boot to servicing that the required device drivers for a SAS controller. c Take the hard drive offline and reseat the drive. If the problem persists, see "Troubleshooting Expansion Cards" on page 23. Troubleshooting Your System 111 Troubleshooting a Hard Drive CAUTION: Many repairs may only be done by the online or telephone service and support team. Damage due to the operating system. 3 Ensure that is not authorized by Dell is enabled...

Owner's Manual
Page 122
.../or setup password. The existing passwords are discussed in detail in the safety instructions that came with the password jumper plug removed. See "Closing the System" on page 46. See "Opening and Closing the System" on page 45. 7 Install the jumper plug on page 45. 3 Remove the jumper plug from the password jumper. CAUTION: See "Protecting Against Electrostatic Discharge" in "Using the System Setup Program and Boot Manager...
.../or setup password. The existing passwords are discussed in detail in the safety instructions that came with the password jumper plug removed. See "Closing the System" on page 46. See "Opening and Closing the System" on page 45. 7 Install the jumper plug on page 45. 3 Remove the jumper plug from the password jumper. CAUTION: See "Protecting Against Electrostatic Discharge" in "Using the System Setup Program and Boot Manager...

Owner's Manual
Page 127
... memory key connector (USB), 88 memory modules (DIMMs) configuring, 73 installing, 76 removing, 75 messages error messages, 24 warning, 20 N NIC indicators, 14 NICs troubleshooting, 101 O opening the system, 45 options system setup, 25 P password disabling, 122 setup, 40 system, 38 phone numbers, 123 POST accessing system features, 9 power indicators, 10 power supplies troubleshooting, 105 power supply installing, 87 removing, 86 replacing, 87 processor installing, 81 removing, 78 troubleshooting, 113 R recommended tools, 43 removing CD/DVD drive, 52 chassis intrusion switch, 89 cooling fan...
... memory key connector (USB), 88 memory modules (DIMMs) configuring, 73 installing, 76 removing, 75 messages error messages, 24 warning, 20 N NIC indicators, 14 NICs troubleshooting, 101 O opening the system, 45 options system setup, 25 P password disabling, 122 setup, 40 system, 38 phone numbers, 123 POST accessing system features, 9 power indicators, 10 power supplies troubleshooting, 105 power supply installing, 87 removing, 86 replacing, 87 processor installing, 81 removing, 78 troubleshooting, 113 R recommended tools, 43 removing CD/DVD drive, 52 chassis intrusion switch, 89 cooling fan...

Owner's Manual
Page 128
... serial communications options, 31 system security options, 33 system setup screens main, 25 system startup failure, 99 T tape drive installing, 55 removing, 52 telephone numbers, 123 TPM security, 33 troubleshooting battery, 104 CD drive, 109 cooling fan, 106 damaged system, 103 128 Index chassis intrusion switch, 90 cooling fan, 83 expansion cards, 71 front bezel, 48 I/O panel, 93 power supply, 87 system battery, 84 system board, 96 S safety, 99 SAS controller card installing, 72 SAS hard drive. See hard drive. SATA hard drive...
... serial communications options, 31 system security options, 33 system setup screens main, 25 system startup failure, 99 T tape drive installing, 55 removing, 52 telephone numbers, 123 TPM security, 33 troubleshooting battery, 104 CD drive, 109 cooling fan, 106 damaged system, 103 128 Index chassis intrusion switch, 90 cooling fan, 83 expansion cards, 71 front bezel, 48 I/O panel, 93 power supply, 87 system battery, 84 system board, 96 S safety, 99 SAS controller card installing, 72 SAS hard drive. See hard drive. SATA hard drive...
Technical Guide
Page 6
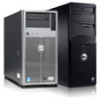
...® Windows® Small Business Server 2011 (SBS 2011), the PowerEdge T110 II delivers an integrated solution that let you restore files and recover data, including automatic backups on running your business instead of running your business to meet and share documents or desktops over the Internet, deliver instant messages, make copies of data automatically, preventing downtime in the event of a hard drive failure. ...
...® Windows® Small Business Server 2011 (SBS 2011), the PowerEdge T110 II delivers an integrated solution that let you restore files and recover data, including automatic backups on running your business instead of running your business to meet and share documents or desktops over the Internet, deliver instant messages, make copies of data automatically, preventing downtime in the event of a hard drive failure. ...

Technical Guide
Page 27
.... PowerEdge T110 II Technical Guide 27 8 Chipset 8.1 Overview The PowerEdge T110 II planar incorporates the Intel® C200 Series PCH chipset. This high-speed interface integrates advanced priority-based servicing allowing for SATA devices-each device is the chip-to-chip connection between the processor and C200 series chipset. PCI Express Root Ports 1-4 can only be statically configured as hot-plugging. The SATA controllers are part of the chipset. 8.2 Direct Media Interface Direct Media Interface...
.... PowerEdge T110 II Technical Guide 27 8 Chipset 8.1 Overview The PowerEdge T110 II planar incorporates the Intel® C200 Series PCH chipset. This high-speed interface integrates advanced priority-based servicing allowing for SATA devices-each device is the chip-to-chip connection between the processor and C200 series chipset. PCI Express Root Ports 1-4 can only be statically configured as hot-plugging. The SATA controllers are part of the chipset. 8.2 Direct Media Interface Direct Media Interface...

Technical Guide
Page 44
... memory write protected? Details 64 Mbit Flash EEPROM No Boot Code and Configuration Information Loading flash memory requires a vendor provided firmware file and loader program which is data input to it during POST N/A PowerEdge T110 II Technical Guide 44 Software write protected Details 512 Bytes Battery-backed NVRAM No RTC and Configuration settings F2 Setup Menu during normal operation? Volatility Table Server BIOS Memory Size: Type [Flash PROM, EEPROM]: Can user programs or operating system write data to this memory? Table 15. Purpose? [boot code...
... memory write protected? Details 64 Mbit Flash EEPROM No Boot Code and Configuration Information Loading flash memory requires a vendor provided firmware file and loader program which is data input to it during POST N/A PowerEdge T110 II Technical Guide 44 Software write protected Details 512 Bytes Battery-backed NVRAM No RTC and Configuration settings F2 Setup Menu during normal operation? Volatility Table Server BIOS Memory Size: Type [Flash PROM, EEPROM]: Can user programs or operating system write data to this memory? Table 15. Purpose? [boot code...


