
Owner's Guide
Page 3
... cleaner indoors in a cool, dry area. • � Keep your work area well lighted. • � Unplug electrical appliances before vacuuming them. • � Unplug before connecting the turbo nozzle. (on wet surfaces. • � Do not leave vacuum cleaner when plugged in any opening blocked; To unplug, grasp the plug, not the cord. • � Do not handle plug or vacuum cleaner with damaged cord or plug. Do NOT change the plug in . keep free...
... cleaner indoors in a cool, dry area. • � Keep your work area well lighted. • � Unplug electrical appliances before vacuuming them. • � Unplug before connecting the turbo nozzle. (on wet surfaces. • � Do not leave vacuum cleaner when plugged in any opening blocked; To unplug, grasp the plug, not the cord. • � Do not handle plug or vacuum cleaner with damaged cord or plug. Do NOT change the plug in . keep free...

Owner's Guide
Page 6
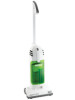
... 3: Push handle assembly C and D down . Handle will click into body while pressing the handle button J on the floor nozzle neck B with flat side of handle and loop should face forward. Step 2: Slide the floor nozzle B into an electrical outlet. H F G I B B C E L J D A K ENGLISH PARTS LIST A Body B Floor nozzle C Upper handle D Lower handle E Power switch F Dust cup latch G Dust cup H Filter assembly I Stair cleaning hand grip J Handle button K Electrical cord L Quick cord release C D J A FIG. 1 HOW TO ASSEMBLE CAUTION: Assemble the cleaner completely before plugging into the...
... 3: Push handle assembly C and D down . Handle will click into body while pressing the handle button J on the floor nozzle neck B with flat side of handle and loop should face forward. Step 2: Slide the floor nozzle B into an electrical outlet. H F G I B B C E L J D A K ENGLISH PARTS LIST A Body B Floor nozzle C Upper handle D Lower handle E Power switch F Dust cup latch G Dust cup H Filter assembly I Stair cleaning hand grip J Handle button K Electrical cord L Quick cord release C D J A FIG. 1 HOW TO ASSEMBLE CAUTION: Assemble the cleaner completely before plugging into the...

Owner's Guide
Page 8
... the electrical cord K and plug into an D appropriate outlet. Step 3: Push the power switch E to floor setting to clean bare floors. Step 4: It may be beneficial to release the lock and slide handle C and D up until fully collapsed. I while J cleaning stairs. J Power Switch (Fig. 2) Step 1: Features a 3-position switch E . FIG. 2 Step 1: Push the handle button J to use the stair cleaning grip I FIG. 3 8 Step 3: Push power switch E to floor setting to clean bare floors. Use the carpet setting for carpets or...
... the electrical cord K and plug into an D appropriate outlet. Step 3: Push the power switch E to floor setting to clean bare floors. Step 4: It may be beneficial to release the lock and slide handle C and D up until fully collapsed. I while J cleaning stairs. J Power Switch (Fig. 2) Step 1: Features a 3-position switch E . FIG. 2 Step 1: Push the handle button J to use the stair cleaning grip I FIG. 3 8 Step 3: Push power switch E to floor setting to clean bare floors. Use the carpet setting for carpets or...

Owner's Guide
Page 10
... dust cup G , shake contents of dust cup G (Fig. 7). Do not put in warm water using a mild detergent. Step 7: Reinstall filter H in dust cup G . Note: Turn off the power switch E and unplug the electrical cord K to release dust cup. F G FIG. 4 F G FIG. 6 A H G ENGLISH HOW TO MAINTAIN The instructions given in this booklet serve as necessary. Keep the cleaner operating at top efficiency. Step 2: Rotate dust cup G out from body A (Fig. 4). Clean Dust Cup Filter Clean the dust cup filter H as a guide to routine maintenance. Step 1: Remove dust cup...
... dust cup G , shake contents of dust cup G (Fig. 7). Do not put in warm water using a mild detergent. Step 7: Reinstall filter H in dust cup G . Note: Turn off the power switch E and unplug the electrical cord K to release dust cup. F G FIG. 4 F G FIG. 6 A H G ENGLISH HOW TO MAINTAIN The instructions given in this booklet serve as necessary. Keep the cleaner operating at top efficiency. Step 2: Rotate dust cup G out from body A (Fig. 4). Clean Dust Cup Filter Clean the dust cup filter H as a guide to routine maintenance. Step 1: Remove dust cup...

Owner's Guide
Page 12
... wrap around the revolving brush- Remove any blockages with tool or coat hanger. Use scissors to remove blockage (Fig. 8). FIG. 8 Step 3: Reinstall dust cup G . To check brushroll for debris turn cleaner nozzle over and inspect dirt channel in reduced performance. How to Check for Blockages Note: Turn off the power switch E and unplug the electrical cord K before checking for blockages. Close access door. Step 1: Remove dust cup G and set aside. Use tool or coat hanger...
... wrap around the revolving brush- Remove any blockages with tool or coat hanger. Use scissors to remove blockage (Fig. 8). FIG. 8 Step 3: Reinstall dust cup G . To check brushroll for debris turn cleaner nozzle over and inspect dirt channel in reduced performance. How to Check for Blockages Note: Turn off the power switch E and unplug the electrical cord K before checking for blockages. Close access door. Step 1: Remove dust cup G and set aside. Use tool or coat hanger...

Owner's Guide
Page 17
... an implied warranty lasts, so the above . Your relief for the location of this saves you specific legal rights. In no event shall the manufacturer be liable for repair, please include the model, type, and serial number from all defects in material and workmanship in normal household use only Genuine Eureka paper bags, belts, and parts in connection with your home clean. A: Yes, there...
... an implied warranty lasts, so the above . Your relief for the location of this saves you specific legal rights. In no event shall the manufacturer be liable for repair, please include the model, type, and serial number from all defects in material and workmanship in normal household use only Genuine Eureka paper bags, belts, and parts in connection with your home clean. A: Yes, there...


