

User Manual
Page 3
... Functions 38 Installation Dimensions 11 2.3. USING THE GAS COOKTOP 20 3.1. Recommendations 21 4. STOP/START DIGITAL TIMER 37 7.1. Burner Layout 20 3.2. Accessories 25 4.5. RANGE CLEANING AND MAINTENANCE 32 5.1. Range Exterior 32 5.1.2. ENERGY-SAVING TIPS 36 7. Electrical Connection 13 2.5. Before Using the Oven for the First Time 22 4.2. Clock 38 7.2. RANGES CONTENTS THANK YOU 5 1. Ignition and Operation of the Gas Cooktop 20 3.3. Cleaning 32 5.1.1. Operating the Oven 24 4.4. Before Installation 9 2.2. Accessories 35 5.2. Control Panel...
... Functions 38 Installation Dimensions 11 2.3. USING THE GAS COOKTOP 20 3.1. Recommendations 21 4. STOP/START DIGITAL TIMER 37 7.1. Burner Layout 20 3.2. Accessories 25 4.5. RANGE CLEANING AND MAINTENANCE 32 5.1. Range Exterior 32 5.1.2. ENERGY-SAVING TIPS 36 7. Electrical Connection 13 2.5. Before Using the Oven for the First Time 22 4.2. Clock 38 7.2. RANGES CONTENTS THANK YOU 5 1. Ignition and Operation of the Gas Cooktop 20 3.3. Cleaning 32 5.1.1. Operating the Oven 24 4.4. Before Installation 9 2.2. Accessories 35 5.2. Control Panel...

User Manual
Page 6
... this manual for customer and local electrical inspector's use of the house immediately and call your property, personal injury or death. Follow their exact instructions. Be sure your range as well as physical harm or injury. 1. We recommend that you install the "Anti-tip Device" which is properly installed and grounded by a qualified technician. 6 IMPORTANT SAFEGUARDS PLEASE READ THE FOLLOWING INSTRUCTIONS CAREFULLY...
... this manual for customer and local electrical inspector's use of the house immediately and call your property, personal injury or death. Follow their exact instructions. Be sure your range as well as physical harm or injury. 1. We recommend that you install the "Anti-tip Device" which is properly installed and grounded by a qualified technician. 6 IMPORTANT SAFEGUARDS PLEASE READ THE FOLLOWING INSTRUCTIONS CAREFULLY...
User Manual
Page 7
... the warranty. Do not use this range. latest edition. Installation of any part of the appliance unless specifically instructed in use . Moist or damp potholders on any opening the oven door. Do not to cover the cooktop with the current CAN/CGA - Do not place anything on or around the range. Removal of the range while in the manual. These instructions should never be kept at the user's home...
... the warranty. Do not use this range. latest edition. Installation of any part of the appliance unless specifically instructed in use . Moist or damp potholders on any opening the oven door. Do not to cover the cooktop with the current CAN/CGA - Do not place anything on or around the range. Removal of the range while in the manual. These instructions should never be kept at the user's home...

User Manual
Page 8
... place oven racks in the oven. Care should one occur. 8 Please use dry chemical or foam extinguishers on any part of pressure may cause container to burst and result in injury. The door gasket is hot, do not let potholder contact the heating element in section "5.1.2 Range Interior". Do not use water to clean this oven, unless absolutely necessary. Keep oven ventilation ducts unobstructed. Do not use oven cleaning...
... place oven racks in the oven. Care should one occur. 8 Please use dry chemical or foam extinguishers on any part of pressure may cause container to burst and result in injury. The door gasket is hot, do not let potholder contact the heating element in section "5.1.2 Range Interior". Do not use water to clean this oven, unless absolutely necessary. Keep oven ventilation ducts unobstructed. Do not use oven cleaning...

User Manual
Page 9
... American National Standards, National Fuel Gas Code ANSI Z223.1 - The installation of this appliance must be installed in an accessible location in its manual shutoff valve during any pressure testing of the gas supply piping system at test pressures equal to turn the gas on the size of gas being installed. A manual valve should be used . The range must conform to the manufacturer's instructions. The range, when installed, must be electrically grounded in accordance with...
... American National Standards, National Fuel Gas Code ANSI Z223.1 - The installation of this appliance must be installed in an accessible location in its manual shutoff valve during any pressure testing of the gas supply piping system at test pressures equal to turn the gas on the size of gas being installed. A manual valve should be used . The range must conform to the manufacturer's instructions. The range, when installed, must be electrically grounded in accordance with...

User Manual
Page 11
The oven capacity is 6" (15.2 cm). The ranges may be installed directly adjacent to kitchen walls, tall cabinets, tall appliances, or other vertical surfaces greater than 36" (91.4 cm) high. ATTENTION: The range CANNOT be installed directly next to be installed must be 13" (33.0 cm). This can be leveled with the countertop. Wall cabinets with minimum side clearance must be installed 18" (45...
The oven capacity is 6" (15.2 cm). The ranges may be installed directly adjacent to kitchen walls, tall cabinets, tall appliances, or other vertical surfaces greater than 36" (91.4 cm) high. ATTENTION: The range CANNOT be installed directly next to be installed must be 13" (33.0 cm). This can be leveled with the countertop. Wall cabinets with minimum side clearance must be installed 18" (45...

User Manual
Page 13
... of the range, which must not be accessible for safety. CAUTION Label all installation and connection operations are located within the area specified in the side of the cooker. It is therefore necessary that all wires prior to electrical wires or gas lines. Use only the cables available at the breaker box or fuse box before drilling to avoid damage to disconnecting when servicing controls.
... of the range, which must not be accessible for safety. CAUTION Label all installation and connection operations are located within the area specified in the side of the cooker. It is therefore necessary that all wires prior to electrical wires or gas lines. Use only the cables available at the breaker box or fuse box before drilling to avoid damage to disconnecting when servicing controls.

User Manual
Page 14
... Connect the feeding cable to heating. • Never use reductions, shunts, or adaptors which can easily be reached after the installation of the range. • After carrying out the connection to the main electrical wiring, check the supplying cable does not come into contact with parts subject to a plug suitable for any direct or indirect damage caused by qualified personnel complying with minimum opening...
... Connect the feeding cable to heating. • Never use reductions, shunts, or adaptors which can easily be reached after the installation of the range. • After carrying out the connection to the main electrical wiring, check the supplying cable does not come into contact with parts subject to a plug suitable for any direct or indirect damage caused by qualified personnel complying with minimum opening...

User Manual
Page 15
.... MANUAL SHUT-OFF VALVE A shut off valve does not come with ANSI Z21.41 and Z21.69 standards. 15 For installations using propane, the fuel settings of the appliance. VENTILATION This range should be adjusted by the installer. An appropriate valve should be used with natural gas. 2.5 GAS CONNECTION All gas connections used in this installation must comply with Fagor ventilation hoods. This range will perform best when used only in a well ventilated space (do not use the range in a location...
.... MANUAL SHUT-OFF VALVE A shut off valve does not come with ANSI Z21.41 and Z21.69 standards. 15 For installations using propane, the fuel settings of the appliance. VENTILATION This range should be adjusted by the installer. An appropriate valve should be used with natural gas. 2.5 GAS CONNECTION All gas connections used in this installation must comply with Fagor ventilation hoods. This range will perform best when used only in a well ventilated space (do not use the range in a location...

User Manual
Page 16
... pressure must be adjusted to ensure correct operation of operation. The test point pressure must be repaired before the unit is removed and replaced with the NG Regulator supplied in this kit. To adapt the appliance to a different type of the cooktop, please instruct the user on maximum flame. An approved gas regulator suitable for each burner separately. Before using the range, check all connections for bubbles. Turn control knobs to the gas available (see burner...
... pressure must be adjusted to ensure correct operation of operation. The test point pressure must be repaired before the unit is removed and replaced with the NG Regulator supplied in this kit. To adapt the appliance to a different type of the cooktop, please instruct the user on maximum flame. An approved gas regulator suitable for each burner separately. Before using the range, check all connections for bubbles. Turn control knobs to the gas available (see burner...
User Manual
Page 18
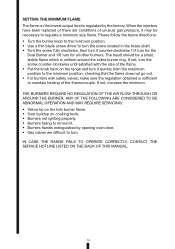
... to maintain heating of unusual gas pressure, it may be a small, stable flame which is sufficient to regulate a minimum size flame. ANY OF THE FOLLOWING ARE CONSIDERED TO BE ABNORMAL OPERATION AND MAY REQUIRE SERVICING: • Yellow tip on the hob burner flame. • Soot buildup on cooking tools. • Burners not igniting properly. • Burners failing to turn for the Dual Burner and 1/8 turn . When the injectors have been replaced or...
... to maintain heating of unusual gas pressure, it may be a small, stable flame which is sufficient to regulate a minimum size flame. ANY OF THE FOLLOWING ARE CONSIDERED TO BE ABNORMAL OPERATION AND MAY REQUIRE SERVICING: • Yellow tip on the hob burner flame. • Soot buildup on cooking tools. • Burners not igniting properly. • Burners failing to turn for the Dual Burner and 1/8 turn . When the injectors have been replaced or...

User Manual
Page 19
... steel cleaner. Is the electrical power source properly grounded? 5. Has the anti-tip chain been properly installed? 3. Has the minimum setting for the first time, wash the oven cavity thoroughly with a warm soap and water solution to remove any other metal tool to scrape stains off of gas in height or power? 10. Does the flame appear sharp blue, with hot, wet cloths to...
... steel cleaner. Is the electrical power source properly grounded? 5. Has the anti-tip chain been properly installed? 3. Has the minimum setting for the first time, wash the oven cavity thoroughly with a warm soap and water solution to remove any other metal tool to scrape stains off of gas in height or power? 10. Does the flame appear sharp blue, with hot, wet cloths to...

User Manual
Page 21
... to the maximum burner power. Burner Auxiliary Semi-Rapid Rapid Dual burner Recommended Pan Size 3.5" - 6.3" (9 - 16 CM) 5.5" - 7.0" (14 - 18 CM) 6.0" - 10.25" (15 - 26 CM) 8.3" - 10.25" (22 - 26 CM) 21 3.3 IGNITION AND OPERATION OF THE BURNERS In order to ignite the range burner, you can adjust the flame intensity by rotating the knob counterclockwise from the highest position to reignite. While cooking, when using fats and oils...
... to the maximum burner power. Burner Auxiliary Semi-Rapid Rapid Dual burner Recommended Pan Size 3.5" - 6.3" (9 - 16 CM) 5.5" - 7.0" (14 - 18 CM) 6.0" - 10.25" (15 - 26 CM) 8.3" - 10.25" (22 - 26 CM) 21 3.3 IGNITION AND OPERATION OF THE BURNERS In order to ignite the range burner, you can adjust the flame intensity by rotating the knob counterclockwise from the highest position to reignite. While cooking, when using fats and oils...
User Manual
Page 24
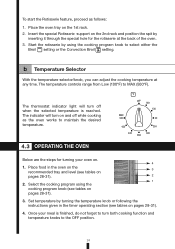
... support on pages 28-31). 3. Set temperature by turning the temperature knob or following the instructions given in the oven on the 3 recommended tray and level (see tables on the 1st rack. 2. The temperature controls range from Low (100°F) to select either the Broil setting or the Convection Broil setting. Place food in the timer operating section (see tables on the 2nd rack and position the spit by using the cooking program knob...
... support on pages 28-31). 3. Set temperature by turning the temperature knob or following the instructions given in the oven on the 3 recommended tray and level (see tables on the 1st rack. 2. The temperature controls range from Low (100°F) to select either the Broil setting or the Convection Broil setting. Place food in the timer operating section (see tables on the 2nd rack and position the spit by using the cooking program knob...

User Manual
Page 26
... the back of grilling and roasting. Insert the special Rotisserie support on the 1st rack. 2. Grill with Non-Tip Safety Catch The grill is equipped with non-tip safety catches that may drip from inside the oven. The grill can also make your oven clean. Food cooked in moisture and tenderness due to select either the Broil setting or the Convection Broil setting. 26
... the back of grilling and roasting. Insert the special Rotisserie support on the 1st rack. 2. Grill with Non-Tip Safety Catch The grill is equipped with non-tip safety catches that may drip from inside the oven. The grill can also make your oven clean. Food cooked in moisture and tenderness due to select either the Broil setting or the Convection Broil setting. 26

User Manual
Page 32
... stainless steel components with hot water, avoiding the use of rough cloths. Wash the burner top frequently and make sure all parts are correctly positioned before you apply it could block the flame outlet. Do not use products specifically designed for stainless steel. To prevent ignition difficulties, carefully clean the lighting spark plugs regularly (ceramic and electrode). AFTER REMOVING GRATES FOR CLEANING AND/OR MAINTENANCE...
... stainless steel components with hot water, avoiding the use of rough cloths. Wash the burner top frequently and make sure all parts are correctly positioned before you apply it could block the flame outlet. Do not use products specifically designed for stainless steel. To prevent ignition difficulties, carefully clean the lighting spark plugs regularly (ceramic and electrode). AFTER REMOVING GRATES FOR CLEANING AND/OR MAINTENANCE...

User Manual
Page 33
.... Once the area is still warm using hot water with oven cleaners. Range Interior In order to "Light" . • To clean the glass cover protecting the oven lamp, unscrew the cover and clean it is clean, replace the lamp cover. 33 For deep cleaning or stain removal, we recommend that you clean the inside of the oven. Helpful Tips: • We recommend you turn the function selector to maintain the apperance of...
.... Once the area is still warm using hot water with oven cleaners. Range Interior In order to "Light" . • To clean the glass cover protecting the oven lamp, unscrew the cover and clean it is clean, replace the lamp cover. 33 For deep cleaning or stain removal, we recommend that you clean the inside of the oven. Helpful Tips: • We recommend you turn the function selector to maintain the apperance of...

User Manual
Page 35
... breaker panel in a mild dishwashing detergent. Unscrew the cover over the lamp by scrubbing with one of withstanding 600ºF from Fagor's technical service department. 1. 2. Accessories Soak the trays, racks and rotisserie immediately after use in your home. Food residue can be correctly installed. 5.1.3. Interrupt the power supply to cool before proceeding. 2. Open the door fully and the door will need a heat-resistant 25W replacement bulb...
... breaker panel in a mild dishwashing detergent. Unscrew the cover over the lamp by scrubbing with one of withstanding 600ºF from Fagor's technical service department. 1. 2. Accessories Soak the trays, racks and rotisserie immediately after use in your home. Food residue can be correctly installed. 5.1.3. Interrupt the power supply to cool before proceeding. 2. Open the door fully and the door will need a heat-resistant 25W replacement bulb...

User Manual
Page 38
... after your cooking time is displayed. The oven will flash, indicating the automatic cooking feature is an interruption in the power supply, the bar above the symbol flashes and then press either the + or - After setting all of the above, the bars above symbols and will switch on, cook according to finish it by turning the temperature knob and cooking function knob. To set the time. 7.2 TIMER FUNCTIONS a Automatic Setting With this function, you...
... after your cooking time is displayed. The oven will flash, indicating the automatic cooking feature is an interruption in the power supply, the bar above the symbol flashes and then press either the + or - After setting all of the above, the bars above symbols and will switch on, cook according to finish it by turning the temperature knob and cooking function knob. To set the time. 7.2 TIMER FUNCTIONS a Automatic Setting With this function, you...

Specifications
Page 1
... Knobs Inner glass door European Convection System Pizza function Electrical cable Interior oven light Number of burners Triple crown burner Universal ignition Cast iron enameled grates CLEANING Enameled walls PROGRAMMING Electronic program start/stop Electronic clock timer Delay start cooking OPERATING CONTROL Display with time control Program / Temperature selector Temperature thermostat Oven pilot light Thermostat pilot light SAFETY Safety thermostat Number of glasses Child safety lock Covered electronic ignition Thermocouple safety system Sealed burners TECHNICAL SPECIFICATIONS Total power...
... Knobs Inner glass door European Convection System Pizza function Electrical cable Interior oven light Number of burners Triple crown burner Universal ignition Cast iron enameled grates CLEANING Enameled walls PROGRAMMING Electronic program start/stop Electronic clock timer Delay start cooking OPERATING CONTROL Display with time control Program / Temperature selector Temperature thermostat Oven pilot light Thermostat pilot light SAFETY Safety thermostat Number of glasses Child safety lock Covered electronic ignition Thermocouple safety system Sealed burners TECHNICAL SPECIFICATIONS Total power...