Fagor Crystal Arco Support and Manuals
Get Help and Manuals for this Fagor item

View All Support Options Below
Free Fagor Crystal Arco manuals!
Problems with Fagor Crystal Arco?
Ask a Question
Free Fagor Crystal Arco manuals!
Problems with Fagor Crystal Arco?
Ask a Question
Popular Fagor Crystal Arco Manual Pages
User & Installation Manual - Page 3
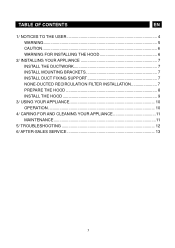
... WARNING FOR INSTALLING THE HOOD 6
2/ INSTALLING YOUR APPLIANCE 7 INSTALL THE DUCTWORK 7 INSTALL MOUNTING BRACKETS 7 INSTALL DUCT FIXING SUPPORT 7 NONE-DUCTED RECIRCULATION FILTER INSTALLATION 7 PREPARE THE HOOD 8 INSTALL THE HOOD 9
3/ USING YOUR APPLIANCE 10 OPERATION 10
4/ CARING FOR AND CLEANING YOUR APPLIANCE 11 MAINTENANCE 11
5/ TROUBLESHOOTING 12 6/ AFTER-SALES SERVICE 13
3
User & Installation Manual - Page 5

... a Class ABC extinguisher and you have questions,
contact the manufacturer at high settings. TO REDUCE THE RISK OF A RANGE TOP GREASE FIRE:
A.
B. You can fight the fire with all applicable codes and standards, including fire-rated construction codes and standards. 4. Before servicing or cleaning unit, switch power off
the burner. Sufficient air is being...
User & Installation Manual - Page 6
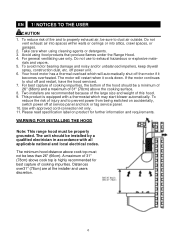
... which may start blower automatically. Please read specification label on accidentally, switch power off the motor if it cools down. rials and vapors. 5. Two installers are at service panel and lock or tag service panel. 10. WARNING FOR INSTALLING THE HOOD
Note: This range hood must not be installed by a qualified electrician in accordance with all...
User & Installation Manual - Page 7

... your dealer.(The non-duct recirculation filter is optional, and bought separately)
2 Install the filter by rotating it onto the brackets which are on a suitable place to perform most efficiently. 3. INSTALL DUCT FIXING SUPPORT
1.
2/ INSTALLING YOUR APPLIANCE
EN
INSTALL THE DUCTWORK
1. Put the drywall anchors into the holes and fix the mounting screws...
User & Installation Manual - Page 8
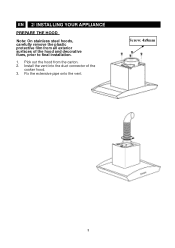
Install the vent into the duct connector of the hood and decorative flues, prior to final installation.
1. Fix the extensive pipe onto the vent. Pick out the hood from all exterior surfaces of the
cooker hood. 3.
Screw: 4x8mm
8 EN 2/ INSTALLING YOUR APPLIANCE
PREPARE THE HOOD
Note: On stainless steel hoods, carefully remove the plastic protective film from the carton. 2.
User & Installation Manual - Page 9

... the hood, use two screws(4x8mm)to fix the chimney to fix the chimneys. 2/ INSTALLING YOUR APPLIANCE
EN
INSTALL THE HOOD
Note: at least two people will be installed as in the lead way, use the duct fixing support with
the wall-mounting bracket. Adjust the height of the hood with two screws (4x8mm...
User & Installation Manual - Page 10

...
and can be adjusted. Power on:
Switch on , displaying "24-hour system". Time Setting:
To set the clock first press and hold the " " indicator for a predetermined time
period. The... the number, and the
key to a lower position, and
the LCD screen displays that position; Power Setting:
The motor has 3 speeds: low, medium and high. Press key once, the is ...
User & Installation Manual - Page 11

... hours of operation. CAUTION: BULB MAY BE HOT, PLEASE ROTATE WHEN THE BULB IS COOL! 2 Replace with a little water and a soft cloth. For stubborn cases, use ordinary steel wool ...remain for extended periods. HALOGEN BULBS
To change bulbs: 1 Use a screwdriver to remove and replace. 4/ CARING FOR AND CLEANING YOUR APPLIANCE
EN
MAINTENANCE
Proper maintenance of the Range Hood will help...
User & Installation Manual - Page 12

...TROUBLESHOOTING
Fault
Cause
Solution
The vent is blocked
Remove the blockage
Lights on, but motor does not work
The capacitor is damaged
Replace capacitor
The motor jammed causing bearing damaged
Replace motor
A bad smell from the motor which suddenly stops working
Replace...
down and seal
The vent is damaged causes shaking
and
Replace the vent
The hood is shaking
The motor is not ...
User & Installation Manual - Page 13

or another qualified mechanic who is an authorized agent for the brand appliances. When making an appointment, state the full reference of your equipment (model, type and serial number) This information appears on your equipment should be undertaken by :
- 6/ AFTER-SALES SERVICE
EN
Any maintenance on the manufacturer's nameplate attached to your equipment.
13 either your dealer, -
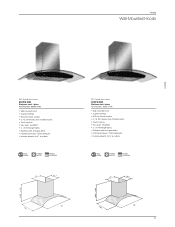
Specs Sheet - Page 1
...
tWall-mounted hood. t600 cfm blower system. tVery quiet - 66 dB(A).
t3 speed settings. t5, 15, 30 minutes shut off delay button. t5, 15, 30 minutes shut off delay .... t2 - 20 W halogen lights. tTouch controls. tOptional accessory: Recirculating kit. t3 speed settings. tOptional accessory: Recirculating kit. Hoods
Wall-Mounted Hoods
HOODS
36" Crystal Arco Hood 60CFG-36B ...
Specs Sheet - Page 2
... Very quiet operation 3 Speed Levels Dishwasher Friendly Filter Plug Halogen Lights Shut off delay buttom Optional accessory: recirculating kit Bracket mounting for ease of installation
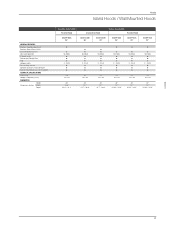
TECHNICAL SPECIFICATIONS
Intensity (A) Voltage / Frequency (V/Hz)
DIMENSIONS
Dimensions (inches)
Height Width Depth
Hoods
Island Hoods / Wall Mounted Hoods
ISLAND-MOUNTED Pyramid Hood
60CFP-36IX 36"
Crystal...
Fagor Crystal Arco Reviews
We have not received any reviews for Fagor yet.