Manual
Page 2
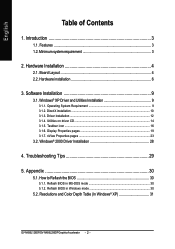
... Color Depth Table (In Windows® XP 31 GV-NX66L128DP/GV-NX66L256DP Graphics Accelerator - 2 - Operating System Requirement 9 3.1.2. Troubleshooting Tips 29 5. Reflash BIOS in MS-DOS mode 30 5.1.2. Software Installation 9 3.1. Utilities on driver CD ...14 3.1.5. Display Properties pages 19 3.1.7. Taskbar icon ...16 3.1.6. Windows® XP Driver and Utilities Installation 9 3.1.1. Windows® 2000 Driver Installation 28 4. Reflash BIOS in Windows...
... Color Depth Table (In Windows® XP 31 GV-NX66L128DP/GV-NX66L256DP Graphics Accelerator - 2 - Operating System Requirement 9 3.1.2. Troubleshooting Tips 29 5. Reflash BIOS in MS-DOS mode 30 5.1.2. Software Installation 9 3.1. Utilities on driver CD ...14 3.1.5. Display Properties pages 19 3.1.7. Taskbar icon ...16 3.1.6. Windows® XP Driver and Utilities Installation 9 3.1.1. Windows® 2000 Driver Installation 28 4. Reflash BIOS in Windows...

Manual
Page 3
... 1. Graphics cards working in an SLI configuration must be of available disk space for GV-NX66L256DP) • Supports DirectX 9.0c • Supports NVIDIA® SLITM (Scalable Link Interface) technology via the PCI Express bus, the GV-NX66L128DP/GV-NX66L256DP requires driver version 77.74 or later. - 3 - Introduction Introduction 1.1. Features • Powered... 650MHz class processor or higher • One PCI Express x 16 slot • Operating Systems Windows® 2000 / Windows® XP • 64MB system memory • 50MB of the same model and from the same vendor.
... 1. Graphics cards working in an SLI configuration must be of available disk space for GV-NX66L256DP) • Supports DirectX 9.0c • Supports NVIDIA® SLITM (Scalable Link Interface) technology via the PCI Express bus, the GV-NX66L128DP/GV-NX66L256DP requires driver version 77.74 or later. - 3 - Introduction Introduction 1.1. Features • Powered... 650MHz class processor or higher • One PCI Express x 16 slot • Operating Systems Windows® 2000 / Windows® XP • 64MB system memory • 50MB of the same model and from the same vendor.

Manual
Page 8
... XP operating system supports SLI mode. English How to enable NVIDIA® SLITM (Scalable Link Interface) technology: After installing two SLI-ready graphics cards of the same model on Desktop and select Properties. GV-NX66L128DP/GV-NX66L256DP ...Graphics Accelerator - 8 - When Display Properties dialog box appears, select the Settings tab. Figure 1 Step 1: After installing the graphics card driver, right-click on an SLI motherboard (Figure 1), users can enable SLI mode simply through the graphics card driver (For the GV-NX66L128DP/GV-NX66L256DP, driver...
... XP operating system supports SLI mode. English How to enable NVIDIA® SLITM (Scalable Link Interface) technology: After installing two SLI-ready graphics cards of the same model on Desktop and select Properties. GV-NX66L128DP/GV-NX66L256DP ...Graphics Accelerator - 8 - When Display Properties dialog box appears, select the Settings tab. Figure 1 Step 1: After installing the graphics card driver, right-click on an SLI motherboard (Figure 1), users can enable SLI mode simply through the graphics card driver (For the GV-NX66L128DP/GV-NX66L256DP, driver...

Manual
Page 9
... motherboard, which consist of Windows® 2000 / Windows® XP drivers is very simple. Windows® XP Driver and Utilities Installation 3.1.1. Operating System Requirement • When loading the graphics card drivers for motherboard driver. - 9 - Software Installation English 3. Or please contact your graphics accelerator.) 3.1. When you insert the driver CD into your CD-ROM drive, you can follow...
... motherboard, which consist of Windows® 2000 / Windows® XP drivers is very simple. Windows® XP Driver and Utilities Installation 3.1.1. Operating System Requirement • When loading the graphics card drivers for motherboard driver. - 9 - Software Installation English 3. Or please contact your graphics accelerator.) 3.1. When you insert the driver CD into your CD-ROM drive, you can follow...

Manual
Page 20
... the Global Driver Settings. Select the format for your application should use quality or high performance texture. • Application profiles: Select the application profile from the list of two GV-NX66L128DP/GV-NX66L256DP graphics cards on an SLI-capable motherboard. GV-NX66L128DP/GV-NX66L256DP Graphics Accelerator ...; nView Display mode: select your system when prompted. "*" Only Windows XP operating system supports the SLI mode. Display Matrix Model CRT+TV CRT+DVI GV-NX66L128DP Yes Yes GV-NX66L256DP Yes Yes DVI+TV Yes Yes Performance and Quality Settings properties „...
... the Global Driver Settings. Select the format for your application should use quality or high performance texture. • Application profiles: Select the application profile from the list of two GV-NX66L128DP/GV-NX66L256DP graphics cards on an SLI-capable motherboard. GV-NX66L128DP/GV-NX66L256DP Graphics Accelerator ...; nView Display mode: select your system when prompted. "*" Only Windows XP operating system supports the SLI mode. Display Matrix Model CRT+TV CRT+DVI GV-NX66L128DP Yes Yes GV-NX66L256DP Yes Yes DVI+TV Yes Yes Performance and Quality Settings properties „...

Manual
Page 30
... and do the update for your card from your computer. 5.1.2. GV-NX66L128DP/GV-NX66L256DP Graphics Accelerator - 30 - icon in MS-DOS mode 1. Download the BIOS ZIP file for you. (@VGA will find a GIGABYTE of the Taskbar. After installing the display drivers, you need a startup disk to your hard disk (or floppy...the @VGA utility. Change the command prompt to your hard disk(s) or floppy disk. Reflash BIOS in MS-DOS mode. (For Windows 2000/XP, you will not download/update the BIOS if it 's done, then restart your hard disk (or floppy disk). Select the Live Update check...
... and do the update for your card from your computer. 5.1.2. GV-NX66L128DP/GV-NX66L256DP Graphics Accelerator - 30 - icon in MS-DOS mode 1. Download the BIOS ZIP file for you. (@VGA will find a GIGABYTE of the Taskbar. After installing the display drivers, you need a startup disk to your hard disk (or floppy...the @VGA utility. Change the command prompt to your hard disk(s) or floppy disk. Reflash BIOS in MS-DOS mode. (For Windows 2000/XP, you will not download/update the BIOS if it 's done, then restart your hard disk (or floppy disk). Select the Live Update check...

