
User Manual
Page 3
... Devices 30 Connecting USB devices 30 Removing USB devices 31 Cleaning and care 32 Screen and computer 32 Cleaning the screen and computer 32 Storing your computer 33 CDs and DVDs (Recovery DVD and Driver CD 33 Cleaning the discs 33 Keyboard and mouse 34 Cleaning your keyboard and mouse 34 BIOS Setup Utility 35 When to Use the BIOS Setup Utility 35 Navigating the BIOS setup screen 37 Main menu 38 Advanced menu 39 Security menu 42 Boot menu 44 SN22A1...
... Devices 30 Connecting USB devices 30 Removing USB devices 31 Cleaning and care 32 Screen and computer 32 Cleaning the screen and computer 32 Storing your computer 33 CDs and DVDs (Recovery DVD and Driver CD 33 Cleaning the discs 33 Keyboard and mouse 34 Cleaning your keyboard and mouse 34 BIOS Setup Utility 35 When to Use the BIOS Setup Utility 35 Navigating the BIOS setup screen 37 Main menu 38 Advanced menu 39 Security menu 42 Boot menu 44 SN22A1...
User Manual
Page 5
... the monitor and the accessories, and the common solutions to the problems you may expose you to the risk of electric shock and other hazards. Overview of your computer system to factory settings. Printed documentation • Quick Start Guide provides information about restoring your documentation Document type Your documentation contains printed information and PDF user manuals to the unit and data, or...
... the monitor and the accessories, and the common solutions to the problems you may expose you to the risk of electric shock and other hazards. Overview of your computer system to factory settings. Printed documentation • Quick Start Guide provides information about restoring your documentation Document type Your documentation contains printed information and PDF user manuals to the unit and data, or...

User Manual
Page 7
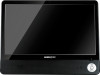
The touch models) screen will responsively react with touch screen. You may make widescreen (for select adjustments to turn on your computer. Press to your work field at your fingertips. Getting to capture still images, record videos, and have video chats. 3 Touch-enabled The monitor is equipped with your fingertip commands. 4 Power. Front view No. Item Description 1 Built-in microphone The built-in microphone receives sounds and voices when used with...
The touch models) screen will responsively react with touch screen. You may make widescreen (for select adjustments to turn on your computer. Press to your work field at your fingertips. Getting to capture still images, record videos, and have video chats. 3 Touch-enabled The monitor is equipped with your fingertip commands. 4 Power. Front view No. Item Description 1 Built-in microphone The built-in microphone receives sounds and voices when used with...

User Manual
Page 9
... thermal problems. 2 Rear panel cover The hard drive and the memory module slots are located under the rear panel cover. Use an Ethernet (RJ45) cable to connect your microphone to this jack to listen to know the PC No. SN22A1 8 Connect your hard drive and the memory module after removing the cover. 3 Computer stand You can adjust the computer stand for audio sound. 6 Microphone input jack. Rear view Getting to the sound from overheating. The internal fans...
... thermal problems. 2 Rear panel cover The hard drive and the memory module slots are located under the rear panel cover. Use an Ethernet (RJ45) cable to connect your microphone to this jack to listen to know the PC No. SN22A1 8 Connect your hard drive and the memory module after removing the cover. 3 Computer stand You can adjust the computer stand for audio sound. 6 Microphone input jack. Rear view Getting to the sound from overheating. The internal fans...

User Manual
Page 10
...-pin D-Sub cable to know the PC USB ports. Connect the power cord to this port to help prevent possible theft. We recommend you to attach a security lock (sold separately) and cable (sold separately) to the slot to power the computer. 15-pin D-Sub input jack. DC IN port. 8 9 10 11 HDMI 12 Getting to connect other devices with HDMI output ports, such as MP3 players, digital cameras, keyboard and mouse, or external hard disk drives...
...-pin D-Sub cable to know the PC USB ports. Connect the power cord to this port to help prevent possible theft. We recommend you to attach a security lock (sold separately) and cable (sold separately) to the slot to power the computer. 15-pin D-Sub input jack. DC IN port. 8 9 10 11 HDMI 12 Getting to connect other devices with HDMI output ports, such as MP3 players, digital cameras, keyboard and mouse, or external hard disk drives...

User Manual
Page 11
SN22A1 10 Right-side view Getting to access photos, audio and video files, or other data stored in the memory cards. This reader supports the following card types: • Secure Digital (SD) • MultiMedia Card (MMC) • Memory Stick (MS) • Memory Stick Pro (MS Pro) Connect the USB plugs into the USB ports to connect your memory card into this media card reader to know the PC No. Item 1 Media card reader 2 USB ports Description Insert your USB devices, such as MP3 players, digital cameras, keyboard and mouse, or external hard disk drives, etc.
SN22A1 10 Right-side view Getting to access photos, audio and video files, or other data stored in the memory cards. This reader supports the following card types: • Secure Digital (SD) • MultiMedia Card (MMC) • Memory Stick (MS) • Memory Stick Pro (MS Pro) Connect the USB plugs into the USB ports to connect your memory card into this media card reader to know the PC No. Item 1 Media card reader 2 USB ports Description Insert your USB devices, such as MP3 players, digital cameras, keyboard and mouse, or external hard disk drives, etc.

User Manual
Page 13
... to increase the volume level. 6. Cursor control keys (left corner of your screen, select "Control Panel" to decrease the volume level. 5. You can use the hotkeys, press and hold the key, and then press the desired hotkey. Press to perform specific tasks. click the mouse. 9. key: Press to open the "Adjusting your computer's settings" window, then select "Keyboard", and make adjustments in the opened "Keyboard Properties" dialog box...
... to increase the volume level. 6. Cursor control keys (left corner of your screen, select "Control Panel" to decrease the volume level. 5. You can use the hotkeys, press and hold the key, and then press the desired hotkey. Press to perform specific tasks. click the mouse. 9. key: Press to open the "Adjusting your computer's settings" window, then select "Keyboard", and make adjustments in the opened "Keyboard Properties" dialog box...

User Manual
Page 14
... desired destination before releasing the button. 2. LED Activities 1 Power • When the computer is on, the LED indicator lights up in blue. 3 CD/DVD drive activity • When the CD/DVD drive is in use , the LED indicator flashes green. • When the CD/DVD drive is on the items and hold the left button, then drag them to open a menu of the wired mouse (front view) 1.
... desired destination before releasing the button. 2. LED Activities 1 Power • When the computer is on, the LED indicator lights up in blue. 3 CD/DVD drive activity • When the CD/DVD drive is in use , the LED indicator flashes green. • When the CD/DVD drive is on the items and hold the left button, then drag them to open a menu of the wired mouse (front view) 1.

User Manual
Page 17
Connect the power adapter to the supplied power adapter. 2. Connecting the wired keyboard and mouse The complete computer installation includes the setup of the computer. Do not plug in or turn on the rear panel of the monitor. 3. Connect the USB cable on the keyboard to a USB port on the rear panel of the keyboard and mouse. SN22A1 16 Connect the power plug to the power jack on the power to the computer until instructed to set up...
Connect the power adapter to the supplied power adapter. 2. Connecting the wired keyboard and mouse The complete computer installation includes the setup of the computer. Do not plug in or turn on the rear panel of the monitor. 3. Connect the USB cable on the keyboard to a USB port on the rear panel of the keyboard and mouse. SN22A1 16 Connect the power plug to the power jack on the power to the computer until instructed to set up...
User Manual
Page 18
... finish the installation of your computer, press the Power button on -screen instructions to open the Adjusting your preference. Select Mouse to complete the initial setup. SN22A1 17 Connect the USB cable on the mouse to turn it on the rear panel for devices that usually remain connected, such as keyboards and mouse. • For information about using the keyboard shortcut keys and mouse, see Special keyboard buttons (front view) and Overview...
... finish the installation of your computer, press the Power button on -screen instructions to open the Adjusting your preference. Select Mouse to complete the initial setup. SN22A1 17 Connect the USB cable on the mouse to turn it on the rear panel for devices that usually remain connected, such as keyboards and mouse. • For information about using the keyboard shortcut keys and mouse, see Special keyboard buttons (front view) and Overview...

User Manual
Page 24
To disable WLAN manually, click "Disconnect" from the Wireless Network Connection list. Using the webcam Your computer comes with a built-in real time via the preinstalled image capture software, or you are able to successfully connect to test the network connection. Open the Web browser and access any Web site to a wireless network, you will receive a message indicating that appear too dark or too light. SN22A1 23 With...
To disable WLAN manually, click "Disconnect" from the Wireless Network Connection list. Using the webcam Your computer comes with a built-in real time via the preinstalled image capture software, or you are able to successfully connect to test the network connection. Open the Web browser and access any Web site to a wireless network, you will receive a message indicating that appear too dark or too light. SN22A1 23 With...

User Manual
Page 27
... window appears on the desktop, click "Start", select "All Programs", and then select the desired disc copying software to play the inserted disc. Removing a disc 1. For more instructions about the selected software, please see its manual or online help . Ensure the optical disc driver indicator is off. 2. SN22A1 26 For more instructions about the selected software, please see its manual or online help . 3. Press the Eject button on -screen instructions...
... window appears on the desktop, click "Start", select "All Programs", and then select the desired disc copying software to play the inserted disc. Removing a disc 1. For more instructions about the selected software, please see its manual or online help . Ensure the optical disc driver indicator is off. 2. SN22A1 26 For more instructions about the selected software, please see its manual or online help . 3. Press the Eject button on -screen instructions...

User Manual
Page 36
... layers of the computer. The startup page screen shows up for your computer to identify the types of the hardware. • You want to modify some specific settings to modify some specific settings of installed devices and establish special features. This chapter tells you must press the key at the time. The actual items or settings on the screen requesting you to use the BIOS Setup Utility.
... layers of the computer. The startup page screen shows up for your computer to identify the types of the hardware. • You want to modify some specific settings to modify some specific settings of installed devices and establish special features. This chapter tells you must press the key at the time. The actual items or settings on the screen requesting you to use the BIOS Setup Utility.
User Manual
Page 37
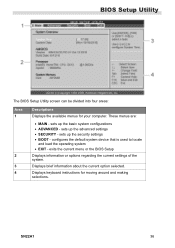
... default system device that is used to locate and load the operating system • EXIT - sets up the security settings • BOOT - sets up the advanced settings • SECURITY - Displays brief information about the current option selected. sets up the basic system configurations • ADVANCED - exits the current menu or the BIOS Setup Displays information or options regarding the current settings of the system. SN22A1 36 Displays keyboard instructions for your computer. BIOS Setup Utility The BIOS Setup Utility screen...
... default system device that is used to locate and load the operating system • EXIT - sets up the security settings • BOOT - sets up the advanced settings • SECURITY - Displays brief information about the current option selected. sets up the basic system configurations • ADVANCED - exits the current menu or the BIOS Setup Displays information or options regarding the current settings of the system. SN22A1 36 Displays keyboard instructions for your computer. BIOS Setup Utility The BIOS Setup Utility screen...

User Manual
Page 43
... changes. BIOS Setup Utility Security menu The Security menu allows you may select Change Supervisor Password and Change User Password to set password in the Descriptions box below. Sets or changes the password up to safeguard your system against unauthorized use. Cancels the installed User Password. SN22A1 42 A brief description of the BIOS setup options. When the Supervisor Password is installed, you to set the passwords. Sets or changes the password up to the whole BIOS setup menu. The first time you enter this menu, the Supervisor Password and User Password...
... changes. BIOS Setup Utility Security menu The Security menu allows you may select Change Supervisor Password and Change User Password to set password in the Descriptions box below. Sets or changes the password up to safeguard your system against unauthorized use. Cancels the installed User Password. SN22A1 42 A brief description of the BIOS setup options. When the Supervisor Password is installed, you to set the passwords. Sets or changes the password up to the whole BIOS setup menu. The first time you enter this menu, the Supervisor Password and User Password...
User Manual
Page 48
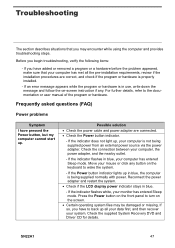
... light up in use, write down the message and follow the on-screen instruction if any button on the screen. • Certain operating system files may encounter while using the computer and provides troubleshooting steps. SN22A1 47 Move your computer has entered Sleep mode. Frequently asked questions (FAQ) Power problems Symptom I have added or removed a program or a hardware before the problem appeared, make sure that you have to turn on the keyboard...
... light up in use, write down the message and follow the on-screen instruction if any button on the screen. • Certain operating system files may encounter while using the computer and provides troubleshooting steps. SN22A1 47 Move your computer has entered Sleep mode. Frequently asked questions (FAQ) Power problems Symptom I have added or removed a program or a hardware before the problem appeared, make sure that you have to turn on the keyboard...
User Manual
Page 52
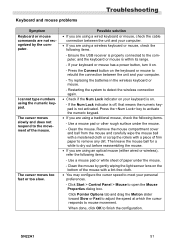
... the computer. Ensure the USB receiver is properly connected to the computer, and the keyboard or mouse is on. - Try replacing the batteries in the wireless keyboard or mouse. - Use a mouse pad or white sheet of paper under the mouse. - I cannot type numbers using an optical mouse (either wired or wireless), refer the following items. - SN22A1 51 Remove the mouse compartment cover and ball from the...
... the computer. Ensure the USB receiver is properly connected to the computer, and the keyboard or mouse is on. - Try replacing the batteries in the wireless keyboard or mouse. - Use a mouse pad or white sheet of paper under the mouse. - I cannot type numbers using an optical mouse (either wired or wireless), refer the following items. - SN22A1 51 Remove the mouse compartment cover and ball from the...
User Manual
Page 53
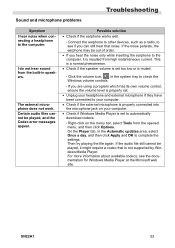
Sound and microphone problems Troubleshooting Symptom I do not hear sound from the opened menu, and then click Options. Then try playing the file again. Certain audio files cannot be played, it is set too low or is not supported by Windows Media Player. If you are using a program which has its own volume control, ensure the volume level is properly set. • Unplug your headphone and external microphone if they have been connected to your...
Sound and microphone problems Troubleshooting Symptom I do not hear sound from the opened menu, and then click Options. Then try playing the file again. Certain audio files cannot be played, it is set too low or is not supported by Windows Media Player. If you are using a program which has its own volume control, ensure the volume level is properly set. • Unplug your headphone and external microphone if they have been connected to your...

User Manual
Page 54
... documentation for Windows Media Player at the Microsoft web site. • Ensure that the memory card is fully inserted into the card reader slot. • Ensure that is one of the supported types. Try connecting your USB device. Miscellaneous problems Troubleshooting Symptom Certain video files cannot be exceeded. - For more information about available codecs, see if the device is set to pre-install software before connecting your USB device directly to the USB port on...
... documentation for Windows Media Player at the Microsoft web site. • Ensure that the memory card is fully inserted into the card reader slot. • Ensure that is one of the supported types. Try connecting your USB device. Miscellaneous problems Troubleshooting Symptom Certain video files cannot be exceeded. - For more information about available codecs, see if the device is set to pre-install software before connecting your USB device directly to the USB port on...

User Manual
Page 55
Specifications: SN22A1 Specifications Model Processor Chipset Operating System Memory Type Memory Capacity Hard Drive Graphics Adapter Display Ports and Connectors Keyboard Media Card Reader Network Wireless Network (for select models) SN22A1 Intel® Pine-View (1.66Ghz, Dual Core) D510 Tiger Point NM10 Microsoft Windows 7 Home Premium SODIMM type, two slots 3GB • One 2.5-inch hard-drive • SATA 5400rpm 320GB Processor: Intel® GMA3150 integrated graphics 65 Watt AC Adapter 100 - 240V at 50/60 Hz • 21.5" Widescreen Full HD...
Specifications: SN22A1 Specifications Model Processor Chipset Operating System Memory Type Memory Capacity Hard Drive Graphics Adapter Display Ports and Connectors Keyboard Media Card Reader Network Wireless Network (for select models) SN22A1 Intel® Pine-View (1.66Ghz, Dual Core) D510 Tiger Point NM10 Microsoft Windows 7 Home Premium SODIMM type, two slots 3GB • One 2.5-inch hard-drive • SATA 5400rpm 320GB Processor: Intel® GMA3150 integrated graphics 65 Watt AC Adapter 100 - 240V at 50/60 Hz • 21.5" Widescreen Full HD...


