Backup and Recovery - Windows Vista
Page 6
...type of recovery discs required. ● When backing up to discs, use any of the following when backing up your preferences. To copy the entire screen, press fn+prt sc. 3. Open a word-processing document, and then select Edit > Paste. To create a backup using them for backup reduces ...the number of optical drive installed in a window, toolbar, or menu bar by taking a screen shot of discs (purchased separately): CD-R, CD-RW, DVD+R, DVD+R DL, DVD-R, DVD-R DL, or DVD±RW. 2 Backing up your information Recovery...
...type of recovery discs required. ● When backing up to discs, use any of the following when backing up your preferences. To copy the entire screen, press fn+prt sc. 3. Open a word-processing document, and then select Edit > Paste. To create a backup using them for backup reduces ...the number of optical drive installed in a window, toolbar, or menu bar by taking a screen shot of discs (purchased separately): CD-R, CD-RW, DVD+R, DVD+R DL, DVD-R, DVD-R DL, or DVD±RW. 2 Backing up your information Recovery...

Backup and Recovery - Windows Vista
Page 7
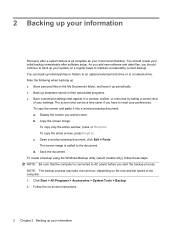
NOTE: Windows® includes the User Account Control feature to improve the security of the computer. 1. Refer to back up your entire computer (select models only) or your computer. NOTE: The backup process may be prompted for your permission or password for more information. 3 Follow the on file size and the speed of your files. Select Start > All Programs > Maintenance > Backup and Restore Center. 2. You may take over an hour, depending on -screen instructions to Help and Support for tasks such as installing software, running utilities, or changing Windows settings.
NOTE: Windows® includes the User Account Control feature to improve the security of the computer. 1. Refer to back up your entire computer (select models only) or your computer. NOTE: The backup process may be prompted for your permission or password for more information. 3 Follow the on file size and the speed of your files. Select Start > All Programs > Maintenance > Backup and Restore Center. 2. You may take over an hour, depending on -screen instructions to Help and Support for tasks such as installing software, running utilities, or changing Windows settings.
Backup and Recovery - Windows Vista
Page 9
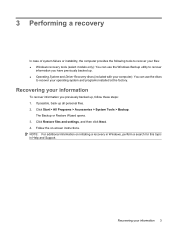
Follow the on -screen instructions. If possible, back up , follow these steps: 1. For additional information, refer to improve the security of the Windows partition and the HP Recovery partition. Using the Windows recovery tools 5 To recover your information using Startup Repair, follow these steps:... and any software installed on recovering information using the Windows tools, perform a search for more information. Follow the on -screen instructions to Help and Support for these topics in this guide. 3. NOTE: For additional information on the computer are permanently...
Follow the on -screen instructions. If possible, back up , follow these steps: 1. For additional information, refer to improve the security of the Windows partition and the HP Recovery partition. Using the Windows recovery tools 5 To recover your information using Startup Repair, follow these steps:... and any software installed on recovering information using the Windows tools, perform a search for more information. Follow the on -screen instructions to Help and Support for these topics in this guide. 3. NOTE: For additional information on the computer are permanently...
Backup and Recovery - Windows Vista
Page 10
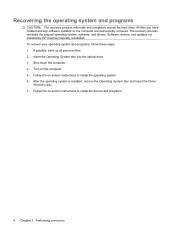
... purchased separately). If possible, back up all personal files. 2. If possible, check for the presence of the screen. 4. NOTE: If the HP Recovery partition has been deleted, you have created and any software installed on the screen. 5. For additional information, refer to the "Using a Windows Vista operating system DVD (purchased separately)" section in...
... purchased separately). If possible, back up all personal files. 2. If possible, check for the presence of the screen. 4. NOTE: If the HP Recovery partition has been deleted, you have created and any software installed on the screen. 5. For additional information, refer to the "Using a Windows Vista operating system DVD (purchased separately)" section in...
Backup and Recovery - Windows Vista
Page 11
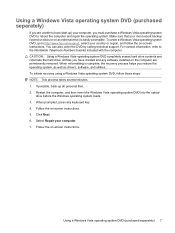
... or region, and follow these steps: NOTE: This process takes several minutes. 1. Follow the on the computer are unable to http://www.hp.com/support, select your computer. 7. Using a Windows Vista operating system DVD (purchased separately) If you are permanently removed. Make sure that... a Windows Vista operating system DVD to the Worldwide Telephone Numbers booklet included with the computer. When prompted, press any software installed on -screen instructions. If possible, back up ) your most recent backup (stored on discs or on an external drive) is complete, the recovery ...
... or region, and follow these steps: NOTE: This process takes several minutes. 1. Follow the on the computer are unable to http://www.hp.com/support, select your computer. 7. Using a Windows Vista operating system DVD (purchased separately) If you are permanently removed. Make sure that... a Windows Vista operating system DVD to the Worldwide Telephone Numbers booklet included with the computer. When prompted, press any software installed on -screen instructions. If possible, back up ) your most recent backup (stored on discs or on an external drive) is complete, the recovery ...
Backup and Recovery - Windows XP
Page 6
...process may take over an hour, depending on a regular basis to maintain a reasonably current backup. You should continue to a network drive. The screen shot can back up your information To create a backup using the Windows Backup utility (select models only), follow these steps: NOTE: Be sure ...that appear in the My Documents folder, and back it into a word-processing document: a. Follow the on-screen instructions. 2 Chapter 2 Backing up individual files or folders to an optional external hard drive or to back up templates stored in their associated ...
...process may take over an hour, depending on a regular basis to maintain a reasonably current backup. You should continue to a network drive. The screen shot can back up your information To create a backup using the Windows Backup utility (select models only), follow these steps: NOTE: Be sure ...that appear in the My Documents folder, and back it into a word-processing document: a. Follow the on-screen instructions. 2 Chapter 2 Backing up individual files or folders to an optional external hard drive or to back up templates stored in their associated ...
Backup and Recovery - Windows XP
Page 7
Recovering your operating system and programs installed at the factory. If possible, back up , follow these steps: 1. NOTE: For additional information on -screen instructions. Recovering your information To recover information you have previously backed up. ● Operating System and Driver Recovery discs (included with your computer): You can ...
Recovering your operating system and programs installed at the factory. If possible, back up , follow these steps: 1. NOTE: For additional information on -screen instructions. Recovering your information To recover information you have previously backed up. ● Operating System and Driver Recovery discs (included with your computer): You can ...
Backup and Recovery - Windows XP
Page 8
...the hard drive. Software, drivers, and updates not installed by HP must be manually reinstalled. Shut down the computer. 4. All files you have created and any software installed on the computer. 5. Follow the on -screen instructions to install the drivers and programs. 4 Chapter 3 ... remove the Operating System disc and insert the Driver Recovery disc. 7. Turn on the computer are permanently removed. Follow the on -screen instructions to install the operating system. 6. If possible, back up all personal files. 2. The recovery process reinstalls the original operating ...
...the hard drive. Software, drivers, and updates not installed by HP must be manually reinstalled. Shut down the computer. 4. All files you have created and any software installed on the computer. 5. Follow the on -screen instructions to install the drivers and programs. 4 Chapter 3 ... remove the Operating System disc and insert the Driver Recovery disc. 7. Turn on the computer are permanently removed. Follow the on -screen instructions to install the operating system. 6. If possible, back up all personal files. 2. The recovery process reinstalls the original operating ...

Software Update - Windows XP
Page 5
... and Support > Update Software & Drivers and following the on-screen instructions. This disc includes device drivers, BIOS updates, and utilities. Select your Internet browser, and go to http://www.hp.com/support. 2. Follow the on -screen instructions. 1 Click the option for software and driver downloads, ...and then type your computer model number in English only.) You can manually check for updates from HP. Updating software Updated versions of ...
... and Support > Update Software & Drivers and following the on-screen instructions. This disc includes device drivers, BIOS updates, and utilities. Select your Internet browser, and go to http://www.hp.com/support. 2. Follow the on -screen instructions. 1 Click the option for software and driver downloads, ...and then type your computer model number in English only.) You can manually check for updates from HP. Updating software Updated versions of ...

Software Update - Windows XP
Page 6
... connected to a network, consult the network administrator before installing any software updates, especially system BIOS updates. Follow the on-screen instructions. 2 Updating software Select your Internet browser, and go to the "Determining the BIOS version" section. To update the software using ...the HP Web site, follow these steps: 1. Open your country or region. 4. Press enter. 6. For details, refer to http://www.hp.com/support. 3. Click the option for data transfer among hardware devices, including...
... connected to a network, consult the network administrator before installing any software updates, especially system BIOS updates. Follow the on-screen instructions. 2 Updating software Select your Internet browser, and go to the "Determining the BIOS version" section. To update the software using ...the HP Web site, follow these steps: 1. Open your country or region. 4. Press enter. 6. For details, refer to http://www.hp.com/support. 3. Click the option for data transfer among hardware devices, including...

Software Update - Windows XP
Page 7
...or restart the computer, and then press esc while the "Press the ESC key for Startup Menu" message is displayed at the bottom of the screen, and follow these steps: 1. Press esc to return to select File > Ignore changes and exit, and then press enter. Click Exit in Windows... File menu. 5. Updating the BIOS To update the BIOS, first determine what BIOS version you are already in the lower-left corner of the screen. 2. or - Turn on -screen instructions. - Updating the BIOS 3 Press f10 to select File > System Information. 4. Use a pointing device or the arrow keys to enter...
...or restart the computer, and then press esc while the "Press the ESC key for Startup Menu" message is displayed at the bottom of the screen, and follow these steps: 1. Press esc to return to select File > Ignore changes and exit, and then press enter. Click Exit in Windows... File menu. 5. Updating the BIOS To update the BIOS, first determine what BIOS version you are already in the lower-left corner of the screen. 2. or - Turn on -screen instructions. - Updating the BIOS 3 Press f10 to select File > System Information. 4. Use a pointing device or the arrow keys to enter...
Software Update - Windows XP
Page 8
... the update later, after the download is complete. Click your operating system. 5. Make a note of the path to the location on the screen to download your hard drive. 6. During the download and installation, follow these steps: 1. Open your Internet browser, go to download. Follow ...extension (for BIOS updates. 1. Do not download or install a BIOS update while the computer is running on -screen instructions to access the BIOS update you want to http://www.hp.com/support, and then select your computer to an optional power source. To download a BIOS update: NOTE:...
... the update later, after the download is complete. Click your operating system. 5. Make a note of the path to the location on the screen to download your hard drive. 6. During the download and installation, follow these steps: 1. Open your Internet browser, go to download. Follow ...extension (for BIOS updates. 1. Do not download or install a BIOS update while the computer is running on -screen instructions to access the BIOS update you want to http://www.hp.com/support, and then select your computer to an optional power source. To download a BIOS update: NOTE:...

Software Update - Windows XP
Page 9
Complete the installation by following the instructions on the screen reports a successful installation, you may delete the downloaded file from your hard drive. NOTE: After a message on the screen. Updating the BIOS 5 The BIOS installation begins. 5.
Complete the installation by following the instructions on the screen reports a successful installation, you may delete the downloaded file from your hard drive. NOTE: After a message on the screen. Updating the BIOS 5 The BIOS installation begins. 5.
Software Update - Windows XP
Page 10
..., restart your computer after the installation is downloaded, navigate to the folder where the file was stored, and double-click the file to http://www.hp.com/support, and then select your operating system. 5. After the file is complete. 6 Updating software Click Run to step 6. 3. Updating programs and drivers 1. Open your...
..., restart your computer after the installation is downloaded, navigate to the folder where the file was stored, and double-click the file to http://www.hp.com/support, and then select your operating system. 5. After the file is complete. 6 Updating software Click Run to step 6. 3. Updating programs and drivers 1. Open your...
HP ProtectTools - Windows Vista and Windows XP
Page 11
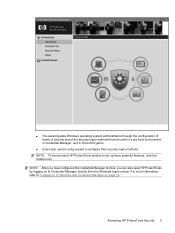
...environment, in Credential Manager, and in Drive Encryption. ● Users also use the setup wizard to Credential Manager directly from the Windows logon screen. For more powerful features, click the module icon. NOTE: After you have configured the Credential Manager module, you can also open... HP ProtectTools by logging on page 16." NOTE: To access each HP ProtectTools module to set up more information, refer to "Logging on to Windows with Credential Manager on to ...
...environment, in Credential Manager, and in Drive Encryption. ● Users also use the setup wizard to Credential Manager directly from the Windows logon screen. For more powerful features, click the module icon. NOTE: After you have configured the Credential Manager module, you can also open... HP ProtectTools by logging on page 16." NOTE: To access each HP ProtectTools module to set up more information, refer to "Logging on to Windows with Credential Manager on to ...
HP ProtectTools - Windows Vista and Windows XP
Page 18
... log on to register your fingerprint for HP ProtectTools Using the Credential Manager Logon Wizard To log on to Credential Manager. Registering fingerprints A fingerprint reader allows you can use the following ways: ● From the Windows logon screen ● From the notification area, by... double-clicking the HP ProtectTools Security Manager icon ● From the "Credential Manager" page of HP ProtectTools Security Manager, by clicking the Log On link in the upper...
... log on to register your fingerprint for HP ProtectTools Using the Credential Manager Logon Wizard To log on to Credential Manager. Registering fingerprints A fingerprint reader allows you can use the following ways: ● From the Windows logon screen ● From the notification area, by... double-clicking the HP ProtectTools Security Manager icon ● From the "Credential Manager" page of HP ProtectTools Security Manager, by clicking the Log On link in the upper...
HP ProtectTools - Windows Vista and Windows XP
Page 19
... card is connected to a USB port. A USB token is no difference in a different form factor. There is simply a smart card in the core functionality of possession when authenticating a user to a domain. If you do not have a reader installed, you have a card reader configured for strong ...on to Windows. To set up the fingerprint reader 1. At the Windows Welcome screen, swipe any USB port. The major difference between a smart card and a token is disabled in the left pane. 2. In HP ProtectTools Security Manager, click Credential Manager in Select Token dialog box. 5. NOTE: ...
... card is connected to a USB port. A USB token is no difference in a different form factor. There is simply a smart card in the core functionality of possession when authenticating a user to a domain. If you do not have a reader installed, you have a card reader configured for strong ...on to Windows. To set up the fingerprint reader 1. At the Windows Welcome screen, swipe any USB port. The major difference between a smart card and a token is disabled in the left pane. 2. In HP ProtectTools Security Manager, click Credential Manager in Select Token dialog box. 5. NOTE: ...

HP ProtectTools - Windows Vista and Windows XP
Page 20
Follow the on-screen instructions. 14 Chapter 2 Credential Manager for HP ProtectTools Click My Identity, and then click Register Credentials. Registering other credentials 1. In HP ProtectTools Security Manager, click Credential Manager. 2. The Credential Manager Registration Wizard opens. 3.
Follow the on-screen instructions. 14 Chapter 2 Credential Manager for HP ProtectTools Click My Identity, and then click Register Credentials. Registering other credentials 1. In HP ProtectTools Security Manager, click Credential Manager. 2. The Credential Manager Registration Wizard opens. 3.
HP ProtectTools - Windows Vista and Windows XP
Page 21
...Example 1-Using the "Advanced Settings" page to complete the PIN change the PIN, and then click Next. 5. To create a new virtual token: 1. In HP ProtectTools Security Manager, click Credential Manager in the left pane. 2. Specify the token name and location, and click Next. In... password boxes. 5. Click My Identity, and then click Change Windows Password. 3. Type your new password in the left pane. 2. Follow the on-screen instructions to allow Windows logon from Credential Manager on page 24." From the "My Identity" page, you can be stored either on with a virtual ...
...Example 1-Using the "Advanced Settings" page to complete the PIN change the PIN, and then click Next. 5. To create a new virtual token: 1. In HP ProtectTools Security Manager, click Credential Manager in the left pane. 2. Specify the token name and location, and click Next. In... password boxes. 5. Click My Identity, and then click Change Windows Password. 3. Type your new password in the left pane. 2. Follow the on-screen instructions to allow Windows logon from Credential Manager on page 24." From the "My Identity" page, you can be stored either on with a virtual ...
HP ProtectTools - Windows Vista and Windows XP
Page 22
... 2 Credential Manager for the token several times in the left corner of the administrators group on your finger to log on. 2. In HP ProtectTools Security Manager, click Credential Manager in sequence, the token gets locked out. You must use Credential Manager to log on to a ...Lock Workstation feature to require a Java Card, biometric reader, or token to unlock the computer. For added security, you and members of the screen next to the fingerprint icon. For more information, see "Configuring Credential Manager settings on page 24." 1. The Credential Manager Logon Wizard opens....
... 2 Credential Manager for the token several times in the left corner of the administrators group on your finger to log on. 2. In HP ProtectTools Security Manager, click Credential Manager in sequence, the token gets locked out. You must use Credential Manager to log on to a ...Lock Workstation feature to require a Java Card, biometric reader, or token to unlock the computer. For added security, you and members of the screen next to the fingerprint icon. For more information, see "Configuring Credential Manager settings on page 24." 1. The Credential Manager Logon Wizard opens....


