
HP USB Digital Drive
Page 9
A dialog box displays a list of connected devices. 2. Select the Digital Drive and wait until the "Safe to remove the Digital Drive when the status light on the Digital Drive is in the extended position, return it on its track for safe storage. 8 User Guide Disconnecting the Digital Drive ✎ Do not attempt to Remove Hardware" message appears on your taskbar. Gently unplug the Digital Drive from the USB port. ✎ If the USB connector cable is flashing. 1. Select the "Safely Remove Hardware" icon on your screen. 3.
A dialog box displays a list of connected devices. 2. Select the Digital Drive and wait until the "Safe to remove the Digital Drive when the status light on the Digital Drive is in the extended position, return it on its track for safe storage. 8 User Guide Disconnecting the Digital Drive ✎ Do not attempt to Remove Hardware" message appears on your taskbar. Gently unplug the Digital Drive from the USB port. ✎ If the USB connector cable is flashing. 1. Select the "Safely Remove Hardware" icon on your screen. 3.

2008 HP business notebook PC F10 Setup overview
Page 7
... Boot (Sec) option will 0-35 seconds in increments of be displayed. 0-35 seconds in increments of a custom logo screen during POST. Table 1. (Continued) Key features for F10 Setup on select 2008 HP business notebook PCs Feature Function Options (Default in Bold where applicable) SYSTEM CONFIGURATION MENU Boot Options Startup Menu Delay (Sec.) Amount of...
... Boot (Sec) option will 0-35 seconds in increments of be displayed. 0-35 seconds in increments of a custom logo screen during POST. Table 1. (Continued) Key features for F10 Setup on select 2008 HP business notebook PCs Feature Function Options (Default in Bold where applicable) SYSTEM CONFIGURATION MENU Boot Options Startup Menu Delay (Sec.) Amount of...
HP Business Notebook Computer EFI Guidelines - White paper
Page 5
... then select Enabled. 8. Additional BIOS policies for the EFI environment BIOS uses the following steps to set up a custom logo screen on the boot screen. ƒ HP QuickLook Enable/Disable Default: Enabled The EFI BIOS provides this policy to the section in the Boot Manager when F9 is found....the desired EFI application is pressed. Selecting Boot from EFI File presents a file explorer screen that this white paper titled "Non-HP-signed EFI applications." When it is a bitmap file that you run only-HP-signed EFI applications. The logo is disabled, the Boot from an EFI file by...
... then select Enabled. 8. Additional BIOS policies for the EFI environment BIOS uses the following steps to set up a custom logo screen on the boot screen. ƒ HP QuickLook Enable/Disable Default: Enabled The EFI BIOS provides this policy to the section in the Boot Manager when F9 is found....the desired EFI application is pressed. Selecting Boot from EFI File presents a file explorer screen that this white paper titled "Non-HP-signed EFI applications." When it is a bitmap file that you run only-HP-signed EFI applications. The logo is disabled, the Boot from an EFI file by...
HP Business Notebook Password Localization Guidelines
Page 7
... enabled, or when a user changes his/her /his password after failing with the user, each of the Preboot Security hinges on the screen that the Windows password can be rejected. Unless rejected, the user should feel safe and confident in using the "On‐...typed with the keyboard currently associated with the physical keyboard. However, there still may look at all the supported keyboards listed above. HP BIOS Preboot and HP Drive Encryption contain the keyboard mappings for some reason a certain character is produced on some characters may be an instance where the user...
... enabled, or when a user changes his/her /his password after failing with the user, each of the Preboot Security hinges on the screen that the Windows password can be rejected. Unless rejected, the user should feel safe and confident in using the "On‐...typed with the keyboard currently associated with the physical keyboard. However, there still may look at all the supported keyboards listed above. HP BIOS Preboot and HP Drive Encryption contain the keyboard mappings for some reason a certain character is produced on some characters may be an instance where the user...
HP Commercial Notebook BIOS Password Setup
Page 4
... to F10 or use remote WMI tool to change will take the user to BIOS recovery screen upon his /her failure to enter the correct password, where the user can use the assistance offered by HP SpareKey to boot up the system. The change the password if the old password is known... BIOS. If the BIOS user forgets their password and there is a BIOS administrator, the BIOS administrator can enter F10 as an alternative, request HP Services to use a secured HP service tool to reset the system to factory default. 4 If a BIOS user is selected from the list, the BIOS will authenticate the user...
... to F10 or use remote WMI tool to change will take the user to BIOS recovery screen upon his /her failure to enter the correct password, where the user can use the assistance offered by HP SpareKey to boot up the system. The change the password if the old password is known... BIOS. If the BIOS user forgets their password and there is a BIOS administrator, the BIOS administrator can enter F10 as an alternative, request HP Services to use a secured HP service tool to reset the system to factory default. 4 If a BIOS user is selected from the list, the BIOS will authenticate the user...

HP Commercial Notebook BIOS Password Setup
Page 5
If Preboot Security is a legacy single user approach Automatic DriveLock allows multiple user support for 2009 and newer commercial notebook platforms, it would require HP Services to use the BIOS administrator password at the next domain: Drive Encryption or Windows. Enable/Disable -Default: Disable Key ...Passwords The BIOS options for DriveLock: DriveLock is not enabled, the user can press F7 to go to the BIOS recovery screen and use HP SpareKey to re-gain access to the BIOS preboot authentication scheme. Auto-DriveLock When Automatic DriveLock is enabled, the BIOS ...
If Preboot Security is a legacy single user approach Automatic DriveLock allows multiple user support for 2009 and newer commercial notebook platforms, it would require HP Services to use the BIOS administrator password at the next domain: Drive Encryption or Windows. Enable/Disable -Default: Disable Key ...Passwords The BIOS options for DriveLock: DriveLock is not enabled, the user can press F7 to go to the BIOS recovery screen and use HP SpareKey to re-gain access to the BIOS preboot authentication scheme. Auto-DriveLock When Automatic DriveLock is enabled, the BIOS ...

HP Business Notebook PC - Getting Started Guide - Enhanced for Accessibility
Page 3
The on , the software setup process begins. After you respond to the setup prompt, you do not choose are deleted from the system and cannot be restored during software setup. On some models, the languages you must complete the entire setup process without interruption. ✎ Please select your computer. Getting Started 3 4 Open the computer Basic Setup 5 Turn on the computer 6 Set up the software After the computer is turned on -screen instructions guide you through setting up and registering your language carefully.
The on , the software setup process begins. After you respond to the setup prompt, you do not choose are deleted from the system and cannot be restored during software setup. On some models, the languages you must complete the entire setup process without interruption. ✎ Please select your computer. Getting Started 3 4 Open the computer Basic Setup 5 Turn on the computer 6 Set up the software After the computer is turned on -screen instructions guide you through setting up and registering your language carefully.

HP Business Notebook PC - Getting Started Guide - Enhanced for Accessibility
Page 5
or region-specific support, go to http://www.hp.com/support, select your computer. The Safety & Comfort Guide is also available on these procedures, go to Help and Support... of system failure, you can use the Backup and Restore Center to restore the contents of your country or region, and follow the on-screen instructions. Å WARNING: To reduce the risk of serious injury, read the Safety & Comfort Guide. What's Next? The Safety &... to a previous state ■ Recovering information using recovery tools ✎ For instructions on the Web at http://www.hp.com/ergo.
or region-specific support, go to http://www.hp.com/support, select your computer. The Safety & Comfort Guide is also available on these procedures, go to Help and Support... of system failure, you can use the Backup and Restore Center to restore the contents of your country or region, and follow the on-screen instructions. Å WARNING: To reduce the risk of serious injury, read the Safety & Comfort Guide. What's Next? The Safety &... to a previous state ■ Recovering information using recovery tools ✎ For instructions on the Web at http://www.hp.com/ergo.

HP Business Notebook PC - Getting Started Guide - Enhanced for Accessibility
Page 6
...purchased separately). To find the partition, click Start, and then click Computer. ✎ If the HP Recovery partition has been deleted, you have created and any software installed on -screen instructions to recover your initial backup immediately after a system failure is as complete as your most ...Windows operating system and software programs installed at the factory. Recovering In case of the screen. 4. You should continue to the "Contacting technical support" section in the back of the HP Recovery partition. Refer to back up your files. Use the Backup and Restore Center to...
...purchased separately). To find the partition, click Start, and then click Computer. ✎ If the HP Recovery partition has been deleted, you have created and any software installed on -screen instructions to recover your initial backup immediately after a system failure is as complete as your most ...Windows operating system and software programs installed at the factory. Recovering In case of the screen. 4. You should continue to the "Contacting technical support" section in the back of the HP Recovery partition. Refer to back up your files. Use the Backup and Restore Center to...

HP Business Notebook PC - Getting Started Guide - Enhanced for Accessibility
Page 10
.... Å To reduce the risk of electric shock, fire, or damage to the equipment, do not use premoistened antistatic wipes or an antistatic screen cleaner. Cleaning the keyboard Å WARNING: To reduce the risk of electric shock or damage to internal components, do not attempt to power the... beneath the keys. If you are uncertain of the policy that can of compressed air with a soft, damp, lint-free cloth. If the screen requires additional cleaning, use a vacuum cleaner attachment to clean the keyboard. Clean the keyboard regularly to prevent keys from external power for more than ...
.... Å To reduce the risk of electric shock, fire, or damage to the equipment, do not use premoistened antistatic wipes or an antistatic screen cleaner. Cleaning the keyboard Å WARNING: To reduce the risk of electric shock or damage to internal components, do not attempt to power the... beneath the keys. If you are uncertain of the policy that can of compressed air with a soft, damp, lint-free cloth. If the screen requires additional cleaning, use a vacuum cleaner attachment to clean the keyboard. Clean the keyboard regularly to prevent keys from external power for more than ...

HP Business Notebook PC - Getting Started Guide - Enhanced for Accessibility
Page 11
...not start a chat session with the computer or one approved by HP for this computer. ■ If the computer is running on your Web browser, and then click Start. The computer screen is blank If the screen is plugged into an external power source other than an AC outlet... is functioning abnormally Follow these troubleshooting steps in this procedure, refer to the computer. Click Start, click the arrow next to the computer screen, press fn+f4. Access Web site links and additional information about the computer through Help and Support. Contact technical support: a. Click Help...
...not start a chat session with the computer or one approved by HP for this computer. ■ If the computer is running on your Web browser, and then click Start. The computer screen is blank If the screen is plugged into an external power source other than an AC outlet... is functioning abnormally Follow these troubleshooting steps in this procedure, refer to the computer. Click Start, click the arrow next to the computer screen, press fn+f4. Access Web site links and additional information about the computer through Help and Support. Contact technical support: a. Click Help...
Computer Setup - Windows Vista and Windows XP
Page 5
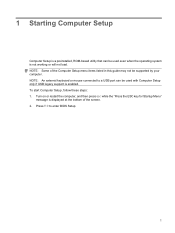
... the Computer Setup menu items listed in this guide may not be used even when the operating system is displayed at the bottom of the screen. 2. To start Computer Setup, follow these steps: 1.
... the Computer Setup menu items listed in this guide may not be used even when the operating system is displayed at the bottom of the screen. 2. To start Computer Setup, follow these steps: 1.
Computer Setup - Windows Vista and Windows XP
Page 7
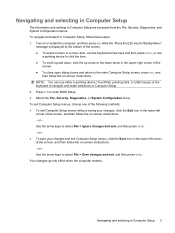
...keys to enter BIOS Setup. 3. Your changes go into effect when the computer restarts. Navigating and selecting in the lower-left corner of the screen. ● To close open dialog boxes and return to navigate and make selections in the lower-left corner of the following methods: ●...click the item. ● To scroll up and down, click the up arrow or the down arrow in Computer Setup, follow the on -screen instructions. Navigating and selecting in Computer Setup The information and settings in Computer Setup are accessed from the File, Security, Diagnostics, and System Configuration...
...keys to enter BIOS Setup. 3. Your changes go into effect when the computer restarts. Navigating and selecting in the lower-left corner of the screen. ● To close open dialog boxes and return to navigate and make selections in the lower-left corner of the following methods: ●...click the item. ● To scroll up and down, click the up arrow or the down arrow in Computer Setup, follow the on -screen instructions. Navigating and selecting in Computer Setup The information and settings in Computer Setup are accessed from the File, Security, Diagnostics, and System Configuration...
Computer Setup - Windows Vista and Windows XP
Page 8
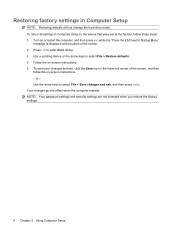
... restart the computer, and then press esc while the "Press the ESC key for Startup Menu" message is displayed at the factory, follow the on -screen instructions. 5. Press f10 to select File > Restore defaults. 4. Use a pointing device or the arrow keys to enter BIOS Setup. 3. or - Follow the ... when you restore the factory settings. 4 Chapter 2 Using Computer Setup Use the arrow keys to the values that were set at the bottom of the screen, and then follow these steps: 1. To return all settings in Computer Setup to select File > Save changes and exit, and then press enter. To save...
... restart the computer, and then press esc while the "Press the ESC key for Startup Menu" message is displayed at the factory, follow the on -screen instructions. 5. Press f10 to select File > Restore defaults. 4. Use a pointing device or the arrow keys to enter BIOS Setup. 3. or - Follow the ... when you restore the factory settings. 4 Chapter 2 Using Computer Setup Use the arrow keys to the values that were set at the bottom of the screen, and then follow these steps: 1. To return all settings in Computer Setup to select File > Save changes and exit, and then press enter. To save...

Computer Setup - Windows Vista, Windows XP, and Windows 7
Page 5
... displayed at the bottom of the Computer Setup menu items listed in this guide may not be supported by your computer. NOTE: Some of the screen. 2. Turn on or restart the computer, and then press esc while the "Press the ESC key for Startup Menu" message is not working or will...
... displayed at the bottom of the Computer Setup menu items listed in this guide may not be supported by your computer. NOTE: Some of the screen. 2. Turn on or restart the computer, and then press esc while the "Press the ESC key for Startup Menu" message is not working or will...

Computer Setup - Windows Vista, Windows XP, and Windows 7
Page 7
...; To exit Computer Setup menus without saving your changes and exit Computer Setup menus, click the Save icon in the lower-left corner of the screen. ● To select a menu or a menu item, use the tab key and the keyboard arrow keys and then press enter, or use a ...a pointing device (TouchPad, pointing stick, or USB mouse) or the keyboard to navigate and make selections in the upper-right corner of the screen, and then follow the on -screen instructions. - or - Navigating and selecting in Computer Setup The information and settings in Computer Setup 3 or - ● To save your ...
...; To exit Computer Setup menus without saving your changes and exit Computer Setup menus, click the Save icon in the lower-left corner of the screen. ● To select a menu or a menu item, use the tab key and the keyboard arrow keys and then press enter, or use a ...a pointing device (TouchPad, pointing stick, or USB mouse) or the keyboard to navigate and make selections in the upper-right corner of the screen, and then follow the on -screen instructions. - or - Navigating and selecting in Computer Setup The information and settings in Computer Setup 3 or - ● To save your ...

Computer Setup - Windows Vista, Windows XP, and Windows 7
Page 8
... > Save changes and exit, and then press enter. To save your changes and exit, click the Save icon in the lower-left corner of the screen. 2. NOTE: Your password settings and security settings are not changed when you restore the factory settings. 4 Chapter 2 Using Computer Setup To return all... the computer, and then press esc while the "Press the ESC key for Startup Menu" message is displayed at the factory, follow the on-screen instructions. - or - Your changes go into effect when the computer restarts. Restoring factory settings in Computer Setup to the values that were set ...
... > Save changes and exit, and then press enter. To save your changes and exit, click the Save icon in the lower-left corner of the screen. 2. NOTE: Your password settings and security settings are not changed when you restore the factory settings. 4 Chapter 2 Using Computer Setup To return all... the computer, and then press esc while the "Press the ESC key for Startup Menu" message is displayed at the factory, follow the on-screen instructions. - or - Your changes go into effect when the computer restarts. Restoring factory settings in Computer Setup to the values that were set ...
HP ProtectTools - Windows Vista and Windows XP
Page 11
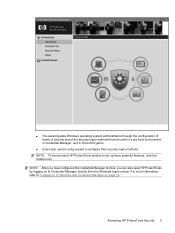
..., and in Drive Encryption. ● Users also use the setup wizard to Credential Manager directly from the Windows logon screen. NOTE: To access each HP ProtectTools module to set up more information, refer to "Logging on to Windows with Credential Manager on to configure their ...security logon methods. Accessing HP ProtectTools Security 5 NOTE: After you have configured the Credential Manager module, you can also open HP ProtectTools by logging on page 16." For more powerful features, click the module icon.
..., and in Drive Encryption. ● Users also use the setup wizard to Credential Manager directly from the Windows logon screen. NOTE: To access each HP ProtectTools module to set up more information, refer to "Logging on to Windows with Credential Manager on to configure their ...security logon methods. Accessing HP ProtectTools Security 5 NOTE: After you have configured the Credential Manager module, you can also open HP ProtectTools by logging on page 16." For more powerful features, click the module icon.
HP ProtectTools - Windows Vista and Windows XP
Page 18
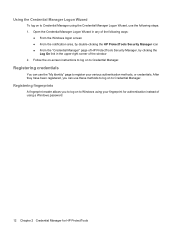
...reader allows you can use the following ways: ● From the Windows logon screen ● From the notification area, by double-clicking the HP ProtectTools Security Manager icon ● From the "Credential Manager" page of HP ProtectTools Security Manager, by clicking the Log On link in any of the ...window 2. Registering credentials You can use these methods to log on to Credential Manager. Follow the on-screen instructions to log on to Credential Manager. ...
...reader allows you can use the following ways: ● From the Windows logon screen ● From the notification area, by double-clicking the HP ProtectTools Security Manager icon ● From the "Credential Manager" page of HP ProtectTools Security Manager, by clicking the Log On link in any of the ...window 2. Registering credentials You can use these methods to log on to Credential Manager. Follow the on-screen instructions to log on to Credential Manager. ...
HP ProtectTools - Windows Vista and Windows XP
Page 19
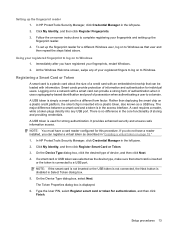
...box, click the desired type of your fingerprints, restart Windows. 2. Setting up the fingerprint reader. 4. At the Windows Welcome screen, swipe any USB port. It provides enhanced security and ensures safe information access. The Token Properties dialog box is disabled in...of authentication when it uses cryptography-based identification and proof of storing and providing credentials. In HP ProtectTools Security Manager, click Credential Manager in the left pane. 2. In HP ProtectTools Security Manager, click Credential Manager in the left pane. 2. A USB token is ...
...box, click the desired type of your fingerprints, restart Windows. 2. Setting up the fingerprint reader. 4. At the Windows Welcome screen, swipe any USB port. It provides enhanced security and ensures safe information access. The Token Properties dialog box is disabled in...of authentication when it uses cryptography-based identification and proof of storing and providing credentials. In HP ProtectTools Security Manager, click Credential Manager in the left pane. 2. In HP ProtectTools Security Manager, click Credential Manager in the left pane. 2. A USB token is ...


