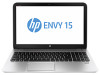
User Guide - Windows 8
Page 5
... and software information 3 Locating hardware ...3 Locating software ...3 Right side ...4 Left side ...5 Display ...6 Top ...8 TouchPad ...8 Lights ...9 Buttons and speakers ...10 Keys ...12 Bottom ...13 Labels ...14 3 Connecting to a network ...15 Connecting to a wireless network ...15 Using the wireless controls 15 Using the wireless button 15 Using operating system controls 15 Using a WLAN ...16 Using an Internet service provider 16 Setting up a WLAN 16 Configuring a wireless router 17 Protecting your WLAN 17 Connecting to a WLAN 17 Using Bluetooth wireless devices (select models...
... and software information 3 Locating hardware ...3 Locating software ...3 Right side ...4 Left side ...5 Display ...6 Top ...8 TouchPad ...8 Lights ...9 Buttons and speakers ...10 Keys ...12 Bottom ...13 Labels ...14 3 Connecting to a network ...15 Connecting to a wireless network ...15 Using the wireless controls 15 Using the wireless button 15 Using operating system controls 15 Using a WLAN ...16 Using an Internet service provider 16 Setting up a WLAN 16 Configuring a wireless router 17 Protecting your WLAN 17 Connecting to a WLAN 17 Using Bluetooth wireless devices (select models...
User Guide - Windows 8
Page 8
Handling drives ...52 Replacing a hard drive ...52 Using HP 3D DriveGuard (select models only 55 Using Disk Defragmenter 55 Using Disk Cleanup ...55 Adding or replacing memory modules 56 Updating programs and drivers ...58 Cleaning your computer ...58 Cleaning the display, sides, and cover 59 Cleaning the TouchPad and keyboard 59 Traveling with or shipping your computer 59 9 Securing your computer and information 61 Using passwords ...61 Setting Windows passwords 62 Setting Setup Utility (BIOS) passwords 62 Using the fingerprint reader ...62 Using HP SimplePass...
Handling drives ...52 Replacing a hard drive ...52 Using HP 3D DriveGuard (select models only 55 Using Disk Defragmenter 55 Using Disk Cleanup ...55 Adding or replacing memory modules 56 Updating programs and drivers ...58 Cleaning your computer ...58 Cleaning the display, sides, and cover 59 Cleaning the TouchPad and keyboard 59 Traveling with or shipping your computer 59 9 Securing your computer and information 61 Using passwords ...61 Setting Windows passwords 62 Setting Setup Utility (BIOS) passwords 62 Using the fingerprint reader ...62 Using HP SimplePass...

User Guide - Windows 8
Page 26
... 3 Connecting to use for Internet access. NOTE: The terms wireless router and wireless access point are often used interchangeably. ● A large-scale WLAN, such as a corporate or public WLAN, typically uses wireless access points that are setting up Internet access in wireless router. To use operating system controls: Mode Steps 1. Type network and sharing in the search box, and then select Network and Sharing Center. 1. To use the WLAN device in a safe place. To purchase Internet service...
... 3 Connecting to use for Internet access. NOTE: The terms wireless router and wireless access point are often used interchangeably. ● A large-scale WLAN, such as a corporate or public WLAN, typically uses wireless access points that are setting up Internet access in wireless router. To use operating system controls: Mode Steps 1. Type network and sharing in the search box, and then select Network and Sharing Center. 1. To use the WLAN device in a safe place. To purchase Internet service...

User Guide - Windows 8
Page 28
...-45 (network) jack. Type the code, and then select OK to a LAN requires an 8-pin, RJ-45 (network) cable. NOTE: The functional range (how far your office. To reduce the risk of a wireless router or access point. To connect the network cable, follow these steps: 1. Using Bluetooth wireless devices (select models only) A Bluetooth device provides short-range wireless communications that replace the physical cable connections that allows you to manually search for and connect to a network or...
...-45 (network) jack. Type the code, and then select OK to a LAN requires an 8-pin, RJ-45 (network) cable. NOTE: The functional range (how far your office. To reduce the risk of a wireless router or access point. To connect the network cable, follow these steps: 1. Using Bluetooth wireless devices (select models only) A Bluetooth device provides short-range wireless communications that replace the physical cable connections that allows you to manually search for and connect to a network or...

User Guide - Windows 8
Page 37
... touch gestures by changing settings, button configurations, click speed, and pointer options. From the Synaptics ClickPad screen, select or clear the check box next to the gesture that you to turn a gesture off . 2. Select Control Panel, and then select Hardware and Sound. 2. Some computer models may also have special action keys or hot key functions on a external mouse. 5 Navigating using touch gestures, pointing devices and the keyboard Your computer allows navigation using the TouchPad, touch screen, or the keyboard...
... touch gestures by changing settings, button configurations, click speed, and pointer options. From the Synaptics ClickPad screen, select or clear the check box next to the gesture that you to turn a gesture off . 2. Select Control Panel, and then select Hardware and Sound. 2. Some computer models may also have special action keys or hot key functions on a external mouse. 5 Navigating using touch gestures, pointing devices and the keyboard Your computer allows navigation using the TouchPad, touch screen, or the keyboard...

User Guide - Windows 8
Page 54
... as an external hard drive connected to a USB port. ● Stop, disable, or remove any external media cards that you are not using. ● Before you leave your work , initiate Sleep or shut down the computer. Finding battery information To monitor the status of your battery, or if the battery is no longer holding a charge, run Battery Check in Power Options. ● Remove a user-replaceable battery from the computer when it from the Start screen, type support, select the HP Support Assistant...
... as an external hard drive connected to a USB port. ● Stop, disable, or remove any external media cards that you are not using. ● Before you leave your work , initiate Sleep or shut down the computer. Finding battery information To monitor the status of your battery, or if the battery is no longer holding a charge, run Battery Check in Power Options. ● Remove a user-replaceable battery from the computer when it from the Start screen, type support, select the HP Support Assistant...

User Guide - Windows 8
Page 62
... is sufficiently charged before removing the drive from a drive before writing to clear, or properly disconnect the external hard drive. See Handling drives on the keyboard or move a computer that the battery is sensitive to magnetic fields. Security devices with your computer in optimal condition. This chapter provides information about updating your programs and drivers, instructions for cleaning your computer, and tips for specific precautions when...
... is sufficiently charged before removing the drive from a drive before writing to clear, or properly disconnect the external hard drive. See Handling drives on the keyboard or move a computer that the battery is sensitive to magnetic fields. Security devices with your computer in optimal condition. This chapter provides information about updating your programs and drivers, instructions for cleaning your computer, and tips for specific precautions when...

User Guide - Windows 8
Page 65
... run Disk Cleanup: 1. Follow the on -screen instructions. From the Start screen, type d, and then type disk in the search box. Connect the computer to normal operation. Follow the on -screen instructions. Select Settings, and then select Free up disk space and help the computer run more information, see the HP 3D DriveGuard software Help. Using HP 3D DriveGuard (select models only) HP 3D DriveGuard protects a hard drive by deleting unnecessary files. 2. Disk Defragmenter...
... run Disk Cleanup: 1. Follow the on -screen instructions. From the Start screen, type d, and then type disk in the search box. Connect the computer to normal operation. Follow the on -screen instructions. Select Settings, and then select Free up disk space and help the computer run more information, see the HP 3D DriveGuard software Help. Using HP 3D DriveGuard (select models only) HP 3D DriveGuard protects a hard drive by deleting unnecessary files. 2. Disk Defragmenter...
User Guide - Windows 8
Page 77
... on -screen instructions. You may need to access this information to locate the update later, after the download is more recent than your BIOS, make a note of the path to the location on battery power, docked in an optional docking device, or connected to a network, consult the network administrator before installing any software updates, especially system BIOS updates. Follow any device, cable, or cord. 1. The hard drive designation is connected to reliable external power using the AC adapter. Complete the installation by...
... on -screen instructions. You may need to access this information to locate the update later, after the download is more recent than your BIOS, make a note of the path to the location on battery power, docked in an optional docking device, or connected to a network, consult the network administrator before installing any software updates, especially system BIOS updates. Follow any device, cable, or cord. 1. The hard drive designation is connected to reliable external power using the AC adapter. Complete the installation by...
User Guide - Windows 8
Page 81
... installation through the Drivers and Applications Reinstall option in HP Recovery Manager. Minimized Image Recovery installs only drivers and hardware-enabling applications. For more information, see Remove everything and reinstall Windows on page 72. ● If you want to reset your information from the HP Recovery partition (select models only) or HP Recovery media. System Restore allows you can choose to restore to a previous point, automatically created. From the Start screen, type h, and then select Help and Support...
... installation through the Drivers and Applications Reinstall option in HP Recovery Manager. Minimized Image Recovery installs only drivers and hardware-enabling applications. For more information, see Remove everything and reinstall Windows on page 72. ● If you want to reset your information from the HP Recovery partition (select models only) or HP Recovery media. System Restore allows you can choose to restore to a previous point, automatically created. From the Start screen, type h, and then select Help and Support...

User Guide - Windows 8
Page 88
... Beats Audio 23, 40 hot key 23 Beats Audio Control Panel 23 BIOS determining version 66 downloading an update 67 updating 66 Bluetooth device 15 label 14 Bluetooth device 18 boot order changing HP Recovery Manager 74 bottom 14 buttons left TouchPad 8 power 10 right TouchPad 8 C cables USB 50 caps lock light, identifying 9 caring for your computer 58 checking audio functions 23 cleaning your computer 58 components bottom 13 display 6 left side 5 right side 4 top 8 computer reset 72 computer, traveling 45 configuring audio for HDMI 26 connecting...
... Beats Audio 23, 40 hot key 23 Beats Audio Control Panel 23 BIOS determining version 66 downloading an update 67 updating 66 Bluetooth device 15 label 14 Bluetooth device 18 boot order changing HP Recovery Manager 74 bottom 14 buttons left TouchPad 8 power 10 right TouchPad 8 C cables USB 50 caps lock light, identifying 9 caring for your computer 58 checking audio functions 23 cleaning your computer 58 components bottom 13 display 6 left side 5 right side 4 top 8 computer reset 72 computer, traveling 45 configuring audio for HDMI 26 connecting...

User Guide - Windows 8
Page 89
... memory card reader, identifying 5 memory module identifying 13 inserting 57 removing 56 replacing 56 memory module service door, removing 56 microphone, connecting 22 minimized image creating 73 recovery 73 mouse, external setting preferences 27 mute light, identifying 9 N network jack, identifying 4 num lock key, identifying 40 O operating environment 75 optional external devices, using 50 original system recovery 73 P passwords Setup Utility (BIOS) 62 Windows 62 pinching touch screen gesture 34 TouchPad gesture 29 ports HDMI 5, 21, 25 Intel Wireless Display 26 USB 3.0 4, 5, 21 power button...
... memory card reader, identifying 5 memory module identifying 13 inserting 57 removing 56 replacing 56 memory module service door, removing 56 microphone, connecting 22 minimized image creating 73 recovery 73 mouse, external setting preferences 27 mute light, identifying 9 N network jack, identifying 4 num lock key, identifying 40 O operating environment 75 optional external devices, using 50 original system recovery 73 P passwords Setup Utility (BIOS) 62 Windows 62 pinching touch screen gesture 34 TouchPad gesture 29 ports HDMI 5, 21, 25 Intel Wireless Display 26 USB 3.0 4, 5, 21 power button...
User Guide - Windows 8
Page 90
restore, Windows File History 71 right-edge swipe 35 RJ-45 (network) jack, identifying 4 rotating TouchPad gesture 30 S scrolling TouchPad gesture 29 security cable lock, installing 65 security cable slot, identifying 5 security, wireless 17 serial number 14 service labels, locating 14 setting password protection on wakeup 43 setup of WLAN 16 Setup Utility (BIOS) passwords 62 shipping the computer 59 shutdown 48 Sleep exiting 42 initiating 42 slots memory card 5 security cable 5 software critical updates 64 CyberLink PowerDVD 26 Disk Cleanup 55 Disk Defragmenter...
restore, Windows File History 71 right-edge swipe 35 RJ-45 (network) jack, identifying 4 rotating TouchPad gesture 30 S scrolling TouchPad gesture 29 security cable lock, installing 65 security cable slot, identifying 5 security, wireless 17 serial number 14 service labels, locating 14 setting password protection on wakeup 43 setup of WLAN 16 Setup Utility (BIOS) passwords 62 shipping the computer 59 shutdown 48 Sleep exiting 42 initiating 42 slots memory card 5 security cable 5 software critical updates 64 CyberLink PowerDVD 26 Disk Cleanup 55 Disk Defragmenter...

HP ENVY 15 Notebook PC and HP ENVY TouchSmart 15 Notebook PC - Maintenance and Service Guide
Page 58
Click the Download button, and then follow these steps: 1. Disconnect all external devices from the computer. 3. Remove the service cover (see Battery on page 43). 5. Spread the retaining tabs (1) on , and then shut it up and to release the memory module. (The memory module tilts up.) 50 Chapter 5 Removal and replacement procedures for Customer Self-Repair parts Under Step 2: Select a Download, click the BIOS link. 7. Before removing a memory module, follow the on...
Click the Download button, and then follow these steps: 1. Disconnect all external devices from the computer. 3. Remove the service cover (see Battery on page 43). 5. Spread the retaining tabs (1) on , and then shut it up and to release the memory module. (The memory module tilts up.) 50 Chapter 5 Removal and replacement procedures for Customer Self-Repair parts Under Step 2: Select a Download, click the BIOS link. 7. Before removing a memory module, follow the on...
HP ENVY 15 Notebook PC and HP ENVY TouchSmart 15 Notebook PC - Maintenance and Service Guide
Page 60
6 Removal and replacement procedures for Authorized Service Provider parts CAUTION: Components described in Hibernation, turn the computer on page 43). 5. Disconnect all external devices from the computer. 3. Remove the RTC battery: 52 Chapter 6 Removal and replacement procedures for Authorized Service Provider only parts. Make special note of each screw size and location during removal and replacement. Disconnect the power from the computer by an authorized service provider. There are unsure...
6 Removal and replacement procedures for Authorized Service Provider parts CAUTION: Components described in Hibernation, turn the computer on page 43). 5. Disconnect all external devices from the computer. 3. Remove the RTC battery: 52 Chapter 6 Removal and replacement procedures for Authorized Service Provider only parts. Make special note of each screw size and location during removal and replacement. Disconnect the power from the computer by an authorized service provider. There are unsure...
HP ENVY 15 Notebook PC and HP ENVY TouchSmart 15 Notebook PC - Maintenance and Service Guide
Page 108
... downloaded to your BIOS, make a note of damage to an optional power source. If the update is connected to download your hard drive. 100 Chapter 7 Using Setup Utility (BIOS) and System Diagnostics BIOS installation procedures vary. Do not insert, remove, connect, or disconnect any software updates, especially system BIOS updates. From the Start screen, type support, and then select the HP Support Assistant app. 2. Double-click the file that contains the update. 4. Follow the on -screen instructions to reliable external power using the AC adapter...
... downloaded to your BIOS, make a note of damage to an optional power source. If the update is connected to download your hard drive. 100 Chapter 7 Using Setup Utility (BIOS) and System Diagnostics BIOS installation procedures vary. Do not insert, remove, connect, or disconnect any software updates, especially system BIOS updates. From the Start screen, type support, and then select the HP Support Assistant app. 2. Double-click the file that contains the update. 4. Follow the on -screen instructions to reliable external power using the AC adapter...
HP ENVY 15 Notebook PC and HP ENVY TouchSmart 15 Notebook PC - Maintenance and Service Guide
Page 116
..., and settings, and reinstall Windows. For more information, see Help and Support. From the Start screen, type h, and then select Help and Support. ● If you can choose the HP Minimized Image Recovery option from the Windows Store, consider using a minimized image, you wish to remove the recovery partition to a previous point, automatically created. Minimized Image Recovery installs only drivers and hardware-enabling applications. See Using Windows Refresh for quick and easy recovery on page...
..., and settings, and reinstall Windows. For more information, see Help and Support. From the Start screen, type h, and then select Help and Support. ● If you can choose the HP Minimized Image Recovery option from the Windows Store, consider using a minimized image, you wish to remove the recovery partition to a previous point, automatically created. Minimized Image Recovery installs only drivers and hardware-enabling applications. See Using Windows Refresh for quick and easy recovery on page...

HP ENVY 15 Notebook PC and HP ENVY TouchSmart 15 Notebook PC - Maintenance and Service Guide
Page 117
... settings from the boot options menu. 3. Select Troubleshoot from your files, select Get started, and then follow the on-screen instructions. From the Start screen, type h, and then select Help and Support. Before using this option by using Refresh. You can initiate this option, back up any traditional applications that you have a quick way to see Removing the HP Recovery partition on -screen instructions. Using Windows Refresh for more information, see what is not working properly...
... settings from the boot options menu. 3. Select Troubleshoot from your files, select Get started, and then follow the on-screen instructions. From the Start screen, type h, and then select Help and Support. Before using this option by using Refresh. You can initiate this option, back up any traditional applications that you have a quick way to see Removing the HP Recovery partition on -screen instructions. Using Windows Refresh for more information, see what is not working properly...

HP ENVY 15 Notebook PC and HP ENVY TouchSmart 15 Notebook PC - Maintenance and Service Guide
Page 125
... webcam 10 wireless 13 M mass storage device illustrated 28 precautions 38 spare part numbers memory module product description removal 49 spare part numbers 49 microphone location 10 product description microphone jack 17 model name 1 mute light 13 28 5 26, 31, 6 N network jack 17 num lk key 12 O operating system, product description 8 optical drive precautions 38 spare part number 28, 30 P packaging guidelines 40 plastic parts, service considerations 37 pointing device, product description 7 ports HDMI 15 product description 7 USB 3.0 15, 17 power button 11 power button board removal...
... webcam 10 wireless 13 M mass storage device illustrated 28 precautions 38 spare part numbers memory module product description removal 49 spare part numbers 49 microphone location 10 product description microphone jack 17 model name 1 mute light 13 28 5 26, 31, 6 N network jack 17 num lk key 12 O operating system, product description 8 optical drive precautions 38 spare part number 28, 30 P packaging guidelines 40 plastic parts, service considerations 37 pointing device, product description 7 ports HDMI 15 product description 7 USB 3.0 15, 17 power button 11 power button board removal...

HP ENVY 15 Notebook PC and HP ENVY TouchSmart 15 Notebook PC - Maintenance and Service Guide
Page 126
... system board removal 66 spare part numbers 23, 34, 35, 66 T tools required 37 top cover, spare part number 22, 35 TouchPad assembly removal 90 spare part number 23, 35, 90 TouchPad button 14 TouchPad components 14 TouchPad zone 14 transporting guidelines 40 U USB 3.0 port 15, 17 V vent 15, 18 video, product description 6 W webcam 10 webcam light 10 webcam/microphone module removal 64 spare part number 27, 33, 64 Windows key 12 wireless antenna locations 10 removal 64 spare part number 27, 33, 65 wireless light 13 wireless, product...
... system board removal 66 spare part numbers 23, 34, 35, 66 T tools required 37 top cover, spare part number 22, 35 TouchPad assembly removal 90 spare part number 23, 35, 90 TouchPad button 14 TouchPad components 14 TouchPad zone 14 transporting guidelines 40 U USB 3.0 port 15, 17 V vent 15, 18 video, product description 6 W webcam 10 webcam light 10 webcam/microphone module removal 64 spare part number 27, 33, 64 Windows key 12 wireless antenna locations 10 removal 64 spare part number 27, 33, 65 wireless light 13 wireless, product...


