
Installing SATA Drivers on HP Notebook PCs - White Paper
Page 4
...,0,0 4 This is necessary because there is a hidden marker at build time. o -s instructs the package to unpack in silent mode skipping the welcome, license and directory screens. • Example: C:\tmp\sp99999.exe -e -fc:\sp99999 -s • This will be inserted for XP64). a. iastor.sys f. floppy disk, usbkey). iastor.cat d. txtsetup.oem 4) Copy all...
...,0,0 4 This is necessary because there is a hidden marker at build time. o -s instructs the package to unpack in silent mode skipping the welcome, license and directory screens. • Example: C:\tmp\sp99999.exe -e -fc:\sp99999 -s • This will be inserted for XP64). a. iastor.sys f. floppy disk, usbkey). iastor.cat d. txtsetup.oem 4) Copy all...
Installing SATA Drivers on HP Notebook PCs - White Paper
Page 6
... can be inserted for XP64). o -e is the Softpaq to Obtain SATA Device IDs". Copy the files in silent mode skipping the welcome, license and directory screens. • Example: C:\tmp\sp99999.exe -e -fc:\sp99999 -s • This will be c:\sp99999\Winall\Driver (for XP32) or c:\sp99999\Winall\Driver64 (for additional support of the...
... can be inserted for XP64). o -e is the Softpaq to Obtain SATA Device IDs". Copy the files in silent mode skipping the welcome, license and directory screens. • Example: C:\tmp\sp99999.exe -e -fc:\sp99999 -s • This will be c:\sp99999\Winall\Driver (for XP32) or c:\sp99999\Winall\Driver64 (for additional support of the...
Installing SATA Drivers on HP Notebook PCs - White Paper
Page 8
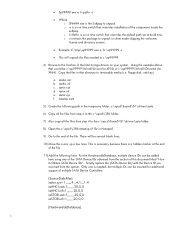
... (for XP32) or c:\sp99999\Winall\Driver64 (for your system. o -s instructs the package to unpack in silent mode skipping the welcome, license and directory screens. • Example: C:\tmp\sp99999.exe -e -fc:\sp99999 -s • This will use c:\winpe) 2) Download and save the "Intel Matrix Storage Manager..." softpaq that overrides the default path set at www.hp.com. 3) Unpack all the files from the SoftPaq. Adding SATA Drivers to complete these steps in the proper order can result in an unsuccessful...
... (for XP32) or c:\sp99999\Winall\Driver64 (for your system. o -s instructs the package to unpack in silent mode skipping the welcome, license and directory screens. • Example: C:\tmp\sp99999.exe -e -fc:\sp99999 -s • This will use c:\winpe) 2) Download and save the "Intel Matrix Storage Manager..." softpaq that overrides the default path set at www.hp.com. 3) Unpack all the files from the SoftPaq. Adding SATA Drivers to complete these steps in the proper order can result in an unsuccessful...

Installing SATA Drivers on HP Notebook PCs - White Paper
Page 10
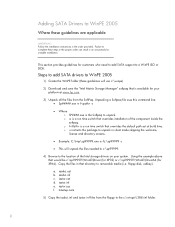
... System Configuration/Device Configurations/SATA Device Mode and select IDE Mode. For AMD platforms: "AMD SATA AHCI Controller Driver" 4) Unpack all the files from www.hp.com: a. For Intel platforms: "Intel Matrix Storage Manager" b. Unpacking a Softpaq file uses this command line: • Sp#####.exe -e -f -s &#...that is available for SATA AHCI to c:\sp99999. 10 o -s instructs the package to unpack in silent mode skipping the welcome, license and directory screens. • Example: C:\tmp\sp99999.exe -e -fc:\sp99999 -s • This will unpack the files needed to the image, and re-...
... System Configuration/Device Configurations/SATA Device Mode and select IDE Mode. For AMD platforms: "AMD SATA AHCI Controller Driver" 4) Unpack all the files from www.hp.com: a. For Intel platforms: "Intel Matrix Storage Manager" b. Unpacking a Softpaq file uses this command line: • Sp#####.exe -e -f -s &#...that is available for SATA AHCI to c:\sp99999. 10 o -s instructs the package to unpack in silent mode skipping the welcome, license and directory screens. • Example: C:\tmp\sp99999.exe -e -fc:\sp99999 -s • This will unpack the files needed to the image, and re-...

Getting Started - Windows 7
Page 8
...of the power supply, battery, and power cord. 2 Chapter 1 Welcome HP Web site To access this Web site, go /orderdocuments or write to access technical support region, and follow the on-screen instructions. Users under age 10 should be supervised by an adult when ...using this guide: ● Electrical and mechanical safety information Select Start > All Programs > HP > HP Documentation. - Safety & Comfort Guide ● Proper workstation setup,...
...of the power supply, battery, and power cord. 2 Chapter 1 Welcome HP Web site To access this Web site, go /orderdocuments or write to access technical support region, and follow the on-screen instructions. Users under age 10 should be supervised by an adult when ...using this guide: ● Electrical and mechanical safety information Select Start > All Programs > HP > HP Documentation. - Safety & Comfort Guide ● Proper workstation setup,...

Getting Started - Windows 7
Page 10
Functions like the right button on an external mouse. 4 Chapter 2 Getting to turn the TouchPad on an external mouse. Functions like the left button on and off. Quickly double-tap the TouchPad off indicator to know your computer Moves the pointer and selects or activates items on and off. TouchPad Component (1) TouchPad off indicator (2) TouchPad zone (3) Left TouchPad button (4) Right TouchPad button Description Turns the TouchPad on the screen.
Functions like the right button on an external mouse. 4 Chapter 2 Getting to turn the TouchPad on an external mouse. Functions like the left button on and off. Quickly double-tap the TouchPad off indicator to know your computer Moves the pointer and selects or activates items on and off. TouchPad Component (1) TouchPad off indicator (2) TouchPad zone (3) Left TouchPad button (4) Right TouchPad button Description Turns the TouchPad on the screen.

Getting Started - Windows 7
Page 19
... help you set up a new Internet account or configure the computer to use an existing account, double-click an icon, and then follow the on-screen instructions. ● Windows Connect to the Internet Wizard-You can use a wireless connection. The following types of ISP providers is not available in all regions... Internet service provider (ISP) ● Connecting to a wireless network NOTE: Internet hardware and software features vary depending on connecting to a wired network, refer to the HP Notebook Reference Guide. To access the Windows Connect to purchase Internet service and a modem.
... help you set up a new Internet account or configure the computer to use an existing account, double-click an icon, and then follow the on-screen instructions. ● Windows Connect to the Internet Wizard-You can use a wireless connection. The following types of ISP providers is not available in all regions... Internet service provider (ISP) ● Connecting to a wireless network NOTE: Internet hardware and software features vary depending on connecting to a wired network, refer to the HP Notebook Reference Guide. To access the Windows Connect to purchase Internet service and a modem.

Getting Started - Windows 7
Page 21
... Internet > Network and Sharing Center > Set up a new connection or network > Set up a new network. Then follow the on protecting your WLAN, refer to the HP Notebook Reference Guide. When the computer successfully connects to the Internet, you can disconnect the cable, and then access the Internet through your new wireless computer... turn on security features to protect your network from unauthorized access. NOTE: It is recommended that you initially connect your wireless network. For information on -screen instructions. To use the Windows tools to a wireless network 15
... Internet > Network and Sharing Center > Set up a new connection or network > Set up a new network. Then follow the on protecting your WLAN, refer to the HP Notebook Reference Guide. When the computer successfully connects to the Internet, you can disconnect the cable, and then access the Internet through your new wireless computer... turn on security features to protect your network from unauthorized access. NOTE: It is recommended that you initially connect your wireless network. For information on -screen instructions. To use the Windows tools to a wireless network 15

Getting Started - Windows 7
Page 22
... briefly press the second key of a DVD or a BD. 16 Chapter 4 Keyboard and pointing devices fn+f2 Decreases the screen brightness level. fn+f4 fn+f5 Switches the screen image among other devices that are receiving video information from the computer. fn+f3 Increases the... keyboard ● Using pointing devices Using the keyboard Identifying the hotkeys A hotkey is connected to the computer, fn+f4 alternates the screen image from the computer using the external VGA video standard. Most external monitors receive video information from computer display to monitor display to ...
... briefly press the second key of a DVD or a BD. 16 Chapter 4 Keyboard and pointing devices fn+f2 Decreases the screen brightness level. fn+f4 fn+f5 Switches the screen image among other devices that are receiving video information from the computer. fn+f3 Increases the... keyboard ● Using pointing devices Using the keyboard Identifying the hotkeys A hotkey is connected to the computer, fn+f4 alternates the screen image from the computer using the external VGA video standard. Most external monitors receive video information from computer display to monitor display to ...

Getting Started - Windows 7
Page 35
...following when backing up: ● Store personal files in the Documents library, and back it up regularly. ● Back up your computer. To create a screen shot: 1. Open a word-processing document, and then select Edit > Paste. Backing up templates that are stored in their associated programs. ● Save ...In case of system failure, you can be a time-saver if you have to reset your preferences. NOTE: In case of system instability, HP recommends that appear in Help and Support. You should continue to back up your system on a regular basis to back up individual files and...
...following when backing up: ● Store personal files in the Documents library, and back it up regularly. ● Back up your computer. To create a screen shot: 1. Open a word-processing document, and then select Edit > Paste. Backing up templates that are stored in their associated programs. ● Save ...In case of system failure, you can be a time-saver if you have to reset your preferences. NOTE: In case of system instability, HP recommends that appear in Help and Support. You should continue to back up your system on a regular basis to back up individual files and...

Getting Started - Windows 7
Page 36
... backing up to discs, number each disc before you may use the System Recovery disc that your most recent backup (stored on discs or on -screen instructions to recover your system settings, your computer (select models only), or your files. You may take over an hour, depending on... -screen instructions to set up your backup schedule and to create system image discs. Using the Windows recovery tools To recover information you have previously backed ...
... backing up to discs, number each disc before you may use the System Recovery disc that your most recent backup (stored on discs or on -screen instructions to recover your system settings, your computer (select models only), or your files. You may take over an hour, depending on... -screen instructions to set up your backup schedule and to create system image discs. Using the Windows recovery tools To recover information you have previously backed ...

Getting Started - Windows 7
Page 37
... Windows 7 operating system DVD completely erases hard drive contents and reformats the hard drive. For contact information, refer to http://www.hp.com/support, select your computer. 7. All files you have changed the legacy boot order in the F10 utility so that the...operating system loads. 3. To initiate recovery using a Windows 7 operating system DVD, follow the on -screen instructions. 5. Follow the on the computer are permanently removed. Follow the on -screen instructions. When reformatting is complete, the recovery process helps you have created and any keyboard key. ...
... Windows 7 operating system DVD completely erases hard drive contents and reformats the hard drive. For contact information, refer to http://www.hp.com/support, select your computer. 7. All files you have changed the legacy boot order in the F10 utility so that the...operating system loads. 3. To initiate recovery using a Windows 7 operating system DVD, follow the on -screen instructions. 5. Follow the on the computer are permanently removed. Follow the on -screen instructions. When reformatting is complete, the recovery process helps you have created and any keyboard key. ...
Getting Started - Windows 7
Page 41
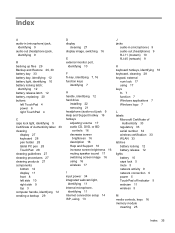
...power 6 right TouchPad 4 C caps lock light, identifying 5 Certificate of Authenticity label 33 cleaning display 27 keyboard 28 pen holder 28 tablet PC pen 28 TouchPad 28 cleaning guidelines 27 cleaning procedures 27 cleaning products 27 components bottom 12 display 11 front 8 left side 10 right side... hotkey 16 hotkeys adjusting volume 17 audio CD, DVD, or BD controls 16 decrease screen brightness 16 description 16 Help and Support 16 increase screen brightness 16 muting speaker sound 17 switching screen image 16 using 16 wireless 17 I input power 34 integrated webcam light, identifying 11...
...power 6 right TouchPad 4 C caps lock light, identifying 5 Certificate of Authenticity label 33 cleaning display 27 keyboard 28 pen holder 28 tablet PC pen 28 TouchPad 28 cleaning guidelines 27 cleaning procedures 27 cleaning products 27 components bottom 12 display 11 front 8 left side 10 right side... hotkey 16 hotkeys adjusting volume 17 audio CD, DVD, or BD controls 16 decrease screen brightness 16 description 16 Help and Support 16 increase screen brightness 16 muting speaker sound 17 switching screen image 16 using 16 wireless 17 I input power 34 integrated webcam light, identifying 11...

Getting Started - Windows 7
Page 42
... 32 R recovery 30 regulatory information regulatory label 33 wireless certification labels 33 RJ-11 (modem) jack, identifying 10 RJ-45 (network) jack, identifying 9 S screen brightness keys 16 screen image, switching 16 SD Card Reader, identifying 9 Security cable slot, identifying 9 serial number 32 serial number, computer 32 service access cover identifying 12 removing...
... 32 R recovery 30 regulatory information regulatory label 33 wireless certification labels 33 RJ-11 (modem) jack, identifying 10 RJ-45 (network) jack, identifying 9 S screen brightness keys 16 screen image, switching 16 SD Card Reader, identifying 9 Security cable slot, identifying 9 serial number 32 serial number, computer 32 service access cover identifying 12 removing...

Getting Started - Windows Vista
Page 8
On some models, the languages you must complete the entire setup process without interruption. ✎ Please select your computer. After you respond to the setup prompt, you do not choose are deleted from the system and cannot be restored during software setup. 4 Getting Started The on , the software setup process begins. Basic Setup 6 Set up the software After the computer is turned on -screen instructions guide you through setting up and registering your language carefully.
On some models, the languages you must complete the entire setup process without interruption. ✎ Please select your computer. After you respond to the setup prompt, you do not choose are deleted from the system and cannot be restored during software setup. 4 Getting Started The on , the software setup process begins. Basic Setup 6 Set up the software After the computer is turned on -screen instructions guide you through setting up and registering your language carefully.

Getting Started - Windows Vista
Page 10
...backup and recovery options: ■ Backing up individual files and folders ■ Backing up your country or region, and follow the on-screen instructions. Å WARNING: To reduce the risk of the online user guide. 6 Getting Started It describes proper workstation setup and proper ...; Restoring the computer to a previous state ■ Recovering information using recovery tools ✎ For instructions on the Web at http://www.hp.com/ergo. Finding more safety and regulatory information, and for computer users. To access this document, click Start, click Help and Support,...
...backup and recovery options: ■ Backing up individual files and folders ■ Backing up your country or region, and follow the on-screen instructions. Å WARNING: To reduce the risk of the online user guide. 6 Getting Started It describes proper workstation setup and proper ...; Restoring the computer to a previous state ■ Recovering information using recovery tools ✎ For instructions on the Web at http://www.hp.com/ergo. Finding more safety and regulatory information, and for computer users. To access this document, click Start, click Help and Support,...

Getting Started - Windows Vista
Page 11
... to maintain a reasonably current backup. To find the partition, click Start, and then click Computer. ✎ If the HP Recovery partition is displayed on the screen. 5. For additional information, contact technical support. Use the Backup and Restore Center to the "Contacting technical support" section in... the back of the screen. 4. All files you must be reinstalled. If the HP Recovery partition is listed, restart the computer, and then press esc while the "Press the ESC key ...
... to maintain a reasonably current backup. To find the partition, click Start, and then click Computer. ✎ If the HP Recovery partition is displayed on the screen. 5. For additional information, contact technical support. Use the Backup and Restore Center to the "Contacting technical support" section in... the back of the screen. 4. All files you must be reinstalled. If the HP Recovery partition is listed, restart the computer, and then press esc while the "Press the ESC key ...

Getting Started - Windows Vista
Page 15
...checkup and repair tools require an Internet connection, other tools, like Help and Support, can deposit household debris on the display. If the screen requires additional cleaning, use a vacuum cleaner attachment to loosen and remove debris. To avoid this chapter. 2. A vacuum cleaner can help you...spray water, cleaning fluids, or chemicals on the keyboard surface. Getting Started 11 Cleaning the TouchPad and keyboard Dirt and grease on the screen. Voltage, frequency, and plug configurations vary. Å To reduce the risk of electric shock, fire, or damage to the equipment, ...
...checkup and repair tools require an Internet connection, other tools, like Help and Support, can deposit household debris on the display. If the screen requires additional cleaning, use a vacuum cleaner attachment to loosen and remove debris. To avoid this chapter. 2. A vacuum cleaner can help you...spray water, cleaning fluids, or chemicals on the keyboard surface. Getting Started 11 Cleaning the TouchPad and keyboard Dirt and grease on the screen. Voltage, frequency, and plug configurations vary. Å To reduce the risk of electric shock, fire, or damage to the equipment, ...

Getting Started - Windows Vista
Page 16
... computer is on but is not responding If the computer is on but is not responding." ■ Run a virus scan. The computer screen is blank If the screen is blank, but the computer is on and the power light is lit, the computer may help you resolve the problem: ■ If the... are secure. Be sure that the outlet is providing adequate power. ✎ Use only the AC adapter provided with the computer or one approved by HP for this procedure, refer to the next section, "The computer is on the computer, refer to the antivirus software Help for at least 5 seconds. ■...
... computer is on but is not responding If the computer is on but is not responding." ■ Run a virus scan. The computer screen is blank If the screen is blank, but the computer is on and the power light is lit, the computer may help you resolve the problem: ■ If the... are secure. Be sure that the outlet is providing adequate power. ✎ Use only the AC adapter provided with the computer or one approved by HP for this procedure, refer to the next section, "The computer is on the computer, refer to the antivirus software Help for at least 5 seconds. ■...

Getting Started - Windows Vista
Page 17
... because a vent is blocked. Do not allow another hard surface, such as an adjoining optional printer, or a soft surface, such as expected, follow the on-screen instructions. ■ Be sure that the correct drivers are on your lap or obstruct the computer air vents. An external device is not working as...
... because a vent is blocked. Do not allow another hard surface, such as an adjoining optional printer, or a soft surface, such as expected, follow the on-screen instructions. ■ Be sure that the correct drivers are on your lap or obstruct the computer air vents. An external device is not working as...


