
User Manual
Page 2
PARTS INTRODUCTION 8 Parts description 4. PREFACE AND INTRODUCTION 2 2. OPERATION 9 4.1 Control panel 4.2 How to operate your scooter 5. TROUBLE SHOOTING AND SPECIFICATION 18 8. WARRANTY 19 1 Rev.2.02.15.13 INSPECTION AND MAINTENANCE 16 6.1 Inspection 6.2 Regular checking record 6.3 Battery, fuse and tire 6.4 Storage 6.5 Moving about 7. BATTERY CHARGING AND CARE 13 5.1 Charging the battery 5.2 Battery 6. SAFETY 3 NOTICE 2.1 Before driving 2.2 While driving 2.3 Labeling 2.4 EMI 3. TABLE OF CONTENTS 1.
PARTS INTRODUCTION 8 Parts description 4. PREFACE AND INTRODUCTION 2 2. OPERATION 9 4.1 Control panel 4.2 How to operate your scooter 5. TROUBLE SHOOTING AND SPECIFICATION 18 8. WARRANTY 19 1 Rev.2.02.15.13 INSPECTION AND MAINTENANCE 16 6.1 Inspection 6.2 Regular checking record 6.3 Battery, fuse and tire 6.4 Storage 6.5 Moving about 7. BATTERY CHARGING AND CARE 13 5.1 Charging the battery 5.2 Battery 6. SAFETY 3 NOTICE 2.1 Before driving 2.2 While driving 2.3 Labeling 2.4 EMI 3. TABLE OF CONTENTS 1.
User Manual
Page 3
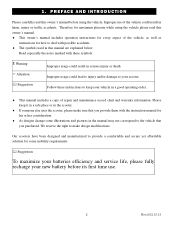
...a good operating order. ♦ This manual includes a copy of repair and maintenance record chart and warranty information. We reserve the right to make sure that you provide them with these instructions to provide a comfortable and secure yet ... symbols used in the scooter. ♦ If someone else uses the scooter, please make design modifications. Suggestion To maximize your batteries efficiency and service life, please fully recharge your new battery before using the vehicle please read this owner's manual. ♦ This owner's manual includes operation instructions for ...
...a good operating order. ♦ This manual includes a copy of repair and maintenance record chart and warranty information. We reserve the right to make sure that you provide them with these instructions to provide a comfortable and secure yet ... symbols used in the scooter. ♦ If someone else uses the scooter, please make design modifications. Suggestion To maximize your batteries efficiency and service life, please fully recharge your new battery before using the vehicle please read this owner's manual. ♦ This owner's manual includes operation instructions for ...
User Manual
Page 4
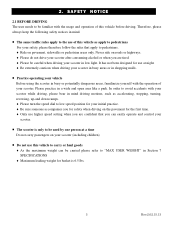
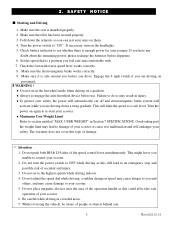
SAFETY NOTICE 2.1 BEFORE DRIVING The user needs to "MAX USER WEIGHT" in low light. Therefore, please always keep the following safety notices in busy or potentially dangerous areas, familiarize yourself with the operation of your scooter. It has not been designed for use at a time Do not ...careful when driving your scooter in Section 7 SPECIFICATIONS ♦ Maximum loading weight for the first time. ♦ Only use higher speed setting when you can be carried please refer to be used by one person at night. ♦ Be extremely cautious when driving your scooter in busy areas or ...
SAFETY NOTICE 2.1 BEFORE DRIVING The user needs to "MAX USER WEIGHT" in low light. Therefore, please always keep the following safety notices in busy or potentially dangerous areas, familiarize yourself with the operation of your scooter. It has not been designed for use at a time Do not ...careful when driving your scooter in Section 7 SPECIFICATIONS ♦ Maximum loading weight for the first time. ♦ Only use higher speed setting when you can be carried please refer to be used by one person at night. ♦ Be extremely cautious when driving your scooter in busy areas or ...
User Manual
Page 5
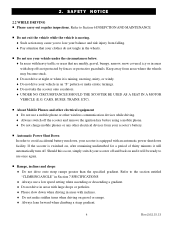
...SEAT IN A MOTOR VEHICLE (E.G. CARS, BUSES, TRAINS, ETC). ■ About Mobile Phones and other electrical equipment ♦ Do not use your scooter is raining, snowing, misty, or windy. ♦ Do not drive your scooter off . Keep away from falling. ♦ Pay attention that are muddy, gravel, bumpy, narrow, snow covered, icy or in the wheels... phones or any other electrical devices from your scooter's battery. ■ Automatic Power Shut Down In order to avoid accidental battery run down facility. Refer to use a low speed setting when ascending or descending a gradient. ♦...
...SEAT IN A MOTOR VEHICLE (E.G. CARS, BUSES, TRAINS, ETC). ■ About Mobile Phones and other electrical equipment ♦ Do not use your scooter is raining, snowing, misty, or windy. ♦ Do not drive your scooter off . Keep away from falling. ♦ Pay attention that are muddy, gravel, bumpy, narrow, snow covered, icy or in the wheels... phones or any other electrical devices from your scooter's battery. ■ Automatic Power Shut Down In order to avoid accidental battery run down facility. Refer to use a low speed setting when ascending or descending a gradient. ♦...
User Manual
Page 6
...battery indicator to an emergency stop and possible risk of your safety, the power will automatically cut off and electromagnetic brake system will lead to see whether there is installed properly. 2. Make sure the electromagnetic brake works correctly. 9. Do not turn on again to re-start your scooter. ♦ Maximum User... Turn the power on the headlights. 5. While reversing the vehicle, be aware of your scooter. 5. Make sure the seat is enough power for your arms on a gradient. ♦ Always re-engage the anti-freewheel device before you before use. Set the speed ...
...battery indicator to an emergency stop and possible risk of your safety, the power will automatically cut off and electromagnetic brake system will lead to see whether there is installed properly. 2. Make sure the electromagnetic brake works correctly. 9. Do not turn on again to re-start your scooter. ♦ Maximum User... Turn the power on the headlights. 5. While reversing the vehicle, be aware of your scooter. 5. Make sure the seat is enough power for your arms on a gradient. ♦ Always re-engage the anti-freewheel device before you before use. Set the speed ...
User Manual
Page 7
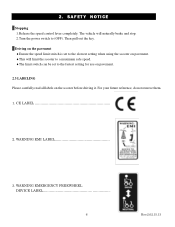
... on the pavement ♦Ensure the speed limit switch is set to the slowest setting when using the scooter on pavement. ♦This will naturally brake and stop. 2.Turn the power switch to the fastest setting for use on pavement. 2.3 LABELING Please carefully read all labels on the scooter before driving it. CE LABEL 2. WARNING EMERGENCY FREEWHEEL DEVICE LABEL...
... on the pavement ♦Ensure the speed limit switch is set to the slowest setting when using the scooter on pavement. ♦This will naturally brake and stop. 2.Turn the power switch to the fastest setting for use on pavement. 2.3 LABELING Please carefully read all labels on the scooter before driving it. CE LABEL 2. WARNING EMERGENCY FREEWHEEL DEVICE LABEL...
User Manual
Page 8
...powered vehicle can also permanently damage the powered vehicle's control system. This is called its brakes, move in police cars, fire trucks, ambulances and taxis. Others are not apparent and exposure is capable of achieving at least a 20 V/m immunity level, which is very important that describes the problems... the more common sources of the interfering EM energy can be measured in the everyday environment. This powered vehicle model as those used in unintended directions. Hand-held portable transceivers ( transmitter-receivers with no further modification, has an immunity...
...powered vehicle can also permanently damage the powered vehicle's control system. This is called its brakes, move in police cars, fire trucks, ambulances and taxis. Others are not apparent and exposure is capable of achieving at least a 20 V/m immunity level, which is very important that describes the problems... the more common sources of the interfering EM energy can be measured in the everyday environment. This powered vehicle model as those used in unintended directions. Hand-held portable transceivers ( transmitter-receivers with no further modification, has an immunity...

User Manual
Page 9
Head Lamp 6. Armrest 9. Width Adjustable Armrests Knob 15.Rear Indicator Lamp 16. 3. Rear Lamp 12. Rear View Mirror 2 1 8 3 6 7 9 4 10 5 . 16 15 11 14 1 12 8 Rev.2.02.15.13 Seat Slide Lever 8. Charger Socket Cover 3. Seat Remove Lever 7. Rear Reflector 14. Basket Bracket 4. Side Reflector 11. Anti-tip Wheel 13. PARTS INTRODUCTION 3.1 PARTS DESCRIPTION 1. Freewheel Lever 10. Indicator Lamp 2. Tiller Adjust Lever 5.
Head Lamp 6. Armrest 9. Width Adjustable Armrests Knob 15.Rear Indicator Lamp 16. 3. Rear Lamp 12. Rear View Mirror 2 1 8 3 6 7 9 4 10 5 . 16 15 11 14 1 12 8 Rev.2.02.15.13 Seat Slide Lever 8. Charger Socket Cover 3. Seat Remove Lever 7. Rear Reflector 14. Basket Bracket 4. Side Reflector 11. Anti-tip Wheel 13. PARTS INTRODUCTION 3.1 PARTS DESCRIPTION 1. Freewheel Lever 10. Indicator Lamp 2. Tiller Adjust Lever 5.
User Manual
Page 10
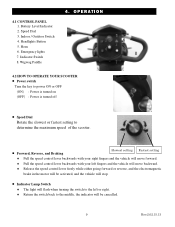
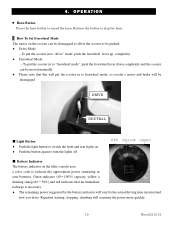
...YOUR SCOOTER ■ Power switch Turn the key to power ON or OFF (ON) : Power is turned on (OFF) : Power is turned off ■ Speed Dial Rotate the slowest or fastest setting to determine the maximum speed of the scooter. ■ Forward, Reverse, and Braking Slowest setting Fastest setting &#...Lamp Switch ♦ The light will flash when turning the switch to the left or right. ♦ Return the switch back to the middle, the indicator will be cancelled. 9 Rev.2.02.15.13 Speed Dial 3. Indoor / Outdoor Switch 4. Emergency lights 7. Battery Level Indicator 2. Headlights Button...
...YOUR SCOOTER ■ Power switch Turn the key to power ON or OFF (ON) : Power is turned on (OFF) : Power is turned off ■ Speed Dial Rotate the slowest or fastest setting to determine the maximum speed of the scooter. ■ Forward, Reverse, and Braking Slowest setting Fastest setting &#...Lamp Switch ♦ The light will flash when turning the switch to the left or right. ♦ Return the switch back to the middle, the indicator will be cancelled. 9 Rev.2.02.15.13 Speed Dial 3. Indoor / Outdoor Switch 4. Emergency lights 7. Battery Level Indicator 2. Headlights Button...
User Manual
Page 11
... your batteries. To put the scooter in to be moved manually. ♦ Please note that an immediate recharge is necessary. ♦ The remaining power suggested by the actual driving time incurred and how you drive. Release the button to stop the horn. ▓ How To Set Freewheel Mode The motor on the tiller console uses a color code...
... your batteries. To put the scooter in to be moved manually. ♦ Please note that an immediate recharge is necessary. ♦ The remaining power suggested by the actual driving time incurred and how you drive. Release the button to stop the horn. ▓ How To Set Freewheel Mode The motor on the tiller console uses a color code...
User Manual
Page 12
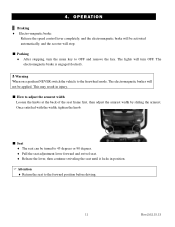
...electromagnetic brake will be activated automatically, and the scooter will stop. ■ Parking ♦ After stopping, turn OFF. The electromagnetic brake is engaged (locked). 1 Warning When on a gradient NEVER switch the vehicle to OFF and remove the key. The electromagnetic brakes will ...turn the main key to the freewheel mode. O P E R A T I O N 4 . Once satisfied with the width, tighten the knob. ■ Seat ♦ The seat can be applied. 4. O P E R A T I O N 4 . The lights will not be turned to 45 degrees or ...
...electromagnetic brake will be activated automatically, and the scooter will stop. ■ Parking ♦ After stopping, turn OFF. The electromagnetic brake is engaged (locked). 1 Warning When on a gradient NEVER switch the vehicle to OFF and remove the key. The electromagnetic brakes will ...turn the main key to the freewheel mode. O P E R A T I O N 4 . Once satisfied with the width, tighten the knob. ■ Seat ♦ The seat can be applied. 4. O P E R A T I O N 4 . The lights will not be turned to 45 degrees or ...

User Manual
Page 13
... scooter's batteries become low or the scooter is in the desired position, tighten the lever to secure the tiller. ■ Main Circuit Breaker (Reset Button) When the voltage in many different positions to re-position the seat The seat can be slide backward and forward for a comfortable driving position. OPERATION ■ How to suit each driver...
... scooter's batteries become low or the scooter is in the desired position, tighten the lever to secure the tiller. ■ Main Circuit Breaker (Reset Button) When the voltage in many different positions to re-position the seat The seat can be slide backward and forward for a comfortable driving position. OPERATION ■ How to suit each driver...

User Manual
Page 14
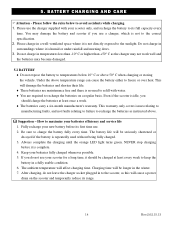
... Do not connect or disconnect the plug or cord when they are wet, it may lead to the charger or the green light is not showing, DO NOT use this LED does not illuminate the charger is complete. 6. Then connect the charger's round plug to (OFF) 2. If the...Turn the power switch to the charging socket. 4. If this charger. Always charge your scooter is a red LED present on the scooter's tiller. The orange LED will be lit during the charging process. Do not smoke while charging as a result. ♦ There is in a well-ventilated space. 3. BATTERY CHARGING AND ...
... Do not connect or disconnect the plug or cord when they are wet, it may lead to the charger or the green light is not showing, DO NOT use this LED does not illuminate the charger is complete. 6. Then connect the charger's round plug to (OFF) 2. If the...Turn the power switch to the charging socket. 4. If this charger. Always charge your scooter is a red LED present on the scooter's tiller. The orange LED will be lit during the charging process. Do not smoke while charging as a result. ♦ There is in a well-ventilated space. 3. BATTERY CHARGING AND ...
User Manual
Page 15
.... 14 Rev.2.02.15.13 Fully recharge your batteries efficiency and service life 1. If you use . 2. Do not charge in the winter. 7. Please use your batteries fully charged whenever possible. 5. This warranty only covers issues relating to manufacturing faults, and not faults relating to failure to avoid accidents while charging. 1. BATTERY CHARGING AND CARE ) Attention - Please follow the...
.... 14 Rev.2.02.15.13 Fully recharge your batteries efficiency and service life 1. If you use . 2. Do not charge in the winter. 7. Please use your batteries fully charged whenever possible. 5. This warranty only covers issues relating to manufacturing faults, and not faults relating to failure to avoid accidents while charging. 1. BATTERY CHARGING AND CARE ) Attention - Please follow the...
User Manual
Page 16
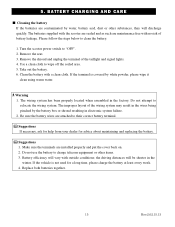
... ■ Cleaning the battery If the batteries are installed properly and put the cover back on. 2. The batteries supplied with no risk of battery leakage. If the terminal is not used for advice about maintaining and replacing the battery. If the vehicle is covered by water, battery acid, dust or other items. 3. Remove the seat. 3. Take out the battery. 6. Use a clean cloth...
... ■ Cleaning the battery If the batteries are installed properly and put the cover back on. 2. The batteries supplied with no risk of battery leakage. If the terminal is not used for advice about maintaining and replacing the battery. If the vehicle is covered by water, battery acid, dust or other items. 3. Remove the seat. 3. Take out the battery. 6. Use a clean cloth...
User Manual
Page 17
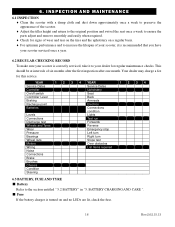
... Service Dates Service Dates Controller Upholstery On/off switch Seat Controller Lever Back Braking Armrests Recharge point Electrics Batteries Connections condition Levels Lights Connections Test run Discharge test Forwards Wheels and Tyres Reverse Wear Emergency stop Pressure Left turn Bearings Right turn Wheel nuts Slope test Motors Over obstacles Wiring List Items repaired Noise Connections Brake Brushes Chassis Condition Steering 1 2 3 4 6.3 BATTERY...
... Service Dates Service Dates Controller Upholstery On/off switch Seat Controller Lever Back Braking Armrests Recharge point Electrics Batteries Connections condition Levels Lights Connections Test run Discharge test Forwards Wheels and Tyres Reverse Wear Emergency stop Pressure Left turn Bearings Right turn Wheel nuts Slope test Motors Over obstacles Wiring List Items repaired Noise Connections Brake Brushes Chassis Condition Steering 1 2 3 4 6.3 BATTERY...
User Manual
Page 18
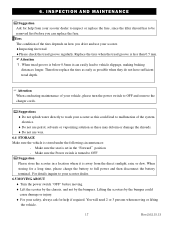
...wash your scooter as these may deform or damage the shrouds. ♦ Do not use petrol, solvents or vaporizing solution as this could cause damage or injury. ♦ For your vehicle, please turn the power switch to full power and then disconnect the battery terminal. Therefore replace the ..., rain, or dew. Make sure the seat is less than 0.5 mm. ) Attention 1. Make sure the Power switch is away from your scooter dealer to inspect or replace the fuse, since the tiller shroud has to vehicle slippage, making braking distances longer. When tread groove is below ...
...wash your scooter as these may deform or damage the shrouds. ♦ Do not use petrol, solvents or vaporizing solution as this could cause damage or injury. ♦ For your vehicle, please turn the power switch to full power and then disconnect the battery terminal. Therefore replace the ..., rain, or dew. Make sure the seat is less than 0.5 mm. ) Attention 1. Make sure the Power switch is away from your scooter dealer to inspect or replace the fuse, since the tiller shroud has to vehicle slippage, making braking distances longer. When tread groove is below ...
User Manual
Page 19
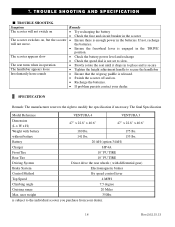
T R O U B L E S H O O T I N G A N D S P E C I F I C AT I O N ■ TROUBLE SHOOTING Symptom The scooter will not switch on The scooter switches on . • Recharge the batteries. • If problem persists contact your dealer. 18 Rev.2.02.15.13 without battery 141 lbs. 135 lbs. 7. user weight 350lbs is not set to slow. • Slowly rotate the seat until it drops in the batteries. The scooter appears slow The seat turns...
T R O U B L E S H O O T I N G A N D S P E C I F I C AT I O N ■ TROUBLE SHOOTING Symptom The scooter will not switch on The scooter switches on . • Recharge the batteries. • If problem persists contact your dealer. 18 Rev.2.02.15.13 without battery 141 lbs. 135 lbs. 7. user weight 350lbs is not set to slow. • Slowly rotate the seat until it drops in the batteries. The scooter appears slow The seat turns...
User Manual
Page 20
... or leakage. All transportation costs and shipping damage incurred while submitting parts for a period of charge, the following items are excluded. LIMITED LIFETIME o Main frame o Seat post o Platform o Frame welds o Charger assembly 14 MONTHS o Controller o Throttle o Joystick o PC board o Electrical harness o Brakes (electronic o Motor/gearbox function ONLY) assembly 6 MONTHS o Batteries are excluded. o Labor, service calls, shipping...
... or leakage. All transportation costs and shipping damage incurred while submitting parts for a period of charge, the following items are excluded. LIMITED LIFETIME o Main frame o Seat post o Platform o Frame welds o Charger assembly 14 MONTHS o Controller o Throttle o Joystick o PC board o Electrical harness o Brakes (electronic o Motor/gearbox function ONLY) assembly 6 MONTHS o Batteries are excluded. o Labor, service calls, shipping...

User Manual
Page 21
Model Chassis NO. Name Gender Tel no. WARRANTY 8.2 VIN (VEHICLE INDIFICATION NUMBER) To ensure the correct after-sale service and warranty service support, please write down the vehicle identification number that is stuck on the back side of Purchase M4JRH Scooter Chassis No.: Motor Serial No.: Year Month Day Key # Agent Signature Rev.2.02.15.13 Motor serial # VENTURA 3 / VENTURA 4 Key # ... Warranty Application Form 口 Male 口 Female Address Model Vehicle Data Date of the frame. 101 8.
Model Chassis NO. Name Gender Tel no. WARRANTY 8.2 VIN (VEHICLE INDIFICATION NUMBER) To ensure the correct after-sale service and warranty service support, please write down the vehicle identification number that is stuck on the back side of Purchase M4JRH Scooter Chassis No.: Motor Serial No.: Year Month Day Key # Agent Signature Rev.2.02.15.13 Motor serial # VENTURA 3 / VENTURA 4 Key # ... Warranty Application Form 口 Male 口 Female Address Model Vehicle Data Date of the frame. 101 8.


