
Owners Manual
Page 4
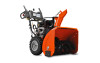
... panels flat. 3. All parts such as necessary to ensure proper tightness. 2. Cut down all four corners of the product. Remove the two (2) screws securing the auger housing to the pallet. 6. Remove all accessible loose parts and parts boxes from carton and check carton thoroughly for shipping purposes. Use the correct tools... in the toolbox. Your new snow thrower has been assembled at the factory with the unit, which will assist you with the exception of the belt cover.
... panels flat. 3. All parts such as necessary to ensure proper tightness. 2. Cut down all four corners of the product. Remove the two (2) screws securing the auger housing to the pallet. 6. Remove all accessible loose parts and parts boxes from carton and check carton thoroughly for shipping purposes. Use the correct tools... in the toolbox. Your new snow thrower has been assembled at the factory with the unit, which will assist you with the exception of the belt cover.

Owners Manual
Page 15
Using other than OEM belts can cause contamination of the friction wheel and damage to the drive system of your snow thrower. AUGER GEAR CASE • The gear case was filled with the left wheel removed, will help drain any spilled oil. NOTE: Although multi...and disconnect spark plug wire from your snow thrower unless the electrical system, muffler and carburetor are shown in contact with plug. 2. MAINTENANCE BELTS Check belts for deterioration and wear after each five (5) hours of continuous use. Install drain plug and tighten securely. 5. LUBRICATION Use only high ...
Using other than OEM belts can cause contamination of the friction wheel and damage to the drive system of your snow thrower. AUGER GEAR CASE • The gear case was filled with the left wheel removed, will help drain any spilled oil. NOTE: Although multi...and disconnect spark plug wire from your snow thrower unless the electrical system, muffler and carburetor are shown in contact with plug. 2. MAINTENANCE BELTS Check belts for deterioration and wear after each five (5) hours of continuous use. Install drain plug and tighten securely. 5. LUBRICATION Use only high ...

Owners Manual
Page 16
...lock nut and tighten securely. Loosen the two (2) screws securing belt cover to spark plug. Remove safety ignition key and disconnect spark plug wire from spark plug. If one or both augers do not turn when auger control lever is in the Operation section of the bolts have ...sheared. Disengage all controls and move throttle control to the impeller shaft with your snow thrower. AUGER SHAFT IMPELLER SHAFT 1/4-20 LOCKNUT FIG. 20 TO REMOVE BELT COVER (See Fig. 21) 1. Replace safety IMPELLER SHEAR BOLTS The impeller is provided to any service or ...
...lock nut and tighten securely. Loosen the two (2) screws securing belt cover to spark plug. Remove safety ignition key and disconnect spark plug wire from spark plug. If one or both augers do not turn when auger control lever is in the Operation section of the bolts have ...sheared. Disengage all controls and move throttle control to the impeller shaft with your snow thrower. AUGER SHAFT IMPELLER SHAFT 1/4-20 LOCKNUT FIG. 20 TO REMOVE BELT COVER (See Fig. 21) 1. Replace safety IMPELLER SHEAR BOLTS The impeller is provided to any service or ...

Owners Manual
Page 17
...Remove bolt, flat washer securing pulley to the snow thrower. REMOVE AUGER BELT from around pulleys and inside belt keepers. 10. SERVICE AND ADJUSTMENTS TO REPLACE BELTS (See Fig. 22) The auger and traction drive belts are damaged or begin to slip from wear, they should be ...the snow thrower together. 14. Place auger belt around pulleys. 17 BELT KEEPER TRACTION DRIVE BELT ENGINE PULLEY FLAT WASHER BOLT IDLER ARM SQUARE HOLE AUGER BELT FRAME CLUTCHING IDLER ARM BRACKET AUGER PULLEY AUGER HOUSING BOLTS FIG. 22 Make sure belt is removed, have your assistant standing ...
...Remove bolt, flat washer securing pulley to the snow thrower. REMOVE AUGER BELT from around pulleys and inside belt keepers. 10. SERVICE AND ADJUSTMENTS TO REPLACE BELTS (See Fig. 22) The auger and traction drive belts are damaged or begin to slip from wear, they should be ...the snow thrower together. 14. Place auger belt around pulleys. 17 BELT KEEPER TRACTION DRIVE BELT ENGINE PULLEY FLAT WASHER BOLT IDLER ARM SQUARE HOLE AUGER BELT FRAME CLUTCHING IDLER ARM BRACKET AUGER PULLEY AUGER HOUSING BOLTS FIG. 22 Make sure belt is removed, have your assistant standing ...

Owners Manual
Page 20
... off of this manual. 7. See "IF RECOIL STARTER HAS FROZEN" in fuel. 1. of power 1. Auger belt is hard to ON position). 5. Auger belt is flooded. 8. Check / reinstall auger belt. 2. Safety ignition key is disconnected. 9. Out of traction 1. Stale fuel. 11. Water in the ... speed and width of snow discharge 1. Stale fuel. 4. Carburetor is OFF). 5. Tighten all fasteners. Check / replace auger belt. 3. Remove debris or foreign object from augers / impeller. 20 Primer not depressed. 7. Fill fuel tank with fresh, clean gasoline. 5. Move to OFF position. ...
... off of this manual. 7. See "IF RECOIL STARTER HAS FROZEN" in fuel. 1. of power 1. Auger belt is hard to ON position). 5. Auger belt is flooded. 8. Check / reinstall auger belt. 2. Safety ignition key is disconnected. 9. Out of traction 1. Stale fuel. 11. Water in the ... speed and width of snow discharge 1. Stale fuel. 4. Carburetor is OFF). 5. Tighten all fasteners. Check / replace auger belt. 3. Remove debris or foreign object from augers / impeller. 20 Primer not depressed. 7. Fill fuel tank with fresh, clean gasoline. 5. Move to OFF position. ...


