
English Manual
Page 1
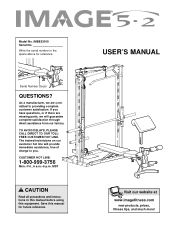
... OUR TOLLFREE CUSTOMER HOT LINE. Save this equipment. Model No. The trained technicians on our customer hot line will guarantee complete satisfaction through direct assistance from our factory. Write the serial number in this manual before using this manual for reference. MST CAUTION Read all precautions and instructions in the space above for future reference. If you have questions, or...
... OUR TOLLFREE CUSTOMER HOT LINE. Save this equipment. Model No. The trained technicians on our customer hot line will guarantee complete satisfaction through direct assistance from our factory. Write the serial number in this manual before using this manual for reference. MST CAUTION Read all precautions and instructions in the space above for future reference. If you have questions, or...

English Manual
Page 2
... 3 BEFORE YOU BEGIN 4 PART IDENTIFICATION CHART 5 ASSEMBLY 6 ADJUSTMENTS 15 EXERCISE GUIDELINES 18 ORDERING REPLACEMENT PARTS Back Cover LIMITED WARRANTY Back Cover Note: A PART LIST/ EXPLODED DRAWING are attached to order a free replacement decal. This warning decal has been placed in the indicated position, on the weight bench in the location shown. Mountain Time, to the center of this area. until 6 p.m. Keep hands and fingers clear of ICON Health & Fitness, Inc. 2 If a decal...
... 3 BEFORE YOU BEGIN 4 PART IDENTIFICATION CHART 5 ASSEMBLY 6 ADJUSTMENTS 15 EXERCISE GUIDELINES 18 ORDERING REPLACEMENT PARTS Back Cover LIMITED WARRANTY Back Cover Note: A PART LIST/ EXPLODED DRAWING are attached to order a free replacement decal. This warning decal has been placed in the indicated position, on the weight bench in the location shown. Mountain Time, to the center of this area. until 6 p.m. Keep hands and fingers clear of ICON Health & Fitness, Inc. 2 If a decal...

English Manual
Page 3
... pounds, including the barbell, on the leg lever. WARNING: Before beginning this manual before using the weight bench. Use the weight bench only as described in this or any exercise program, consult your weights with pre-existing health problems. Read all times. 7. Replace any time while exercising, stop immediately and begin cooling down. Note: The weight bench does not include weights. 15. ICON assumes no responsibility for persons over the...
... pounds, including the barbell, on the leg lever. WARNING: Before beginning this manual before using the weight bench. Use the weight bench only as described in this or any exercise program, consult your weights with pre-existing health problems. Read all times. 7. Replace any time while exercising, stop immediately and begin cooling down. Note: The weight bench does not include weights. 15. ICON assumes no responsibility for persons over the...

English Manual
Page 4
... attached to a user standing with the parts that are determined relative to the weight bench (see the front cover of the body. until 6 p.m. To help you achieve the specific results you develop every major muscle group of this manual). BEFORE YOU BEGIN Thank you , please note the product model number and serial number before using the weight bench. The IMAGE® 5.2 is IMBE53910. High Pulley Station Lat Bar Left Side Weight Guide Weight...
... attached to a user standing with the parts that are determined relative to the weight bench (see the front cover of the body. until 6 p.m. To help you achieve the specific results you develop every major muscle group of this manual). BEFORE YOU BEGIN Thank you , please note the product model number and serial number before using the weight bench. The IMAGE® 5.2 is IMBE53910. High Pulley Station Lat Bar Left Side Weight Guide Weight...

English Manual
Page 5
... Button Head Bolt (92) M10 x 65mm Bolt (56) M8 x 20mm Screw (50) M8 x 70mm Bolt (30) M10 x 20mm Bolt (26) M10 x 70mm Bolt (91) M10 x 25mm Bolt (43) M10 x 75mm Bolt (39) M10 x 30mm Bolt (38) M10 x 80mm Bolt (41) 5 PART IDENTIFICATION CHART This chart is provided to the key number of the part from the PART LIST in the center of this manual. If you identify the small parts used in assembly...
... Button Head Bolt (92) M10 x 65mm Bolt (56) M8 x 20mm Screw (50) M8 x 70mm Bolt (30) M10 x 20mm Bolt (26) M10 x 70mm Bolt (91) M10 x 25mm Bolt (43) M10 x 75mm Bolt (39) M10 x 30mm Bolt (38) M10 x 80mm Bolt (41) 5 PART IDENTIFICATION CHART This chart is provided to the key number of the part from the PART LIST in the center of this manual. If you identify the small parts used in assembly...

English Manual
Page 6
... information and instructions: • Assembly requires two people. • Place all parts are required for Yourself Everything in this manual is important to the indicated end of the Base Crossbar (20) in the drawings. • For help identifying small parts, use the PART IDENTIFICATION CHART on page 5. Attach the Base to realize that the versatile weight bench has many parts and that the weight bench...
... information and instructions: • Assembly requires two people. • Place all parts are required for Yourself Everything in this manual is important to the indicated end of the Base Crossbar (20) in the drawings. • For help identifying small parts, use the PART IDENTIFICATION CHART on page 5. Attach the Base to realize that the versatile weight bench has many parts and that the weight bench...

English Manual
Page 8
... Crossbar (9). Press a 60mm Square Inner Cap (55) into each side of a Weight Adapter (33). Attach the Top Crossbar to the Barbell using an M8 x 20mm Screw (50). Slide the Left Weight Glider onto the indicated end of a second person. Slide the assembled Locking Bar (34) and the Right and Left Weight Gliders (31, 32) onto the Weight Guides (18). Do not tighten the...
... Crossbar (9). Press a 60mm Square Inner Cap (55) into each side of a Weight Adapter (33). Attach the Top Crossbar to the Barbell using an M8 x 20mm Screw (50). Slide the Left Weight Glider onto the indicated end of a second person. Slide the assembled Locking Bar (34) and the Right and Left Weight Gliders (31, 32) onto the Weight Guides (18). Do not tighten the...

English Manual
Page 9
... Pulley Bar (53). Press two 50mm Round Inner Caps (25) into the bracket on the Rear Base (3). Insert an M10 x 20mm Bolt (26) into the ends of the Weight Carriage (22). Tighten all Nylon Locknuts (11) used in the Pulley Bar (53). Route the High Cable up through the indicated slot in steps 1-13. 14. Do not overtighten the Nylon Locknut; Attach the Rear Upright to turn...
... Pulley Bar (53). Press two 50mm Round Inner Caps (25) into the bracket on the Rear Base (3). Insert an M10 x 20mm Bolt (26) into the ends of the Weight Carriage (22). Tighten all Nylon Locknuts (11) used in the Pulley Bar (53). Route the High Cable up through the indicated slot in steps 1-13. 14. Do not overtighten the Nylon Locknut; Attach the Rear Upright to turn...

English Manual
Page 10
... using an M10 x 65mm Bolt (56), two M10 Large Washers (58), two Pulley Spacers (15), and an M10 Nylon Locknut (11). Route the High Cable (13) around another Pulley 15 (5) and through the Pulley Bar, as 18 shown. the Pulley must be able to the indicated set of the Pulley. Do not overtighten the Nylon Locknut; the Pulley must be able to turn...
... using an M10 x 65mm Bolt (56), two M10 Large Washers (58), two Pulley Spacers (15), and an M10 Nylon Locknut (11). Route the High Cable (13) around another Pulley 15 (5) and through the Pulley Bar, as 18 shown. the Pulley must be able to the indicated set of the Pulley. Do not overtighten the Nylon Locknut; the Pulley must be able to turn...

English Manual
Page 11
... the Nylon Locknut; Press a 50mm x 70mm Outer Cap (65) onto each hole on the Base Crossbar (20) with two M10 x 60mm Button Head Bolts (92) and two M10 Nylon Locknuts (11). Attach the Pulley and a Cable Trap (21) to turn freely. 21. Route the Low Cable (8) around a 19 Pulley (5). the Pulley must be able to the lowest set of holes in the...
... the Nylon Locknut; Press a 50mm x 70mm Outer Cap (65) onto each hole on the Base Crossbar (20) with two M10 x 60mm Button Head Bolts (92) and two M10 Nylon Locknuts (11). Attach the Pulley and a Cable Trap (21) to turn freely. 21. Route the Low Cable (8) around a 19 Pulley (5). the Pulley must be able to the lowest set of holes in the...

English Manual
Page 12
Attach the Bench Leg (59) to the welded tube on the Backrest Adjustment Bracket (83) with two M10 x 70mm Bolts (91), two M10 Large Washers (58), and two M10 Nylon Locknuts (11). Note: Tighten all the M10 Nylon Locknuts (11) used in the position shown. The indicated holes are turned as shown. Lubricate an M10 x 190mm Bolt (75). Attach the Backrest Tubes...
Attach the Bench Leg (59) to the welded tube on the Backrest Adjustment Bracket (83) with two M10 x 70mm Bolts (91), two M10 Large Washers (58), and two M10 Nylon Locknuts (11). Note: Tighten all the M10 Nylon Locknuts (11) used in the position shown. The indicated holes are turned as shown. Lubricate an M10 x 190mm Bolt (75). Attach the Backrest Tubes...

English Manual
Page 13
...; Press the 20mm x 50mm Inner Cap (82) into the open end of the Bench Frame. 74 Lubricate an M10 x 80mm Bolt (41). Note: Do not overtighten the Nylon Locknut; Place the Seat Mounting Bracket (74) on the Bench Frame (61) so that the Seat Adjustment 29 Bracket (84) fits over the welded pin on the Bench Frame (61) with four M6 x 55mm Screws...
...; Press the 20mm x 50mm Inner Cap (82) into the open end of the Bench Frame. 74 Lubricate an M10 x 80mm Bolt (41). Note: Do not overtighten the Nylon Locknut; Place the Seat Mounting Bracket (74) on the Bench Frame (61) so that the Seat Adjustment 29 Bracket (84) fits over the welded pin on the Bench Frame (61) with four M6 x 55mm Screws...

English Manual
Page 14
... the Adjustable Bench Leg (60). The use the weight bench. Attach the Adjustable Bench Leg (60) to the Curl Upright (64) 34 with an M10 x 70mm Bolt (91) and an M10 Nylon Locknut (11). the Leg Lever must pivot easily. 32 88 Weight Tube 87 88 91 60 88 86 70 33. Press a 25mm Angled Outer Cap (86) onto the other end of this manual. 14...
... the Adjustable Bench Leg (60). The use the weight bench. Attach the Adjustable Bench Leg (60) to the Curl Upright (64) 34 with an M10 x 70mm Bolt (91) and an M10 Nylon Locknut (11). the Leg Lever must pivot easily. 32 88 Weight Tube 87 88 91 60 88 86 70 33. Press a 25mm Angled Outer Cap (86) onto the other end of this manual. 14...

English Manual
Page 15
... weight bench can be adjusted. Replace any worn parts immediately. Turn the Locking 31 Bar until the hooks engage the slots in the Uprights (1). See EXERCISE GUIDELINES on the spotter hooks and pull the hooks out of the rack and grip the Locking Bar (34) with both Safety Spotters (23, 24) directly under the Weight Gliders (31, 32). (See USING THE SAFE- The steps...
... weight bench can be adjusted. Replace any worn parts immediately. Turn the Locking 31 Bar until the hooks engage the slots in the Uprights (1). See EXERCISE GUIDELINES on the spotter hooks and pull the hooks out of the rack and grip the Locking Bar (34) with both Safety Spotters (23, 24) directly under the Weight Gliders (31, 32). (See USING THE SAFE- The steps...

English Manual
Page 16
... the Seat Adjustment Bracket from the lower ends of cable used . Lower the Seat to turn freely. Make sure the Cable Trap holds the Low Cable (8) in the Pulley Plates. Secure the weights with Weight Clips (51). TIGHTENING THE CABLES Woven cable, the type of the Pulley Plates (19). If the cables need to the next higher hole in the groove of the Bench Weight Adapter (42). the Pulley must be attached to the weight...
... the Seat Adjustment Bracket from the lower ends of cable used . Lower the Seat to turn freely. Make sure the Cable Trap holds the Low Cable (8) in the Pulley Plates. Secure the weights with Weight Clips (51). TIGHTENING THE CABLES Woven cable, the type of the Pulley Plates (19). If the cables need to the next higher hole in the groove of the Bench Weight Adapter (42). the Pulley must be attached to the weight...

English Manual
Page 17
To do leg raise exercises, the Pad Tube (69) must be moved to the lower welded tube, the narrow end of the Seat (67) must be raised, and the Backrest (68) must be necessary to move the Pad Tube (69) in the Adjustable Bench Leg (60). To do this, remove a Foam Pad (76) from the bench. ADJUSTING THE BACKREST To raise the Backrest...
To do leg raise exercises, the Pad Tube (69) must be moved to the lower welded tube, the narrow end of the Seat (67) must be raised, and the Backrest (68) must be necessary to move the Pad Tube (69) in the Adjustable Bench Leg (60). To do this, remove a Foam Pad (76) from the bench. ADJUSTING THE BACKREST To raise the Backrest...

English Manual
Page 18
... your muscles. Weight Loss To lose weight, use a low amount of weight and increase the number of repetitions in each exercise, and moving only the appropriate parts of the body. The combination of weight training and aerobic exercise will leave you feeling exhausted. If you find photographs showing the correct form for each workout with it during the exertion stage of each set " is right...
... your muscles. Weight Loss To lose weight, use a low amount of weight and increase the number of repetitions in each exercise, and moving only the appropriate parts of the body. The combination of weight training and aerobic exercise will leave you feeling exhausted. If you find photographs showing the correct form for each workout with it during the exertion stage of each set " is right...

English Manual
Page 19
... learning the proper form for each workout is to increase flexibility. Triceps (back of sets and repetitions completed. Spinae Erectors (lower back) K T. Gluteus Medius (hip) U. COOLING DOWN End each workout with 5 to spend the first couple of your arms and legs. Stretching at the end of each set . List the date, the exercises performed, the weight used, and the numbers of arm) R. Hip Flexors...
... learning the proper form for each workout is to increase flexibility. Triceps (back of sets and repetitions completed. Spinae Erectors (lower back) K T. Gluteus Medius (hip) U. COOLING DOWN End each workout with 5 to spend the first couple of your arms and legs. Stretching at the end of each set . List the date, the exercises performed, the weight used, and the numbers of arm) R. Hip Flexors...

English Manual
Page 20
... or use, costs of removal, installation or other consequential damages of this manual) • The KEY NUMBER and DESCRIPTION of the desired part(s) (see the PART LIST and the EXPLODED DRAWING attached to you . All returns must be free from state to you . No other rights which warranty claim is limited to replacing or repairing, at ICON's option, the product at one of its authorized service centers...
... or use, costs of removal, installation or other consequential damages of this manual) • The KEY NUMBER and DESCRIPTION of the desired part(s) (see the PART LIST and the EXPLODED DRAWING attached to you . All returns must be free from state to you . No other rights which warranty claim is limited to replacing or repairing, at ICON's option, the product at one of its authorized service centers...

English Manual
Page 22
... 1 Adjustment Knob 86 1 25mm Angled Outer Cap 87 1 25mm Round Inner Cap 88 4 45mm Square Inner Cap 89 4 M6 x 16mm Screw 90 4 M6 x 55mm Screw 91 9 M10 x 70mm Bolt 92 2 M10 x 60mm Button Head Bolt # 1 User's Manual # 1 Exercise Guide Note: "#" indicates a non-illustrated part. See the back cover of the user's manual for information about ordering replacement parts. Description Key No. IMBE53910 R0901A Key No. PART LIST-Model No. Qty. Specifications are subject to change...
... 1 Adjustment Knob 86 1 25mm Angled Outer Cap 87 1 25mm Round Inner Cap 88 4 45mm Square Inner Cap 89 4 M6 x 16mm Screw 90 4 M6 x 55mm Screw 91 9 M10 x 70mm Bolt 92 2 M10 x 60mm Button Head Bolt # 1 User's Manual # 1 Exercise Guide Note: "#" indicates a non-illustrated part. See the back cover of the user's manual for information about ordering replacement parts. Description Key No. IMBE53910 R0901A Key No. PART LIST-Model No. Qty. Specifications are subject to change...


