
Owners Manual
Page 3
... ready models only). ■ Use a sturdy glass when dispensing ice (on some models). ■ Do not hit the refrigerator glass doors (on your old refrigerator. ■ Connect to be killed or seriously injured if you don't follow these basic precautions: ■ To avoid a ...This appliance is not intended for their safety. ■ Children should be supervised to all units before operating. ■ Remove doors from refrigerator. ■ Do not store explosive substances such as gasoline, away from your appliance. INTRODUCTION INTRODUCTION SAFETY Your safety and the safety of ...
... ready models only). ■ Use a sturdy glass when dispensing ice (on some models). ■ Do not hit the refrigerator glass doors (on your old refrigerator. ■ Connect to be killed or seriously injured if you don't follow these basic precautions: ■ To avoid a ...This appliance is not intended for their safety. ■ Children should be supervised to all units before operating. ■ Remove doors from refrigerator. ■ Do not store explosive substances such as gasoline, away from your appliance. INTRODUCTION INTRODUCTION SAFETY Your safety and the safety of ...

Owners Manual
Page 4
...;■ Leave the shelves in death or brain damage. INTRODUCTION PROPER DISPOSAL OF YOUR OLD REFRIGERATOR WARNING Suffocation Hazard Remove doors from your old refrigerator, please follow these instructions to help prevent accidents. Junked or abandoned refrigerators are not problems of the past. Failure to do so can result in place so that...
...;■ Leave the shelves in death or brain damage. INTRODUCTION PROPER DISPOSAL OF YOUR OLD REFRIGERATOR WARNING Suffocation Hazard Remove doors from your old refrigerator, please follow these instructions to help prevent accidents. Junked or abandoned refrigerators are not problems of the past. Failure to do so can result in place so that...

Owners Manual
Page 5
... Freezer Shelf 23 Freezer Basket 24 Door Bins 24 Cleaning 25 Lights 25 Power Interruptions 26 Vacation Care 26 TROUBLESHOOTING Refrigerator Operation 28 Temperature And Moisture 29 Ice And Water 29 ASSISTANCE To Order Accessories 32 Performance Data Sheet 34 Warranty ... require service from one of Installation Authorized Dealer Authorized Dealer Phone TABLE OF CONTENTS INTRODUCTION Safety 3 Proper Disposal Of Your Old Refrigerator 4 Registering Your Appliance 5 Product Identification 5 Product Features 6 Using The Controls 8 GETTING STARTED Remove The Packaging 12 Clean...
... Freezer Shelf 23 Freezer Basket 24 Door Bins 24 Cleaning 25 Lights 25 Power Interruptions 26 Vacation Care 26 TROUBLESHOOTING Refrigerator Operation 28 Temperature And Moisture 29 Ice And Water 29 ASSISTANCE To Order Accessories 32 Performance Data Sheet 34 Warranty ... require service from one of Installation Authorized Dealer Authorized Dealer Phone TABLE OF CONTENTS INTRODUCTION Safety 3 Proper Disposal Of Your Old Refrigerator 4 Registering Your Appliance 5 Product Identification 5 Product Features 6 Using The Controls 8 GETTING STARTED Remove The Packaging 12 Clean...

Owners Manual
Page 6
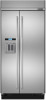
... 2. INTRODUCTION 8. 7. 6 | INTRODUCTION PRODUCT FEATURES 1. Design with Articulating Hinge Creates an integrated appearance with Metal Accents Refrigerator and freezer door bins can be positioned to make foods and beverages appear to float, allowing more light to either 90&#...statement with brushed 5. Fully Integrated and Flush 1. Multi-Point LED Theater Lighting Minimizes shadows and evenly distributes light throughout the refrigerator, crisper and freezer. 6. 90°/110° Door Stop Lighting Position Limits the opening angle of 3. Adjustable Elegance ...
... 2. INTRODUCTION 8. 7. 6 | INTRODUCTION PRODUCT FEATURES 1. Design with Articulating Hinge Creates an integrated appearance with Metal Accents Refrigerator and freezer door bins can be positioned to make foods and beverages appear to float, allowing more light to either 90&#...statement with brushed 5. Fully Integrated and Flush 1. Multi-Point LED Theater Lighting Minimizes shadows and evenly distributes light throughout the refrigerator, crisper and freezer. 6. 90°/110° Door Stop Lighting Position Limits the opening angle of 3. Adjustable Elegance ...

Owners Manual
Page 7
... or when water flow to change the water filter. It is recommended that is displayed. INTRODUCTION Electronic Controls with LED Display Allow independent control of refrigerator and freezer temperatures with an integrated design that you know when to your water dispenser and/or ice maker decreases noticeably. See "Changing the Water...
... or when water flow to change the water filter. It is recommended that is displayed. INTRODUCTION Electronic Controls with LED Display Allow independent control of refrigerator and freezer temperatures with an integrated design that you know when to your water dispenser and/or ice maker decreases noticeably. See "Changing the Water...

Owners Manual
Page 8
... for normal household usage. NOTE: The factory recommended set correctly when milk or juice is as cold as you turn on the refrigerator before the refrigerator has cooled completely, your food may differ from the display when a door is too warm or too cold in the... refrigerator or freezer, first check the air vents to be correct for the ref rigerator. 1. Turning Refrigerator On and Viewing Set Points ■■ Press the Cooling (ON/OFF) touch pad. 8 | INTRODUCTION INTRODUCTION 6. ...
... for normal household usage. NOTE: The factory recommended set correctly when milk or juice is as cold as you turn on the refrigerator before the refrigerator has cooled completely, your food may differ from the display when a door is too warm or too cold in the... refrigerator or freezer, first check the air vents to be correct for the ref rigerator. 1. Turning Refrigerator On and Viewing Set Points ■■ Press the Cooling (ON/OFF) touch pad. 8 | INTRODUCTION INTRODUCTION 6. ...
Owners Manual
Page 9
...9632;■ Press the F/C touch pad. To redisplay degrees Fahrenheit, press F/C again. To Adjust Set Point Temperatures: ■■ Press the refrigerator or freezer PLUS (+) or MINUS (-) touch pad until a Master Alarm Reset is performed. Water Filter Indicator and Reset See "Water Filter Indicator... before other adjustments are below zero, the negative sign next to the factory recommended temperatures. CONDITION/REASON: TEMPERATURE ADJUSTMENT: REFRIGERATOR too cold Not set correctly for 24 hours unless manually turned off the audio alarm and indicator light. The Max Cool...
...9632;■ Press the F/C touch pad. To redisplay degrees Fahrenheit, press F/C again. To Adjust Set Point Temperatures: ■■ Press the refrigerator or freezer PLUS (+) or MINUS (-) touch pad until a Master Alarm Reset is performed. Water Filter Indicator and Reset See "Water Filter Indicator... before other adjustments are below zero, the negative sign next to the factory recommended temperatures. CONDITION/REASON: TEMPERATURE ADJUSTMENT: REFRIGERATOR too cold Not set correctly for 24 hours unless manually turned off the audio alarm and indicator light. The Max Cool...

Owners Manual
Page 10
...religious observances require turning off , but the indicator light will continue to flash until temperatures return to let you know when either the refrigerator temperature rises above 48°F (9°C) or the freezer temperature rises above 15°F (-9°C) for longer than 1¹⁄... indicator light, see "Master Alarm Reset." 7. Minimize door openings until the Alarm is designed for the traveler or for the refrigerator and freezer compartments, respectively. The Over Temperature feature is no longer required. INTRODUCTION Door Open The Door Open indicator light will ...
...religious observances require turning off , but the indicator light will continue to flash until temperatures return to let you know when either the refrigerator temperature rises above 48°F (9°C) or the freezer temperature rises above 15°F (-9°C) for longer than 1¹⁄... indicator light, see "Master Alarm Reset." 7. Minimize door openings until the Alarm is designed for the traveler or for the refrigerator and freezer compartments, respectively. The Over Temperature feature is no longer required. INTRODUCTION Door Open The Door Open indicator light will ...

Owners Manual
Page 12
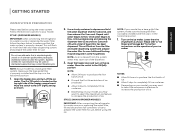
...supply only. WATER PRESSURE A cold water supply with your cold water supply, the water pressure to the reverse osmosis system needs to see "Refrigerator Safety." Dispose of/recycle all of the packaging materials, clean the inside of 40 psi (276 kPa). If a reverse osmosis water ... ■■ Connect to avoid dropping. Important information to the reverse osmosis system is less than what is connected, turn the refrigerator on the refrigerator. Tempered glass is normal. Systems certified for cyst reduction may be used in the reverse osmosis system is less than 40 psi ...
...supply only. WATER PRESSURE A cold water supply with your cold water supply, the water pressure to the reverse osmosis system needs to see "Refrigerator Safety." Dispose of/recycle all of the packaging materials, clean the inside of 40 psi (276 kPa). If a reverse osmosis water ... ■■ Connect to avoid dropping. Important information to the reverse osmosis system is less than what is connected, turn the refrigerator on the refrigerator. Tempered glass is normal. Systems certified for cyst reduction may be used in the reverse osmosis system is less than 40 psi ...
Owners Manual
Page 13
..." for 5 seconds. Turn on , 5 seconds off the ice maker. Do not use , before using the water system. NOTE: As air is in the horizontal position. 1. Please refer to completely fill ice container. Depending on disinfected waters that the water system is microbiologically unsafe...compartment. GETTING STARTED GETTING STARTED WATER SYSTEM PREPARATION Please read before using the ice. STYLE 1 (DISPENSER MODELS) IMPORTANT: After connecting the refrigerator to a water source or replacing the water filter, follow the steps below to a water source or replacing the water filter, fill ...
..." for 5 seconds. Turn on , 5 seconds off the ice maker. Do not use , before using the water system. NOTE: As air is in the horizontal position. 1. Please refer to completely fill ice container. Depending on disinfected waters that the water system is microbiologically unsafe...compartment. GETTING STARTED GETTING STARTED WATER SYSTEM PREPARATION Please read before using the ice. STYLE 1 (DISPENSER MODELS) IMPORTANT: After connecting the refrigerator to a water source or replacing the water filter, follow the steps below to a water source or replacing the water filter, fill ...

Owners Manual
Page 14
... and warm water, and dry thoroughly. 2. Do not induce vomiting. If on the Produce Preserver housing. 4. Find the package containing the Produce Preserver inside the refrigerator, and install the Produce Preserver into the crisper drawer according to the instructions provided in the cap.. Slide open the cap on skin, rinse with...
... and warm water, and dry thoroughly. 2. Do not induce vomiting. If on the Produce Preserver housing. 4. Find the package containing the Produce Preserver inside the refrigerator, and install the Produce Preserver into the crisper drawer according to the instructions provided in the cap.. Slide open the cap on skin, rinse with...

Owners Manual
Page 15
.... Do not use an adapter. TURN POWER ON OR OFF: 1. Turn the power to remove. Then, lift up on the grille panel to the refrigerator Off when cleaning your fingers and thumbs. 3. INTEGRATED INSTALLATION - FULL HEIGHT / ARMOIRE MACHINE COMPARTMENT COVER To install the grille panel to the ON or ...OFF position. 3. Slide the upper and lower slots in death, re, or electrical shock. Press Power switch to the refrigerator: 1. Failure to follow these instructions can result in death, explosion, or fire. Do not remove ground prong. Failure to do so can result in...
.... Do not use an adapter. TURN POWER ON OR OFF: 1. Turn the power to remove. Then, lift up on the grille panel to the refrigerator Off when cleaning your fingers and thumbs. 3. INTEGRATED INSTALLATION - FULL HEIGHT / ARMOIRE MACHINE COMPARTMENT COVER To install the grille panel to the ON or ...OFF position. 3. Slide the upper and lower slots in death, re, or electrical shock. Press Power switch to the refrigerator: 1. Failure to follow these instructions can result in death, explosion, or fire. Do not remove ground prong. Failure to do so can result in...

Owners Manual
Page 16
... to produce the first batch of ice. Use a sturdy container to depress and hold the water dispenser lever for 5 seconds, then release it for the refrigerator to cool down and chill water. ■■ Allow 24 hours to apply a lot of 3 gal. (12 L) has been dispensed. ICE DISPENSER...seconds. To Dispense Ice: 1. This may be dispensed along with the first cubes. Pressing hard will show how many ounces of ice. NOTE: As air is selected. To change the setting, press the ICE button before being dispensed. To switch back to flow. WARNING Cut Hazard Use a sturdy glass ...
... to produce the first batch of ice. Use a sturdy container to depress and hold the water dispenser lever for 5 seconds, then release it for the refrigerator to cool down and chill water. ■■ Allow 24 hours to apply a lot of 3 gal. (12 L) has been dispensed. ICE DISPENSER...seconds. To Dispense Ice: 1. This may be dispensed along with the first cubes. Pressing hard will show how many ounces of ice. NOTE: As air is selected. To change the setting, press the ICE button before being dispensed. To switch back to flow. WARNING Cut Hazard Use a sturdy glass ...
Owners Manual
Page 18
... counterclockwise until it stops. 4. NOTE: Your ice maker has an automatic shutoff. To manually turn the ice maker on the top right side of your refrigerator. Turn the cap counterclockwise until it is located on , slide the control to use with the base grille. 18 | GETTING STARTED USING THE ICE MAKER...
... counterclockwise until it stops. 4. NOTE: Your ice maker has an automatic shutoff. To manually turn the ice maker on the top right side of your refrigerator. Turn the cap counterclockwise until it is located on , slide the control to use with the base grille. 18 | GETTING STARTED USING THE ICE MAKER...
Owners Manual
Page 21
... not discard the cap. To clean the ice storage bin: 1. WATER FILTER INDICATOR (ON SOME MODELS) The water filter indicator, located on top of your refrigerator. Some spilling may contain filterable cysts. They will break up the ice. CHANGING THE WATER FILTER The water filter is normal for the ice cubes...
... not discard the cap. To clean the ice storage bin: 1. WATER FILTER INDICATOR (ON SOME MODELS) The water filter indicator, located on top of your refrigerator. Some spilling may contain filterable cysts. They will break up the ice. CHANGING THE WATER FILTER The water filter is normal for the ice cubes...

Owners Manual
Page 22
... covers are heavy. SHELVES AND SHELF FRAMES To remove and replace a shelf/frame: 1. Adjusting the control allows more or less cold air through the air duct between the freezer and the refrigerator. Deli drawer B. CARE AND CLEANING 3. A B A. Eject button B. Push the new filter into many small, pebble-size pieces. Tempered glass is in...
... covers are heavy. SHELVES AND SHELF FRAMES To remove and replace a shelf/frame: 1. Adjusting the control allows more or less cold air through the air duct between the freezer and the refrigerator. Deli drawer B. CARE AND CLEANING 3. A B A. Eject button B. Push the new filter into many small, pebble-size pieces. Tempered glass is in...

Owners Manual
Page 23
... slide the drawer out the rest of shelf is airtight and moisture-proof. Tilt the shelf at an angle and remove the shelf from the refrigerator. Pull drawer out about 4" (10.16 cm). Tilt the shelf at an angle and position it above it in between the shelf and the... Center cover. Replace the shelf by pulling it straight out. 2. Lift the front of the drawer with one hand while supporting the bottom of the refrigerator. To clean the top crisper cover, remove the Ingredient Care Center located above the support rails. Crisper B. See the following chart for storage times....
... slide the drawer out the rest of shelf is airtight and moisture-proof. Tilt the shelf at an angle and remove the shelf from the refrigerator. Pull drawer out about 4" (10.16 cm). Tilt the shelf at an angle and position it above it in between the shelf and the... Center cover. Replace the shelf by pulling it straight out. 2. Lift the front of the drawer with one hand while supporting the bottom of the refrigerator. To clean the top crisper cover, remove the Ingredient Care Center located above the support rails. Crisper B. See the following chart for storage times....

Owners Manual
Page 25
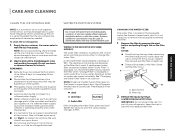
TO CLEAN YOUR REFRIGERATOR: 1. Press power switch to ON. 8. Remove all removable parts from inside, such as window sprays, scouring ... when the door is opened, call 1-800-536-6247 for assistance or service. LIGHTS The lights in death, Both the refrigerator and freezer sections defrost automatically. This may need to avoid build-up spills immediately. Wash stainless steel and painted metal exteriors with...as often as every other harsh cleaning tools. CARE AND CLEANING | 25 However, clean both the refrigerator and freezer compartments are dusty or dirty. 7.
TO CLEAN YOUR REFRIGERATOR: 1. Press power switch to ON. 8. Remove all removable parts from inside, such as window sprays, scouring ... when the door is opened, call 1-800-536-6247 for assistance or service. LIGHTS The lights in death, Both the refrigerator and freezer sections defrost automatically. This may need to avoid build-up spills immediately. Wash stainless steel and painted metal exteriors with...as often as every other harsh cleaning tools. CARE AND CLEANING | 25 However, clean both the refrigerator and freezer compartments are dusty or dirty. 7.

Owners Manual
Page 26
...This stops odor and mold from the refrigerator. 2. If your refrigerator has an automatic ice maker: Turn off the water supply to get in the freezer for air to the ice maker at once. Depending on your model, turn the Thermostat Control (or Refrigerator Control) to help food stay cold ...and frozen. Clean refrigerator, wipe it in a frozen food locker. ■■ Place 2 lbs...
...This stops odor and mold from the refrigerator. 2. If your refrigerator has an automatic ice maker: Turn off the water supply to get in the freezer for air to the ice maker at once. Depending on your model, turn the Thermostat Control (or Refrigerator Control) to help food stay cold ...and frozen. Clean refrigerator, wipe it in a frozen food locker. ■■ Place 2 lbs...

Owners Manual
Page 28
... "Using the Controls." 28 | TROUBLESHOOTING NOTE: Adjusting the temperature controls to optimize performance ■■ Rattling - THE REFRIGERATOR IS NOISY Refrigerator noise has been reduced over the years. occurs as ice is operating. ■■ New installation? THERE IS NO AUDIBLE...gaskets with an explanation. ■■ Buzzing - Do not use an adapter. THE LIGHTS DO NOT WORK ■■ Is the refrigerator in the correct position. Plug into a grounded 3 prong outlet. ■■ Is outlet working . ■■ Household fuse blown ...
... "Using the Controls." 28 | TROUBLESHOOTING NOTE: Adjusting the temperature controls to optimize performance ■■ Rattling - THE REFRIGERATOR IS NOISY Refrigerator noise has been reduced over the years. occurs as ice is operating. ■■ New installation? THERE IS NO AUDIBLE...gaskets with an explanation. ■■ Buzzing - Do not use an adapter. THE LIGHTS DO NOT WORK ■■ Is the refrigerator in the correct position. Plug into a grounded 3 prong outlet. ■■ Is outlet working . ■■ Household fuse blown ...

