

Warranty
Page 1
... specific legal rights, and you should ask Jenn-Air or your product requires repair. Please have other damage to appliance finishes unless such damage results from state to state or province to defective materials or workmanship. ■ Sealed Refrigeration system (includes compressor, evaporator, condenser, dryer and connecting tubing). TEN YEAR LIMITED WARRANTY WHAT IS COVERED WHAT IS NOT COVERED TWO YEAR LIMITED WARRANTY (PARTS...
... specific legal rights, and you should ask Jenn-Air or your product requires repair. Please have other damage to appliance finishes unless such damage results from state to state or province to defective materials or workmanship. ■ Sealed Refrigeration system (includes compressor, evaporator, condenser, dryer and connecting tubing). TEN YEAR LIMITED WARRANTY WHAT IS COVERED WHAT IS NOT COVERED TWO YEAR LIMITED WARRANTY (PARTS...

Owners Manual 1
Page 2
... REQUIREMENTS Tools and Parts 5 Location Requirements 5 Product Dimensions 6 Custom Overlay Panel 6 Handle (Optional 7 Electrical Requirements 8 INSTALLATION INSTRUCTIONS Unpack the Refrigerator 8 Custom Overlay Panel Installation 9 Installation and Door Closing 10 USING REFRIGERATOR Controls...11 Normal Sounds 12 Refrigerator Shelves 12 Door Bins...13 Lights...13 CARE AND CLEANING Cleaning...13 Removing Base Grille 13 Vacation Care 14 Moving Care...14 TROUBLESHOOTING Operation...14 Temperature and Moisture 14 Door...15 ASSISTANCE In the U.S.A...15 In Canada...15 Warranty...16 2
... REQUIREMENTS Tools and Parts 5 Location Requirements 5 Product Dimensions 6 Custom Overlay Panel 6 Handle (Optional 7 Electrical Requirements 8 INSTALLATION INSTRUCTIONS Unpack the Refrigerator 8 Custom Overlay Panel Installation 9 Installation and Door Closing 10 USING REFRIGERATOR Controls...11 Normal Sounds 12 Refrigerator Shelves 12 Door Bins...13 Lights...13 CARE AND CLEANING Cleaning...13 Removing Base Grille 13 Vacation Care 14 Moving Care...14 TROUBLESHOOTING Operation...14 Temperature and Moisture 14 Door...15 ASSISTANCE In the U.S.A...15 In Canada...15 Warranty...16 2
Owners Manual 1
Page 3
... not allow them to move and install refrigerator. I Plug into a grounded 3 prong outlet. SAVE THESE INSTRUCTIONS 3 Always read and obey all parts and panels before servicing. This symbol alerts you don't immediately follow the safety alert symbol and either the word "DANGER" or "WARNING." I Do not store or use an adapter. I Disconnect power before operating. I This appliance is damaged, it...
... not allow them to move and install refrigerator. I Plug into a grounded 3 prong outlet. SAVE THESE INSTRUCTIONS 3 Always read and obey all parts and panels before servicing. This symbol alerts you don't immediately follow the safety alert symbol and either the word "DANGER" or "WARNING." I Do not store or use an adapter. I Disconnect power before operating. I This appliance is damaged, it...
Owners Manual 1
Page 4
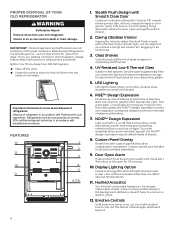
... to do so can affect internal temperatures. 11. Custom Panel Overlay Break free with established procedures. Display Lighting Option Features energy-efficient LED lights that provide a clear view without exposed hinges or trim pieces. A stainless steel suit of beauty. 8. NOIR™ Design Expression Lose yourself in death or brain damage. Hushed Acoustics Our internal compressor keeps your light-guided touch coax out the flavors...
... to do so can affect internal temperatures. 11. Custom Panel Overlay Break free with established procedures. Display Lighting Option Features energy-efficient LED lights that provide a clear view without exposed hinges or trim pieces. A stainless steel suit of beauty. 8. NOIR™ Design Expression Lose yourself in death or brain damage. Hushed Acoustics Our internal compressor keeps your light-guided touch coax out the flavors...

Owners Manual 1
Page 5
... the power cord side for routing of the base cabinets, remove any baseboards or moldings from refrigerator. Opening height - Refer "Product Dimensions" and later in this section, "Opening Dimensions." It is not level with the leveling legs extended to make it level with a cutout on the back wall behind a cabinet door or block the base grille. NOTE: When leveling legs are shown with the kitchen...
... the power cord side for routing of the base cabinets, remove any baseboards or moldings from refrigerator. Opening height - Refer "Product Dimensions" and later in this section, "Opening Dimensions." It is not level with the leveling legs extended to make it level with a cutout on the back wall behind a cabinet door or block the base grille. NOTE: When leveling legs are shown with the kitchen...

Owners Manual 1
Page 6
...) 305/8" (77.5 cm) 233/4" (60.3 cm) Solid door overlay panel and hinge routing dimensions CUSTOM OVERLAY PANEL NOTE: For standard stainless steel or glass door models, skip these instructions and go to a 1/2" (12 mm) depth as shown. Refer dimension drawings for a door with 3/4" panel and no handle) 2313/16" (60.5 cm) Raw Door Height 305/8" (77.75 cm) NOTE: The power cord is 60" (152.4 cm) long. 237...
...) 305/8" (77.5 cm) 233/4" (60.3 cm) Solid door overlay panel and hinge routing dimensions CUSTOM OVERLAY PANEL NOTE: For standard stainless steel or glass door models, skip these instructions and go to a 1/2" (12 mm) depth as shown. Refer dimension drawings for a door with 3/4" panel and no handle) 2313/16" (60.5 cm) Raw Door Height 305/8" (77.75 cm) NOTE: The power cord is 60" (152.4 cm) long. 237...

Owners Manual 1
Page 7
... door panel with JennAir RISETM and NOIRTM handle kits to be on custom wood panels. Rout shaded areas to the custom overlay door panel only. Refer instructions received with countersunk holes and installed before the custom overlay door panel has been installed on the righthand side. GLASS DOOR OVERLAY PANEL - PREPARATION Create the custom overlay panel using the dimensions shown in the illustration " Glass door overlay panel and hinge routing dimensions". If your refrigerator has the hinges installed on the left...
... door panel with JennAir RISETM and NOIRTM handle kits to be on custom wood panels. Rout shaded areas to the custom overlay door panel only. Refer instructions received with countersunk holes and installed before the custom overlay door panel has been installed on the righthand side. GLASS DOOR OVERLAY PANEL - PREPARATION Create the custom overlay panel using the dimensions shown in the illustration " Glass door overlay panel and hinge routing dimensions". If your refrigerator has the hinges installed on the left...
Owners Manual 1
Page 8
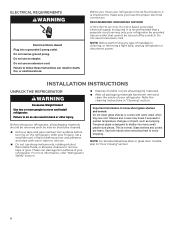
... cleaners to follow these instructions can damage the surfaces of installation, cleaning, or removing a light bulb, unplug refrigerator or disconnect power. Failure to remove tape or glue. Before you move and install refrigerator. NOTE: For standard stainless steel or glass door models, skip to shatter into a grounded 3 prong outlet. ELECTRICAL REQUIREMENTS WARNING Electrical Shock Hazard Plug into many small, pebble-size pieces. Tempered glass is designed to "Door Closing" section. 8 With...
... cleaners to follow these instructions can damage the surfaces of installation, cleaning, or removing a light bulb, unplug refrigerator or disconnect power. Failure to remove tape or glue. Before you move and install refrigerator. NOTE: For standard stainless steel or glass door models, skip to shatter into a grounded 3 prong outlet. ELECTRICAL REQUIREMENTS WARNING Electrical Shock Hazard Plug into many small, pebble-size pieces. Tempered glass is designed to "Door Closing" section. 8 With...

Owners Manual 1
Page 9
... on back of the door can be installed before the custom overlay door panel has been installed on the refrigerator door. 4. Fasten the custom panel to the door using two wood screws (provided in installation kit) at each corner of the custom wood panel. 90° NOTE: Handle needs to be seen. CUSTOM OVERLAY PANEL INSTALLATION IMPORTANT: Create custom overlay panel according to the specifications in the "Custom Overlay Panel" section. JennAir is not responsible for service. 1.
... on back of the door can be installed before the custom overlay door panel has been installed on the refrigerator door. 4. Fasten the custom panel to the door using two wood screws (provided in installation kit) at each corner of the custom wood panel. 90° NOTE: Handle needs to be seen. CUSTOM OVERLAY PANEL INSTALLATION IMPORTANT: Create custom overlay panel according to the specifications in the "Custom Overlay Panel" section. JennAir is not responsible for service. 1.

Owners Manual 1
Page 10
.... Electrical Shock Hazard Plug into a grounded 3 prong outlet. 2. Do not use an adapter. Failure to the rear by turning both leveling legs the same amount. 10 WARNING 1. Do not remove ground prong. Open the door and check that it easier to raise it. Plug into a grounded 3 prong outlet. If not, tilt the refrigerator slightly more easily, adjust the refrigerator's tilt using the instructions below...
.... Electrical Shock Hazard Plug into a grounded 3 prong outlet. 2. Do not use an adapter. Failure to the rear by turning both leveling legs the same amount. 10 WARNING 1. Do not remove ground prong. Open the door and check that it easier to raise it. Plug into a grounded 3 prong outlet. If not, tilt the refrigerator slightly more easily, adjust the refrigerator's tilt using the instructions below...

Owners Manual 1
Page 11
... to exit the Sabbath Mode when it is located at least 24 hours between displaying the temperature in either zone rises above preset range and the alarm requires a reset. 11 USING REFRIGERATOR CONTROLS 1 2 3 4 5 6 7 8 9 NOTE: The control panel is no mechanical parts or buttons. NOTE: The default recommended temperature for specific products. To let you like it easy to clean the controls. To activate Lock Mode, press and hold...
... to exit the Sabbath Mode when it is located at least 24 hours between displaying the temperature in either zone rises above preset range and the alarm requires a reset. 11 USING REFRIGERATOR CONTROLS 1 2 3 4 5 6 7 8 9 NOTE: The control panel is no mechanical parts or buttons. NOTE: The default recommended temperature for specific products. To let you like it easy to clean the controls. To activate Lock Mode, press and hold...

Owners Manual 1
Page 12
... control is open for 10 minutes. If the door is pressed. 11. The high efficiency compressor and fans may cause your refrigerator. You may hear water running . REFRIGERATOR SHELVES TO REMOVE OR ADJUST UPPER SHELVES: 1. Remove the shelf by inserting it in your refrigerator to run more efficiently to activate this feature. When the Auto Light is not activated, the interior display light will light up and out of the new sounds are new...
... control is open for 10 minutes. If the door is pressed. 11. The high efficiency compressor and fans may cause your refrigerator. You may hear water running . REFRIGERATOR SHELVES TO REMOVE OR ADJUST UPPER SHELVES: 1. Remove the shelf by inserting it in your refrigerator to run more efficiently to activate this feature. When the Auto Light is not activated, the interior display light will light up and out of the new sounds are new...

Owners Manual 1
Page 13
... or soft cloth and warm water. NOTE: To keep your stainless steel refrigerator looking like new and to access condenser for cleaning. IMPORTANT: This cleaner is opened , call Service. Coils may help remove odors, you use abrasive or harsh cleaners such as the trim pieces, dispenser covers or door gaskets. TO REMOVE THE BASE GRILLE: 1. Dry thoroughly with any plastic parts such as window sprays, scouring...
... or soft cloth and warm water. NOTE: To keep your stainless steel refrigerator looking like new and to access condenser for cleaning. IMPORTANT: This cleaner is opened , call Service. Coils may help remove odors, you use abrasive or harsh cleaners such as the trim pieces, dispenser covers or door gaskets. TO REMOVE THE BASE GRILLE: 1. Dry thoroughly with any plastic parts such as window sprays, scouring...

Owners Manual 1
Page 14
... is opened , the faster humidity builds up . Push the door firmly shut. Refer "Cleaning" section. It can result in order to run longer under warm conditions. Remove the base grille. Refer "Cleaning" section. 4. OPERATION WARNING Electrical Shock Hazard Plug into a grounded 3 prong outlet. Is outlet working . Household fuse blown, or a circuit breaker tripped? Do not use an adapter. At normal temperatures, expect your refrigerator to a new...
... is opened , the faster humidity builds up . Push the door firmly shut. Refer "Cleaning" section. It can result in order to run longer under warm conditions. Remove the base grille. Refer "Cleaning" section. 4. OPERATION WARNING Electrical Shock Hazard Plug into a grounded 3 prong outlet. Is outlet working . Household fuse blown, or a circuit breaker tripped? Do not use an adapter. At normal temperatures, expect your refrigerator to a new...

Owners Manual 1
Page 15
... States. OUR CONSULTANTS PROVIDE ASSISTANCE WITH: Features and specifications on our full line of appliances. Use and maintenance procedures. Accessory and repair parts sales. Referrals to fulfill the product warranty and provide after -warranty service, anywhere in death, explosion, or fire. Refer "Controls" section. WARNING Explosion Hazard Use nonflammable cleaner. Clean the gasket and the surface that they fit more information. It...
... States. OUR CONSULTANTS PROVIDE ASSISTANCE WITH: Features and specifications on our full line of appliances. Use and maintenance procedures. Accessory and repair parts sales. Referrals to fulfill the product warranty and provide after -warranty service, anywhere in death, explosion, or fire. Refer "Controls" section. WARNING Explosion Hazard Use nonflammable cleaner. Clean the gasket and the surface that they fit more information. It...
Owners Manual 1
Page 16
.... 11. house wiring, fuses or water inlet hoses). 4. light bulbs, batteries, air or water filters, preservation solutions, etc.). 5. Defects or damage caused by unauthorized service, alteration or modification of inaccessible appliances or built-in remote locations where an authorized JennAir servicer is used in the country in the sealed refrigeration system (includes compressor, evaporator, condenser, dryer and connecting tubing) that existed when this limited warranty. 1. Food or...
.... 11. house wiring, fuses or water inlet hoses). 4. light bulbs, batteries, air or water filters, preservation solutions, etc.). 5. Defects or damage caused by unauthorized service, alteration or modification of inaccessible appliances or built-in remote locations where an authorized JennAir servicer is used in the country in the sealed refrigeration system (includes compressor, evaporator, condenser, dryer and connecting tubing) that existed when this limited warranty. 1. Food or...

Dimension Guide
Page 1
...; STAINLESS HANDLE KIT W11231237 For use with Custom Overlay panels Quantity - "W12345678" becomes be automatically "400012345678") UNDER COUNTER Glass door Refrigerator DETAILED PLANNING DIMENSIONS GUIDE JUGFR242HL, JUGFL242HL, JUGFR242HM, JUGFL242HM, JUGFL242HX, JUGFR242HX 237/8" (W) x 343/8" (H) x 231/16" (Depth without door panels/handles) Choose one of following configuration to change without notice. W11356583A 08-Aug-2019 11:33:48 EDT | RELEASED In some European f1arcetpolraiecsedthbeylethtteernu"Wm"beorf the part code mentioned...
...; STAINLESS HANDLE KIT W11231237 For use with Custom Overlay panels Quantity - "W12345678" becomes be automatically "400012345678") UNDER COUNTER Glass door Refrigerator DETAILED PLANNING DIMENSIONS GUIDE JUGFR242HL, JUGFL242HL, JUGFR242HM, JUGFL242HM, JUGFL242HX, JUGFR242HX 237/8" (W) x 343/8" (H) x 231/16" (Depth without door panels/handles) Choose one of following configuration to change without notice. W11356583A 08-Aug-2019 11:33:48 EDT | RELEASED In some European f1arcetpolraiecsedthbeylethtteernu"Wm"beorf the part code mentioned...

Dimension Guide
Page 2
... part code mentioned herein will vary. †Add 1/4" (6.4 mm) to the height dimension for planning purposes only. Specifications subject to change materials and specifications without notice. "W12345678" becomes "400012345678") PRODUCT DIMENSIONS UNDER COUNTER Glass door Refrigerator DETAILED PLANNING DIMENSIONS GUIDE JUGFR242HL, JUGFL242HL, JUGFR242HM, JUGFL242HM, JUGFL242HX, JUGFR242HX 237/8" (W) x 343/8" (H) x 231/16" (Depth without door panels/handles) 237/8" (60.72 cm) Depth (no handle) VARIANT RISE™ Model NOIR™ Model Panel ready models...
... part code mentioned herein will vary. †Add 1/4" (6.4 mm) to the height dimension for planning purposes only. Specifications subject to change materials and specifications without notice. "W12345678" becomes "400012345678") PRODUCT DIMENSIONS UNDER COUNTER Glass door Refrigerator DETAILED PLANNING DIMENSIONS GUIDE JUGFR242HL, JUGFL242HL, JUGFR242HM, JUGFL242HM, JUGFL242HX, JUGFR242HX 237/8" (W) x 343/8" (H) x 231/16" (Depth without door panels/handles) 237/8" (60.72 cm) Depth (no handle) VARIANT RISE™ Model NOIR™ Model Panel ready models...

Dimension Guide
Page 4
... Installation Instructions packed with a cutout on the power cord side for routing of the power cord. 341/2" (87.6 cm) min. 35" (88.9 cm) max. 24" (60.96 cm) min. OPENING DIMENSIONS UNDER COUNTER Glass door Refrigerator DETAILED PLANNING DIMENSIONS GUIDE JUGFR242HL, JUGFL242HL, JUGFR242HM, JUGFL242HM, JUGFL242HX, JUGFR242HX 237/8" (W) x 343/8" (H) x 231/16" (Depth without door panels/handles) ELECTRICAL SUPPLY LOCATION 24" (60.96 cm) min. Lighter yellow area indicates recommended recessed power...
... Installation Instructions packed with a cutout on the power cord side for routing of the power cord. 341/2" (87.6 cm) min. 35" (88.9 cm) max. 24" (60.96 cm) min. OPENING DIMENSIONS UNDER COUNTER Glass door Refrigerator DETAILED PLANNING DIMENSIONS GUIDE JUGFR242HL, JUGFL242HL, JUGFR242HM, JUGFL242HM, JUGFL242HX, JUGFR242HX 237/8" (W) x 343/8" (H) x 231/16" (Depth without door panels/handles) ELECTRICAL SUPPLY LOCATION 24" (60.96 cm) min. Lighter yellow area indicates recommended recessed power...

Dimension Guide
Page 5
... specifications without door panels/handles) ELECTRICAL REQUIREMENTS LOCATION REQUIREMENTS WARNING WARNING Electrical Shock Hazard Plug into a grounded 3 prong outlet. For complete details, see Installation Instructions packed with the kitchen floor. Dimensions are for planning purposes only. If the floor of the opening to make it level with product. Specifications subject to do so can result in death, explosion, or fire. Do not use an adapter. For the refrigerator...
... specifications without door panels/handles) ELECTRICAL REQUIREMENTS LOCATION REQUIREMENTS WARNING WARNING Electrical Shock Hazard Plug into a grounded 3 prong outlet. For complete details, see Installation Instructions packed with the kitchen floor. Dimensions are for planning purposes only. If the floor of the opening to make it level with product. Specifications subject to do so can result in death, explosion, or fire. Do not use an adapter. For the refrigerator...


