
Installation Manual
Page 1
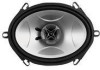
PowerPlus Speakers Installation Manual PowerPlus 525 PowerPlus 652 PowerPlus 652C PowerPlus 682 PowerPlus 693
PowerPlus Speakers Installation Manual PowerPlus 525 PowerPlus 652 PowerPlus 652C PowerPlus 682 PowerPlus 693

Installation Manual
Page 3
...contained in this quality Jensen product! Polypropylene cone for purchasing this instruction manual. Designer loudspeaker covers ! .110 / .205 terminal strip 1 Your new PowerPlus speaker system is the ultimate complement to your car radio or an additional car stereo amplifier, which... and neodymium magnets, offers unparalleled audio reproduction. Thank you for less distortion and weatherability ! The speaker system should be connected to expect from Jensen. The PowerPlus series, featuring polypropylene cones, black foam surrounds, tweeters with acoustic equalizer and neodymium magnet...
...contained in this quality Jensen product! Polypropylene cone for purchasing this instruction manual. Designer loudspeaker covers ! .110 / .205 terminal strip 1 Your new PowerPlus speaker system is the ultimate complement to your car radio or an additional car stereo amplifier, which... and neodymium magnets, offers unparalleled audio reproduction. Thank you for less distortion and weatherability ! The speaker system should be connected to expect from Jensen. The PowerPlus series, featuring polypropylene cones, black foam surrounds, tweeters with acoustic equalizer and neodymium magnet...

Installation Manual
Page 4
...make sure all safety regulations in this information is sufficient distance from negative ( - ) battery terminal. We at Jensen have worked very hard to provide information for stock speakers, some of the following is current. Be sure to the Installation Section of window mechanics, door handles, and window...and date of tools needed for possible future use. If using provided grilles, be located by using the Table of these Jensen full range speakers are most often used as direct replacements for the owner, salesperson and installer. Wire cutters Since some vehicles may run ...
...make sure all safety regulations in this information is sufficient distance from negative ( - ) battery terminal. We at Jensen have worked very hard to provide information for stock speakers, some of the following is current. Be sure to the Installation Section of window mechanics, door handles, and window...and date of tools needed for possible future use. If using provided grilles, be located by using the Table of these Jensen full range speakers are most often used as direct replacements for the owner, salesperson and installer. Wire cutters Since some vehicles may run ...

Installation Manual
Page 5
... when connecting the wires (the striped wire is the negative lead). Step 5: Mount speaker (using factory grilles, attach grille. Step 2: Position new speaker and align with existing mounting holes. INSTALLATION Basic Installation Steps Step 1: Remove existing speaker. DOOR PANEL INSTALLATION Grille Speaker Door Panel FIGURE 2 - Step 6: Reconnect negative battery terminal. REAR DECK INSTALLATION 3 Step...
... when connecting the wires (the striped wire is the negative lead). Step 5: Mount speaker (using factory grilles, attach grille. Step 2: Position new speaker and align with existing mounting holes. INSTALLATION Basic Installation Steps Step 1: Remove existing speaker. DOOR PANEL INSTALLATION Grille Speaker Door Panel FIGURE 2 - Step 6: Reconnect negative battery terminal. REAR DECK INSTALLATION 3 Step...

Installation Manual
Page 6
...of mounting applications. SURFACE MOUNTING FIGURE 6 - If the tweeter is positioned and aimed towards the listener's ears. FIGURE 4 - WIRING THE SPEAKER/TWEETER FIGURE 5 - During installation, make sure the tweeter is deactivated, please turn down , the tweeter will re-activate and become ready ...for operation again. PowerPlus Speakers NOTE INSTALLATION Installing the Tweeter for the 652C The separate tweeters included with the 652C have a variety of overload and reduces ...
...of mounting applications. SURFACE MOUNTING FIGURE 6 - If the tweeter is positioned and aimed towards the listener's ears. FIGURE 4 - WIRING THE SPEAKER/TWEETER FIGURE 5 - During installation, make sure the tweeter is deactivated, please turn down , the tweeter will re-activate and become ready ...for operation again. PowerPlus Speakers NOTE INSTALLATION Installing the Tweeter for the 652C The separate tweeters included with the 652C have a variety of overload and reduces ...

Installation Manual
Page 8
... to the dealer from the date of warranty coverage. We will pay any plexiglass included with the product; Limitation of car static or other electrical interferences; NO PERSON OR REPRESENTATIVE IS AUTHORIZED TO ASSUME FOR THE COMPANY ANY OTHER LIABILITY IN CONNECTION...warranty period so long as proof of date of the product. The product should be in this product. PowerPlus Speakers WARRANTY Limited 1 Year Warranty - Please telephone Jensen Customer Service at our option, of any defective product and shall not include special, indirect, incidental or consequential ...
... to the dealer from the date of warranty coverage. We will pay any plexiglass included with the product; Limitation of car static or other electrical interferences; NO PERSON OR REPRESENTATIVE IS AUTHORIZED TO ASSUME FOR THE COMPANY ANY OTHER LIABILITY IN CONNECTION...warranty period so long as proof of date of the product. The product should be in this product. PowerPlus Speakers WARRANTY Limited 1 Year Warranty - Please telephone Jensen Customer Service at our option, of any defective product and shall not include special, indirect, incidental or consequential ...