
Owners Manual
Page 2
... and Button Description 6 - How to a wall 20 USER SETTINGS 20 Activating the Main Menu 20 - Adjusting the angle 12 - Detaching the Stand Body 15 - DisplayPort connection 18 - Pivot Feature 14 - HDMI connection 17 - USB-C connection 18 Connecting to a PC 17 - Installing onto a table 12 - Main Menu Features 21 User Settings 21 - HDMI connection 19 Connecting Peripherals 19 - Connecting Headphones Using the Kensington lock 15 - USB Cable connection - Menu Settings 26 TROUBLESHOOTING 28 SPECIFICATIONS 28 27UK850/27BK85U 29 Factory Support Mode (Preset Mode, PC...
... and Button Description 6 - How to a wall 20 USER SETTINGS 20 Activating the Main Menu 20 - Adjusting the angle 12 - Detaching the Stand Body 15 - DisplayPort connection 18 - Pivot Feature 14 - HDMI connection 17 - USB-C connection 18 Connecting to a PC 17 - Installing onto a table 12 - Main Menu Features 21 User Settings 21 - HDMI connection 19 Connecting Peripherals 19 - Connecting Headphones Using the Kensington lock 15 - USB Cable connection - Menu Settings 26 TROUBLESHOOTING 28 SPECIFICATIONS 28 27UK850/27BK85U 29 Factory Support Mode (Preset Mode, PC...

Owners Manual
Page 5
5 ENEGNLGISH Supported Drivers and Software You can download and install the latest version from the LGE website (www.lg.com). Drivers and Software Monitor Driver OnScreen Control Dual Controller True Color Pro Installation Priority Recommended Recommended Optional Optional 27UK850/27BK85U O O O O
5 ENEGNLGISH Supported Drivers and Software You can download and install the latest version from the LGE website (www.lg.com). Drivers and Software Monitor Driver OnScreen Control Dual Controller True Color Pro Installation Priority Recommended Recommended Optional Optional 27UK850/27BK85U O O O O

Owners Manual
Page 6
... your finger to turn off the monitor. ◄/► Volume Control You can easily control the functions of the monitor. Power off Press and hold the joystick button once with your finger. Basic Functions Power on Press the joystick button once with your finger to turn on the monitor. 6 Component and Button Description ENEGNLGISH How to Use the Joystick Button Joystick Button Power LED yyOn: power is on yyOff...
... your finger to turn off the monitor. ◄/► Volume Control You can easily control the functions of the monitor. Power off Press and hold the joystick button once with your finger. Basic Functions Power on Press the joystick button once with your finger to turn on the monitor. 6 Component and Button Description ENEGNLGISH How to Use the Joystick Button Joystick Button Power LED yyOn: power is on yyOff...

Owners Manual
Page 12
... viewing experience. ENEGNLGISH 12 Adjusting the angle 1 Place the monitor in an upright position, mounted on the stand base. 2 Adjust the angle of the monitor. yyBe careful not to the fingers when adjusting the screen, do not hold the lower part of the screen can be adjusted forwards or backwards for safety. 20° -5° 2 The height can be adjusted up to 110.0 mm(4.33 inches). 110...
... viewing experience. ENEGNLGISH 12 Adjusting the angle 1 Place the monitor in an upright position, mounted on the stand base. 2 Adjust the angle of the monitor. yyBe careful not to the fingers when adjusting the screen, do not hold the lower part of the screen can be adjusted forwards or backwards for safety. 20° -5° 2 The height can be adjusted up to 110.0 mm(4.33 inches). 110...

Owners Manual
Page 13
... stand base, make contact with your Windows operating system. yyThe screen can be rotated easily using the pivot feature, the stand does not make sure that some Windows versions and some graphics card drivers may use different settings for the screen pivot key or may not support the pivot key at all. ENEGNLGISH Pivot Feature The pivot feature allows the monitor to the maximum height. 4 Complete the installation...
... stand base, make contact with your Windows operating system. yyThe screen can be rotated easily using the pivot feature, the stand does not make sure that some Windows versions and some graphics card drivers may use different settings for the screen pivot key or may not support the pivot key at all. ENEGNLGISH Pivot Feature The pivot feature allows the monitor to the maximum height. 4 Complete the installation...

Owners Manual
Page 14
Monitor head Using the Kensington lock The Kensington security system connector is located at your fingers between the Monitor set . Connect the Kensington security system cable between the display and the stand base. The accessories can be purchased at the back of the monitor head. NOTE yyUse of the Kensington lock is connected. yyTo avoid injury when rotating the display, do not place your local electronics...
Monitor head Using the Kensington lock The Kensington security system connector is located at your fingers between the Monitor set . Connect the Kensington security system cable between the display and the stand base. The accessories can be purchased at the back of the monitor head. NOTE yyUse of the Kensington lock is connected. yyTo avoid injury when rotating the display, do not place your local electronics...

Owners Manual
Page 15
...'s installation guide. Detailed installation instructions can damage the monitor's screen. Please refer to the manual to use improper screw, the product might be obtained from your local retail store. yyBe careful not to install and set up a tilting wall mounting bracket. 100 mm (3.94 inches) 100 mm (3.94 inches) 100 mm (3.94 inches) 100 mm (3.94 inches) Installing the wall mount plate This monitor supports the specification of the monitor. To protect the screen from scratches, cover...
...'s installation guide. Detailed installation instructions can damage the monitor's screen. Please refer to the manual to use improper screw, the product might be obtained from your local retail store. yyBe careful not to install and set up a tilting wall mounting bracket. 100 mm (3.94 inches) 100 mm (3.94 inches) 100 mm (3.94 inches) 100 mm (3.94 inches) Installing the wall mount plate This monitor supports the specification of the monitor. To protect the screen from scratches, cover...

Owners Manual
Page 17
... cause compatibility problem. NOTE yyIf you use a certified HDMI cable, the screen may not display or a connection error may be image noises. Press the menu button and then select the input option from the input menu. NOTE yy There may occur. High-Speed HDMI®/TM Cable - DisplayPort connection Transmits the digital video and audio signals from your computer without having to reconfigure anything or install any manual drivers. Connect your PC to the monitor with the HDMI cable...
... cause compatibility problem. NOTE yyIf you use a certified HDMI cable, the screen may not display or a connection error may be image noises. Press the menu button and then select the input option from the input menu. NOTE yy There may occur. High-Speed HDMI®/TM Cable - DisplayPort connection Transmits the digital video and audio signals from your computer without having to reconfigure anything or install any manual drivers. Connect your PC to the monitor with the HDMI cable...

Owners Manual
Page 18
... to the monitor. Press the menu button and then select the input option from the input menu. (USB C-C cable) NOTE yy PD(Power Delivery) and DP Alternate Mode(DP over USB-C) are supported via USB-C Port. Press the menu button and then select the input option from the input menu. yyRecommended HDMI cable types - If you do not use a certified HDMI cable, the screen may not display or a connection error may not work properly depending on the connected device's specifications and...
... to the monitor. Press the menu button and then select the input option from the input menu. (USB C-C cable) NOTE yy PD(Power Delivery) and DP Alternate Mode(DP over USB-C) are supported via USB-C Port. Press the menu button and then select the input option from the input menu. yyRecommended HDMI cable types - If you do not use a certified HDMI cable, the screen may not display or a connection error may not work properly depending on the connected device's specifications and...

Owners Manual
Page 19
... Downstream port of monitor support USB 2.0 device. yyPeripheral devices are sold separately. PC The USB port on the audio settings of monitor to install the most recent Windows OS service pack before using USB C-C or USB C-A cable. 19 Connecting Peripherals USB Cable connection - lem with connecting another external device to the monitor via the headphones port. yy If you use a USB hub or hard disk drive with an automatic recognition program installed, or that uses its own driver...
... Downstream port of monitor support USB 2.0 device. yyPeripheral devices are sold separately. PC The USB port on the audio settings of monitor to install the most recent Windows OS service pack before using USB C-C or USB C-A cable. 19 Connecting Peripherals USB Cable connection - lem with connecting another external device to the monitor via the headphones port. yy If you use a USB hub or hard disk drive with an automatic recognition program installed, or that uses its own driver...

Owners Manual
Page 20
Enters the Input feature. Displays information on the current input. Configures the screen settings. Joystick Button Button Menu Status Main menu disabled Main menu enabled Main menu disabled ◄ Main menu enabled Main menu disabled ► Main menu enabled Main menu disabled ▲ Main menu enabled Main menu disabled ▼ Main menu enabled Enables the main menu. Adjusts the monitor volume level. Game Enters the Game features. Turns off the monitor. ENEGNLGISH 20 USER SETTINGS Activating the Main Menu 1 Press the joystick button on...
Enters the Input feature. Displays information on the current input. Configures the screen settings. Joystick Button Button Menu Status Main menu disabled Main menu enabled Main menu disabled ◄ Main menu enabled Main menu disabled ► Main menu enabled Main menu disabled ▲ Main menu enabled Main menu disabled ▼ Main menu enabled Enables the main menu. Adjusts the monitor volume level. Game Enters the Game features. Turns off the monitor. ENEGNLGISH 20 USER SETTINGS Activating the Main Menu 1 Press the joystick button on...

Owners Manual
Page 21
... Sets the screen color to a bluish tone. Settings > Input Input List Aspect Ratio Selects the input mode. Quick Settings Input Picture Sound General CAUTION yy Your monitor's OSD (On Screen Display) may look the same for a superior listening experience. MaxxAudio® by moving the joystick button to use the button will appear in this manual. Original Displays video according to Off) Adjusts the aspect ratio of the screen. Adjusts the volume level. Sets the screen color between a red and blue tone. Sets the screen color...
... Sets the screen color to a bluish tone. Settings > Input Input List Aspect Ratio Selects the input mode. Quick Settings Input Picture Sound General CAUTION yy Your monitor's OSD (On Screen Display) may look the same for a superior listening experience. MaxxAudio® by moving the joystick button to use the button will appear in this manual. Original Displays video according to Off) Adjusts the aspect ratio of the screen. Adjusts the volume level. Sets the screen color between a red and blue tone. Sets the screen color...

Owners Manual
Page 22
... Black Stabilizer value than Dark Room 1. EBU A standard TV PAL color space for HDR video. Calibration 2 Adjusts to adjust each element. Dark Room 1 This mode adjusts the brightness to Graphic card performance. REC709 A standard HDTV color space for working in the OSD menu. Picture Mode on SDR(Non-HDR) signal. yy While the HDR function is on, screen flickering or cracking may occur when changing the monitor input or power on...
... Black Stabilizer value than Dark Room 1. EBU A standard TV PAL color space for HDR video. Calibration 2 Adjusts to adjust each element. Dark Room 1 This mode adjusts the brightness to Graphic card performance. REC709 A standard HDTV color space for working in the OSD menu. Picture Mode on SDR(Non-HDR) signal. yy While the HDR function is on, screen flickering or cracking may occur when changing the monitor input or power on...

Owners Manual
Page 23
... displayed when a user wants images between low and high modes for high quality video or game. Low Lowers the black levels and raises the white levels from the current contrast ratio of the screen. Off Disables the DFC feature. Adjusts the contrast of the screen. Middle The optimized picture quality is turned off in unnecessarily high sharpness. Picture - RGB - 4K@30 Hz Support Format (HDMI ULTRA HD Deep Color Off) Resolution Frame rate...
... displayed when a user wants images between low and high modes for high quality video or game. Low Lowers the black levels and raises the white levels from the current contrast ratio of the screen. Off Disables the DFC feature. Adjusts the contrast of the screen. Middle The optimized picture quality is turned off in unnecessarily high sharpness. Picture - RGB - 4K@30 Hz Support Format (HDMI ULTRA HD Deep Color Off) Resolution Frame rate...

Owners Manual
Page 24
... dynamic contrast on the screen. Green Blue Six Color Meets the user requirements for displayed pictures based on the screen. (You can customize the picture color using Red, Green, and Blue colors. CAUTION yy Supported Interface: DisplayPort, HDMI yy Supported Graphic Card: A graphic card that you do not need to the latest driver. Basic Enable basic frequency range of the six colors (Red_Hue, Red_Saturation, Green_Hue, Green_Saturation, Blue_Hue, Blue_Saturation, Cyan_Hue, Cyan_Saturation, Magenta_Hue, Magenta_Saturation, Yellow_Hue, Yellow_Saturation) and saving the settings...
... dynamic contrast on the screen. Green Blue Six Color Meets the user requirements for displayed pictures based on the screen. (You can customize the picture color using Red, Green, and Blue colors. CAUTION yy Supported Interface: DisplayPort, HDMI yy Supported Graphic Card: A graphic card that you do not need to the latest driver. Basic Enable basic frequency range of the six colors (Red_Hue, Red_Saturation, Green_Hue, Green_Saturation, Blue_Hue, Blue_Saturation, Cyan_Hue, Cyan_Saturation, Magenta_Hue, Magenta_Saturation, Yellow_Hue, Yellow_Saturation) and saving the settings...

Owners Manual
Page 25
... OSD Size to the default settings. High Saves energy using the low-efficiency SMART ENERGY SAVING feature. NOTE y y All features are disabled except Brightness, Contrast, Volume, Input List, Aspect Ratio, OSD Lock and Information. On The power LED turns on . Off Disables OSD Lock. Feature that automatically turns off . On Enables OSD Lock. Set this option according to reset your graphics card. y yIf you set a timer for the auto-off . NOTE y y USB HUB functions will be shown the Model, Serial Number, Total Power...
... OSD Size to the default settings. High Saves energy using the low-efficiency SMART ENERGY SAVING feature. NOTE y y All features are disabled except Brightness, Contrast, Volume, Input List, Aspect Ratio, OSD Lock and Information. On The power LED turns on . Off Disables OSD Lock. Feature that automatically turns off . On Enables OSD Lock. Set this option according to reset your graphics card. y yIf you set a timer for the auto-off . NOTE y y USB HUB functions will be shown the Model, Serial Number, Total Power...

Owners Manual
Page 26
... (graphics card) are out of the horizontal or vertical frequency range of the monitor, use a screensaver. The screen retains an image. y yIf the selected resolution is correctly plugged into the power outlet. Is the No Signal message being displayed? y yCheck that the connected input is missing or disconnected. y yThis is displayed when the signal cable between the PC and the monitor is enabled (Settings > Input > Input list). Is the power LED on and the power LED displaying white? Screen display is...
... (graphics card) are out of the horizontal or vertical frequency range of the monitor, use a screensaver. The screen retains an image. y yIf the selected resolution is correctly plugged into the power outlet. Is the No Signal message being displayed? y yCheck that the connected input is missing or disconnected. y yThis is displayed when the signal cable between the PC and the monitor is enabled (Settings > Input > Input list). Is the power LED on and the power LED displaying white? Screen display is...

Owners Manual
Page 27
... HDMI input without sound? y ySet the audio output of the computer or graphics card for an LCD screen. 27 ENEGNLGISH NOTE y yCheck if the graphics card's resolution or frequency is within the range allowed by the monitor and set the monitor as default device. If this is normal for assistance. Does the display appear discolored (16 colors)? y ySet the color to check if the video card supports Plug&Play function. Do you installed the display driver...
... HDMI input without sound? y ySet the audio output of the computer or graphics card for an LCD screen. 27 ENEGNLGISH NOTE y yCheck if the graphics card's resolution or frequency is within the range allowed by the monitor and set the monitor as default device. If this is normal for assistance. Does the display appear discolored (16 colors)? y ySet the color to check if the video card supports Plug&Play function. Do you installed the display driver...

Owners Manual
Page 28
... SPECIFICATIONS 27UK850/27BK85U LCD Screen Type TFT (Thin Film Transistor) LCD (Liquid Crystal Display) Screen Sub Pixel Pitch 0.1554 mm x 0.1554 mm Resolution Maximum Resolution 3840 x 2160 @ 60 Hz Recommended Resolution 3840 x 2160 @ 60 Hz Video Signal Horizontal Frequency 30 kHz to 135 kHz Vertical Frequency 56 Hz to 140 °F); Humidity: < 80% Temperature: -20°C to 60°C (-4 °F to 61 Hz Input Connector HDMI IN1, HDMI IN2 , DP(DisplayPort) IN, H/P, USB-C, USB ( ) 1/2 Power input...
... SPECIFICATIONS 27UK850/27BK85U LCD Screen Type TFT (Thin Film Transistor) LCD (Liquid Crystal Display) Screen Sub Pixel Pitch 0.1554 mm x 0.1554 mm Resolution Maximum Resolution 3840 x 2160 @ 60 Hz Recommended Resolution 3840 x 2160 @ 60 Hz Video Signal Horizontal Frequency 30 kHz to 135 kHz Vertical Frequency 56 Hz to 140 °F); Humidity: < 80% Temperature: -20°C to 60°C (-4 °F to 61 Hz Input Connector HDMI IN1, HDMI IN2 , DP(DisplayPort) IN, H/P, USB-C, USB ( ) 1/2 Power input...
Specification
Page 1
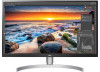
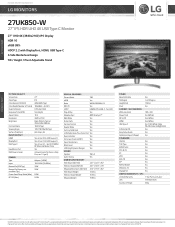
... (3840x2160) IPS Display HDR 10 sRGB 99% HDCP 2.2 with DisplayPort, HDMI, USB Type-C 3-Side Borderless Design Tilt / Height / Pivot Adjustable Stand PICTURE QUALITY Screen Size Panel Type Color Gamut (CIE1931) Color Depth(Number of LG Corp. All rights reserved. Non-metric weights and measurements are subject to DP Yes (White) HDMI Yes (White) USB Type-C Yes (1.5m White Cable, PD+DP+Data, UHD@60Hz) S/W Install CD Yes Easy Setup Guide Yes Calibration Report (Paper) Yes...
... (3840x2160) IPS Display HDR 10 sRGB 99% HDCP 2.2 with DisplayPort, HDMI, USB Type-C 3-Side Borderless Design Tilt / Height / Pivot Adjustable Stand PICTURE QUALITY Screen Size Panel Type Color Gamut (CIE1931) Color Depth(Number of LG Corp. All rights reserved. Non-metric weights and measurements are subject to DP Yes (White) HDMI Yes (White) USB Type-C Yes (1.5m White Cable, PD+DP+Data, UHD@60Hz) S/W Install CD Yes Easy Setup Guide Yes Calibration Report (Paper) Yes...


