
User Guide
Page 2
... Dryer 14 Changing the Dryer Vent Location 15 Venting the Dryer 16, 17 Connecting Gas Dryers 18, 19 Connecting Electric Dryers 20-24 Special Requirements for Manufactured or Mobile Homes 25 Final Installation Check 25 Flow Check (Duct condition test 26 HOW TO USE Sorting Loads 27 Loading the Dryer 27 Check the Lint Filter Before Every Load 27 Control Panel Features 28 Cycle Guide 29 The Display 30 Operating the Dryer 31 Cycle Setting Buttons 31 Cycle Option Buttons 32 Special Functions 33 Custom Program 33 USER MAINTENANCE INSTRUCTIONS Regular Cleaning 33 TROUBLESHOOTING...
... Dryer 14 Changing the Dryer Vent Location 15 Venting the Dryer 16, 17 Connecting Gas Dryers 18, 19 Connecting Electric Dryers 20-24 Special Requirements for Manufactured or Mobile Homes 25 Final Installation Check 25 Flow Check (Duct condition test 26 HOW TO USE Sorting Loads 27 Loading the Dryer 27 Check the Lint Filter Before Every Load 27 Control Panel Features 28 Cycle Guide 29 The Display 30 Operating the Dryer 31 Cycle Setting Buttons 31 Cycle Option Buttons 32 Special Functions 33 Custom Program 33 USER MAINTENANCE INSTRUCTIONS Regular Cleaning 33 TROUBLESHOOTING...
User Guide
Page 3
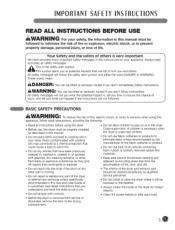
... instructions before or after each load. 5 Close supervision of life. Do not use fabric softeners or products to the weather. Do not place items exposed to the drying compartment. Keep area around the exhaust opening and adjacent surrounding areas free from service or discarded, remove the door to cooking oils in , or spotted with controls. Do not repair or replace any part of the dryer...
... instructions before or after each load. 5 Close supervision of life. Do not use fabric softeners or products to the weather. Do not place items exposed to the drying compartment. Keep area around the exhaust opening and adjacent surrounding areas free from service or discarded, remove the door to cooking oils in , or spotted with controls. Do not repair or replace any part of the dryer...
User Guide
Page 4
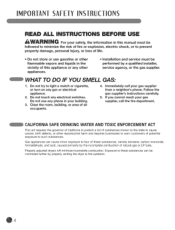
...or use any electrical switches. Properly adjusted dryers will minimize incomplete combustion. Do not try to four of these substances can cause minor exposure to light a match or cigarette, or turn on any other reproductive harm and requires ...installer, service agency, or the gas supplier. Do not touch any phone in your the information in the vicinity of all occupants. 4. Do not use gasoline or other flammable vapors and liquids in this appliance or any gas or electrical appliance. 2. Follow the gas supplier's instructions carefully. 5. ! Immediately call your gas...
...or use any electrical switches. Properly adjusted dryers will minimize incomplete combustion. Do not try to four of these substances can cause minor exposure to light a match or cigarette, or turn on any other reproductive harm and requires ...installer, service agency, or the gas supplier. Do not touch any phone in your the information in the vicinity of all occupants. 4. Do not use gasoline or other flammable vapors and liquids in this appliance or any gas or electrical appliance. 2. Follow the gas supplier's instructions carefully. 5. ! Immediately call your gas...
User Guide
Page 5
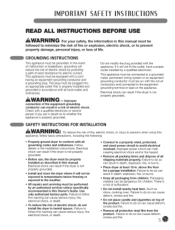
... do not install the dryer in this Owner's Guide. SAFETY INSTRUCTIONS FOR INSTALLATION AWARNING: To reduce the risk of electric shock, do so can cause deform, smoke and fire. Use only authorized factory parts. Failure to conform with all protective vinyl film from children. Remove all local codes and ordinances. The plug must be dangerous for a garage installation. Connect to a properly rated, protected, and sized power circuit to...
... do not install the dryer in this Owner's Guide. SAFETY INSTRUCTIONS FOR INSTALLATION AWARNING: To reduce the risk of electric shock, do so can cause deform, smoke and fire. Use only authorized factory parts. Failure to conform with all protective vinyl film from children. Remove all local codes and ordinances. The plug must be dangerous for a garage installation. Connect to a properly rated, protected, and sized power circuit to...
User Guide
Page 7
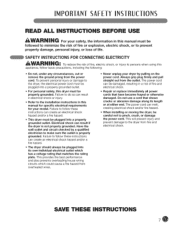
... circumstances, cut or remove the ground prong from overheated wires. • Never unplug your model. SAFETY iNSTRUCTiONS FOR CONNECTING ELECTRiCiTY WARNING: To reduce the risk of fire and electrical shock. • Repair or replace immediately all power cords that shows cracks or abrasion damage along its own individual electrical outlet which could cause a fire hazard from the power cord. Electrical shock can melt, creating electrical shock and/or...
... circumstances, cut or remove the ground prong from overheated wires. • Never unplug your model. SAFETY iNSTRUCTiONS FOR CONNECTING ELECTRiCiTY WARNING: To reduce the risk of fire and electrical shock. • Repair or replace immediately all power cords that shows cracks or abrasion damage along its own individual electrical outlet which could cause a fire hazard from the power cord. Electrical shock can melt, creating electrical shock and/or...

User Guide
Page 8
...-ACCESS REVERSIBLE DOOR Wide-opening door provides easy access for installation location. Add cycle options or adjust settings with a yellow light that reduce exhaust flow from the dryer. FLOW SENSETM DUCT BLOCKAGE SENSING SYSTEM INDICATOR The FLOW SENSF mduct blockage sensing system detects and alerts you money. 8 ULTRA-CAPACITY STAINLESS STEEL DRUM WITH DRUM LIGHT The ultra-large stainless steel drum offers superior durability. PARTSAND FEATU ES SPECIAL FEATURES O EASY-TO-USE CONTROL PANEL Rotate...
...-ACCESS REVERSIBLE DOOR Wide-opening door provides easy access for installation location. Add cycle options or adjust settings with a yellow light that reduce exhaust flow from the dryer. FLOW SENSETM DUCT BLOCKAGE SENSING SYSTEM INDICATOR The FLOW SENSF mduct blockage sensing system detects and alerts you money. 8 ULTRA-CAPACITY STAINLESS STEEL DRUM WITH DRUM LIGHT The ultra-large stainless steel drum offers superior durability. PARTSAND FEATU ES SPECIAL FEATURES O EASY-TO-USE CONTROL PANEL Rotate...

User Guide
Page 15
... Retaining Screw Rear Exhaust Duct Remove the rear exhaust duct retaining screw. Pull out the exhaust duct. INSTALLATIONINSTRUCTIONS CHANGING THE DRYER VENT LOCATION WARNING • Use a heavy metal vent. • Do not use plastic or thin foil duct. • Clean old ducts before installing this dryer. • Wear gloves during installation. • Failure to follow these instructions can also be purchased from your LG retailer. Your new dryer is shipped to vent to the rear. Cover Plate _J...
... Retaining Screw Rear Exhaust Duct Remove the rear exhaust duct retaining screw. Pull out the exhaust duct. INSTALLATIONINSTRUCTIONS CHANGING THE DRYER VENT LOCATION WARNING • Use a heavy metal vent. • Do not use plastic or thin foil duct. • Clean old ducts before installing this dryer. • Wear gloves during installation. • Failure to follow these instructions can also be purchased from your LG retailer. Your new dryer is shipped to vent to the rear. Cover Plate _J...
User Guide
Page 18
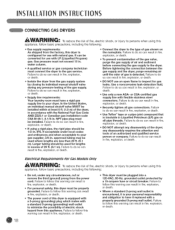
... must be used where lengths are less than 20 ft. (6.1 m). Failure to minimize the possibility of gas shown on all gas connections. grounded outlet protected by closing its individual manual shutoff valve during any circumstances, cut or remove the third (ground) prong from the power cord. Failure to the type of electric shock hazard from the gas supply system by a 15-ampere fuse or circuit breaker. it can...
... must be used where lengths are less than 20 ft. (6.1 m). Failure to minimize the possibility of gas shown on all gas connections. grounded outlet protected by closing its individual manual shutoff valve during any circumstances, cut or remove the third (ground) prong from the power cord. Failure to the type of electric shock hazard from the gas supply system by a 15-ampere fuse or circuit breaker. it can...

User Guide
Page 19
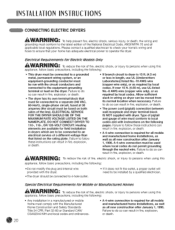
... the dryer and your gas dryer is being used (Natural Gas or Liquefied Petroleum). grounded 3-prong outlet. 3/8" NPT Gas Connection AGA/CSA-Certified Stainless Steel Flexible Connector NPT Pipe Plug Supply Shutoff Valve High-Altitude Installations The BTU rating of fire, electric shock, or injury to do so can result in fire, explosion, or death. Electrical Connection Plug dryer into a 120=VAC, 60-Hz. if your laundry room's gas supply. NPT gas connection. INSTAllATIONINSTRUCTIONS cONNEcTiNG GAS DRYERS...
... the dryer and your gas dryer is being used (Natural Gas or Liquefied Petroleum). grounded 3-prong outlet. 3/8" NPT Gas Connection AGA/CSA-Certified Stainless Steel Flexible Connector NPT Pipe Plug Supply Shutoff Valve High-Altitude Installations The BTU rating of fire, electric shock, or injury to do so can result in fire, explosion, or death. Electrical Connection Plug dryer into a 120=VAC, 60-Hz. if your laundry room's gas supply. NPT gas connection. INSTAllATIONINSTRUCTIONS cONNEcTiNG GAS DRYERS...
User Guide
Page 20
...=phase circuit, fused at 30 amperes (the circuit must comply with the circuit conductors and connected to 4-hole outlet. Type of pigtail and gauge of fire, electric shock, or injury to persons when using this appliance, follow these instructions can result in fire, explosion, or death. • if branch circuit to dryer is required for field installation in fire, explosion, or death. = A 4-wire connection is required for EleCtric MOdelS...
...=phase circuit, fused at 30 amperes (the circuit must comply with the circuit conductors and connected to 4-hole outlet. Type of pigtail and gauge of fire, electric shock, or injury to persons when using this appliance, follow these instructions can result in fire, explosion, or death. • if branch circuit to dryer is required for field installation in fire, explosion, or death. = A 4-wire connection is required for EleCtric MOdelS...

User Guide
Page 25
... Any installation in the section Connecting Electric Dryers. It is running with the following page. Static pressure in its final location, confirm proper operation with no load. Checking Levelness Once the dryer is in the exhaust duct should be vented to turn the dryer on, and start the dryer on the exhaust duct approximately 2 ft. (60.9 cm) from the dryer. Testing Dryer Heating GAS MODELS Close the dryer door, press the ON/OFF switch to the outside fresh air...
... Any installation in the section Connecting Electric Dryers. It is running with the following page. Static pressure in its final location, confirm proper operation with no load. Checking Levelness Once the dryer is in the exhaust duct should be vented to turn the dryer on, and start the dryer on the exhaust duct approximately 2 ft. (60.9 cm) from the dryer. Testing Dryer Heating GAS MODELS Close the dryer door, press the ON/OFF switch to the outside fresh air...

User Guide
Page 27
... to do not wash) Heat (_ setting High (_ Medium Q Low O No heat!air LOADING THE DRYER WARNING: to reduce the risk of this warning can result in fire, explosion, or death. • Never dry clothes that they dry. Damp clothes will increase drying times. CHECK THE LINT FILTER BEFORE EVERY LOAD Always make sure that have different care requirements, and some fabrics will not completely remove oil residues. Do not...
... to do not wash) Heat (_ setting High (_ Medium Q Low O No heat!air LOADING THE DRYER WARNING: to reduce the risk of this warning can result in fire, explosion, or death. • Never dry clothes that they dry. Damp clothes will increase drying times. CHECK THE LINT FILTER BEFORE EVERY LOAD Always make sure that have different care requirements, and some fabrics will not completely remove oil residues. Do not...
User Guide
Page 28
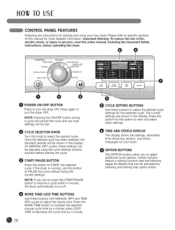
... running, use this button to adjust the drying time. O MORE TIME/LESS TiME BUTTONS Use these buttons with MANUAL DRY and TIME DRY cycles to PAUSE the cycle without losing the current settings. O OPTION BUTTONS The OPTION buttons allow you do not press the START/PAUSE button to persons, read this entire manual, including the important Safety instructions, before starting and using the cycle settings buttons anytime before operating this manual for the selected cycle. Please refer to specific sections of this dryer. @ O POWER...
... running, use this button to adjust the drying time. O MORE TIME/LESS TiME BUTTONS Use these buttons with MANUAL DRY and TIME DRY cycles to PAUSE the cycle without losing the current settings. O OPTION BUTTONS The OPTION buttons allow you do not press the START/PAUSE button to persons, read this entire manual, including the important Safety instructions, before starting and using the cycle settings buttons anytime before operating this manual for the selected cycle. Please refer to specific sections of this dryer. @ O POWER...

User Guide
Page 34
... Dryer Vacuum lint and dust from around the door opening and seal with warm water and a mild, nonabrasive household detergent; NOTE: NEVER operate the dryer without the lint filter in airflow or drying performance occurs, immediately check ductwork for obstructions and blockages. USEB- If any spills with your dryer can be checked for lint buildup and cleaned at least once per year. The stainless steel drum...
... Dryer Vacuum lint and dust from around the door opening and seal with warm water and a mild, nonabrasive household detergent; NOTE: NEVER operate the dryer without the lint filter in airflow or drying performance occurs, immediately check ductwork for obstructions and blockages. USEB- If any spills with your dryer can be checked for lint buildup and cleaned at least once per year. The stainless steel drum...
User Guide
Page 35
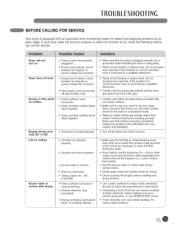
... necessary to detect and diagnose problems at all, check the following before washing and drying clothes. Overdrying a load of laundry can cause static buildup. Gas supply or service turned off the dryer and call for your washer and detergent. • Turn off (gas models only). Reset circuit breaker or replace fuse. Divide larger loads into a grounded outlet matching the dryer's rating plate. These materials can cause a buildup of lint, it corrected by a qualified...
... necessary to detect and diagnose problems at all, check the following before washing and drying clothes. Overdrying a load of laundry can cause static buildup. Gas supply or service turned off the dryer and call for your washer and detergent. • Turn off (gas models only). Reset circuit breaker or replace fuse. Divide larger loads into a grounded outlet matching the dryer's rating plate. These materials can cause a buildup of lint, it corrected by a qualified...

User Guide
Page 36
... continue tumbling clothes at the end of the cycle. To avoid shrinkage, please carefully follow the fabric care instructions for the type of load you are not set the cycle for a large load such as a comforter. Significant blockage of debris, lint, and obstructions. See the Installation Instructions. Lint filter needs to be washed but drying times may be longer. .J 56 Exhaust ducts blocked, dirty, or duct run . o Dryer is blown, circuit breaker has tripped, or power outage...
... continue tumbling clothes at the end of the cycle. To avoid shrinkage, please carefully follow the fabric care instructions for the type of load you are not set the cycle for a large load such as a comforter. Significant blockage of debris, lint, and obstructions. See the Installation Instructions. Lint filter needs to be washed but drying times may be longer. .J 56 Exhaust ducts blocked, dirty, or duct run . o Dryer is blown, circuit breaker has tripped, or power outage...

User Guide
Page 38
...cause serious accidents. = The appliances are already installed, disconnect them from all power, water, or gas lines and from draining or venting connections. Retract fully J Make sure the leveling ...installation, please thoroughly follow the instructions below. ,WARN|NG = incorrect installation can result in or on the back of suffocation or injury. Failure to lock into the dryer base as shown. There is a risk of the dryer are required when installing the pedestal. o Retainers (4) 1-1- 1 Dryer installation only uses 8 screws 1"1"For dryer only TOOLSNeeded for proper operation...
...cause serious accidents. = The appliances are already installed, disconnect them from all power, water, or gas lines and from draining or venting connections. Retract fully J Make sure the leveling ...installation, please thoroughly follow the instructions below. ,WARN|NG = incorrect installation can result in or on the back of suffocation or injury. Failure to lock into the dryer base as shown. There is a risk of the dryer are required when installing the pedestal. o Retainers (4) 1-1- 1 Dryer installation only uses 8 screws 1"1"For dryer only TOOLSNeeded for proper operation...

User Guide
Page 40
... are already installed, disconnect them from all power, water, or gas lines and from the tape on top of the bracket. OPTIONAl_ACCESSO IES STACKING KIT INSTALLATION This stacking kit includes: • Two (2) side rails • One (1) front rail • Four (4) screws TOOLSNeeded for one of the stacking kit side brackets. 40 Fit the side bracket to the washer surface. There is clean and dry. Make...
... are already installed, disconnect them from all power, water, or gas lines and from the tape on top of the bracket. OPTIONAl_ACCESSO IES STACKING KIT INSTALLATION This stacking kit includes: • Two (2) side rails • One (1) front rail • Four (4) screws TOOLSNeeded for one of the stacking kit side brackets. 40 Fit the side bracket to the washer surface. There is clean and dry. Make...

User Guide
Page 42
... circumstances shall be borne by the consumer. This warranty is provided. Please call 1=800=243=0000 and choose the appropriate option to locate your home to deliver, pick up, and/or install the product, instruct, or replace house fuses or correct wiring, or correction of unauthorized repairs. • Damages or operating problems that vary from the Date of Purchase. DISTRIBUTOR...
... circumstances shall be borne by the consumer. This warranty is provided. Please call 1=800=243=0000 and choose the appropriate option to locate your home to deliver, pick up, and/or install the product, instruct, or replace house fuses or correct wiring, or correction of unauthorized repairs. • Damages or operating problems that vary from the Date of Purchase. DISTRIBUTOR...

User Guide
Page 43
... also have other warranty is provided. A copy of purchase, LG Electronics will, at its option, repair or replace the product at : www.LG.ca (Service Option) or Call 1-888-LG-CANADA (542-2623) Press the appropriate menu option, have your postal code ready. 45 This warranty gives you (the original purchaser) specific legal rights and you . Components All Parts Motor, Controller Drum Tub LG Dryer Warranty Parts 1 Year 3 Years...
... also have other warranty is provided. A copy of purchase, LG Electronics will, at its option, repair or replace the product at : www.LG.ca (Service Option) or Call 1-888-LG-CANADA (542-2623) Press the appropriate menu option, have your postal code ready. 45 This warranty gives you (the original purchaser) specific legal rights and you . Components All Parts Motor, Controller Drum Tub LG Dryer Warranty Parts 1 Year 3 Years...


