
User Guide
Page 1
Commercial Gas Hot Plate E-Series User's Manual Model: M12HP / M24HP / M36HP PLEASE READ THIS MANUAL CAREFULLY BEFORE USING YOUR COMMERCIAL GAS HOT PLATE AND KEEP IT FOR FUTURE REFERENCE. 1
Commercial Gas Hot Plate E-Series User's Manual Model: M12HP / M24HP / M36HP PLEASE READ THIS MANUAL CAREFULLY BEFORE USING YOUR COMMERCIAL GAS HOT PLATE AND KEEP IT FOR FUTURE REFERENCE. 1
User Guide
Page 2
... REGISTRATION Thank you for purchasing a Magic Chef Commercial product. 2 The first step to protect your proof of purchase in the event of registering your product include the following: 1. Registering your product will allow for more efficient warranty service processing when warranty service is to contact you regarding a safety notification or product update. 2. Registering your product will...
... REGISTRATION Thank you for purchasing a Magic Chef Commercial product. 2 The first step to protect your proof of purchase in the event of registering your product include the following: 1. Registering your product will allow for more efficient warranty service processing when warranty service is to contact you regarding a safety notification or product update. 2. Registering your product will...
User Guide
Page 3
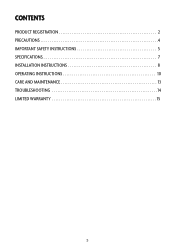
CONTENTS PRODUCT REGISTRATION 2 PRECAUTIONS 4 IMPORTANT SAFETY INSTRUCTIONS 5 SPECIFICATIONS 7 INSTALLATION INSTRUCTIONS 8 OPERATING INSTRUCTIONS 10 CARE AND MAINTENANCE 13 TROUBLESHOOTING 14 LIMITED WARRANTY 15 3
CONTENTS PRODUCT REGISTRATION 2 PRECAUTIONS 4 IMPORTANT SAFETY INSTRUCTIONS 5 SPECIFICATIONS 7 INSTALLATION INSTRUCTIONS 8 OPERATING INSTRUCTIONS 10 CARE AND MAINTENANCE 13 TROUBLESHOOTING 14 LIMITED WARRANTY 15 3
User Guide
Page 4
...manual is detected, follow all instructions described in severe personal injury or death. WARNING: Gas Leak • Gas leaks cannot always be performed by UL or CSA. • For more information, contact your gas supplier. • If a gas leak is not followed exactly, a fire or explosion may result in electric...DO NOT touch any electrical switch. • DO NOT use any other appliance. WARNING: If information in this user manual cannot cover all safety precautions. DO NOT store or use a gas detector approved by a qualified installer or service agency. 4 PRECAUTIONS ...
...manual is detected, follow all instructions described in severe personal injury or death. WARNING: Gas Leak • Gas leaks cannot always be performed by UL or CSA. • For more information, contact your gas supplier. • If a gas leak is not followed exactly, a fire or explosion may result in electric...DO NOT touch any electrical switch. • DO NOT use any other appliance. WARNING: If information in this user manual cannot cover all safety precautions. DO NOT store or use a gas detector approved by a qualified installer or service agency. 4 PRECAUTIONS ...
User Guide
Page 5
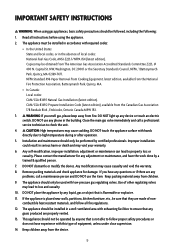
... should be installed in the building. NFPA Standard #96 Vapor Removal from Cooking Equipment, latest edition, available from children. 9. DO NOT light up any phone in a well-ventilated area with exhausting facilities to high temperature during or after operation. 5. DO NOT touch the appliance surface with this type of local codes: National Fuel Gas Code, ANSI-Z223...
... should be installed in the building. NFPA Standard #96 Vapor Removal from Cooking Equipment, latest edition, available from children. 9. DO NOT light up any phone in a well-ventilated area with exhausting facilities to high temperature during or after operation. 5. DO NOT touch the appliance surface with this type of local codes: National Fuel Gas Code, ANSI-Z223...
User Guide
Page 6
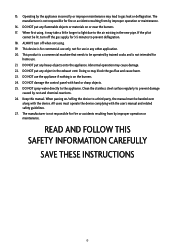
... burners. 17. When first using . 19. All users must be operated by trained cooks and is not responsible for fire or accidents resulting from by rust and chemical reactions. 26. DO NOT put any other application. 20. Clean the stainless steel surface regularly to the appliance. DO NOT spray water directly to prevent damage caused...
... burners. 17. When first using . 19. All users must be operated by trained cooks and is not responsible for fire or accidents resulting from by rust and chemical reactions. 26. DO NOT put any other application. 20. Clean the stainless steel surface regularly to the appliance. DO NOT spray water directly to prevent damage caused...
User Guide
Page 7
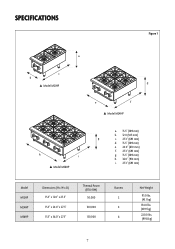
SPECIFICATIONS Figure 1 a c b ▲ Model M12HP d e f ▲ Model M24HP h i ▲ Model M36HP a. 15.3" (389 mm) b. 12.0 (305 mm) g c. 27.3" (693 mm) d. 15.3" (389 mm) e. 24.0" (610 mm) f. 27.3" (693 mm) g. 15.3" (389 mm) h. 36.0" (914 mm) i. 27.3" (693 mm) Model M12HP M24HP M36HP Dimensions (H x W x D) 15.3" x 12.0" x 27.3" 15.3" x 24.0" x 27.3" 15.3" x 36.0" x 27.3" Thermal Power (BTU/KW) 50,000 100,000 150,000 Burners 2 4 6 Net Weight 95.0 lbs. (43.1 kg) 154.0 lbs. (69.9 kg) 220.0 lbs. (99.8 kg) 7
SPECIFICATIONS Figure 1 a c b ▲ Model M12HP d e f ▲ Model M24HP h i ▲ Model M36HP a. 15.3" (389 mm) b. 12.0 (305 mm) g c. 27.3" (693 mm) d. 15.3" (389 mm) e. 24.0" (610 mm) f. 27.3" (693 mm) g. 15.3" (389 mm) h. 36.0" (914 mm) i. 27.3" (693 mm) Model M12HP M24HP M36HP Dimensions (H x W x D) 15.3" x 12.0" x 27.3" 15.3" x 24.0" x 27.3" 15.3" x 36.0" x 27.3" Thermal Power (BTU/KW) 50,000 100,000 150,000 Burners 2 4 6 Net Weight 95.0 lbs. (43.1 kg) 154.0 lbs. (69.9 kg) 220.0 lbs. (99.8 kg) 7
User Guide
Page 8
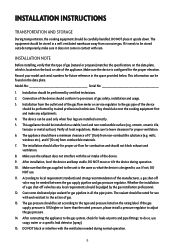
...service regulator to the type and pressure listed on the data plate. They should also test the cooking equipment first and make sure it does not come in contact with rain. The appliance should have a minimum clearance of the device should be performed by the gas installation professional. 12. If not, DO NOT use soapy water or a specific.... 8 After connecting the appliance to the action of gas safety, installation and usage. 3. Record your model and serial numbers for the proper elevation. After installation, level the device and keep stable. Make sure the device is ...
...service regulator to the type and pressure listed on the data plate. They should also test the cooking equipment first and make sure it does not come in contact with rain. The appliance should have a minimum clearance of the device should be performed by the gas installation professional. 12. If not, DO NOT use soapy water or a specific.... 8 After connecting the appliance to the action of gas safety, installation and usage. 3. Record your model and serial numbers for the proper elevation. After installation, level the device and keep stable. Make sure the device is ...
User Guide
Page 9
16. Verify the gas type and pressure, and make sure that they conform to those marked on the rating label. If incorrect gas type/pressure is connected, it may affect the performance of the device and create safety hazards. 9
16. Verify the gas type and pressure, and make sure that they conform to those marked on the rating label. If incorrect gas type/pressure is connected, it may affect the performance of the device and create safety hazards. 9
User Guide
Page 10
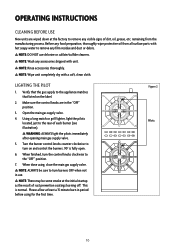
...5. NOTE: ALWAYS be some smoke at the factory to remove any film residue and dust or debris. NOTE: Wash any visible signs of dirt, oil, grease, etc. LIGHTING THE PILOT 1. Using a long match or grill lighter, light the pilots located just to turn burners OFF ...each burner (see illustration). When done using for the first time. OPERATING INSTRUCTIONS CLEANING BEFORE USE New units are in the "OFF" position. 3. Turn the burner control knobs counter-clockwise to turn the control knobs clockwise to the appliance matches that listed on and control the burners. 90° is normal....
...5. NOTE: ALWAYS be some smoke at the factory to remove any film residue and dust or debris. NOTE: Wash any visible signs of dirt, oil, grease, etc. LIGHTING THE PILOT 1. Using a long match or grill lighter, light the pilots located just to turn burners OFF ...each burner (see illustration). When done using for the first time. OPERATING INSTRUCTIONS CLEANING BEFORE USE New units are in the "OFF" position. 3. Turn the burner control knobs counter-clockwise to turn the control knobs clockwise to the appliance matches that listed on and control the burners. 90° is normal....
User Guide
Page 11
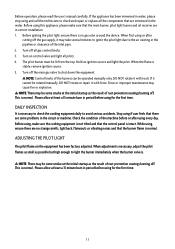
...using for the first time. Before using , ensure there are in correct installation. 1. ADJUSTING THE PILOT LIGHT The pilot flame on control...remove ignition source. 5. NOTE: Control knobs of rust prevention coatings burning off. DAILY INSPECTION It is necessary to check the cooking equipment daily to light the burner immediately when the burner valve is normal. While using , make sure that are some problems in period before using or after using... user's manual carefully. When first using for the first time. 11 Turn off the main gas valve to check and repair or replace ...
...using for the first time. Before using , ensure there are in correct installation. 1. ADJUSTING THE PILOT LIGHT The pilot flame on control...remove ignition source. 5. NOTE: Control knobs of rust prevention coatings burning off. DAILY INSPECTION It is necessary to check the cooking equipment daily to light the burner immediately when the burner valve is normal. While using , make sure that are some problems in period before using or after using... user's manual carefully. When first using for the first time. 11 Turn off the main gas valve to check and repair or replace ...
User Guide
Page 12
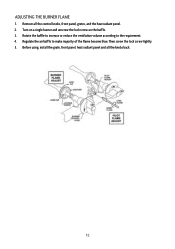
Then screw the lock screw tightly. 5. Regulate the air baffle to the requirement. 4. Before using, install the grate, front panel, heat radiant panel and all the control knobs, front panel, grates, and the heat radiant panel. 2. Rotate the baffle to increase or reduce the ventilation volume according to make majority of the flame become blue. Turn on a single burner and unscrew the lock screw on the baffle. 3. ADJUSTING THE BURNER FLAME 1. Remove all the knobs back. 12
Then screw the lock screw tightly. 5. Regulate the air baffle to the requirement. 4. Before using, install the grate, front panel, heat radiant panel and all the control knobs, front panel, grates, and the heat radiant panel. 2. Rotate the baffle to increase or reduce the ventilation volume according to make majority of the flame become blue. Turn on a single burner and unscrew the lock screw on the baffle. 3. ADJUSTING THE BURNER FLAME 1. Remove all the knobs back. 12
User Guide
Page 13
... is turned off. 10. Clean the stainless steel surfaces with warm soapy water every day, and rinse completely with clean water. (Do not spray water directly at least once a week ...there is cool before doing any problems are normal. Clean the burners at the appliance during cleaning.) 5. ALWAYS wipe in use, make sure it should have service done on stainless surfaces. 7. ... use chlorine products (bleach, hydrochloric acid, etc.) on the appliance. Clean the front panel and drip tray at least once a year by a service technician. 12. Please be aware that most parts...
... is turned off. 10. Clean the stainless steel surfaces with warm soapy water every day, and rinse completely with clean water. (Do not spray water directly at least once a week ...there is cool before doing any problems are normal. Clean the burners at the appliance during cleaning.) 5. ALWAYS wipe in use, make sure it should have service done on stainless surfaces. 7. ... use chlorine products (bleach, hydrochloric acid, etc.) on the appliance. Clean the front panel and drip tray at least once a year by a service technician. 12. Please be aware that most parts...

User Guide
Page 14
Adjust pilot to allow for service) Burner valves adjusted too high Faulty ventilation Overrated gas pressure Improperly adjusted burner Burner valves improperly adjusted Improperly adjusted burner Appliance is not level Faulty Ventilation Pilot flame is set too low. TROUBLESHOOTING Too much top heat Uneven heating Pilot outage Low gas pressure. (Call for gas flow Obstruction in pilot orifice Low gas pressure 14
Adjust pilot to allow for service) Burner valves adjusted too high Faulty ventilation Overrated gas pressure Improperly adjusted burner Burner valves improperly adjusted Improperly adjusted burner Appliance is not level Faulty Ventilation Pilot flame is set too low. TROUBLESHOOTING Too much top heat Uneven heating Pilot outage Low gas pressure. (Call for gas flow Obstruction in pilot orifice Low gas pressure 14
User Guide
Page 15
...replacement will be free from defects in use of the product or improper installation. • Replacement or resetting of house fuses or circuit breakers. • Failure of this warranty, the consumer is required to receive warranty service, replacement or refund. Parts and labor expenses are covered on proper use...price paid for non repairable products are hereby limited to one year from state to state. Under no representative or person is your appliance if it is installed in an inaccessible location or is not installed in connection with published installation instructions....
...replacement will be free from defects in use of the product or improper installation. • Replacement or resetting of house fuses or circuit breakers. • Failure of this warranty, the consumer is required to receive warranty service, replacement or refund. Parts and labor expenses are covered on proper use...price paid for non repairable products are hereby limited to one year from state to state. Under no representative or person is your appliance if it is installed in an inaccessible location or is not installed in connection with published installation instructions....

User Guide
Page 16
CNA International, Inc. Magic Chef®logo is a registered trademark of CNA International, Inc. www.mcappliance.com 16 Printed in China d/b/a MC Appliance Corporation. All rights reserved.
CNA International, Inc. Magic Chef®logo is a registered trademark of CNA International, Inc. www.mcappliance.com 16 Printed in China d/b/a MC Appliance Corporation. All rights reserved.
Warranty Information
Page 1
... be free from defects in material and workmanship, and agrees to remedy any such defect or to furnish a new part(s), at the company's option, for us on implied warranties. This warranty covers appliances in accordance with published installation instructions. • Refunds for non repairable products are hereby limited to one year from state to the price...
... be free from defects in material and workmanship, and agrees to remedy any such defect or to furnish a new part(s), at the company's option, for us on implied warranties. This warranty covers appliances in accordance with published installation instructions. • Refunds for non repairable products are hereby limited to one year from state to the price...