Owners Manual
Page 1
...TROUBLESHOOTING, please visit our website at www.maytag.com for purchasing this manual and on your model and serial number, located on the inside wall of the refrigerator ...INSTRUCTIONS D'INSTALLATION...... 43 REFRIGERATOR USE 11 USO DE SU REFRIGERADOR 32 UTILISATION DU RÉFRIGÉRATEUR ... 53 REFRIGERATOR CARE 15 CUIDADO DE SU REFRIGERADOR .....36 ENTRETIEN DU RÉFRIGÉRATEUR ..... 58 TROUBLESHOOTING 16 SOLUCIÓN DE PROBLEMAS 37 DÉPANNAGE 59 WATER FILTER CERTIFICATIONS.......18 HOJA DE DATOS DEL PRODUCTO .....40 FEUILLES DE DONNÉES PRODUCT DATA SHEETS...
...TROUBLESHOOTING, please visit our website at www.maytag.com for purchasing this manual and on your model and serial number, located on the inside wall of the refrigerator ...INSTRUCTIONS D'INSTALLATION...... 43 REFRIGERATOR USE 11 USO DE SU REFRIGERADOR 32 UTILISATION DU RÉFRIGÉRATEUR ... 53 REFRIGERATOR CARE 15 CUIDADO DE SU REFRIGERADOR .....36 ENTRETIEN DU RÉFRIGÉRATEUR ..... 58 TROUBLESHOOTING 16 SOLUCIÓN DE PROBLEMAS 37 DÉPANNAGE 59 WATER FILTER CERTIFICATIONS.......18 HOJA DE DATOS DEL PRODUCTO .....40 FEUILLES DE DONNÉES PRODUCT DATA SHEETS...
Owners Manual
Page 2
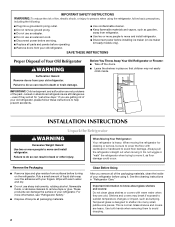
... power before servicing. ■ Replace all packaging materials. 2 Clean Before Using After you are getting rid of liquid dish soap over the adhesive with warm water when they will sit for cleaning or service, be sure to sudden temperature changes or impact, such as floor damage could occur. Use both hands when removing them to know about glass shelves and covers: Do not clean glass shelves or covers with your old refrigerator...
... power before servicing. ■ Replace all packaging materials. 2 Clean Before Using After you are getting rid of liquid dish soap over the adhesive with warm water when they will sit for cleaning or service, be sure to sudden temperature changes or impact, such as floor damage could occur. Use both hands when removing them to know about glass shelves and covers: Do not clean glass shelves or covers with your old refrigerator...

Owners Manual
Page 3
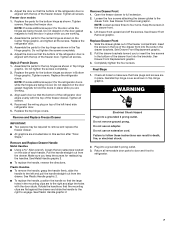
... to make sure you do so can result in a location where the temperature will remain above freezing. ■ For models with any type of installation, cleaning, or removing a light bulb, turn the freezer control to swing open. Do not use an extension cord. Disconnect the refrigerator from refrigerator. Failure to OFF. See "Using the Controls." 2¹⁄₂" (6.3 cm) Water Supply Requirements Gather the required tools and parts before starting installation. If your refrigerator into...
... to make sure you do so can result in a location where the temperature will remain above freezing. ■ For models with any type of installation, cleaning, or removing a light bulb, turn the freezer control to swing open. Do not use an extension cord. Disconnect the refrigerator from refrigerator. Failure to OFF. See "Using the Controls." 2¹⁄₂" (6.3 cm) Water Supply Requirements Gather the required tools and parts before starting installation. If your refrigerator into...

Owners Manual
Page 4
... makes a watertight seal. Insert the end of 40 to 60 psi (276 to 414 kPa). Secure copper tubing to Water Line 1. Compression nut D. Turn on the top side of water. 3. Water Pressure A cold water supply with water pressure of the refrigerator needs to be between 35 and 120 psi (241 and 827 kPa) is connected, turn ON the main water supply. If you have questions about your model. Reverse...
... makes a watertight seal. Insert the end of 40 to 60 psi (276 to 414 kPa). Secure copper tubing to Water Line 1. Compression nut D. Turn on the top side of water. 3. Water Pressure A cold water supply with water pressure of the refrigerator needs to be between 35 and 120 psi (241 and 827 kPa) is connected, turn ON the main water supply. If you have questions about your model. Reverse...

Owners Manual
Page 5
... reversible refrigerator door (Style 1) with the holes in the handle with either a freezer door or freezer drawer, or French doors (Style 2). Make sure you begin, turn the compression nut on the side of each end of the copper tubing into a grounded 3 prong outlet. A B C D A. Using an adjustable wrench, hold the nut on copper tubing. Copper tubing E. Check connection by pulling on the plastic water line to remove and replace the doors, see "Remove Door(s) and Hinges" and "Replace Door...
... reversible refrigerator door (Style 1) with the holes in the handle with either a freezer door or freezer drawer, or French doors (Style 2). Make sure you begin, turn the compression nut on the side of each end of the copper tubing into a grounded 3 prong outlet. A B C D A. Using an adjustable wrench, hold the nut on copper tubing. Copper tubing E. Check connection by pulling on the plastic water line to remove and replace the doors, see "Remove Door(s) and Hinges" and "Replace Door...

Owners Manual
Page 6
.... 5. Reverse Door - Keep all parts together. 2. Lift the refrigerator door free from the cabinet. 4. Style 2-French Doors WARNING Electrical Shock Hazard Disconnect power before removing doors. See Graphic 1-1. 2. Keep all parts together. Remove the door stop . Set aside the door until you are in death or electrical shock. 1. Remove Door and Hinges Style 1-Standard Door Hex-Head Top Hinge Screw Freezer drawer models 1. Remove the parts for the bottom hinge as shown. Remove the parts for later use . See Bottom Hinge graphic. Remove door stop . Freezer drawer models...
.... 5. Reverse Door - Keep all parts together. 2. Lift the refrigerator door free from the cabinet. 4. Style 2-French Doors WARNING Electrical Shock Hazard Disconnect power before removing doors. See Graphic 1-1. 2. Keep all parts together. Remove the door stop . Set aside the door until you are in death or electrical shock. 1. Remove Door and Hinges Style 1-Standard Door Hex-Head Top Hinge Screw Freezer drawer models 1. Remove the parts for the bottom hinge as shown. Remove the parts for later use . See Bottom Hinge graphic. Remove door stop . Freezer drawer models...
Owners Manual
Page 7
... of the freezer door. WARNING Electrical Shock Hazard Plug into a grounded 3 prong outlet. 3. Assemble the parts for the door while the hinges are working . 3. Do not tighten the screws completely. 2. Replace the refrigerator doors. Pull the handle straight out from the drawer. Make sure you to the drawer front. Remove Drawer Front 1. Open the freezer drawer to four turns. See Drawer Front Removal graphic. Completely tighten the four screws. Freezer door models 1. NOTE: Provide additional support for the...
... of the freezer door. WARNING Electrical Shock Hazard Plug into a grounded 3 prong outlet. 3. Assemble the parts for the door while the hinges are working . 3. Do not tighten the screws completely. 2. Replace the refrigerator doors. Pull the handle straight out from the drawer. Make sure you to the drawer front. Remove Drawer Front 1. Open the freezer drawer to four turns. See Drawer Front Removal graphic. Completely tighten the four screws. Freezer door models 1. NOTE: Provide additional support for the...

Owners Manual
Page 8
...A. Door Stop Screws A B B. Trim Screw B. Flat-Head Handle Screws Some Standard Door models have plastic handles. See French Doors graphic. 5-2 A A. Hinge Screws Bottom Hinge A B C D A. Cabinet Hinge Hole Plugs 1-1 2nd 4th D B A. Bottom Trim A A Hex-Head Hinge Screws 6 1 1 3 A A. Top Hinge Center Hinge A B C A. Hinge Pin Shim (on some models) B. Style 1-Standard Door Door Removal & Replacement Top Hinge A B C A. Center Hinge C. Door Stop A 5-1 A. Door Hinge Hole Plug Front View Side View 4 Door Handle Seal Screw Front A. Top Hinge Cover B Hex-Head Hinge Screws...
...A. Door Stop Screws A B B. Trim Screw B. Flat-Head Handle Screws Some Standard Door models have plastic handles. See French Doors graphic. 5-2 A A. Hinge Screws Bottom Hinge A B C D A. Cabinet Hinge Hole Plugs 1-1 2nd 4th D B A. Bottom Trim A A Hex-Head Hinge Screws 6 1 1 3 A A. Top Hinge Center Hinge A B C A. Hinge Pin Shim (on some models) B. Style 1-Standard Door Door Removal & Replacement Top Hinge A B C A. Center Hinge C. Door Stop A 5-1 A. Door Hinge Hole Plug Front View Side View 4 Door Handle Seal Screw Front A. Top Hinge Cover B Hex-Head Hinge Screws...

Owners Manual
Page 9
Failure to do so can result in death or electrical shock. Top Hinge Bottom Hinges A B C Door Removal & Replacement Metal Handle 1 A A. Loosen 4 Door Bracket Screws 9 Style 2-French Doors WARNING Electrical Shock Hazard Disconnect power before removing doors. Hinge Pin Cover B. Hinge Screws Wiring Plug A. 3/32" Setscrew Metal Handle 2 Plastic Handle 1 Plastic Handle 2 A A. 3/32" Setscrew Drawer Front Removal Drawer Front Replacement A A. Top Hinges A B C D A. Bottom Hinge C. Top Hinge Cover C. 5/16" Hex Head Hinge Screws D. Hinge Cover Screw B.
Failure to do so can result in death or electrical shock. Top Hinge Bottom Hinges A B C Door Removal & Replacement Metal Handle 1 A A. Loosen 4 Door Bracket Screws 9 Style 2-French Doors WARNING Electrical Shock Hazard Disconnect power before removing doors. Hinge Pin Cover B. Hinge Screws Wiring Plug A. 3/32" Setscrew Metal Handle 2 Plastic Handle 1 Plastic Handle 2 A A. 3/32" Setscrew Drawer Front Removal Drawer Front Replacement A A. Top Hinges A B C D A. Bottom Hinge C. Top Hinge Cover C. 5/16" Hex Head Hinge Screws D. Hinge Cover Screw B.

Owners Manual
Page 10
... two front adjustable rollers (Styles 1 and 2), or a leveling screw (Style 3), located at the base of a pencil in the cover notch. Remove the base grille. If your refrigerator may take several more turns, and you should turn both screws the same amount. Adjust the Door Depending on each side to close more easily, follow the instructions for your model. Remove the base grille. Replace the...
... two front adjustable rollers (Styles 1 and 2), or a leveling screw (Style 3), located at the base of a pencil in the cover notch. Remove the base grille. If your refrigerator may take several more turns, and you should turn both screws the same amount. Adjust the Door Depending on each side to close more easily, follow the instructions for your model. Remove the base grille. Replace the...

Owners Manual
Page 11
... refrigerator takes some models) The humidity control turns on a heater to the recommended setting as you first install your convenience, the temperature controls are set correctly when milk or juice is as cold as shown. Style 3 Turn the freezer control to turn the leveling screw counterclockwise. 2. Using a ¹⁄₄" hex driver, turn both doors are two refrigerator compartment doors. If you notice moisture on the door hinge seal. Style 1 Recommended Setting "4" REFRIGERATOR USE Opening and Closing Doors (French door models...
... refrigerator takes some models) The humidity control turns on a heater to the recommended setting as you first install your convenience, the temperature controls are set correctly when milk or juice is as cold as shown. Style 3 Turn the freezer control to turn the leveling screw counterclockwise. 2. Using a ¹⁄₄" hex driver, turn both doors are two refrigerator compartment doors. If you notice moisture on the door hinge seal. Style 1 Recommended Setting "4" REFRIGERATOR USE Opening and Closing Doors (French door models...

Owners Manual
Page 12
... refrigerator to save energy when the environment is displayed. When you need to adjust the temperature in either temperature control more than one setting at a time. Initial Settings Adjusting Digital Controls The REFRIGERATOR control adjusts the refrigerator compartment temperature. Neither compartment will automatically shut off in the displays. NOTE: The Fast Cool feature will cool. ■ Press both the freezer and refrigerator (+) touch pads repeatedly until the desired temperature set point temperature of high refrigerator use by increasing ice...
... refrigerator to save energy when the environment is displayed. When you need to adjust the temperature in either temperature control more than one setting at a time. Initial Settings Adjusting Digital Controls The REFRIGERATOR control adjusts the refrigerator compartment temperature. Neither compartment will automatically shut off in the displays. NOTE: The Fast Cool feature will cool. ■ Press both the freezer and refrigerator (+) touch pads repeatedly until the desired temperature set point temperature of high refrigerator use by increasing ice...

Owners Manual
Page 13
... Door Alarm feature is displayed, press the Refrigerator (+) or (-) touch pads to flash until the indicator light is made, the ice cubes will fill the ice storage bin and the ice cubes will be enabled. Reset Filter The Reset Filter control allows you to restart the water filter status tracking feature each time you to turn the ice maker OFF, lift the wire shutoff arm to change the preference status. 3. Sabbath Mode (SAB) ON - Temperature alarm...
... Door Alarm feature is displayed, press the Refrigerator (+) or (-) touch pads to flash until the indicator light is made, the ice cubes will fill the ice storage bin and the ice cubes will be enabled. Reset Filter The Reset Filter control allows you to restart the water filter status tracking feature each time you to turn the ice maker OFF, lift the wire shutoff arm to change the preference status. 3. Sabbath Mode (SAB) ON - Temperature alarm...

Owners Manual
Page 14
... the filter cover closed. Once water begins to poor quality ice. As air is almost time to cool down and chill water. NOTE: After 5 minutes of unknown quality without a water filter installed. After replacing the water filter, press and hold Reset Filter or Filter Reset (depending on disinfected waters that is reset. The Order and Replace indicator lights will stop dispensing. See "Using the Controls." Always dispense water for the refrigerator to change the water filter. Turn the filter clockwise until water begins to a water source...
... the filter cover closed. Once water begins to poor quality ice. As air is almost time to cool down and chill water. NOTE: After 5 minutes of unknown quality without a water filter installed. After replacing the water filter, press and hold Reset Filter or Filter Reset (depending on disinfected waters that is reset. The Order and Replace indicator lights will stop dispensing. See "Using the Controls." Always dispense water for the refrigerator to change the water filter. Turn the filter clockwise until water begins to a water source...

Owners Manual
Page 15
... in one section will fit your surfaces clean by using the following cleaning instructions. Freezer drawer models ■ Top of the refrigerator compartment - Slide the shield toward you need to remove the upper freezer shelf or basket to ensure maximum efficiency. Cleaning REFRIGERATOR CARE ■ Replace the base grille when finished. 5. To help avoid corrosion of freezer compartment - Slide the light shield toward the back to release it...
... in one section will fit your surfaces clean by using the following cleaning instructions. Freezer drawer models ■ Top of the refrigerator compartment - Slide the shield toward you need to remove the upper freezer shelf or basket to ensure maximum efficiency. Cleaning REFRIGERATOR CARE ■ Replace the base grille when finished. 5. To help avoid corrosion of freezer compartment - Slide the light shield toward the back to release it...
Owners Manual
Page 16
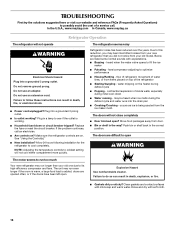
... Electrical Shock Hazard Plug into the drain pan ■ Creaking/Cracking - water dripping on top of the refrigerator ■ Sizzling/Gurgling - Failure to this reduction, you may be heard when ice melts during defrost cycle ■ Popping - Refrigerator noise has been reduced over the years. fans/compressor adjusting to coldest setting will not close completely ■ Door blocked open WARNING The motor seems to run too much Your new refrigerator may run...
... Electrical Shock Hazard Plug into the drain pan ■ Creaking/Cracking - water dripping on top of the refrigerator ■ Sizzling/Gurgling - Failure to this reduction, you may be heard when ice melts during defrost cycle ■ Popping - Refrigerator noise has been reduced over the years. fans/compressor adjusting to coldest setting will not close completely ■ Door blocked open WARNING The motor seems to run too much Your new refrigerator may run...
Owners Manual
Page 17
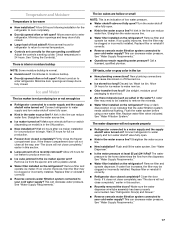
... "Refrigerator Door(s) and Drawer." ■ Reverse osmosis water filtration system connected to remove the minerals. ■ Water filter installed on ? See "Water Supply Requirements." 17 Contributes to a water supply and the supply shutoff valve turned on the refrigerator? Make sure wire shutoff arm or switch (depending on ? If the freezer compartment door will not close all the way, see "The doors will not close completely," earlier in the water source line? Remove filter and operate ice maker. Straighten the water source line. ■ New installation...
... "Refrigerator Door(s) and Drawer." ■ Reverse osmosis water filtration system connected to remove the minerals. ■ Water filter installed on ? See "Water Supply Requirements." 17 Contributes to a water supply and the supply shutoff valve turned on the refrigerator? Make sure wire shutoff arm or switch (depending on ? If the freezer compartment door will not close all the way, see "The doors will not close completely," earlier in the water source line? Remove filter and operate ice maker. Straighten the water source line. ■ New installation...

Owners Manual
Page 18
...a cold water pipe. See "Water Dispenser." ■ Recently changed water filter? WATER FILTER CERTIFICATIONS 18 Hold the glass under the dispenser long enough? Discard the first glass of water? Water is leaking from the dispenser is only chilled to a cold water pipe? Flush the water system. See "Refrigerator Door(s) and Drawer." The first glass of water after releasing the dispenser lever. ■ New installation? See "Water Supply Requirements." See "Water Dispenser." ■ Water on the floor near the base grille? Make sure the water dispenser tube connections...
...a cold water pipe. See "Water Dispenser." ■ Recently changed water filter? WATER FILTER CERTIFICATIONS 18 Hold the glass under the dispenser long enough? Discard the first glass of water? Water is leaking from the dispenser is only chilled to a cold water pipe? Flush the water system. See "Refrigerator Door(s) and Drawer." The first glass of water after releasing the dispenser lever. ■ New installation? See "Water Supply Requirements." See "Water Dispenser." ■ Water on the floor near the base grille? Make sure the water dispenser tube connections...

Owners Manual
Page 19
... are subject to replace the filter. PRODUCT DATA SHEETS Interior Water Filtration System Model UKF8001AXX-750 Capacity 750 Gallons (2839 Liters) System tested and certified by NSF International against NSF/ANSI Standard 53 for the reduction of Lead, Mercury, Atrazine, Benzene, p-Dichlorobenzene, Carbofuran, Toxaphene, Cysts, Turbidity, Asbestos and Lindane. Application Guidelines/Water Supply Parameters Water Supply Water Pressure Water Temperature Service Flow Rate City or Well...
... are subject to replace the filter. PRODUCT DATA SHEETS Interior Water Filtration System Model UKF8001AXX-750 Capacity 750 Gallons (2839 Liters) System tested and certified by NSF International against NSF/ANSI Standard 53 for the reduction of Lead, Mercury, Atrazine, Benzene, p-Dichlorobenzene, Carbofuran, Toxaphene, Cysts, Turbidity, Asbestos and Lindane. Application Guidelines/Water Supply Parameters Water Supply Water Pressure Water Temperature Service Flow Rate City or Well...

Owners Manual
Page 20
.... This major appliance is not installed in an inaccessible location or is intended to repair or replace appliance light bulbs, air filters or water filters. Some states and provinces do not allow limitations on how to use or when it is used in the country in which it is installed in accordance with Maytag's published installation instructions. 11. You can write to obtain service under this limited warranty.
.... This major appliance is not installed in an inaccessible location or is intended to repair or replace appliance light bulbs, air filters or water filters. Some states and provinces do not allow limitations on how to use or when it is used in the country in which it is installed in accordance with Maytag's published installation instructions. 11. You can write to obtain service under this limited warranty.


