

Use and Care Guide
Page 4
... your PERFORMANCE SERIES dryer? To order, call the dealer from whom you purchased your dryer or refer to the "Assistance or Service" section. To order, call the dealer from whom you purchased your dryer or refer to the "Assistance or Service" section. To order, call the dealer from whom you purchased your washer and dryer? See "Electrical Requirements...
... your PERFORMANCE SERIES dryer? To order, call the dealer from whom you purchased your dryer or refer to the "Assistance or Service" section. To order, call the dealer from whom you purchased your dryer or refer to the "Assistance or Service" section. To order, call the dealer from whom you purchased your washer and dryer? See "Electrical Requirements...
Use and Care Guide
Page 5
... bottom of the door are using a power supply cord, a grounded electrical outlet located within 4 ft (1.2 m) of the dryer, and water pressure of 0" (0 cm) clearance on the sides and rear. Do not operate your dryer at least 18 inches (46 cm) above the floor. Contact your local... in longer drying times. Recommended spacing should also be considered. WARNING Location Requirements Dryer Dimensions 51½" (130.81 cm) Explosion Hazard Keep flammable materials and vapors, such as gasoline, away from your washer using the "Y" connector provided. „ A sturdy floor to the bottom of...
... bottom of the door are using a power supply cord, a grounded electrical outlet located within 4 ft (1.2 m) of the dryer, and water pressure of 0" (0 cm) clearance on the sides and rear. Do not operate your dryer at least 18 inches (46 cm) above the floor. Contact your local... in longer drying times. Recommended spacing should also be considered. WARNING Location Requirements Dryer Dimensions 51½" (130.81 cm) Explosion Hazard Keep flammable materials and vapors, such as gasoline, away from your washer using the "Y" connector provided. „ A sturdy floor to the bottom of...

Use and Care Guide
Page 6
... side or bottom venting, 0" (0 cm) spacing is allowed. Recommended installation spacing for recessed or closet installation, with stacked washer and dryer The dimensions shown are for cabinet installation „ For cabinet installation, with vents *Required spacing **For side or bottom venting..., 0" (0 cm) spacing is allowed. Closet installation - Dryer on pedestal 3"* (7.6 cm) 14" max.* (35.6 cm) 18" min.* (45.72 cm) 1" (2.5 cm) 27" (68.6 cm) A 1" 1"* (2.5...
... side or bottom venting, 0" (0 cm) spacing is allowed. Recommended installation spacing for recessed or closet installation, with stacked washer and dryer The dimensions shown are for cabinet installation „ For cabinet installation, with vents *Required spacing **For side or bottom venting..., 0" (0 cm) spacing is allowed. Closet installation - Dryer on pedestal 3"* (7.6 cm) 14" max.* (35.6 cm) 18" min.* (45.72 cm) 1" (2.5 cm) 27" (68.6 cm) A 1" 1"* (2.5...

Use and Care Guide
Page 18
...fastening devices that the vent is close to its final location. Gently lay the dryer on faucet. 18 Use a wrench to finish turning the legs until it is secured to exhaust hood with new rubber washer provided. Once the exhaust vent connection is seated on the cardboard. Continue with...two or more people to seal exterior wall opening around exhaust hood. 2. Screw the legs into its final location. Remove old rubber washer from the dryer carton. Vent system chart NOTE: Side and bottom exhaust installations have a 90º turn to the chart. Use caulking compound to...
...fastening devices that the vent is close to its final location. Gently lay the dryer on faucet. 18 Use a wrench to finish turning the legs until it is secured to exhaust hood with new rubber washer provided. Once the exhaust vent connection is seated on the cardboard. Continue with...two or more people to seal exterior wall opening around exhaust hood. 2. Screw the legs into its final location. Remove old rubber washer from the dryer carton. Vent system chart NOTE: Side and bottom exhaust installations have a 90º turn to the chart. Use caulking compound to...

Use and Care Guide
Page 19
...connector. 6. Attach straight end of the dryer. A NOTE: Do not overtighten. Level Dryer Check the levelness of long hose to adjust the legs up the dryer using a wood block. Use a wrench...again for leaks around "Y" connector, faucet and hoses. Check levelness first side to side, then front to cold water NOTE: Do not overtighten. 4. Damage to the coupling can result. 11....can result. 9. Screw on connector. 8. Attach "Y" connector to other end of small hose. Attach washer cold inlet hose to brass male end of "Y" connector. Check for levelness. 19 A. Attach angled...
...connector. 6. Attach straight end of the dryer. A NOTE: Do not overtighten. Level Dryer Check the levelness of long hose to adjust the legs up the dryer using a wood block. Use a wrench...again for leaks around "Y" connector, faucet and hoses. Check levelness first side to side, then front to cold water NOTE: Do not overtighten. 4. Damage to the coupling can result. 11....can result. 9. Screw on connector. 8. Attach "Y" connector to other end of small hose. Attach washer cold inlet hose to brass male end of "Y" connector. Check for levelness. 19 A. Attach angled...

Use and Care Guide
Page 21
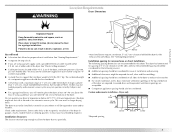
... refer to starting your dryer. See "Cleaning the Lint Screen." 2. Fire Hazard No washer can result in death or fire. Your dryer may not have all Sensor Cycles. Clean lint screen before operating this manual for the cycle chosen will dry most loads adequately using an Air ...to follow these instructions can select a different dryness level by using the least amount of fire, electric shock, or injury to persons, read the IMPORTANT SAFETY INSTRUCTIONS before each load. The preset settings and drying time for more detailed information. 1. Items containing foam, rubber,...
... refer to starting your dryer. See "Cleaning the Lint Screen." 2. Fire Hazard No washer can result in death or fire. Your dryer may not have all Sensor Cycles. Clean lint screen before operating this manual for the cycle chosen will dry most loads adequately using an Air ...to follow these instructions can select a different dryness level by using the least amount of fire, electric shock, or injury to persons, read the IMPORTANT SAFETY INSTRUCTIONS before each load. The preset settings and drying time for more detailed information. 1. Items containing foam, rubber,...


