
User Guide
Page 2
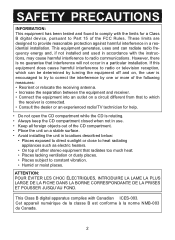
.... Avoid direct exposure to defeat or bypass the safety switches. FCC WARNING: This equipment may be of sufficient magnitude to use radio frequency energy. SURGE PROTECTORS: It is located at the bottom enclosure of important operating and maintenance (servicing) instructions in the instruction manual. Please do not attempt to beam. Lightning and power surges ARE NOT covered under warranty for AC connection...
.... Avoid direct exposure to defeat or bypass the safety switches. FCC WARNING: This equipment may be of sufficient magnitude to use radio frequency energy. SURGE PROTECTORS: It is located at the bottom enclosure of important operating and maintenance (servicing) instructions in the instruction manual. Please do not attempt to beam. Lightning and power surges ARE NOT covered under warranty for AC connection...
User Guide
Page 3
... connected. • Consult the dealer or an experienced radio/TV technician for a Class B digital device, pursuant to Part 15 of the CD compartment. • Place the unit on a stable surface. • Avoid installing the unit in a particular installation. If this equipment does cause harmful interference to radio or television reception, which can radiate radio frequency energy and, if not installed and used...
... connected. • Consult the dealer or an experienced radio/TV technician for a Class B digital device, pursuant to Part 15 of the CD compartment. • Place the unit on a stable surface. • Avoid installing the unit in a particular installation. If this equipment does cause harmful interference to radio or television reception, which can radiate radio frequency energy and, if not installed and used...
User Guide
Page 4
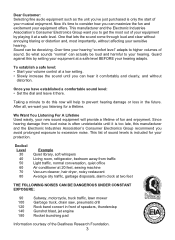
...noisy restaurant Average city traffic, garbage disposals, alarm clock at a low setting. • Slowly increase the sound until it at a safe level BEFORE your hearing adapts. To establish a safe level: • Start your volume control at two feet THE FOLLOWING NOISES CAN BE DANGEROUS...Used wisely, your new sound equipment will help to excessive noise. Dear Customer: Selecting fine audio equipment such as the unit you to your hearing. Over time your hearing "comfort level" adapts to consider how you avoid prolonged exposure to prevent hearing damage or loss in front of speakers...
...noisy restaurant Average city traffic, garbage disposals, alarm clock at a low setting. • Slowly increase the sound until it at a safe level BEFORE your hearing adapts. To establish a safe level: • Start your volume control at two feet THE FOLLOWING NOISES CAN BE DANGEROUS...Used wisely, your new sound equipment will help to excessive noise. Dear Customer: Selecting fine audio equipment such as the unit you to your hearing. Over time your hearing "comfort level" adapts to consider how you avoid prolonged exposure to prevent hearing damage or loss in front of speakers...

User Guide
Page 5
DBBS (Bass Boost) Switch (Rear of Unit) 3. CD Door OPEN Switch 6. Skip/Search o Button 10. Skip/Search n Button 4 PHONES (Headphones) Jack (Rear of Unit) 5. Display 11. PLAY/PAUSE (®p)/POWER ON Button 16. PROG (Program) Button 9. VOLUME Control (Rear of Unit) 13. DC 4.5V Jack z (Rear of Unit) 4. STOP (I)/POWER OFF Button 17. ESP Button 7. HOLD (ON/OFF) Switch (Rear of Unit) 2. Battery Compartment (Under CD Compartment) 14. LOCATION OF CONTROLS 1. LINE OUT Jack (Rear of Unit) 12. MODE Button 8. CD Compartment 15.
DBBS (Bass Boost) Switch (Rear of Unit) 3. CD Door OPEN Switch 6. Skip/Search o Button 10. Skip/Search n Button 4 PHONES (Headphones) Jack (Rear of Unit) 5. Display 11. PLAY/PAUSE (®p)/POWER ON Button 16. PROG (Program) Button 9. VOLUME Control (Rear of Unit) 13. DC 4.5V Jack z (Rear of Unit) 4. STOP (I)/POWER OFF Button 17. ESP Button 7. HOLD (ON/OFF) Switch (Rear of Unit) 2. Battery Compartment (Under CD Compartment) 14. LOCATION OF CONTROLS 1. LINE OUT Jack (Rear of Unit) 12. MODE Button 8. CD Compartment 15.
User Guide
Page 6
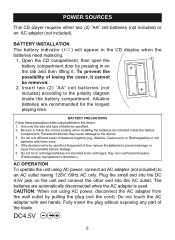
... rupture. (Follow battery manufacturer's directions.) AC OPERATION To operate the unit using AC power, connect an AC adapter (not included) to be used . Do not try to recharge batteries not intended to an AC outlet having 120V, 60Hz AC only. POWER SOURCES This CD player requires either two (2) "AA" cell batteries (not included) or an AC adapter (not included). Open the CD compartment, then open the battery compartment door...
... rupture. (Follow battery manufacturer's directions.) AC OPERATION To operate the unit using AC power, connect an AC adapter (not included) to be used . Do not try to recharge batteries not intended to an AC outlet having 120V, 60Hz AC only. POWER SOURCES This CD player requires either two (2) "AA" cell batteries (not included) or an AC adapter (not included). Open the CD compartment, then open the battery compartment door...
User Guide
Page 7
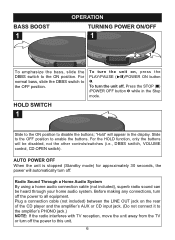
... STOP (I) /POWER OFF button ƒ while in the display. "Hold" will appear in the Stop mode. AUTO POWER OFF When the unit is stopped (Standby mode) for approximately 30 seconds, the power will be heard through your home audio system. For normal bass, slide the DBBS switch to the OFF position. 1 To turn the unit on the rear of the CD player and the amplifier's AUX or CD input jack. (Do not connect...
... STOP (I) /POWER OFF button ƒ while in the display. "Hold" will appear in the Stop mode. AUTO POWER OFF When the unit is stopped (Standby mode) for approximately 30 seconds, the power will be heard through your home audio system. For normal bass, slide the DBBS switch to the OFF position. 1 To turn the unit on the rear of the CD player and the amplifier's AUX or CD input jack. (Do not connect...
User Guide
Page 8
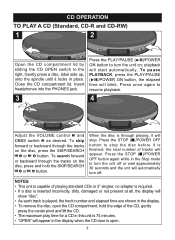
... PHONES jack. 3 2 1 2 Press the PLAY/PAUSE (®p)/POWER ON button to stop . When the disc is finished; Press once again to the right. To search forward or backward through the tracks on ; CD OPERATION TO PLAY A CD (Standard, CD-R and CD-RW) 1 2 Open the CD compartment lid by sliding the CD OPEN switch to resume2playback. 4 3 4 Adjust the VOLUME control ‚ and DBBS switch ƒ as desired. playback will blink. To pause PLAYBACK, press the PLAY...
... PHONES jack. 3 2 1 2 Press the PLAY/PAUSE (®p)/POWER ON button to stop . When the disc is finished; Press once again to the right. To search forward or backward through the tracks on ; CD OPERATION TO PLAY A CD (Standard, CD-R and CD-RW) 1 2 Open the CD compartment lid by sliding the CD OPEN switch to resume2playback. 4 3 4 Adjust the VOLUME control ‚ and DBBS switch ƒ as desired. playback will blink. To pause PLAYBACK, press the PLAY...

User Guide
Page 9
... in the memory until the CD player can read the music data properly from the disc. CONTINUED ON THE NEXT PAGE 8 Insert headpho2nes into the PHONES jack. With a CD inserted, press the PLAY/PAUSE (®p)/POWER ON button to turn the unit on CD skipping, which is useful when using the CD player in memory. 4 If the CD player is subject to the right. CD OPERATION (CONTINUED) 60 SECOND ELECTRONIC...
... in the memory until the CD player can read the music data properly from the disc. CONTINUED ON THE NEXT PAGE 8 Insert headpho2nes into the PHONES jack. With a CD inserted, press the PLAY/PAUSE (®p)/POWER ON button to turn the unit on CD skipping, which is useful when using the CD player in memory. 4 If the CD player is subject to the right. CD OPERATION (CONTINUED) 60 SECOND ELECTRONIC...
User Guide
Page 10
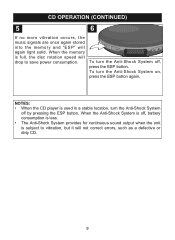
...; When the CD player is off by pressing the ESP button. When the Anti-Shock System is used in a stable location, turn the Anti-Shock System off, press the ESP button. To turn the Anti-Shock System off , battery consumption is less. • The Anti-Shock System provides for continuous sound output when the unit is full, the disc rotation speed...
...; When the CD player is off by pressing the ESP button. When the Anti-Shock System is used in a stable location, turn the Anti-Shock System off, press the ESP button. To turn the Anti-Shock System off , battery consumption is less. • The Anti-Shock System provides for continuous sound output when the unit is full, the disc rotation speed...
User Guide
Page 11
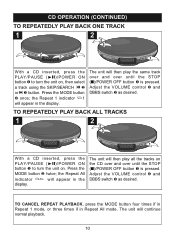
... appear in the display. TO CANCEL REPEAT PLAYBACK, press the MODE button four times if in Repeat 1 mode, or three times if in the display. CD OPERATION (CONTINUED) TO REPEATEDLY PLAY BACK ONE TRACK 1 2 2 3 4 2 3 1 1 With a CD inserted, press the PLAY/PAUSE (®p)/POWER ON button ‚ to turn the unit on, then select a track using the SKIP/SEARCH o 2 or n 3 button. the Repeat 1 indicator 1 will appear in Repeat All mode. Adjust the VOLUME control ƒ and DBBS switch „ as desired...
... appear in the display. TO CANCEL REPEAT PLAYBACK, press the MODE button four times if in Repeat 1 mode, or three times if in the display. CD OPERATION (CONTINUED) TO REPEATEDLY PLAY BACK ONE TRACK 1 2 2 3 4 2 3 1 1 With a CD inserted, press the PLAY/PAUSE (®p)/POWER ON button ‚ to turn the unit on, then select a track using the SKIP/SEARCH o 2 or n 3 button. the Repeat 1 indicator 1 will appear in Repeat All mode. Adjust the VOLUME control ƒ and DBBS switch „ as desired...
User Guide
Page 12
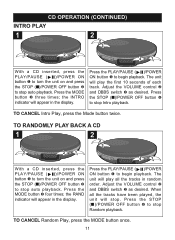
... Mode button twice. When all the tracks in the display. CD OPERATION (CONTINUED) INTRO PLAY 1 2 2 3 3 21 41 With a CD inserted, press the PLAY/PAUSE ( )/POWER ON button ‚ to turn the unit on and press the STOP (I)/POWER OFF button ƒ to stop auto playback. Press the PLAY/PAUSE ( )/POWER ON button ‚ to begin playback. the INTRO indicator will appear in random order. Adjust the VOLUME control ƒ and DBBS switch „ as desired. Adjust the VOLUME control...
... Mode button twice. When all the tracks in the display. CD OPERATION (CONTINUED) INTRO PLAY 1 2 2 3 3 21 41 With a CD inserted, press the PLAY/PAUSE ( )/POWER ON button ‚ to turn the unit on and press the STOP (I)/POWER OFF button ƒ to stop auto playback. Press the PLAY/PAUSE ( )/POWER ON button ‚ to begin playback. the INTRO indicator will appear in random order. Adjust the VOLUME control ƒ and DBBS switch „ as desired. Adjust the VOLUME control...
User Guide
Page 13
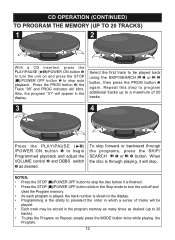
.... • As each program is played, the track number is shown in the display. • Programming is finished. • Press the STOP (I )/POWER OFF button 2 to stop . Press the PROG button 3; Repeat this step to program additional tracks up to be stored in which a series of 20 tracks. 3 4 2 3 1 2 1 Press the PLAY/PAUSE (®p) /POWER ON button ‚ to begin Programmed playback and adjust the VOLUME control ƒ and DBBS switch „ as desired...
.... • As each program is played, the track number is shown in the display. • Programming is finished. • Press the STOP (I )/POWER OFF button 2 to stop . Press the PROG button 3; Repeat this step to program additional tracks up to be stored in which a series of 20 tracks. 3 4 2 3 1 2 1 Press the PLAY/PAUSE (®p) /POWER ON button ‚ to begin Programmed playback and adjust the VOLUME control ƒ and DBBS switch „ as desired...
User Guide
Page 14
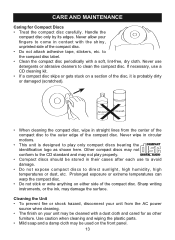
... not play only compact discs bearing the identification logo as other furniture. Use caution when cleaning and wiping the plastic parts. • Mild soap and a damp cloth may damage the surface. to clean the compact disc. Never wipe in circular motions. • This unit is probably dirty or damaged (scratched). • When cleaning the compact disc, wipe in straight lines from the AC power...
... not play only compact discs bearing the identification logo as other furniture. Use caution when cleaning and wiping the plastic parts. • Mild soap and a damp cloth may damage the surface. to clean the compact disc. Never wipe in circular motions. • This unit is probably dirty or damaged (scratched). • When cleaning the compact disc, wipe in straight lines from the AC power...
User Guide
Page 15
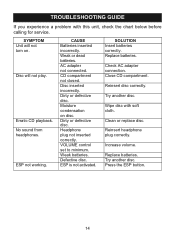
... for service. Replace batteries. Press the ESP button. 14 ESP not working. Headphone plug not inserted correctly. Defective disc. Try another disc. CAUSE Batteries inserted incorrectly. Dirty or defective disc. VOLUME control set to minimum. Clean or replace disc. Try another disc. Disc will not turn on disc. Moisture condensation on . ESP is not activated. Replace batteries. Check AC adapter connection. Reinsert disc correctly. Reinsert headphone plug correctly. AC adapter not connected. CD compartment not closed. Weak batteries. Disc inserted...
... for service. Replace batteries. Press the ESP button. 14 ESP not working. Headphone plug not inserted correctly. Defective disc. Try another disc. CAUSE Batteries inserted incorrectly. Dirty or defective disc. VOLUME control set to minimum. Clean or replace disc. Try another disc. Disc will not turn on disc. Moisture condensation on . ESP is not activated. Replace batteries. Check AC adapter connection. Reinsert disc correctly. Reinsert headphone plug correctly. AC adapter not connected. CD compartment not closed. Weak batteries. Disc inserted...
User Guide
Page 16
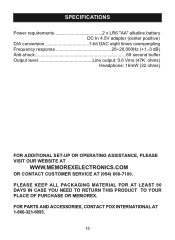
... PURCHASE OR MEMOREX. FOR PARTS AND ACCESSORIES, CONTACT FOX INTERNATIONAL AT 1-800-321-6993. 15 SPECIFICATIONS Power requirements 2 x LR6 "AA" alkaline battery DC In 4.5V adapter (center positive) D/A conversion 1-bit DAC eight times oversampling Frequency response 20~20,000Hz (+1,-3 dB) Anti-shock 60 second buffer Output level Line output: 0.6 Vms (47K ohms) Headphone: 16mW (32 ohms) FOR ADDITIONAL SET-UP OR OPERATING ASSISTANCE...
... PURCHASE OR MEMOREX. FOR PARTS AND ACCESSORIES, CONTACT FOX INTERNATIONAL AT 1-800-321-6993. 15 SPECIFICATIONS Power requirements 2 x LR6 "AA" alkaline battery DC In 4.5V adapter (center positive) D/A conversion 1-bit DAC eight times oversampling Frequency response 20~20,000Hz (+1,-3 dB) Anti-shock 60 second buffer Output level Line output: 0.6 Vms (47K ohms) Headphone: 16mW (32 ohms) FOR ADDITIONAL SET-UP OR OPERATING ASSISTANCE...


