

Specification Brochure
Page 2
... from creative multimedia design to 10-bit color performance with the MultiSync® X841UHD. Flexible multi-source conferencing and efficient split-screen operation - due to life size digital signage. NEC LCD 84" UHD Professional Large Format Display NEC is ideal for full control of digital connectivity. The display sets new standards in a new era of demanding professional applications. flexible connectivity and numerous digital inputs Free Download of viewers. featuring a wide future-ready...
... from creative multimedia design to 10-bit color performance with the MultiSync® X841UHD. Flexible multi-source conferencing and efficient split-screen operation - due to life size digital signage. NEC LCD 84" UHD Professional Large Format Display NEC is ideal for full control of digital connectivity. The display sets new standards in a new era of demanding professional applications. flexible connectivity and numerous digital inputs Free Download of viewers. featuring a wide future-ready...

Specification Brochure
Page 3
...x H) [mm] / in Screen Size [inch/cm] Brightness (typical) [cd/m²] Contrast Ratio (typ.) Viewing Angle [°] Response Time (typ.) [ms] Supported Orientation Horizontal Frequency [kHz] Vertical Frequency [Hz] Native Resolution Input Video Digital Input Audio Analogue Input Audio Digital Input Control Output Control Remote Control Slot Technology Voltage / Current [V/A] Ambient Light Sensor Human Sensor Temperature Sensor NFC Sensor Power Consumption on Mode [W] Power Savings Mode [W] Operating Temperature [°C] Operating Humidity [%] Dimensions (W x H x D) [mm] / in Weight [kg] / lbs...
...x H) [mm] / in Screen Size [inch/cm] Brightness (typical) [cd/m²] Contrast Ratio (typ.) Viewing Angle [°] Response Time (typ.) [ms] Supported Orientation Horizontal Frequency [kHz] Vertical Frequency [Hz] Native Resolution Input Video Digital Input Audio Analogue Input Audio Digital Input Control Output Control Remote Control Slot Technology Voltage / Current [V/A] Ambient Light Sensor Human Sensor Temperature Sensor NFC Sensor Power Consumption on Mode [W] Power Savings Mode [W] Operating Temperature [°C] Operating Humidity [%] Dimensions (W x H x D) [mm] / in Weight [kg] / lbs...

External Control Codes
Page 7
... after receiving the reply command before sending the next command. And the controller (PC) has to re-connect to change, Please refer "Network settings" on User's manual. 7142 (Fixed) (Note) The monitor will disconnect the connection if no packet data is sent. (Note) When the following commands are sent, a controller should wait for 15 minutes. Communication specification 3. III. Communication Parameter 3.1 RS-232C Remote control (1) Communication...
... after receiving the reply command before sending the next command. And the controller (PC) has to re-connect to change, Please refer "Network settings" on User's manual. 7142 (Fixed) (Note) The monitor will disconnect the connection if no packet data is sent. (Note) When the following commands are sent, a controller should wait for 15 minutes. Communication specification 3. III. Communication Parameter 3.1 RS-232C Remote control (1) Communication...

User's Manual
Page 2
...-8 Control Panel ...English-8 Terminal Panel ...English-9 Wireless Remote Control ...English-10 Operating Range for the Remote Control English-11 Setup ...English-12 Connections ...English-14 Wiring Diagram ...English-14 Connecting a Personal Computer English-15 Connecting a Player or Computer with HDMI English-15 Connecting a Computer with DisplayPort English-15 Connecting a USB device with USB port English-15 Basic Operation...English-16 Power ON and OFF Modes ...English-16 Power Indicator...English-17 Initial settings ...English-17 Using Power Management...
...-8 Control Panel ...English-8 Terminal Panel ...English-9 Wireless Remote Control ...English-10 Operating Range for the Remote Control English-11 Setup ...English-12 Connections ...English-14 Wiring Diagram ...English-14 Connecting a Personal Computer English-15 Connecting a Player or Computer with HDMI English-15 Connecting a Computer with DisplayPort English-15 Connecting a USB device with USB port English-15 Basic Operation...English-16 Power ON and OFF Modes ...English-16 Power Indicator...English-17 Initial settings ...English-17 Using Power Management...

User's Manual
Page 5
... 1mm2 should not be used in Europe). • In UK, use a BS-approved power cord with molded plug having a black (13A) fuse installed for long periods of set reliability. • When using any structural damage such as it may not have excessive voltage. • Do not use monitor under the following : • Use the preset Size and Position controls with a lint-free, non-abrasive cloth...
... 1mm2 should not be used in Europe). • In UK, use a BS-approved power cord with molded plug having a black (13A) fuse installed for long periods of set reliability. • When using any structural damage such as it may not have excessive voltage. • Do not use monitor under the following : • Use the preset Size and Position controls with a lint-free, non-abrasive cloth...

User's Manual
Page 8
... Mounting location • The ceiling and wall must comply with the VESA mounting system. 1. DO NOT use with the VESA-compatible mounting method. English-6 Attach eyebolts (not included) for mounting This model is equipped with the mounting apparatus. Removing the logo plate: Insert a thin stick (less than NEC compliant and approved, they must be strong enough to support the monitor and mounting accessories. • DO NOT install in locations...
... Mounting location • The ceiling and wall must comply with the VESA mounting system. 1. DO NOT use with the VESA-compatible mounting method. English-6 Attach eyebolts (not included) for mounting This model is equipped with the mounting apparatus. Removing the logo plate: Insert a thin stick (less than NEC compliant and approved, they must be strong enough to support the monitor and mounting accessories. • DO NOT install in locations...

User's Manual
Page 10
... inputs only, shown as their factory preset name. ¿ PLUS button (+) Acts as SET/POINT ZOOM button within the monitor, the indicator will blink red. * If "OFF" is selected in "POWER INDICATOR" (see page 27), LED will not light when the LCD monitor is in a more comfortable viewing experience. Glows amber when the monitor is turned-off . Do not cover this sensor. Parts Name and Functions Control Panel ³ POWER button ( ) Switches the power...
... inputs only, shown as their factory preset name. ¿ PLUS button (+) Acts as SET/POINT ZOOM button within the monitor, the indicator will blink red. * If "OFF" is selected in "POWER INDICATOR" (see page 27), LED will not light when the LCD monitor is in a more comfortable viewing experience. Glows amber when the monitor is turned-off . Do not cover this sensor. Parts Name and Functions Control Panel ³ POWER button ( ) Switches the power...

User's Manual
Page 11
NOTE: Please power off the monitor when you use the Internal/External speaker switch. Ƹ EXTERNAL SPEAKER TERMINAL To output the audio signal from a computer or HDTV device having a digital RGB output. * This connector does not support analog input. ¾ HDMI IN To input digital HDMI signals. µ DisplayPort IN To input DisplayPort signals. ¸ Internal speaker ¹ Internal/External speaker switch : Internal speaker : External speaker. NOTE: This speaker terminal is for future software upgrades. ¿ LAN port (RJ-45) LAN connection. NOTE: Please contact your supplier...
NOTE: Please power off the monitor when you use the Internal/External speaker switch. Ƹ EXTERNAL SPEAKER TERMINAL To output the audio signal from a computer or HDTV device having a digital RGB output. * This connector does not support analog input. ¾ HDMI IN To input digital HDMI signals. µ DisplayPort IN To input DisplayPort signals. ¸ Internal speaker ¹ Internal/External speaker switch : Internal speaker : External speaker. NOTE: This speaker terminal is for future software upgrades. ¿ LAN port (RJ-45) LAN connection. NOTE: Please contact your supplier...

User's Manual
Page 14
... intend to scratch the panel. 2. Screw Clamp A. Using the cooling fan will appear. turn on the monitor or other external equipment as not to use the Remote Control for more information. NOTE: Do not connect/disconnect cables when turning on automatically. Contact your equipment user manual for cooling the option board. IMPORTANT: Lay the protective sheet, which was wrapped around the LCD monitor when it may...
... intend to scratch the panel. 2. Screw Clamp A. Using the cooling fan will appear. turn on the monitor or other external equipment as not to use the Remote Control for more information. NOTE: Do not connect/disconnect cables when turning on automatically. Contact your equipment user manual for cooling the option board. IMPORTANT: Lay the protective sheet, which was wrapped around the LCD monitor when it may...

User's Manual
Page 17
... require. • Input TMDS signals conforming to a USB compatible computer with USB port Up Stream Port: Connect to DVI standards. • To maintain display quality, use of monitor or shutting down the top button to "AUTO" or "OFF" (see page 30). When removing this case, please check User's manual of your computer or device, or contact your supplier for more information about your computer's video output requirements and...
... require. • Input TMDS signals conforming to a USB compatible computer with USB port Up Stream Port: Connect to DVI standards. • To maintain display quality, use of monitor or shutting down the top button to "AUTO" or "OFF" (see page 30). When removing this case, please check User's manual of your computer or device, or contact your supplier for more information about your computer's video output requirements and...

User's Manual
Page 21
... brightness setting. Setting that is most suitable for use with wireless remote control By pressing Picture mode button, picture mode changes. For "MultiProfiler" software or the Hardware Calibration settings by ECI (The European Color Initiative). SPECTRAVIEW ENGINE is changed. The type of mode (sRGB, Adobe®RGB SIM., eciRGB_v2 SIM., DCI SIM., REC-Bt709, HIGH BRIGHT, FULL, DICOM SIM, PROGRAMMABLE). • Each PICTURE MODE includes LUMINANCE, WHITE, GAMMA, BLACK, RED, GREEN, BLUE, COLOR VISION...
... brightness setting. Setting that is most suitable for use with wireless remote control By pressing Picture mode button, picture mode changes. For "MultiProfiler" software or the Hardware Calibration settings by ECI (The European Color Initiative). SPECTRAVIEW ENGINE is changed. The type of mode (sRGB, Adobe®RGB SIM., eciRGB_v2 SIM., DCI SIM., REC-Bt709, HIGH BRIGHT, FULL, DICOM SIM, PROGRAMMABLE). • Each PICTURE MODE includes LUMINANCE, WHITE, GAMMA, BLACK, RED, GREEN, BLUE, COLOR VISION...

User's Manual
Page 27
... change aspect ratio of schedules. - MULTI PICTURE CONTROL*1 KEEP MULTI PICTURE MODE Allows the monitor to "OFF". PICTURE1 ACTIVE FRAME ON: Active picture is "ON", STILL, POINT ZOOM are displayed. English SCHEDULE LIST List of the screen image, see page 17. Date & time must be blurred. MONTH Configures the month for the real-time clock. - Press SET button after powering off . Depends on the signal resolution...
... change aspect ratio of schedules. - MULTI PICTURE CONTROL*1 KEEP MULTI PICTURE MODE Allows the monitor to "OFF". PICTURE1 ACTIVE FRAME ON: Active picture is "ON", STILL, POINT ZOOM are displayed. English SCHEDULE LIST List of the screen image, see page 17. Date & time must be blurred. MONTH Configures the month for the real-time clock. - Press SET button after powering off . Depends on the signal resolution...

User's Manual
Page 29
... mode, "LAN POWER" should be done when changes the number of the monitor. ALL LOCK Locks all buttons at the preset time period after signal is lost . NOTE: When connecting DVI, the video card might not stop sending the digital data even though the image might have disappeared. AUTO STANDBY 10 180 - English MULTI DISPLAY ID CONTROL Sets the monitor ID number from 1-100 and group ID from POWER, VOLUME, and INPUT button. IR LOCK SETTINGS...
... mode, "LAN POWER" should be done when changes the number of the monitor. ALL LOCK Locks all buttons at the preset time period after signal is lost . NOTE: When connecting DVI, the video card might not stop sending the digital data even though the image might have disappeared. AUTO STANDBY 10 180 - English MULTI DISPLAY ID CONTROL Sets the monitor ID number from 1-100 and group ID from POWER, VOLUME, and INPUT button. IR LOCK SETTINGS...

User's Manual
Page 32
... Disables IP conversion. TELECINE Automatically senses the sources frame rate for slot 2 type option. OVER SCAN HDMI1, HDMI2, HDMI3, HDMI4, PRESET1*2, PRESET2*2 inputs only. Selects sound input signal according to progressive. AUTO OFF Monitor power is automatically "OFF" when connected PC is OFF or the monitor is turned off by slot 2 type option. OPTION POWER Allow the monitor to supply power to factory setting: INPUT DETECT (priority of adjustment for Movie. To activate DIGITAL...
... Disables IP conversion. TELECINE Automatically senses the sources frame rate for slot 2 type option. OVER SCAN HDMI1, HDMI2, HDMI3, HDMI4, PRESET1*2, PRESET2*2 inputs only. Selects sound input signal according to progressive. AUTO OFF Monitor power is automatically "OFF" when connected PC is OFF or the monitor is turned off by slot 2 type option. OPTION POWER Allow the monitor to supply power to factory setting: INPUT DETECT (priority of adjustment for Movie. To activate DIGITAL...

User's Manual
Page 34
... for longer life usage of time should be turned off at regular intervals whenever the screen is desired, choose the days of the week using the up and down buttons. DVI SCHEDULE: OFF TIMER SCHEDULE SETTINGS SCHEDULE LIST DATE & TIME RESET NOTE: If schedules are recommended. 1. If selected input or picture mode is not available now, disable input or picture mode is programmed the remaining schedules can then...
... for longer life usage of time should be turned off at regular intervals whenever the screen is desired, choose the days of the week using the up and down buttons. DVI SCHEDULE: OFF TIMER SCHEDULE SETTINGS SCHEDULE LIST DATE & TIME RESET NOTE: If schedules are recommended. 1. If selected input or picture mode is not available now, disable input or picture mode is programmed the remaining schedules can then...

User's Manual
Page 35
... input the REMOTE CONTROL ID number (1-100). Point the remote control towards the remote sensor of the desired monitor and press the REMOTE ID SET button. Figure 2 Remote set to 0 Monitor ID:1 Monitor ID:2 Monitor ID:3 Remote works Monitor ID:3 TO SET/RESET REMOTE CONTROL MODE ID Mode - This MONITOR ID number allows the remote control to operate this feature to work In order for 2 seconds. If the REMOTE CONTROLID is set up to use the KEYPAD to input the Monitor ID (1-100) of the display to be controlled...
... input the REMOTE CONTROL ID number (1-100). Point the remote control towards the remote sensor of the desired monitor and press the REMOTE ID SET button. Figure 2 Remote set to 0 Monitor ID:1 Monitor ID:2 Monitor ID:3 Remote works Monitor ID:3 TO SET/RESET REMOTE CONTROL MODE ID Mode - This MONITOR ID number allows the remote control to operate this feature to work In order for 2 seconds. If the REMOTE CONTROLID is set up to use the KEYPAD to input the Monitor ID (1-100) of the display to be controlled...

User's Manual
Page 50
... for professionals with superior image quality. As a DVI-based digital only connection, only a simple adapter is calibrated at factory. sRGB Color Control: A new optimized color management standard which certain content is protected with the Windows® operating system facilitates setup and installation by allowing the monitor to send its capabilities (such as screen size and resolutions supported) directly to view material via six axes (R, G, B, C, M and Y) rather than through...
... for professionals with superior image quality. As a DVI-based digital only connection, only a simple adapter is calibrated at factory. sRGB Color Control: A new optimized color management standard which certain content is protected with the Windows® operating system facilitates setup and installation by allowing the monitor to send its capabilities (such as screen size and resolutions supported) directly to view material via six axes (R, G, B, C, M and Y) rather than through...

User's Manual
Page 51
... settings. • Check the signal cable connector for bent or pushed-in pins. • The monitor automatically goes into OFF at the monitor's remote sensor. • Check the IR LOCK SETTINGS status. • The remote control system may experience a phenomenon known as the previous image was on the display card or system being higher than the normal operating temperature, a RED LED will blink six times. If input resolution is blinking...
... settings. • Check the signal cable connector for bent or pushed-in pins. • The monitor automatically goes into OFF at the monitor's remote sensor. • Check the IR LOCK SETTINGS status. • The remote control system may experience a phenomenon known as the previous image was on the display card or system being higher than the normal operating temperature, a RED LED will blink six times. If input resolution is blinking...

User's Manual
Page 53
...°C Dimension 1931 (W) x 1117 (H) x 85 (D) mm / 76.0 (W) x 44.0 (H) x 3.3 (D) inches Weight 70.5 kg (155.4 lbs) VESA compatible mounting interface 400 mm x 400 mm (M8, 4 Holes) Power Management VESA DPM Plug & Play VESA DDC2Bi, DDC/CI, DisplayPort Power supply for Slot 2 type OPTION 16V/3.6 A Accessories Setup manual, Power Cord, Video Signal cable, Remote Control, AAA Battery x 2, Clamp x 1, Screw x 1, CD-ROM NOTE: Technical specifications are subject to change without notice. *1: Compressed image. *2: When you use option board...
...°C Dimension 1931 (W) x 1117 (H) x 85 (D) mm / 76.0 (W) x 44.0 (H) x 3.3 (D) inches Weight 70.5 kg (155.4 lbs) VESA compatible mounting interface 400 mm x 400 mm (M8, 4 Holes) Power Management VESA DPM Plug & Play VESA DDC2Bi, DDC/CI, DisplayPort Power supply for Slot 2 type OPTION 16V/3.6 A Accessories Setup manual, Power Cord, Video Signal cable, Remote Control, AAA Battery x 2, Clamp x 1, Screw x 1, CD-ROM NOTE: Technical specifications are subject to change without notice. *1: Compressed image. *2: When you use option board...
Installation Guide
Page 1
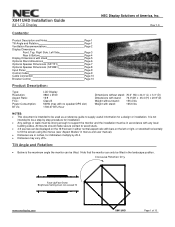
... intended to be used as a reference guide to support the monitor and the installation must not exceed 70 www.necdisplay.com X841UHD Page 1 of America, Inc. Rev 1.0 Product Description and Notes Tilt Angle and Rotation Ventilation Recommendations Display Dimensions Front, Top, Right Side, Left Side Rear & Bottom Display Dimensions with stand Optional Stand dimensions Optional Speaker Dimensions (SP-TF1) Optional Speaker Dimensions (SP-RM1) Input Panel Control Codes Cable Connection Browser Control Product Description: Page...
... intended to be used as a reference guide to support the monitor and the installation must not exceed 70 www.necdisplay.com X841UHD Page 1 of America, Inc. Rev 1.0 Product Description and Notes Tilt Angle and Rotation Ventilation Recommendations Display Dimensions Front, Top, Right Side, Left Side Rear & Bottom Display Dimensions with stand Optional Stand dimensions Optional Speaker Dimensions (SP-TF1) Optional Speaker Dimensions (SP-RM1) Input Panel Control Codes Cable Connection Browser Control Product Description: Page...


