
Instruction Manual
Page 3
... waste handling of parts and accessories and, as well, symbols for production of this product may contain materials that can be handed over to protect the appliance during shipping and are indicated on its packaging indicates that this product. IMPORTANT SAFETY INSTRUCTIONS When using an electrical appliance, basic precautions should always be treated as you purchased the product. Old vacuum cleaners may...
... waste handling of parts and accessories and, as well, symbols for production of this product may contain materials that can be handed over to protect the appliance during shipping and are indicated on its packaging indicates that this product. IMPORTANT SAFETY INSTRUCTIONS When using an electrical appliance, basic precautions should always be treated as you purchased the product. Old vacuum cleaners may...

Instruction Manual
Page 4
If you are dry. • Do not allow the vacuum cleaner to be vacuumed. Close attention is not working as an handle, close a door on wet surfaces or to an electrical outlet; Use only manufacturer's recommended attachments. • Connect to freshly shampooed carpets: wait until they should be used by the cord, use the cord as it should correspond with wet hands. 4 Never use the cleaner with a damaged cord or plug. •...
If you are dry. • Do not allow the vacuum cleaner to be vacuumed. Close attention is not working as an handle, close a door on wet surfaces or to an electrical outlet; Use only manufacturer's recommended attachments. • Connect to freshly shampooed carpets: wait until they should be used by the cord, use the cord as it should correspond with wet hands. 4 Never use the cleaner with a damaged cord or plug. •...

Instruction Manual
Page 5
... use. • Use extra care when cleaning on stairs. • When using this appliance with a cord reel always hold the plug when rewinding onto the cord reel. Do not allow the plug to whip while rewinding. • Floor attachments accessories and wands must not be used at head level to avoid injury to eyes and ears. • Always keep free of the body away from openings and moving parts...
... use. • Use extra care when cleaning on stairs. • When using this appliance with a cord reel always hold the plug when rewinding onto the cord reel. Do not allow the plug to whip while rewinding. • Floor attachments accessories and wands must not be used at head level to avoid injury to eyes and ears. • Always keep free of the body away from openings and moving parts...

Instruction Manual
Page 6
... a cord having the same configuration as the plug. Improper connection of the equipment-grounding conductor can be accepted for damages to the original product. This appliance is properly installed and grounded in a risk of tampering and or modifications to persons and or objects caused by improper use, maintenance carried out by a qualified electrician. SAVE THESE INSTRUCTIONS. The plug...
... a cord having the same configuration as the plug. Improper connection of the equipment-grounding conductor can be accepted for damages to the original product. This appliance is properly installed and grounded in a risk of tampering and or modifications to persons and or objects caused by improper use, maintenance carried out by a qualified electrician. SAVE THESE INSTRUCTIONS. The plug...

Instruction Manual
Page 7
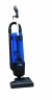
D Replace the wand and ergonomic handle of the appliance. 7 Insert the oval tube complete with handgrip into the top seating in the machine and push all the way in compartment D of the suction hose in . ENGLISH DESCRIPTION 1 Ergonomic handgrip 2 Top and bottom cord winder 3 ON/OFF switch 4 Full bag indicator 5 Ventilation grid 6 Filter 7 Suction hose 8 Power head 9 Back door Insert the rotary hose coupling in the suction opening B.
D Replace the wand and ergonomic handle of the appliance. 7 Insert the oval tube complete with handgrip into the top seating in the machine and push all the way in compartment D of the suction hose in . ENGLISH DESCRIPTION 1 Ergonomic handgrip 2 Top and bottom cord winder 3 ON/OFF switch 4 Full bag indicator 5 Ventilation grid 6 Filter 7 Suction hose 8 Power head 9 Back door Insert the rotary hose coupling in the suction opening B.

Instruction Manual
Page 8
BAG FULL INDICATOR ENGLISH The bag full indicator switches on to be replaced about every 20 dust bags). 8 To insert a new bag, proceed in M. Open the filter support and replace it or clean it by tapping it gently (the filter needs to show when the dust bag needs replacing or when there is something blocking the suction pipe (in the figure. REPLACING THE BAG FILTER Pull out the full dust bag, as illustrated in this case, inspect the pipe and remove the blockage). FILTER REPLACEMENT Remove the small door H using the latch, as shown in reverse order.
BAG FULL INDICATOR ENGLISH The bag full indicator switches on to be replaced about every 20 dust bags). 8 To insert a new bag, proceed in M. Open the filter support and replace it or clean it by tapping it gently (the filter needs to show when the dust bag needs replacing or when there is something blocking the suction pipe (in the figure. REPLACING THE BAG FILTER Pull out the full dust bag, as illustrated in this case, inspect the pipe and remove the blockage). FILTER REPLACEMENT Remove the small door H using the latch, as shown in reverse order.

Instruction Manual
Page 9
FILTER REPLACEMENT ENGLISH STARTING THE CARPET BEATER Activate the fasteners N to release the ventilation grille. Avoid frequent use of the carpet beater attachment on special rugs or carpets that could become damaged over time. 9 The carpet beater attachment will start up. To work, press the power head down and lower the vacuum cleaner at the same time. Replace or clean the filter by washing it with water, then dry it and put it carefully back in place. Refit the filter and ventilation grid, until you hear the click into place.
FILTER REPLACEMENT ENGLISH STARTING THE CARPET BEATER Activate the fasteners N to release the ventilation grille. Avoid frequent use of the carpet beater attachment on special rugs or carpets that could become damaged over time. 9 The carpet beater attachment will start up. To work, press the power head down and lower the vacuum cleaner at the same time. Replace or clean the filter by washing it with water, then dry it and put it carefully back in place. Refit the filter and ventilation grid, until you hear the click into place.

Instruction Manual
Page 10
ENGLISH APPLIANCE BLOCKAGE REMOVING OBSTRUCTIONS FROM THE EXTERNAL HOSE REMOVING OBSTRUCTIONS FROM THE CARPET BEATER Check and if necessary, unblock the pipe, using the pipe of the vacuum cleaner or a flexible brush. 10
ENGLISH APPLIANCE BLOCKAGE REMOVING OBSTRUCTIONS FROM THE EXTERNAL HOSE REMOVING OBSTRUCTIONS FROM THE CARPET BEATER Check and if necessary, unblock the pipe, using the pipe of the vacuum cleaner or a flexible brush. 10

Instruction Manual
Page 11
... power supply. Do not attempt any repair or for purchase of accessory parts contact only your private dealer or an authorised technical centre. Dustbags are disposable and intended to reuse them. FOR SAFETY WHEN SERVICING OR MAINTAINING MACHINE • Do not leave the vacuum plugged in. Do not attempt to be used only once. Never immerse in water...
... power supply. Do not attempt any repair or for purchase of accessory parts contact only your private dealer or an authorised technical centre. Dustbags are disposable and intended to reuse them. FOR SAFETY WHEN SERVICING OR MAINTAINING MACHINE • Do not leave the vacuum plugged in. Do not attempt to be used only once. Never immerse in water...

Instruction Manual
Page 23
ELECTRIC DIAGRAM Caution! SCHEMA ELECTRIQUE Attention, les interventions sur l'installation électrique doivent être effectuées par un spécialisé. 23 Any job involving the electric plant must be carried out only by qualified personnel.
ELECTRIC DIAGRAM Caution! SCHEMA ELECTRIQUE Attention, les interventions sur l'installation électrique doivent être effectuées par un spécialisé. 23 Any job involving the electric plant must be carried out only by qualified personnel.
