
User Manual English
Page 1
CD Player C-1VL Instruction Manual Contents Introduction 2 Connections 10 Operation 12 Thank you to obtain optimum performance and listening enjoyment from your new CD Player. Troubleshooting 17 Specifications 18 En Please read this manual will enable you for future reference. Please retain this manual for purchasing an Onkyo CD Player. Following the instructions in this manual thoroughly before making connections and plugging in the unit.
CD Player C-1VL Instruction Manual Contents Introduction 2 Connections 10 Operation 12 Thank you to obtain optimum performance and listening enjoyment from your new CD Player. Troubleshooting 17 Specifications 18 En Please read this manual will enable you for future reference. Please retain this manual for purchasing an Onkyo CD Player. Following the instructions in this manual thoroughly before making connections and plugging in the unit.
User Manual English
Page 2
... covered by the operating instructions as power-supply cord or plug is damaged, liquid has been spilled or objects have fallen into the apparatus through openings as vases shall be set 10 cm (4") away from the apparatus. 11. Servicing is intended to alert the user to qualified service personnel. When the apparatus exhibits a distinct change in any ventilation openings. The apparatus...
... covered by the operating instructions as power-supply cord or plug is damaged, liquid has been spilled or objects have fallen into the apparatus through openings as vases shall be set 10 cm (4") away from the apparatus. 11. Servicing is intended to alert the user to qualified service personnel. When the apparatus exhibits a distinct change in any ventilation openings. The apparatus...

User Manual English
Page 3
... fuse. Care Occasionally you install this unit turned on the body of the optical pickup. • Avoid damp and dusty places, and places subject to be performed only by your discs and certain parts inside this unit, especially if it on the power supply cord of condensation, keep this unit. - Should the fuse need to vibrations from country to...
... fuse. Care Occasionally you install this unit turned on the body of the optical pickup. • Avoid damp and dusty places, and places subject to be performed only by your discs and certain parts inside this unit, especially if it on the power supply cord of condensation, keep this unit. - Should the fuse need to vibrations from country to...
User Manual English
Page 4
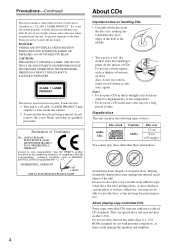
... ONKYO EUROPE ELECTRONICS GmbH About CDs Important notes on handling CDs • Carefully lift the disc from adhesive tape, rental discs that have custom labels or stickers. Do not use this model properly, read this instruction manual is in this Instruction Manual carefully. So, to open the enclosure. In case of time. DANGER: VISIBLE AND INVISIBLE LASER RADIATION WHEN OPEN AND INTERLOCK FAILED OR DEFEATED. Refer servicing...
... ONKYO EUROPE ELECTRONICS GmbH About CDs Important notes on handling CDs • Carefully lift the disc from adhesive tape, rental discs that have custom labels or stickers. Do not use this model properly, read this instruction manual is in this Instruction Manual carefully. So, to open the enclosure. In case of time. DANGER: VISIBLE AND INVISIBLE LASER RADIATION WHEN OPEN AND INTERLOCK FAILED OR DEFEATED. Refer servicing...

User Manual English
Page 5
......7 Remote Controller...8 Remote Controller (RC-544C 8 Inserting the Batteries...9 Using the Remote Controller 9 Connections Cables and Connectors...10 Before Making Any Connections 10 Connections ...11 Making Analog Connections to Amplifier and Recorder 11 Making Digital Connections to Amplifier and Recorder 11 Operation Turning On the C-1VL ...12 Connecting the Supplied Power Cord 12 Turning On the C-1VL ...12 Enabling the Digital Signal Output 12 Playing CDs...13 Playing CDs ...13 Selecting Tracks by Number 14 Displaying the Remaining Time 14 Random Playback ...15 Repeat Playback...
......7 Remote Controller...8 Remote Controller (RC-544C 8 Inserting the Batteries...9 Using the Remote Controller 9 Connections Cables and Connectors...10 Before Making Any Connections 10 Connections ...11 Making Analog Connections to Amplifier and Recorder 11 Making Digital Connections to Amplifier and Recorder 11 Operation Turning On the C-1VL ...12 Connecting the Supplied Power Cord 12 Turning On the C-1VL ...12 Enabling the Digital Signal Output 12 Playing CDs...13 Playing CDs ...13 Selecting Tracks by Number 14 Displaying the Remaining Time 14 Random Playback ...15 Repeat Playback...
User Manual English
Page 6
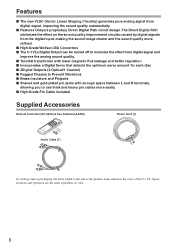
..., the letter added to use thick and heavy pin cables more refined. I The new VLSC (Vector Linear Shaping Circuitry) generates pure analog signal from digital signal, improving the sound quality substantially. I High-Grade Pin Cable included Supplied Accessories Remote Controller (RC-544C) & Two batteries (AA/R6) RC-544C 1 4 2 7 5 OPEN / CLOSE 3 >10 10 / 0 8 CLEAR 9 6 REPEAT RANDOM MEMORY PLAY Audio Cable [1] Power Cord [1] In catalogs and on...
..., the letter added to use thick and heavy pin cables more refined. I The new VLSC (Vector Linear Shaping Circuitry) generates pure analog signal from digital signal, improving the sound quality substantially. I High-Grade Pin Cable included Supplied Accessories Remote Controller (RC-544C) & Two batteries (AA/R6) RC-544C 1 4 2 7 5 OPEN / CLOSE 3 >10 10 / 0 8 CLEAR 9 6 REPEAT RANDOM MEMORY PLAY Audio Cable [1] Power Cord [1] In catalogs and on...

User Manual English
Page 7
... B RANDOM indicator Illuminates during repeat playback. C MEMORY indicator Illuminates during memory playback. Rear Panel DIGITAL OUTPUT COMPACT DISC PLAYER C-1VL 7 [ / ] button Press to start playback. These three terminals output the sound signal with equal quality. When using the digital connection, you have to turn on/off the C-1VL. 2 DISPLAY button Press to change the displayed information. 3 Open [ ] button Press to open and close the disc tray. 4 Pause [ ] button Press to pause the playback 5 Stop [ ] button Press to stop the playback. 6 Play [ ] button Press to select the...
... B RANDOM indicator Illuminates during repeat playback. C MEMORY indicator Illuminates during memory playback. Rear Panel DIGITAL OUTPUT COMPACT DISC PLAYER C-1VL 7 [ / ] button Press to start playback. These three terminals output the sound signal with equal quality. When using the digital connection, you have to turn on/off the C-1VL. 2 DISPLAY button Press to change the displayed information. 3 Open [ ] button Press to open and close the disc tray. 4 Pause [ ] button Press to pause the playback 5 Stop [ ] button Press to stop the playback. 6 Play [ ] button Press to select the...

User Manual English
Page 8
... the disc tray. 6 REPEAT button During playback, press to repeat playback. 7 RANDOM button Press to start random playback. 8 MEMORY button Press to make a memory program while stopped. 9 CLEAR button Press to remove the last track in the program. 0 PLAY [ ] button Press to select the previous or next track. A [ / ] buttons Press to start playback. PLAY [ ] button Stop [ ] button Pause [ ] button [ / ] buttons [ / ] buttons PLAY RC-573A 8 The RC-573A remote controller, which is supplied with the Onkyo's Integrated Stereo Amplifier A-1VL, can be used to operate the C-1VL.
... the disc tray. 6 REPEAT button During playback, press to repeat playback. 7 RANDOM button Press to start random playback. 8 MEMORY button Press to make a memory program while stopped. 9 CLEAR button Press to remove the last track in the program. 0 PLAY [ ] button Press to select the previous or next track. A [ / ] buttons Press to start playback. PLAY [ ] button Stop [ ] button Pause [ ] button [ / ] buttons [ / ] buttons PLAY RC-573A 8 The RC-573A remote controller, which is supplied with the Onkyo's Integrated Stereo Amplifier A-1VL, can be used to operate the C-1VL.

User Manual English
Page 9
... the remote controller and the remote control sensor, the remote controller will vary depending on the remote controller. POWER DISPLAY A(b1o6ufte5etm) DIGITAL OUTPUT COMPACT DISC PLAYER C-1VL Notes: • Place the unit away from corrosion. Placing the unit behind such doors may cause operational interference. • Do not put any object, such as a book, on usage. Attach the battery cover. If the remote controller does not operate smoothly, replace both batteries at the same time...
... the remote controller and the remote control sensor, the remote controller will vary depending on the remote controller. POWER DISPLAY A(b1o6ufte5etm) DIGITAL OUTPUT COMPACT DISC PLAYER C-1VL Notes: • Place the unit away from corrosion. Placing the unit behind such doors may cause operational interference. • Do not put any object, such as a book, on usage. Attach the battery cover. If the remote controller does not operate smoothly, replace both batteries at the same time...

User Manual English
Page 10
... instructions that came with a digital input to the C-1VL for the left channel. Before you disconnect the cable, put the cap back on the terminal. If you connect a cable to the equipment. Improper connections can connect a DAT or CD recorder with the component that you are connecting. • Do not plug in the power cord until all plugs and connectors securely. Doing so may adversely affect the sound...
... instructions that came with a digital input to the C-1VL for the left channel. Before you disconnect the cable, put the cap back on the terminal. If you connect a cable to the equipment. Improper connections can connect a DAT or CD recorder with the component that you are connecting. • Do not plug in the power cord until all plugs and connectors securely. Doing so may adversely affect the sound...

User Manual English
Page 11
... sound or perform analog recording, make digital connection. Example for connecting the Cassette recorder AUDIO OUTPUT ANALOG R L AUDIO OUTPUT DIGITAL OPTICAL COAXIAL COMPACT DISC PLAYER C-1VL AUDIO OUTPUT ANALOG R L Supplied L R (IN) (OUT) AC IN Connect one or the other STANDBY/ON AUDIO ADJUST SETUP RETURN MASTER VOLUME POWER ON OFF REC OUT OFF STANDBY DISPLAY DIMMER STEREO LISTENING MODE SURROUND THX DSP PHONES DIRECT/ PURE AUDIO PURE AUDIO AUDIO SELECTOR DVD VIDEO 1 VIDEO 2 VIDEO 3 VIDEO 4 VCR 1 VCR 2 TAPE TUNER CD PHONO ENTER VIDEO 4 INPUT...
... sound or perform analog recording, make digital connection. Example for connecting the Cassette recorder AUDIO OUTPUT ANALOG R L AUDIO OUTPUT DIGITAL OPTICAL COAXIAL COMPACT DISC PLAYER C-1VL AUDIO OUTPUT ANALOG R L Supplied L R (IN) (OUT) AC IN Connect one or the other STANDBY/ON AUDIO ADJUST SETUP RETURN MASTER VOLUME POWER ON OFF REC OUT OFF STANDBY DISPLAY DIMMER STEREO LISTENING MODE SURROUND THX DSP PHONES DIRECT/ PURE AUDIO PURE AUDIO AUDIO SELECTOR DVD VIDEO 1 VIDEO 2 VIDEO 3 VIDEO 4 VCR 1 VCR 2 TAPE TUNER CD PHONO ENTER VIDEO 4 INPUT...

User Manual English
Page 12
.... Always connect by plugging into the wall outlet. AC INLET To AC wall outlet Turning On the C-1VL Enabling the Digital Signal Output In the C-1VL, the digital audio output is turned off by unplugging from the C-1VL while the other end is recommended. 12 POWER DISPLAY DIGITAL OUTPUT COMPACT DISC PLAYER C-1VL DIGITAL OUTPUT DIGITAL OUTPUT Pressing the DIGITAL OUTPUT button toggles the digital audio output function between on the playing component (C1VL) before turning off ( ). OFF: Disable the digital audio signal output. The power cord supplied is...
.... Always connect by plugging into the wall outlet. AC INLET To AC wall outlet Turning On the C-1VL Enabling the Digital Signal Output In the C-1VL, the digital audio output is turned off by unplugging from the C-1VL while the other end is recommended. 12 POWER DISPLAY DIGITAL OUTPUT COMPACT DISC PLAYER C-1VL DIGITAL OUTPUT DIGITAL OUTPUT Pressing the DIGITAL OUTPUT button toggles the digital audio output function between on the playing component (C1VL) before turning off ( ). OFF: Disable the digital audio signal output. The power cord supplied is...

User Manual English
Page 13
... [ ] button to open the disc tray. 2 Put the CD on the Label side tray with the label-side facing up. Note: With CDs that contain many tracks, playback may take a while to start . I To Stop Playback Press the Stop [ ] button. The Pause indicator appears. Playback starts and the Play indi- I To Pause Playback Press the Pause [ ] button. Using the buttons on the display. I To Fast Forward or Fast Reverse Using remote controller: During playback...
... [ ] button to open the disc tray. 2 Put the CD on the Label side tray with the label-side facing up. Note: With CDs that contain many tracks, playback may take a while to start . I To Stop Playback Press the Stop [ ] button. The Pause indicator appears. Playback starts and the Play indi- I To Pause Playback Press the Pause [ ] button. Using the buttons on the display. I To Fast Forward or Fast Reverse Using remote controller: During playback...

User Manual English
Page 14
Playing CDs-Continued Selecting Tracks by Number You can use the number buttons to enter track numbers above 10. Use the [>10] button to select specific tracks. Elapsed track time: Remaining track time: Remaining disc time: 1 Use the number buttons to display the informations. To enter track number 12, press [>10], [1], and [2]. Number buttons Displaying the Remaining Time POWER DISPLAY DISPLAY DIGITAL OUTPUT COMPACT DISC PLAYER C-1VL 1 During playback, press the [DIS- PLAY] button on the C-1VL repeat- If you're using the Memory function to enter track ...
Playing CDs-Continued Selecting Tracks by Number You can use the number buttons to enter track numbers above 10. Use the [>10] button to select specific tracks. Elapsed track time: Remaining track time: Remaining disc time: 1 Use the number buttons to display the informations. To enter track number 12, press [>10], [1], and [2]. Number buttons Displaying the Remaining Time POWER DISPLAY DISPLAY DIGITAL OUTPUT COMPACT DISC PLAYER C-1VL 1 During playback, press the [DIS- PLAY] button on the C-1VL repeat- If you're using the Memory function to enter track ...

User Manual English
Page 15
... on remote controller's [REPEAT] the display and random playback button. Playing CDs-Continued Random Playback With the Random function you can play all tracks are played repeatedly. 2 To cancel random playback, stop playback, or press the [RAN- 2 To cancel Repeat playback, press DOM] button so that the RAN- Repeat Random Playback If you can play repeatedly. the [REPEAT] button again. The REPEAT indicator disappears. Repeat Memory Playback If you press the [REPEAT] button during random playback, tracks will not move to the previous track. Repeat Playback...
... on remote controller's [REPEAT] the display and random playback button. Playing CDs-Continued Random Playback With the Random function you can play all tracks are played repeatedly. 2 To cancel random playback, stop playback, or press the [RAN- 2 To cancel Repeat playback, press DOM] button so that the RAN- Repeat Random Playback If you can play repeatedly. the [REPEAT] button again. The REPEAT indicator disappears. Repeat Memory Playback If you press the [REPEAT] button during random playback, tracks will not move to the previous track. Repeat Playback...

User Manual English
Page 16
... The MEMORY indicator appears on the display. • If the total playing time of your program exceeds 99 minutes and 59 seconds, "--:--" is displayed. (This does not affect program playback.) • The program is deleted when the disc tray is opened. To add track 13, press [>10], [1], [3]. • Tracks can add up to 25 tracks to your program, use the number buttons. Notes: • If you try to...
... The MEMORY indicator appears on the display. • If the total playing time of your program exceeds 99 minutes and 59 seconds, "--:--" is displayed. (This does not affect program playback.) • The program is deleted when the disc tray is opened. To add track 13, press [>10], [1], [3]. • Tracks can add up to 25 tracks to your program, use the number buttons. Notes: • If you try to...

User Manual English
Page 17
... the DIGITAL OUTPUT button on the C-1VL to direct sunshine or inverter-type fluorescent lights. Install the C-1VL somewhere free of approximately 5 meters (16 ft.). The disc is not connected properly. Can not enter track numbers for signal processing and control functions. Can not start and stop memory playback. The batteries are closed. You're too far away from an external source, or static electricity may not work...
... the DIGITAL OUTPUT button on the C-1VL to direct sunshine or inverter-type fluorescent lights. Install the C-1VL somewhere free of approximately 5 meters (16 ft.). The disc is not connected properly. Can not enter track numbers for signal processing and control functions. Can not start and stop memory playback. The batteries are closed. You're too far away from an external source, or static electricity may not work...

User Manual English
Page 18
Specifications Power Supply Power Consumption Dimensions (W × H × D) Weight Operation Condition Temperature/Humidity Frequency Response SN Ratio Audio Dynamic Range THD (Total Harmonic Distortion) Audio Output Digital Optical Digital Coaxial Analog AC 230-240 V, 50 Hz 9 W 435 W × 82 H × 356 D mm 6.8 kg 5 ~ 35 °C / 5 ~ 85 % (no condensation) 5 Hz ~ 20 kHz 110 dB 96 dB 0.002 % -22.5 dBm 0.5 Vp-p / 75 Ω 2.0 V (rms) / 320 Ω Specifications and external appearance are subject to change without notice as a result of product improvement. 18
Specifications Power Supply Power Consumption Dimensions (W × H × D) Weight Operation Condition Temperature/Humidity Frequency Response SN Ratio Audio Dynamic Range THD (Total Harmonic Distortion) Audio Output Digital Optical Digital Coaxial Analog AC 230-240 V, 50 Hz 9 W 435 W × 82 H × 356 D mm 6.8 kg 5 ~ 35 °C / 5 ~ 85 % (no condensation) 5 Hz ~ 20 kHz 110 dB 96 dB 0.002 % -22.5 dBm 0.5 Vp-p / 75 Ω 2.0 V (rms) / 320 Ω Specifications and external appearance are subject to change without notice as a result of product improvement. 18

User Manual English
Page 20
..., U.S.A. Tel: 201-785-2600 Fax: 201-785-2650 http://www.onkyousa.com ONKYO EUROPE ELECTRONICS GmbH Liegnitzerstrasse 6, 82194 Groebenzell, GERMANY Tel: +49-8142-4401-0 Fax: +49-8142-4401-555 http://www.onkyo.net ONKYO CHINA LIMITED Units 2102-2107, Metroplaza Tower I, 223 Hing Fong Road, Kwai Chung..., N.T., HONG KONG Tel: 852-2429-3118 Fax: 852-2428-9039 HOMEPAGE http://www.onkyo.com/ Printed in Japan D0404-1 SN 29343548 (C) Copyright 2004 ONKYO CORPORATION Japan. Sales & Product Planning Div. : 2-1, Nisshin-cho, Neyagawa-shi, OSAKA 572-8540, JAPAN Tel: 072-831-8023 Fax: ...
..., U.S.A. Tel: 201-785-2600 Fax: 201-785-2650 http://www.onkyousa.com ONKYO EUROPE ELECTRONICS GmbH Liegnitzerstrasse 6, 82194 Groebenzell, GERMANY Tel: +49-8142-4401-0 Fax: +49-8142-4401-555 http://www.onkyo.net ONKYO CHINA LIMITED Units 2102-2107, Metroplaza Tower I, 223 Hing Fong Road, Kwai Chung..., N.T., HONG KONG Tel: 852-2429-3118 Fax: 852-2428-9039 HOMEPAGE http://www.onkyo.com/ Printed in Japan D0404-1 SN 29343548 (C) Copyright 2004 ONKYO CORPORATION Japan. Sales & Product Planning Div. : 2-1, Nisshin-cho, Neyagawa-shi, OSAKA 572-8540, JAPAN Tel: 072-831-8023 Fax: ...


