Operation Manual
Page 8
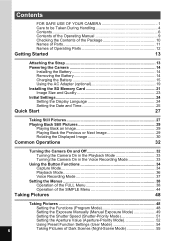
... Strap 13 Powering the Camera 14 Installing the Battery 14 Removing the Battery 14 Charging the Battery 15 Using the AC Adapter (optional 19 Installing the SD Memory Card 21 Image Size and Quality 23 Initial Settings 24 Setting the Display Language 24 Setting the Date and Time 25 Quick Start 27 Taking Still Pictures 27 Playing Back Still Pictures 29 Playing Back an Image 29 Playing Back the Previous or Next Image 29 Rotating the Displayed Image 30 Common Operations 32 Turning the Camera On and...
... Strap 13 Powering the Camera 14 Installing the Battery 14 Removing the Battery 14 Charging the Battery 15 Using the AC Adapter (optional 19 Installing the SD Memory Card 21 Image Size and Quality 23 Initial Settings 24 Setting the Display Language 24 Setting the Date and Time 25 Quick Start 27 Taking Still Pictures 27 Playing Back Still Pictures 29 Playing Back an Image 29 Playing Back the Previous or Next Image 29 Rotating the Displayed Image 30 Common Operations 32 Turning the Camera On and...

Operation Manual
Page 9
...(Picture Mode 58 Taking 3D Pictures (3D Image Mode 60 Taking Panorama Pictures (Panorama Assist Mode 66 Using the Zoom 68 Using the Self-Timer 70 Continuous Shooting (Continuous Shooting Mode 71 Using the Remote Control Unit (optional 72 Automatically Changing the Shooting Conditions (Auto Bracket).......... 74 Taking Pictures at Fixed Intervals (Interval Shooting 76 Taking Time-lapse Movies 79 Setting the Shooting Functions 81 Changing the Mode 81 Selecting the Capture Mode 81 Displaying Shooting Information in the Capture Mode 82 Selecting the Flash Mode 84 Selecting the Focus...
...(Picture Mode 58 Taking 3D Pictures (3D Image Mode 60 Taking Panorama Pictures (Panorama Assist Mode 66 Using the Zoom 68 Using the Self-Timer 70 Continuous Shooting (Continuous Shooting Mode 71 Using the Remote Control Unit (optional 72 Automatically Changing the Shooting Conditions (Auto Bracket).......... 74 Taking Pictures at Fixed Intervals (Interval Shooting 76 Taking Time-lapse Movies 79 Setting the Shooting Functions 81 Changing the Mode 81 Selecting the Capture Mode 81 Displaying Shooting Information in the Capture Mode 82 Selecting the Flash Mode 84 Selecting the Focus...

Operation Manual
Page 10
... Images 136 Using Digital Filters to Edit Images 138 Settings 142 Camera Settings 142 Formatting an SD Memory Card 142 Adjusting the Brightness of the LCD Monitor 143 Changing the Start-up Screen, Background Color and Screen Effects 144 Changing the Date and Time 147 Changing the Sound Settings 148 Setting the World Time 150 Changing the Display Language 152 Setting the Folder Name 152 Changing the Video Output Format 153 Changing the USB Connection Mode 153 Sleep Timeout 154 Setting Auto Power Off 155 Registering a Function (Fn Setting 156 Resetting to Default Settings...
... Images 136 Using Digital Filters to Edit Images 138 Settings 142 Camera Settings 142 Formatting an SD Memory Card 142 Adjusting the Brightness of the LCD Monitor 143 Changing the Start-up Screen, Background Color and Screen Effects 144 Changing the Date and Time 147 Changing the Sound Settings 148 Setting the World Time 150 Changing the Display Language 152 Setting the Folder Name 152 Changing the Video Output Format 153 Changing the USB Connection Mode 153 Sleep Timeout 154 Setting Auto Power Off 155 Registering a Function (Fn Setting 156 Resetting to Default Settings...

Operation Manual
Page 13
Names of Parts Front Back Shutter release button Remote control receiver/ Self-timer lamp Power switch Flash Speaker Lens USB/AV terminal Microphone Strap lug DC input terminal Terminal cover Viewfinder Focus status lamp (green) Mode dial Flash status lamp (red) LCD monitor Battery charging stand terminal Battery/Card cover Tripod socket 11
Names of Parts Front Back Shutter release button Remote control receiver/ Self-timer lamp Power switch Flash Speaker Lens USB/AV terminal Microphone Strap lug DC input terminal Terminal cover Viewfinder Focus status lamp (green) Mode dial Flash status lamp (red) LCD monitor Battery charging stand terminal Battery/Card cover Tripod socket 11
Operation Manual
Page 24
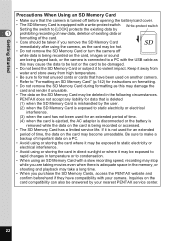
...; Be sure to a PC with the USB cable as this may be hot. • Do not remove the SD Memory Card or turn the camera off before opening the battery/card cover. • The SD Memory Card is connected to format unused cards or cards that have compatibility with a write-protect switch. Inquiries on the card, images or sound are taking movies even when there is not used on another camera. Keep it is adequate space in...
...; Be sure to a PC with the USB cable as this may be hot. • Do not remove the SD Memory Card or turn the camera off before opening the battery/card cover. • The SD Memory Card is connected to format unused cards or cards that have compatibility with a write-protect switch. Inquiries on the card, images or sound are taking movies even when there is not used on another camera. Keep it is adequate space in...

Operation Manual
Page 26
... language in which the menus, error messages, etc. Initial Settings Getting Started 1 Power switch Q Playback button Four-way controller OK button MENU button If the Initial Settings screen or Date Adjust screen appears when you turn the camera on, follow the procedure below to select the language. 4 Press the OK button. 24 New York DST The Language Setting screen appears. 3 MENU Exit Press the four-way controller (23) OK OK to set the display language and/or current date and time. Language/ English The default setting...
... language in which the menus, error messages, etc. Initial Settings Getting Started 1 Power switch Q Playback button Four-way controller OK button MENU button If the Initial Settings screen or Date Adjust screen appears when you turn the camera on, follow the procedure below to select the language. 4 Press the OK button. 24 New York DST The Language Setting screen appears. 3 MENU Exit Press the four-way controller (23) OK OK to set the display language and/or current date and time. Language/ English The default setting...

Operation Manual
Page 29
... LCD monitor indicates the zone of the viewfinder blink alternately while the image is being recorded.) 27 The flash fires automatically depending on the light conditions. 1 Press the power switch. 046 The camera turns on. 2 Set the mode dial to check the focusing area on the LCD monitor. The focus frame on the LCD monitor will light green when the camera is in focus. 5 Press the shutter release button. You can check the size...
... LCD monitor indicates the zone of the viewfinder blink alternately while the image is being recorded.) 27 The flash fires automatically depending on the light conditions. 1 Press the power switch. 046 The camera turns on. 2 Set the mode dial to check the focusing area on the LCD monitor. The focus frame on the LCD monitor will light green when the camera is in focus. 5 Press the shutter release button. You can check the size...

Operation Manual
Page 32
.... Deleting Images, Movies and Sounds 1p.118 30 Rotating the Displayed Image 1 Press the Q Playback button after taking a picture. 2 2 The image appears on the LCD monitor by pressing the Zoom /f/y button. (The image cannot be magnified when rotated.) • If there are no images stored, the [No image or sound] message appears. Press the four-way controller (3). Deleting the Displayed Image You can enlarge the image displayed on the LCD monitor by pressing the i button, using the fourway controller...
.... Deleting Images, Movies and Sounds 1p.118 30 Rotating the Displayed Image 1 Press the Q Playback button after taking a picture. 2 2 The image appears on the LCD monitor by pressing the Zoom /f/y button. (The image cannot be magnified when rotated.) • If there are no images stored, the [No image or sound] message appears. Press the four-way controller (3). Deleting the Displayed Image You can enlarge the image displayed on the LCD monitor by pressing the i button, using the fourway controller...

Operation Manual
Page 39
... Recording Mode 1 Q Playback button Switches to the Voice Recording mode. 2 Shutter release button When pressed, starts recording, and when pressed again, stops recording. When pressed again, pauses playback. (45) Performs the following operations during standby or before playback. Selects a recorded file before recording or playing back, displays the [Q Playback] and [B Set-up] menus. (1p.38) 37 When pressed for more than one second, recording continues for as long as follows. When (4) is released. 3 OK button Changes...
... Recording Mode 1 Q Playback button Switches to the Voice Recording mode. 2 Shutter release button When pressed, starts recording, and when pressed again, stops recording. When pressed again, pauses playback. (45) Performs the following operations during standby or before playback. Selects a recorded file before recording or playing back, displays the [Q Playback] and [B Set-up] menus. (1p.38) 37 When pressed for more than one second, recording continues for as long as follows. When (4) is released. 3 OK button Changes...
Operation Manual
Page 43
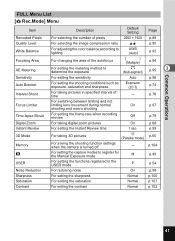
... Operations FULL Menu List [A Rec.Mode] Menu Item Description Default Setting Page Recorded Pixels For selecting the number of pixels 2560 × 1920 p.88 Quality Level For selecting the image compression ratio D p.90 White Balance For adjusting the color balance according to lighting AWB (Auto) p.92 Focusing Area For changing the area of the autofocus [ ] (Multiple) p.94 AE Metering For setting the metering method to register for the Manual Exposure mode M p.49 USER For setting...
... Operations FULL Menu List [A Rec.Mode] Menu Item Description Default Setting Page Recorded Pixels For selecting the number of pixels 2560 × 1920 p.88 Quality Level For selecting the image compression ratio D p.90 White Balance For adjusting the color balance according to lighting AWB (Auto) p.92 Focusing Area For changing the area of the autofocus [ ] (Multiple) p.94 AE Metering For setting the metering method to register for the Manual Exposure mode M p.49 USER For setting...

Operation Manual
Page 44
For adjusting the date and time For setting the world time For changing the language in which menus and messages appear For changing the name of the folder to save the images and sounds For setting the start-up screen, background screen and screen effects For changing the brightness of start-up ] Menu Item Format Sound Date Adjust World Time Language/ Folder setting Screen Setting Brightness Level Video Out USB Connection Mode Sleep Timeout Auto Power Off Fn Setting Reset Description For formatting the SD Memory Card For adjusting the operation volume and playback volume and setting the ...
For adjusting the date and time For setting the world time For changing the language in which menus and messages appear For changing the name of the folder to save the images and sounds For setting the start-up screen, background screen and screen effects For changing the brightness of start-up ] Menu Item Format Sound Date Adjust World Time Language/ Folder setting Screen Setting Brightness Level Video Out USB Connection Mode Sleep Timeout Auto Power Off Fn Setting Reset Description For formatting the SD Memory Card For adjusting the operation volume and playback volume and setting the ...
Operation Manual
Page 52
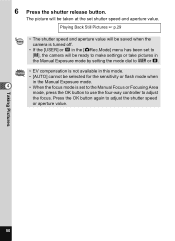
... the OK button again to adjust the focus. Taking Pictures 50 Playing Back Still Pictures 1 p.29 • The shutter speed and aperture value will be saved when the camera is turned off. • If the [USER] or b in the [ARec.Mode] menu has been set to [a], the camera will be selected for the sensitivity or flash mode when in the Manual Exposure mode. 4 • When the focus mode is not available in this mode. • [AUTO] cannot...
... the OK button again to adjust the focus. Taking Pictures 50 Playing Back Still Pictures 1 p.29 • The shutter speed and aperture value will be saved when the camera is turned off. • If the [USER] or b in the [ARec.Mode] menu has been set to [a], the camera will be selected for the sensitivity or flash mode when in the Manual Exposure mode. 4 • When the focus mode is not available in this mode. • [AUTO] cannot...

Operation Manual
Page 71
Setting the Digital Zoom Function to select P (Off). 4 Press the MENU button. Rec. Mode Auto Bracket Interval Shoot Focus Limiter Time-lapse Movie Off Digital Zoom Instant Review 1sec MENU Exit SIMPLE The digital zoom is disabled when you turn the LCD monitor off, even if the digital zoom function is ready to On. 4 You should compose the picture on the LCD monitor when you use the digital zoom function. The [A Rec.Mode] menu appears. 2 Use the four-way controller (23) to select [Digital Zoom]. 3 Use the four...
Setting the Digital Zoom Function to select P (Off). 4 Press the MENU button. Rec. Mode Auto Bracket Interval Shoot Focus Limiter Time-lapse Movie Off Digital Zoom Instant Review 1sec MENU Exit SIMPLE The digital zoom is disabled when you turn the LCD monitor off, even if the digital zoom function is ready to On. 4 You should compose the picture on the LCD monitor when you use the digital zoom function. The [A Rec.Mode] menu appears. 2 Use the four-way controller (23) to select [Digital Zoom]. 3 Use the four...

Operation Manual
Page 76
... AWB AUTO MENU Exit SIMPLE MENU button Automatically Changing the Shooting Conditions (Auto Bracket) 4 You can take pictures automatically with the [Negative (-)] and [Positive (+)] value. • You cannot add the voice memo to the image shot in bracket shooting. • Bracket shooting is not possible in the Capture mode to display a on the LCD monitor. [Auto Bracket] is set to On by default. Then the camera shoots with three different exposure, white balance, sharpness...
... AWB AUTO MENU Exit SIMPLE MENU button Automatically Changing the Shooting Conditions (Auto Bracket) 4 You can take pictures automatically with the [Negative (-)] and [Positive (+)] value. • You cannot add the voice memo to the image shot in bracket shooting. • Bracket shooting is not possible in the Capture mode to display a on the LCD monitor. [Auto Bracket] is set to On by default. Then the camera shoots with three different exposure, white balance, sharpness...

Operation Manual
Page 94
...Mode] menu appears. 2 Use the four-way controller (23) to change the setting. Mode Recorded Pixels Quality Level White Balance Focusing Area AE Metering Sensitivity 2560 AWB AUTO MENU Exit SIMPLE MENU button Adjusting the White Balance You can take pictures in the Capture mode. White Balance The White Balance screen appears. Manual Use this mode when taking pictures by adjusting the white balance manually. 1 Press the MENU button in natural colors by selecting the white balance 4 best suited to the light conditions at the time of shooting. Fluorescent Light Use this mode...
...Mode] menu appears. 2 Use the four-way controller (23) to change the setting. Mode Recorded Pixels Quality Level White Balance Focusing Area AE Metering Sensitivity 2560 AWB AUTO MENU Exit SIMPLE MENU button Adjusting the White Balance You can take pictures in the Capture mode. White Balance The White Balance screen appears. Manual Use this mode when taking pictures by adjusting the white balance manually. 1 Press the MENU button in natural colors by selecting the white balance 4 best suited to the light conditions at the time of shooting. Fluorescent Light Use this mode...

Operation Manual
Page 106
... The flash mode setting on the [A Rec.Mode] menu is inserted, file numbers are assigned sequentially. P Zoom Position The optional zoom position setting on the [A Rec.Mode] menu is saved. P White Balance The [White Balance] setting on the Zoom/f/y button is saved. P MF The manual focus position is saved. P Sensitivity The [Sensitivity] setting on the [A Rec.Mode] menu is saved. O 104 P AE Metering The [AE Metering] setting on the [A Rec.Mode] menu is saved. O DISPLAY The LCD monitor display mode is saved. Default Setting O P Focus Mode The focus mode...
... The flash mode setting on the [A Rec.Mode] menu is inserted, file numbers are assigned sequentially. P Zoom Position The optional zoom position setting on the [A Rec.Mode] menu is saved. P White Balance The [White Balance] setting on the Zoom/f/y button is saved. P MF The manual focus position is saved. P Sensitivity The [Sensitivity] setting on the [A Rec.Mode] menu is saved. O 104 P AE Metering The [AE Metering] setting on the [A Rec.Mode] menu is saved. O DISPLAY The LCD monitor display mode is saved. Default Setting O P Focus Mode The focus mode...

Operation Manual
Page 108
... Shooting Focus Limit Time-lapse Movie Digital Zoom Instant Review 3D Mode Memory Noise Reduction Sharpness Saturation Contrast Fn Setting Auto ±0.0 Exposure - Taking Pictures Registering Functions in the User Mode Functions set with the the Capture mode on E will be registered in the User Mode Default Setting Flash Mode Auto Drive Mode Normal Focus Mode Autofocus Manual Focus Position Infinity Display Mode (Capture Mode) Display On Recorded Pixels 2560×1920 Quality Level D 4 White Balance Manual White Balance AWB (auto) - Functions Registered in the User Mode...
... Shooting Focus Limit Time-lapse Movie Digital Zoom Instant Review 3D Mode Memory Noise Reduction Sharpness Saturation Contrast Fn Setting Auto ±0.0 Exposure - Taking Pictures Registering Functions in the User Mode Functions set with the the Capture mode on E will be registered in the User Mode Default Setting Flash Mode Auto Drive Mode Normal Focus Mode Autofocus Manual Focus Position Infinity Display Mode (Capture Mode) Display On Recorded Pixels 2560×1920 Quality Level D 4 White Balance Manual White Balance AWB (auto) - Functions Registered in the User Mode...

Operation Manual
Page 164
... an image or sound in a format not supported by this camera. (p.142) No card in the camera. Recharge the battery or replace with this camera. Data being recorded The image is no SD Memory Card in camera There is being changed. Battery depleted Cannot save image The battery is write-protected. Change the quality/size and try again. (p.134) Memory card error Shooting and playback are trying to a problem with the SD Memory Card. The SD Memory Card is not compatible with charged battery. (p.14) Formatting... Compression error Compression of camera...
... an image or sound in a format not supported by this camera. (p.142) No card in the camera. Recharge the battery or replace with this camera. Data being recorded The image is no SD Memory Card in camera There is being changed. Battery depleted Cannot save image The battery is write-protected. Change the quality/size and try again. (p.134) Memory card error Shooting and playback are trying to a problem with the SD Memory Card. The SD Memory Card is not compatible with charged battery. (p.14) Formatting... Compression error Compression of camera...

Operation Manual
Page 169
..., Auto + Red-eye Reduction, Flash On + Red-eye Reduction Light Compensation ±2 EV (can be set in 1/3 EV steps) Auto Bracket EV Compensation, White Balance, Sharpness, Saturation, Contrast Capture Modes Program, Picture, Night-Scene, Movie, Voice Recording, USER, Manual Picture Modes Landscape, Flower, Portrait, Self-Portrait, Sports, Surf & Snow, Autumn Colors, Sunset, Museum, Food, 3D, Panoramic Assist Movie Recording Time From approx. 1 sec. f/5.0 - Appendix 167 Self-timer, Auto Bracket, Interval Time Function World Time setting for 68 cities (28 time zones) Power...
..., Auto + Red-eye Reduction, Flash On + Red-eye Reduction Light Compensation ±2 EV (can be set in 1/3 EV steps) Auto Bracket EV Compensation, White Balance, Sharpness, Saturation, Contrast Capture Modes Program, Picture, Night-Scene, Movie, Voice Recording, USER, Manual Picture Modes Landscape, Flower, Portrait, Self-Portrait, Sports, Surf & Snow, Autumn Colors, Sunset, Museum, Food, 3D, Panoramic Assist Movie Recording Time From approx. 1 sec. f/5.0 - Appendix 167 Self-timer, Auto Bracket, Interval Time Function World Time setting for 68 cities (28 time zones) Power...

Operation Manual
Page 176
... Playback Menu 42 Playback Mode 81 Playback time 17 Playing Back Movies 113 Playing Back Sounds 109 Playing Back Still Pictures 29 Playing Back the Previous or Next Image 29 Power switch 11, 12, 32 Press down fully (Shutter release button 28 Press halfway (Shutter release button 28 Printer 129 Printing Service 125 Program Mode 48 Protect 122 Q Quality 23, 134 Quality Level 90 8 Quick Delete 119 Quick Zoom 112 R Rec.Mode Menu 41 Recorded Pixels 88 Recording Sound 108 Remote control receiver 11 Remote Control Unit 72 Reset...
... Playback Menu 42 Playback Mode 81 Playback time 17 Playing Back Movies 113 Playing Back Sounds 109 Playing Back Still Pictures 29 Playing Back the Previous or Next Image 29 Power switch 11, 12, 32 Press down fully (Shutter release button 28 Press halfway (Shutter release button 28 Printer 129 Printing Service 125 Program Mode 48 Protect 122 Q Quality 23, 134 Quality Level 90 8 Quick Delete 119 Quick Zoom 112 R Rec.Mode Menu 41 Recorded Pixels 88 Recording Sound 108 Remote control receiver 11 Remote Control Unit 72 Reset...


