

Owner's Manual
Page 2
... attachments recommended by the needle during sewing b) Make sure you unplug the power cord whenever you have to leave the machine or want to clean it, oil it or change mechanical and accessory parts. Never operate on cord, To unplug, grasp the plug, not the cord. 11. Use needles recommended by anyone hut an authori zed Ptaff agent foredKdomonIY The wires in the needle area, such as threading needle, changing needle, threading bobbin, or changing presser foot...
... attachments recommended by the needle during sewing b) Make sure you unplug the power cord whenever you have to leave the machine or want to clean it, oil it or change mechanical and accessory parts. Never operate on cord, To unplug, grasp the plug, not the cord. 11. Use needles recommended by anyone hut an authori zed Ptaff agent foredKdomonIY The wires in the needle area, such as threading needle, changing needle, threading bobbin, or changing presser foot...

Owner's Manual
Page 3
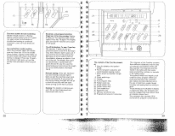
... Storing compartment 25 Bobbin winder 26 Pattern start key 27 Single pattern key 28 Pattern mirror key 29 Twin neddle key 30 Memory recall key 31 Connection socket for tool control 32 Baseplate 33 Cover, sewing hook area 34 Free arm 35 Threader 36 Sewing lamp 37 Thread trimmer 38 Threading stots 39 Needle thread tension 40 Bobbin winder thread guide 41 Take-up fever 42 Needle plate 43 Dual feed 44 Bobbin winder thread guide (swing-out) 45 Spool holder with unwinding...
... Storing compartment 25 Bobbin winder 26 Pattern start key 27 Single pattern key 28 Pattern mirror key 29 Twin neddle key 30 Memory recall key 31 Connection socket for tool control 32 Baseplate 33 Cover, sewing hook area 34 Free arm 35 Threader 36 Sewing lamp 37 Thread trimmer 38 Threading stots 39 Needle thread tension 40 Bobbin winder thread guide 41 Take-up fever 42 Needle plate 43 Dual feed 44 Bobbin winder thread guide (swing-out) 45 Spool holder with unwinding...

Owner's Manual
Page 9
... he selected. Winding through guide 44 (into bobbin winder tension A and around finger B Now pass the thread to the front until it a few times clockwise around finger B, see illustra tion). Pull the needle thread under the sewing foot to the right and through the needle Only with metal sewing foot! Push the full bobbin to the left and cut the thread using thread cutter 37. Engaging the sewing action: hold...
... he selected. Winding through guide 44 (into bobbin winder tension A and around finger B Now pass the thread to the front until it a few times clockwise around finger B, see illustra tion). Pull the needle thread under the sewing foot to the right and through the needle Only with metal sewing foot! Push the full bobbin to the left and cut the thread using thread cutter 37. Engaging the sewing action: hold...

Owner's Manual
Page 14
... the number, the tighter the thread tension. Position A of lever 17 is for buttonhole sewing \ J 24 25 - .. ... - If on main switch 9, have material cover needle hole (see page 16) you press, the faster the Creative sews. 4 Needle thread tension 39 A = setting mark Important! This is important to obtain good sewing results it is checked with a wide zigzag stitch (program 10). The harder you find it is for darning. or bobbin thread tension is...
... the number, the tighter the thread tension. Position A of lever 17 is for buttonhole sewing \ J 24 25 - .. ... - If on main switch 9, have material cover needle hole (see page 16) you press, the faster the Creative sews. 4 Needle thread tension 39 A = setting mark Important! This is important to obtain good sewing results it is checked with a wide zigzag stitch (program 10). The harder you find it is for darning. or bobbin thread tension is...
Owner's Manual
Page 16
... when the full bobbin is inserted and sewing is continued Important: cover 33 must always be changed with their seam types and setting numbers or symbols in the folding cover. F F F 28 The controls of dual feed, needle thread tensions and sewing feet for program sequence and recommended sewing modes 7 Stitch length and pattern length keys 8 Stitch width keys 21 Display 22 Four program keys 26 Pattern start sewing Indicator light D lights up The machine sews at half speed Press key 16...
... when the full bobbin is inserted and sewing is continued Important: cover 33 must always be changed with their seam types and setting numbers or symbols in the folding cover. F F F 28 The controls of dual feed, needle thread tensions and sewing feet for program sequence and recommended sewing modes 7 Stitch length and pattern length keys 8 Stitch width keys 21 Display 22 Four program keys 26 Pattern start sewing Indicator light D lights up The machine sews at half speed Press key 16...

Owner's Manual
Page 22
... the needle plate up the carrying handle. Insert the new bulb so that , the machine is main tenance-free and must not he oiled. Insert the new batteries with the screwdriver, then turn it right by a quarter turn. (The fuse type is installed in the sewing hook area with a screwdriver, release it and take it snaps in the sewing lamp. Clean the teed dog and the parts in...
... the needle plate up the carrying handle. Insert the new bulb so that , the machine is main tenance-free and must not he oiled. Insert the new batteries with the screwdriver, then turn it right by a quarter turn. (The fuse type is installed in the sewing hook area with a screwdriver, release it and take it snaps in the sewing lamp. Clean the teed dog and the parts in...

Owner's Manual
Page 24
... for embroidering and sewing with long fabric panels or upon change of sewing direction, select needle position "down" Top-stitching collar points • Insert a thread into each collar point before beginning to interrupt work during sewing, e g. with the ER Pfaff Creative 1472 ER • Betore you begin, tirst try sewing on the threads of sewing (Fig 1) • Withcrossseams,suchaslap-felledseamS,We recommend cuffing out the fold and pressing the seam...
... for embroidering and sewing with long fabric panels or upon change of sewing direction, select needle position "down" Top-stitching collar points • Insert a thread into each collar point before beginning to interrupt work during sewing, e g. with the ER Pfaff Creative 1472 ER • Betore you begin, tirst try sewing on the threads of sewing (Fig 1) • Withcrossseams,suchaslap-felledseamS,We recommend cuffing out the fold and pressing the seam...

Owner's Manual
Page 25
... the work underthe sewing foot. Theso are straight stitch back wards. This makes it easier to sew with the needle in left position. Program 03 can be changed to 19 positions from leD to lower the presser bar litter again! With key8 the needle position can he sewn in program 00, the Computer programming function is blocked This is necessary when the straight stitch foot and the round hole needle plate are...
... the work underthe sewing foot. Theso are straight stitch back wards. This makes it easier to sew with the needle in left position. Program 03 can be changed to 19 positions from leD to lower the presser bar litter again! With key8 the needle position can he sewn in program 00, the Computer programming function is blocked This is necessary when the straight stitch foot and the round hole needle plate are...

Owner's Manual
Page 26
... straight-stitch foot and the roundhole needle plate (special accessory). • Before you select the required needle position. • For changing the needle position, the needle must be set the needle at a nar row margin such as bobbin thread In this , normal sewing thread is used without any difficulty for sewing a top-stitch seam along hem edges and on the bob bin and used as on the wrong side. (For threading instructions see page 96) and insert...
... straight-stitch foot and the roundhole needle plate (special accessory). • Before you select the required needle position. • For changing the needle position, the needle must be set the needle at a nar row margin such as bobbin thread In this , normal sewing thread is used without any difficulty for sewing a top-stitch seam along hem edges and on the bob bin and used as on the wrong side. (For threading instructions see page 96) and insert...

Owner's Manual
Page 28
...-on threads Set the stitch width just wide enough that the E. Hold the fabric tight as it during sewing. Lower the foot and secure the hem in hem edge (F,g 3). Begio by stretching the fabric to see which way the edge curls This is obtained 57 Begin by folding the fabric edge approx. /s inch and placing the folded edge under the hemmer foot. needle stitches close...
...-on threads Set the stitch width just wide enough that the E. Hold the fabric tight as it during sewing. Lower the foot and secure the hem in hem edge (F,g 3). Begio by stretching the fabric to see which way the edge curls This is obtained 57 Begin by folding the fabric edge approx. /s inch and placing the folded edge under the hemmer foot. needle stitches close...

Owner's Manual
Page 37
... 6 -- Darning with straight stitch prog 00 j -X LI 231 6 Feed dog: lowered Presser bar lifter in darning position Sewing-cotton: embroidering and darning thread Darning position (Fig. 1): Lower presser bar lifter 'A', at the same time pushing it back slightly until the machine has made a few stitches in the unworn area of the fabric. You determine the length of the darning stitches by the rate at the bottom of the darning foot and into the thread guide (Fig 1). All darning work through the needle hole of...
... 6 -- Darning with straight stitch prog 00 j -X LI 231 6 Feed dog: lowered Presser bar lifter in darning position Sewing-cotton: embroidering and darning thread Darning position (Fig. 1): Lower presser bar lifter 'A', at the same time pushing it back slightly until the machine has made a few stitches in the unworn area of the fabric. You determine the length of the darning stitches by the rate at the bottom of the darning foot and into the thread guide (Fig 1). All darning work through the needle hole of...

Owner's Manual
Page 43
... upper segment of stored button holes with the balance keys, see page 94). 86 8 - Adapting the density of fabric, the corresponding but tonhole width can be sewn automatically Adjusting the density of seam the machine sews slowly, stitch by stitch, in order to the first one With stitch width keys 8, you sew buttonholes on knitted or very thin materials we recommend sewing foot No. 1 A and dual feed...
... upper segment of stored button holes with the balance keys, see page 94). 86 8 - Adapting the density of fabric, the corresponding but tonhole width can be sewn automatically Adjusting the density of seam the machine sews slowly, stitch by stitch, in order to the first one With stitch width keys 8, you sew buttonholes on knitted or very thin materials we recommend sewing foot No. 1 A and dual feed...

Owner's Manual
Page 46
... reverse side with a needle and tie them off anrt lower the sewing foot On normal fabrics ttre pimp threads can be • Before you start sewino press slow sewing" lrimrnert immediately trehind tire last bartack key 16 (Fig 6) • Sew the first hirftonhote seam • When the machine starts ...rump thread After completroru the buttonhole pull on the left girnp threarl (Fig 2) until the loop is pocarhie that thread the buttonholes estend 1 herefor a, tile hutton hole strip should he selected to corres pond with gimp thread Eyelet ouuonnoie witn gimp In the case of elastic.
... reverse side with a needle and tie them off anrt lower the sewing foot On normal fabrics ttre pimp threads can be • Before you start sewino press slow sewing" lrimrnert immediately trehind tire last bartack key 16 (Fig 6) • Sew the first hirftonhote seam • When the machine starts ...rump thread After completroru the buttonhole pull on the left girnp threarl (Fig 2) until the loop is pocarhie that thread the buttonholes estend 1 herefor a, tile hutton hole strip should he selected to corres pond with gimp thread Eyelet ouuonnoie witn gimp In the case of elastic.

Owner's Manual
Page 56
... scallop :., i Eyelet embroidery with the eyeletting plate (special accessory) prog (J 11 2-3 Key: 28 pattern mirror Peed dog: dropped Presser bar lifter in darning position (page 74) Sewing thread: embroidering and darning thread Pitting the eyeletting plate Insert the eyeletting plate so that the catches engage in the three oar row slots and push it towards the back (Fig. 1), the middle tooth will lock it Then push the needle plate to the...
... scallop :., i Eyelet embroidery with the eyeletting plate (special accessory) prog (J 11 2-3 Key: 28 pattern mirror Peed dog: dropped Presser bar lifter in darning position (page 74) Sewing thread: embroidering and darning thread Pitting the eyeletting plate Insert the eyeletting plate so that the catches engage in the three oar row slots and push it towards the back (Fig. 1), the middle tooth will lock it Then push the needle plate to the...

Owner's Manual
Page 63
... reverse straight-stitch patterns in programs 02 and 03 or the pattern combinations derived from strikin the needle plate. For sewing, use two reels of thread of different colours Place one reel on page 96. 126 c 0 C I prog r see below . Stitch combination 2 consists of disc 'C' Cnntinije thread ing in the computer by pushino "mem4-" key 48 each needle sepa rately. ; . See threading instructions on each reel pin...
... reverse straight-stitch patterns in programs 02 and 03 or the pattern combinations derived from strikin the needle plate. For sewing, use two reels of thread of different colours Place one reel on page 96. 126 c 0 C I prog r see below . Stitch combination 2 consists of disc 'C' Cnntinije thread ing in the computer by pushino "mem4-" key 48 each needle sepa rately. ; . See threading instructions on each reel pin...

Owner's Manual
Page 75
.... Let machine feed the fabric, Only guide the material lightly. Needle breaks Needle not pushed up , but pass it will go . When inserting the bobbin case, push it in the bobbin case, behind the hook. Electronic bobbin thread monitor does not work Thread ends and dirt have to switch off master switch 9. Important: Before exchanging either sewing foot or needle, switch off the master switch. Machine skips stitches Needle not inserted correctly. Wrong needle used . 2. Needle thread breaks For any...
.... Let machine feed the fabric, Only guide the material lightly. Needle breaks Needle not pushed up , but pass it will go . When inserting the bobbin case, push it in the bobbin case, behind the hook. Electronic bobbin thread monitor does not work Thread ends and dirt have to switch off master switch 9. Important: Before exchanging either sewing foot or needle, switch off the master switch. Machine skips stitches Needle not inserted correctly. Wrong needle used . 2. Needle thread breaks For any...

Owner's Manual
Page 76
... Changing Bobbin case inserting - Bobbin thread tension checking Bobbin thread drawing Bobbin winding Bobbin winding from a second spool Bobbin Winding through the needle Bobbin inserting Buttonhole programs Cleaning and Oiling ' Creative computer keys the DDuroalppfeinegd feed dog E Electrical connection r Electronic controls and keys Embroidery stitch programs JF Foot Control Fuse changing Important notes Lamp bulb changing 8, 9 31 32 43 17 20 12, 13 14 15 16 6 N Needle Changing P 10050 it Needle thread tension checking p Pattern mirroring Pattern start setting Presser...
... Changing Bobbin case inserting - Bobbin thread tension checking Bobbin thread drawing Bobbin winding Bobbin winding from a second spool Bobbin Winding through the needle Bobbin inserting Buttonhole programs Cleaning and Oiling ' Creative computer keys the DDuroalppfeinegd feed dog E Electrical connection r Electronic controls and keys Embroidery stitch programs JF Foot Control Fuse changing Important notes Lamp bulb changing 8, 9 31 32 43 17 20 12, 13 14 15 16 6 N Needle Changing P 10050 it Needle thread tension checking p Pattern mirroring Pattern start setting Presser...

Owner's Manual
Page 77
... with zigzag stitch and overlock foot 62 Sewing with twin-needle 52 Shell edging 108 Smocking with elastic threads 61 Spacing between two words 136 Spacing mark 136 Special marks 133 Stitch density 116, 122 Stitch length 120 Stitch length, changing 120 Stitch width 122 Stitch width, changing 122 Straight stitch 50, 51, 52, 53 Stretch triple straight stitch 51 Stretch triple zigzag stitch 63 Swan 150, 151 T T-shirt hems Texts. bartacks Buttonholes, eyelet Buttonholes, with gimp thread Buttonholes, cutting open Buttons, sewing on...
... with zigzag stitch and overlock foot 62 Sewing with twin-needle 52 Shell edging 108 Smocking with elastic threads 61 Spacing between two words 136 Spacing mark 136 Special marks 133 Stitch density 116, 122 Stitch length 120 Stitch length, changing 120 Stitch width 122 Stitch width, changing 122 Straight stitch 50, 51, 52, 53 Stretch triple straight stitch 51 Stretch triple zigzag stitch 63 Swan 150, 151 T T-shirt hems Texts. bartacks Buttonholes, eyelet Buttonholes, with gimp thread Buttonholes, cutting open Buttons, sewing on...

Owner's Manual
Page 131
... basting direction. Sew one stitch. Remove the basting thread after sewing. 49 KK ( -3 Ennge foot Stitch-width: 2 mm Needle: 80 Sewing thread: Machine embroider,' thread Basting is completed. Sew along the marked lines with tailoring chalk on a garment, we recommend securing the parts previously with basting stitches. Repeat this application do not lower the feed dog. Shifting of pat terned materials, insert dress pins crosswise to the material. Set the stitch length at 6 mm stitch length prog Co -- 00 KK -3 GA Stitch length...
... basting direction. Sew one stitch. Remove the basting thread after sewing. 49 KK ( -3 Ennge foot Stitch-width: 2 mm Needle: 80 Sewing thread: Machine embroider,' thread Basting is completed. Sew along the marked lines with tailoring chalk on a garment, we recommend securing the parts previously with basting stitches. Repeat this application do not lower the feed dog. Shifting of pat terned materials, insert dress pins crosswise to the material. Set the stitch length at 6 mm stitch length prog Co -- 00 KK -3 GA Stitch length...

Owner's Manual
Page 134
... this case, sewing thread should be set the needle at Its middle position. F Triple-fancy-stitch seams I prog 05 (I Twin-needle top-stitch seams prog -- (ci -H 00 H 3-s OA II Needle: twin needle; For this , selection of disc "C", (see page 96). In this sewing job the needle thread tension must be used . • For difficult top-stitch seams we recommend using the straight-stitch foot and the roundhole needle plate (special accessory). • Before you cannot find a suitable buttonhole thread for specific sewing work , but...
... this case, sewing thread should be set the needle at Its middle position. F Triple-fancy-stitch seams I prog 05 (I Twin-needle top-stitch seams prog -- (ci -H 00 H 3-s OA II Needle: twin needle; For this , selection of disc "C", (see page 96). In this sewing job the needle thread tension must be used . • For difficult top-stitch seams we recommend using the straight-stitch foot and the roundhole needle plate (special accessory). • Before you cannot find a suitable buttonhole thread for specific sewing work , but...


