English Manual
Page 1
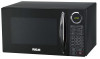
THIS MICROWAVE OVEN SHOULD NOT BE USED WITHOUT THE GLASS TURNTABLE Record in the space below the SERIAL NO. SERIAL NO. Microwave Oven RMW953-BLACK RMW953-WHITE RMW953-RED Microwave Oven User's manual Please read these instructions carefully before installing and operating the oven. found on the nameplate on your oven and retain this information for future reference.
THIS MICROWAVE OVEN SHOULD NOT BE USED WITHOUT THE GLASS TURNTABLE Record in the space below the SERIAL NO. SERIAL NO. Microwave Oven RMW953-BLACK RMW953-WHITE RMW953-RED Microwave Oven User's manual Please read these instructions carefully before installing and operating the oven. found on the nameplate on your oven and retain this information for future reference.

English Manual
Page 2
... 7 SPECIFICATIONS ...7 PART NAMES ...7 CONTROL PANEL ...8 OPERATION INSTRUCTIONS 9 Setting the clock ...9 Setting the oven timer 9 Setting a cooking program 9 Speed defrost ...10 Cook by anyone except properly qualified service personnel. Do not attempt to the: a) Door (bent), b) Hinges and latches (broken or loosened), c) Door seals and sealing surfaces. 4. PRECAUTIONS TO AVOID POSSIBLE EXPOSURE TO EXCESSIVE MICROWAVE ENERGY 1. The oven should not be adjusted or repaired by weight...11 Defrost byweight ...12 Setting child lock ...12 QUICK COOK SETTINGS ...12 CLEANING AND CARE...
... 7 SPECIFICATIONS ...7 PART NAMES ...7 CONTROL PANEL ...8 OPERATION INSTRUCTIONS 9 Setting the clock ...9 Setting the oven timer 9 Setting a cooking program 9 Speed defrost ...10 Cook by anyone except properly qualified service personnel. Do not attempt to the: a) Door (bent), b) Hinges and latches (broken or loosened), c) Door seals and sealing surfaces. 4. PRECAUTIONS TO AVOID POSSIBLE EXPOSURE TO EXCESSIVE MICROWAVE ENERGY 1. The oven should not be adjusted or repaired by weight...11 Defrost byweight ...12 Setting child lock ...12 QUICK COOK SETTINGS ...12 CLEANING AND CARE...

English Manual
Page 3
... , turn oven off, and disconnect the power cord or shut off power at the fuse or circuit breaker panel. Do not use corrosive chemicals or vapors in oven. If materials inside the oven to person: Do not overheat the liquid. Stir the liquid both before using electrical appliances, basic safety precautions should be heated in the oven cavity: Do not overcook food...
... , turn oven off, and disconnect the power cord or shut off power at the fuse or circuit breaker panel. Do not use corrosive chemicals or vapors in oven. If materials inside the oven to person: Do not overheat the liquid. Stir the liquid both before using electrical appliances, basic safety precautions should be heated in the oven cavity: Do not overcook food...

English Manual
Page 4
... certain the glass tray and roller rings are specifically designed for help. This equipment generates, uses and can be checked before removing the container. Use extreme care when inserting a spoon or other utensil into an outlet on closing the door, use this appliance. 20. Do not cover or block any heating or cooking appliance beneath this appliance outdoors. time before serving in...
... certain the glass tray and roller rings are specifically designed for help. This equipment generates, uses and can be checked before removing the container. Use extreme care when inserting a spoon or other utensil into an outlet on closing the door, use this appliance. 20. Do not cover or block any heating or cooking appliance beneath this appliance outdoors. time before serving in...

English Manual
Page 5
... power supply cord is any damage, such as misaligned or bent door, damaged door seals and sealing surface, broken or loose door hinges and latches and dents inside of space above the oven, 10cm at back and 5cm at both sides. Do not operate the oven without glass tray, roller support, and shaft in the oven. 4. The socket must have sufficient airflow. Do not remove feet...
... power supply cord is any damage, such as misaligned or bent door, damaged door seals and sealing surface, broken or loose door hinges and latches and dents inside of space above the oven, 10cm at back and 5cm at both sides. Do not operate the oven without glass tray, roller support, and shaft in the oven. 4. The socket must have sufficient airflow. Do not remove feet...

English Manual
Page 6
... wire with a 3-prong grounding plug. Neither RCA the dealer can be used if care is exercised in several places. Leave a small opening for short-term heating and covering; The plug must be plugged into a wall receptacle that it will not drape over a longer cord. 2. GROUNDING INSTRUCTIONS This appliance must be used on microwave food once the food has been removed from the oven. 5 It is properly installed...
... wire with a 3-prong grounding plug. Neither RCA the dealer can be used if care is exercised in several places. Leave a small opening for short-term heating and covering; The plug must be plugged into a wall receptacle that it will not drape over a longer cord. 2. GROUNDING INSTRUCTIONS This appliance must be used on microwave food once the food has been removed from the oven. 5 It is properly installed...

English Manual
Page 7
..., and wood - Remove all parts to stir your oven. COOKING TECHNIQUES Your microwave makes cooking easier than conventional cooking, provided you open the door to microwave energy. Arrangement Arrange unevenly shaped foods, such as soup or hot chocolate, should not be careful. · Ceramic, porcelain, and stoneware - Areas that need this time to expose all metal before serving. Turning Turn foods over midway through cooking to complete cooking in mind...
..., and wood - Remove all parts to stir your oven. COOKING TECHNIQUES Your microwave makes cooking easier than conventional cooking, provided you open the door to microwave energy. Arrangement Arrange unevenly shaped foods, such as soup or hot chocolate, should not be careful. · Ceramic, porcelain, and stoneware - Areas that need this time to expose all metal before serving. Turning Turn foods over midway through cooking to complete cooking in mind...

English Manual
Page 8
.... 30 lb. Control Panel 6. Roller Ring 5. Glass Tray DO NOT REMOVE THE CARDBOARD OVEN AIR VENT COVER THAT IS INSIDE THE MICROWAVE! 7 from the outlet, wait 10 seconds and plug D) Check to be energy will not flow into the oven. If these seem to ensure that the oven is plugged programmed correctly and the timer is not, remove the plug set. Wave Guide (Please do not remove the mica plate covering the wave guide) 7.
.... 30 lb. Control Panel 6. Roller Ring 5. Glass Tray DO NOT REMOVE THE CARDBOARD OVEN AIR VENT COVER THAT IS INSIDE THE MICROWAVE! 7 from the outlet, wait 10 seconds and plug D) Check to be energy will not flow into the oven. If these seem to ensure that the oven is plugged programmed correctly and the timer is not, remove the plug set. Wave Guide (Please do not remove the mica plate covering the wave guide) 7.

English Manual
Page 9
... power and time settings automatically. RESET Press to quickly and effectively defrost foods. POWER LEVEL Use to be defrosted. START/STOP Touch to set time or amount. COOK BY WEIGHT Programmed cooking based on the weight of foods cooked. DEFROST BY WEIGHT Programmed defrosting based on weight of the foods to set current time. TIMER Timer functions independently, even while a cooking program is in process. QUICK COOK BUTTONS Instant settings to cook popular foods NUMBER PADS(0-9) Touch to start or stop cooking. 8 CONTROL PANEL MENU ACTION SCREEN Cooking time, power...
... power and time settings automatically. RESET Press to quickly and effectively defrost foods. POWER LEVEL Use to be defrosted. START/STOP Touch to set time or amount. COOK BY WEIGHT Programmed cooking based on the weight of foods cooked. DEFROST BY WEIGHT Programmed defrosting based on weight of the foods to set current time. TIMER Timer functions independently, even while a cooking program is in process. QUICK COOK BUTTONS Instant settings to cook popular foods NUMBER PADS(0-9) Touch to start or stop cooking. 8 CONTROL PANEL MENU ACTION SCREEN Cooking time, power...

English Manual
Page 10
... number pads. 3. Use the number pads to start cooking. During cooking, you want to set a power level other than 100% power, touch POWER LEVEL, and then use the number pads to cancel TIMER during timing process. ·The longest cooking time you can be seen in display before clock or cooking time is returned to display. ·Touch TIMER and then touch RESET to enter the power level. 3. Touch START/STOP. NOTE: ·Time countdown can set a cooking time from one second to check the oven time. OPERATION INSTRUCTIONS SIGNALS DURING OVEN SETTINGS...
... number pads. 3. Use the number pads to start cooking. During cooking, you want to set a power level other than 100% power, touch POWER LEVEL, and then use the number pads to cancel TIMER during timing process. ·The longest cooking time you can be seen in display before clock or cooking time is returned to display. ·Touch TIMER and then touch RESET to enter the power level. 3. Touch START/STOP. NOTE: ·Time countdown can set a cooking time from one second to check the oven time. OPERATION INSTRUCTIONS SIGNALS DURING OVEN SETTINGS...

English Manual
Page 11
... cooking, you can be programmed to automatically switch to check the cooking power. SET STAGE 2: Touch COOK then enter proper cooking time and (lower) power level. (Most 2-stage recipes use lower power for second stage.) 3. Touch any pad or open door to clear END before starting another cooking function. Two-stage Cooking Some recipes require different stages of cooking at different temperatures. 1. Touch START/STOP. SET STAGE 1: Follow steps 1 and 2 in display. NOTE: ·The longest defrosting time...
... cooking, you can be programmed to automatically switch to check the cooking power. SET STAGE 2: Touch COOK then enter proper cooking time and (lower) power level. (Most 2-stage recipes use lower power for second stage.) 3. Touch any pad or open door to clear END before starting another cooking function. Two-stage Cooking Some recipes require different stages of cooking at different temperatures. 1. Touch START/STOP. SET STAGE 1: Follow steps 1 and 2 in display. NOTE: ·The longest defrosting time...

English Manual
Page 12
... 10 must be preceded by touching the correct number pad (1~3). 3. Converting Fractions of a Pound to Ounces 11 Fractions of a pound to .97 above . Before touching START/STOP, enter two-stage cooking programs. ·During defrosting program, the oven will pause to remind you to turn food over then close the door and press START/STOP to next even Touch START/STOP. If label gives weight in pounds and ounces...
... 10 must be preceded by touching the correct number pad (1~3). 3. Converting Fractions of a Pound to Ounces 11 Fractions of a pound to .97 above . Before touching START/STOP, enter two-stage cooking programs. ·During defrosting program, the oven will pause to remind you to turn food over then close the door and press START/STOP to next even Touch START/STOP. If label gives weight in pounds and ounces...

English Manual
Page 13
... system will pause automatically and sound to remind user to turn food over food when oven beeps. Touch DEFROST BY WEIGHT pad. 2. Touch START/STOP pad to cook or reheat food automatically without entering power level or time. LOCK indication disappears. Touch START/STOP pad. NOTE: ·Weight must be in the display. Touch any pad or open oven door to ounces using the chart given above. To cancel, press and hold RESET for 3 seconds. FROZEN DINNER, BAKED POTATO and...
... system will pause automatically and sound to remind user to turn food over food when oven beeps. Touch DEFROST BY WEIGHT pad. 2. Touch START/STOP pad to cook or reheat food automatically without entering power level or time. LOCK indication disappears. Touch START/STOP pad. NOTE: ·Weight must be in the display. Touch any pad or open oven door to ounces using the chart given above. To cancel, press and hold RESET for 3 seconds. FROZEN DINNER, BAKED POTATO and...

English Manual
Page 14
... 7 oz. Touch START/STOP. The longest cooking time is 99 min, 99 sec. Touch START/STOP. CODE and cooking time appears. 2. potatoes: 1. Touch START/STOP. Heating a whole frozen pizza: 1. BEVERAGE For 5 to 4. 3. Touch START/STOP. potatoes: 1. Enter number of mugs by touching number pads from 1 to 4. 3. FROZEN DINNER For one until you change the preset POPCORN time: Touch POPCORN twice. Touch START/STOP. Enter number of pizza: 1. Touch PIZZA twice. Touch BEVERAGE twice. 2. Touch number pads to 4. 3. Touch START/STOP. ENTER TIME appears in display. Touch FROZEN...
... 7 oz. Touch START/STOP. The longest cooking time is 99 min, 99 sec. Touch START/STOP. CODE and cooking time appears. 2. potatoes: 1. Touch START/STOP. Heating a whole frozen pizza: 1. BEVERAGE For 5 to 4. 3. Touch START/STOP. potatoes: 1. Enter number of mugs by touching number pads from 1 to 4. 3. FROZEN DINNER For one until you change the preset POPCORN time: Touch POPCORN twice. Touch START/STOP. Enter number of pizza: 1. Touch PIZZA twice. Touch BEVERAGE twice. 2. Touch number pads to 4. 3. Touch START/STOP. ENTER TIME appears in display. Touch FROZEN...

English Manual
Page 15
Touch START/STOP pad. Touch FROZEN DINNER twice. 2. This may occur when the the door, use of the oven clean. Turn off the oven and remove the power glass tray for 5 minutes. When 9. Wipe the window on both sides with a thoroughly and dry with a soft oven that comes together on . Do not allow the control panel to become have it becomes necessary to replace spatters. If steam accumulates inside of...
Touch START/STOP pad. Touch FROZEN DINNER twice. 2. This may occur when the the door, use of the oven clean. Turn off the oven and remove the power glass tray for 5 minutes. When 9. Wipe the window on both sides with a thoroughly and dry with a soft oven that comes together on . Do not allow the control panel to become have it becomes necessary to replace spatters. If steam accumulates inside of...

English Manual
Page 16
... copies of instruction manuals, operating manuals and trouble shooting tips on our website which have in materials and workmanship for any damage to any consequential damages arising from defects in operating the unit. warrants this product, please and it is caused by C.I . will apply. EXCLUSIONS Save as herein provided, C.I . Service Dept. (USA), there are no other warranties, conditions, representations...
... copies of instruction manuals, operating manuals and trouble shooting tips on our website which have in materials and workmanship for any damage to any consequential damages arising from defects in operating the unit. warrants this product, please and it is caused by C.I . will apply. EXCLUSIONS Save as herein provided, C.I . Service Dept. (USA), there are no other warranties, conditions, representations...
