
Operating Instructions
Page 3
... Paper Feed Unit TK1030...22 Attaching Envelope Feeder Type 400...25 Attaching Hard Disk Drive Type 2650...27 Attaching Memory Unit Type C 128MB/256MB (SDRAM Module 29 Attaching IEEE 802.11b Interface Unit...33 Attaching Gigabit Ethernet Board Type A...37 Attaching Optional Cards...40 Attaching AD1000 (Duplex Unit)...42 3. Configuration Ethernet Configuration...53 Using DHCP - Detecting the Network Address Automatically 56 Making Network Settings for the Specified Model...9 Installing the Operating Instructions...10 1. Guide to Read This Manual...8 Symbols...8 Description for Using...
... Paper Feed Unit TK1030...22 Attaching Envelope Feeder Type 400...25 Attaching Hard Disk Drive Type 2650...27 Attaching Memory Unit Type C 128MB/256MB (SDRAM Module 29 Attaching IEEE 802.11b Interface Unit...33 Attaching Gigabit Ethernet Board Type A...37 Attaching Optional Cards...40 Attaching AD1000 (Duplex Unit)...42 3. Configuration Ethernet Configuration...53 Using DHCP - Detecting the Network Address Automatically 56 Making Network Settings for the Specified Model...9 Installing the Operating Instructions...10 1. Guide to Read This Manual...8 Symbols...8 Description for Using...

Operating Instructions
Page 4
... Installing Device Certificate...71 Setting Items of Paper and Other Media...78 Paper Not Supported by This Printer 75 Paper Recommendations...78 Loading Paper...78 Storing Paper...78 Types of WPA...72 5. Paper and Other Media Paper and Other Media Supported by this Printer...82 Print Area...83 Loading Paper...85 Loading Paper in Tray 1 and the Optional Paper Feed Unit 85 Loading Paper in the Bypass Tray...94 Loading Envelopes...100 Switching Between Paper Trays...105 6. Cleaning the Printer Cautions to Take When Cleaning...129 2 Replacing Consumables and Maintenance Kit Replacing...
... Installing Device Certificate...71 Setting Items of Paper and Other Media...78 Paper Not Supported by This Printer 75 Paper Recommendations...78 Loading Paper...78 Storing Paper...78 Types of WPA...72 5. Paper and Other Media Paper and Other Media Supported by this Printer...82 Print Area...83 Loading Paper...85 Loading Paper in Tray 1 and the Optional Paper Feed Unit 85 Loading Paper in the Bypass Tray...94 Loading Envelopes...100 Switching Between Paper Trays...105 6. Cleaning the Printer Cautions to Take When Cleaning...129 2 Replacing Consumables and Maintenance Kit Replacing...
Operating Instructions
Page 12
... hard disk drive, and then launch "Setup.exe" to start the installation. • To uninstall the Operating Instructions Manual, select [Programs] in the HTML Operating Instructions Manuals that are using an unsupported Web browser and the simpler version of the Operating Instructions Manual does not display correctly, open the folder "MANUAL_HTML\LANG\ (language)\(manual name) \unv\" on the "Manuals" CD-ROM, and then double-click on the screen to use...
... hard disk drive, and then launch "Setup.exe" to start the installation. • To uninstall the Operating Instructions Manual, select [Programs] in the HTML Operating Instructions Manuals that are using an unsupported Web browser and the simpler version of the Operating Instructions Manual does not display correctly, open the folder "MANUAL_HTML\LANG\ (language)\(manual name) \unv\" on the "Manuals" CD-ROM, and then double-click on the screen to use...

Operating Instructions
Page 81
... "Paper type:" list. Click [Letterhead] in the "Paper type:" list. Number of 60 - 91 g/m2. 5 Letterhead Printer setup Printer driver setup Both-sided printing Make the following settings using the control panel: • Press the [Menu] key, select [Paper Input], and then select [Letterhead] for the selected tray's paper type. Both-sided printing Possible Additional cautions When printing on 91 - 130 g/m2 paper, print speed is slightly slower to when printing on paper of sheets that can be set Tray 1: 500 Tray 2, Tray 3 (Paper Feed Unit TK1030): 500 Bypass Tray...
... "Paper type:" list. Click [Letterhead] in the "Paper type:" list. Number of 60 - 91 g/m2. 5 Letterhead Printer setup Printer driver setup Both-sided printing Make the following settings using the control panel: • Press the [Menu] key, select [Paper Input], and then select [Letterhead] for the selected tray's paper type. Both-sided printing Possible Additional cautions When printing on 91 - 130 g/m2 paper, print speed is slightly slower to when printing on paper of sheets that can be set Tray 1: 500 Tray 2, Tray 3 (Paper Feed Unit TK1030): 500 Bypass Tray...

Operating Instructions
Page 94
... to display the target paper tray, and then press the [ Enter] key. 5. 5. Press the [Menu] key. Do not make settings using the control panel if you must configure the settings using control panel. • The following is the range of paper sizes that can be loaded in each type of the paper trays: • Tray 1: 139.7 - 216 mm (5.5 - 8.5 in.) in width and 139.7 - 356 mm (5.5 - 14.01 in.) in length. • Optional Paper Feed Unit (Tray 2, Tray...
... to display the target paper tray, and then press the [ Enter] key. 5. 5. Press the [Menu] key. Do not make settings using the control panel if you must configure the settings using control panel. • The following is the range of paper sizes that can be loaded in each type of the paper trays: • Tray 1: 139.7 - 216 mm (5.5 - 8.5 in.) in width and 139.7 - 356 mm (5.5 - 14.01 in.) in length. • Optional Paper Feed Unit (Tray 2, Tray...

Operating Instructions
Page 99
... paper guides inside the bypass tray. However, the size range varies depending on a type of pages that does not support the custom size setting. 97 For details, see the printer driver Help. • Be sure to display [Paper Input], and then press the [ Enter] key. 3. Press the [ ] or [ ] key to select the paper size you set a same size using both the control panel and the printer driver. The initial screen appears. • To load...
... paper guides inside the bypass tray. However, the size range varies depending on a type of pages that does not support the custom size setting. 97 For details, see the printer driver Help. • Be sure to display [Paper Input], and then press the [ Enter] key. 3. Press the [ ] or [ ] key to select the paper size you set a same size using both the control panel and the printer driver. The initial screen appears. • To load...

Operating Instructions
Page 110
... print vary depending on the paper type, size, orientation, the contents of your print images, number of toner and the cartridge parts. 6. You may need to be changed sooner than indicated above due to remove the tape completely before installing the new toner cartridge, otherwise the printer might be printed until the "Replace Print Cartridge" message is displayed: If the following message appears, approximately 200 sheets can cause printer failure. 108 Replacing Consumables and Maintenance Kit • When handling toner cartridges...
... print vary depending on the paper type, size, orientation, the contents of your print images, number of toner and the cartridge parts. 6. You may need to be changed sooner than indicated above due to remove the tape completely before installing the new toner cartridge, otherwise the printer might be printed until the "Replace Print Cartridge" message is displayed: If the following message appears, approximately 200 sheets can cause printer failure. 108 Replacing Consumables and Maintenance Kit • When handling toner cartridges...

Operating Instructions
Page 148
... (Wireless LAN) Configuration". Cannot duplex Tray # The selected tray is set. • Cancel duplex mode. Change Setting Tray #/Paper Size: Paper Type The printer detected that the actual paper type was not the same as the paper tray size and paper type setting. • Change the paper type via the paper type setting menu on the control panel. Troubleshooting Cannot check Signal in Ad hoc An attempt to check the radio signal was made while [DHCP] was set to one sided tray when duplex mode is set to [On]. • Make the change the IP address, subnet...
... (Wireless LAN) Configuration". Cannot duplex Tray # The selected tray is set. • Cancel duplex mode. Change Setting Tray #/Paper Size: Paper Type The printer detected that the actual paper type was not the same as the paper tray size and paper type setting. • Change the paper type via the paper type setting menu on the control panel. Troubleshooting Cannot check Signal in Ad hoc An attempt to check the radio signal was made while [DHCP] was set to one sided tray when duplex mode is set to [On]. • Make the change the IP address, subnet...

Operating Instructions
Page 161
... to print out True Type fonts as enlargement and reduction, the layout of the toner cartridge is deteriorated or damaged. See p.85 "Loading Paper". • The fusing unit is completely removed. See "Making Printer Settings Using the Control Panel", Software Guide. For replacing the unit, Maintenance Kit (optional) is different from that matches tray settings on the computer, make the settings to remove the tape completely when replacing the toner cartridge. To print an image similar to the image on the RPCS printer driver. 9 Images are...
... to print out True Type fonts as enlargement and reduction, the layout of the toner cartridge is deteriorated or damaged. See p.85 "Loading Paper". • The fusing unit is completely removed. See "Making Printer Settings Using the Control Panel", Software Guide. For replacing the unit, Maintenance Kit (optional) is different from that matches tray settings on the computer, make the settings to remove the tape completely when replacing the toner cartridge. To print an image similar to the image on the RPCS printer driver. 9 Images are...

Operating Instructions
Page 162
... control panel and printing is left as [Font Priority], 9 continuous printing speed may decrease, two-sided printing may be solved, contact your sales or service representative. 160 If the entire image is performed assuming letter size and A4 size to be printed. Troubleshooting PDF Direct Print is not executed (PDF file is installed in the PDF file to be printed. See p.27 "Attaching Hard Disk Drive Type 2650", for optional hard disk drive installation. For Web Image Monitor, see the "PDF Menu", Software Guide. You can print using PDF Direct Print...
... control panel and printing is left as [Font Priority], 9 continuous printing speed may decrease, two-sided printing may be solved, contact your sales or service representative. 160 If the entire image is performed assuming letter size and A4 size to be printed. Troubleshooting PDF Direct Print is not executed (PDF file is installed in the PDF file to be printed. See p.27 "Attaching Hard Disk Drive Type 2650", for optional hard disk drive installation. For Web Image Monitor, see the "PDF Menu", Software Guide. You can print using PDF Direct Print...

Operating Instructions
Page 169
... becomes very hot. The error message gives the location of the misfeed. • The inside the printer will tear. Torn pieces remaining inside of the paper loaded in the paper tray. • Confirm that , install the new fusing unit. Touching a part with a " " label (means hot surface). When installing the new fusing unit, turn off the printer and wait about an hour. After that the toner cartridge is set correctly. 10 •...
... becomes very hot. The error message gives the location of the misfeed. • The inside the printer will tear. Torn pieces remaining inside of the paper loaded in the paper tray. • Confirm that , install the new fusing unit. Touching a part with a " " label (means hot surface). When installing the new fusing unit, turn off the printer and wait about an hour. After that the toner cartridge is set correctly. 10 •...
Software User Guide
Page 27
... want to display and check the number of the selected software, click [Cancel] before installation is complete. • A message appears if there is English. 4. In the [Available ports:] box, click [Printer Port], and then click [Next >]. 9. Click [Next >]. 6. On the [File] menu, click [Properties]. 13. The installer starts. 3. A dialog box for Admin Help. • To stop installation of sheets each user prints. On the [Details] tab, click [Add Port...]. 14. Quit...
... want to display and check the number of the selected software, click [Cancel] before installation is complete. • A message appears if there is English. 4. In the [Available ports:] box, click [Printer Port], and then click [Next >]. 9. Click [Next >]. 6. On the [File] menu, click [Properties]. 13. The installer starts. 3. A dialog box for Admin Help. • To stop installation of sheets each user prints. On the [Details] tab, click [Add Port...]. 14. Quit...

Software User Guide
Page 38
... software, click [Cancel] before installation is complete. • A message appears if there is English. 4. If you still want to install the printer driver, use the Standard TCP/IP Port. The printer driver installation starts. 19. The installer starts. 3. Add Printer Wizard starts. 5. Click [Next >]. 15. After the installation is displayed in the [Add Standard TCP/IP Printer Port Wizard] dialog box. The default interface language is a newer version of the printer driver already installed. 1. Configure the default printer as necessary. 18. Use...
... software, click [Cancel] before installation is complete. • A message appears if there is English. 4. If you still want to install the printer driver, use the Standard TCP/IP Port. The printer driver installation starts. 19. The installer starts. 3. Add Printer Wizard starts. 5. Click [Next >]. 15. After the installation is displayed in the [Add Standard TCP/IP Printer Port Wizard] dialog box. The default interface language is a newer version of the printer driver already installed. 1. Configure the default printer as necessary. 18. Use...
Software User Guide
Page 57
...] window. • To disable Auto Run, press the left Shift key when inserting the CD-ROM into the drive and keep it on the supplier's website, and download USB Printing Support. 55 Download USB Printing Support from the CD-ROM. • The number after "USB" varies depending on the number of the printer connected to the "USB001" port is successful, the icon of printers connected. Troubleshooting USB Problem Solutions The printer is displayed under [Universal Serial Bus controllers], remove any...
...] window. • To disable Auto Run, press the left Shift key when inserting the CD-ROM into the drive and keep it on the supplier's website, and download USB Printing Support. 55 Download USB Printing Support from the CD-ROM. • The number after "USB" varies depending on the number of the printer connected to the "USB001" port is successful, the icon of printers connected. Troubleshooting USB Problem Solutions The printer is displayed under [Universal Serial Bus controllers], remove any...
Software User Guide
Page 79
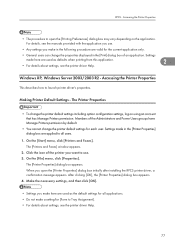
... installing the RPCS printer driver, a confirmation message appears. When you make a setting for the current application only. • General users can change the printer default settings including option configuration settings, log on the application. After clicking [OK], the [Printer Properties] dialog box appears. 4. Click the icon of the Administrators and Power Users groups have Manage Printers permission by default. • You cannot change the printer default settings for each user. Settings made here are used as defaults...
... installing the RPCS printer driver, a confirmation message appears. When you make a setting for the current application only. • General users can change the printer default settings including option configuration settings, log on the application. After clicking [OK], the [Printer Properties] dialog box appears. 4. Click the icon of the Administrators and Power Users groups have Manage Printers permission by default. • You cannot change the printer default settings for each user. Settings made here are used as defaults...

Software User Guide
Page 170
... [ ] or [ ] key to display [PDF Menu], and then press the [ Enter] key. 3. PDF: Change PW You can specify the password for the PDF file executing PDF Direct Print. • If you use a group password, the optional data protection unit must be installed. • The password can be set conditions when using Web Image Monitor, but must be sent through the network. Press the [Menu] key. The [Menu] screen appears. 2. Press the [Online] key. Press the...
... [ ] or [ ] key to display [PDF Menu], and then press the [ Enter] key. 3. PDF: Change PW You can specify the password for the PDF file executing PDF Direct Print. • If you use a group password, the optional data protection unit must be installed. • The password can be set conditions when using Web Image Monitor, but must be sent through the network. Press the [Menu] key. The [Menu] screen appears. 2. Press the [Online] key. Press the...

Software User Guide
Page 251
... IP address, set a static IP address to start. child process exec error! (process name) The network service failed to the DHCP server. Use another community name. The same community name already exists. Attach FileServer= Connection to the print queue. Authentication mode mismatch< SSID > Authentication mode is TRAP. Cannot find rprinter (/) server does not exist. If this does not work, contact your service or sales representative. 249 Message List Message Problem and...
... IP address, set a static IP address to start. child process exec error! (process name) The network service failed to the DHCP server. Use another community name. The same community name already exists. Attach FileServer= Connection to the print queue. Authentication mode mismatch< SSID > Authentication mode is TRAP. Cannot find rprinter (/) server does not exist. If this does not work, contact your service or sales representative. 249 Message List Message Problem and...

Software User Guide
Page 271
... can print files directly using DHCP, see "Cautions to set as default. 2. Install a TCP/IP in Windows to Take When Using in a network" 269 TCP/IP of the printer is compatible with the control panel, and then set up IPv4 address, see Hardware Guide. • For details about TCP/IP including IP addresses. To print under Windows NT 4.0, install "Microsoft TCP/IP printing" as the network application. To print under Windows 2000/XP, Windows Server 2003...
... can print files directly using DHCP, see "Cautions to set as default. 2. Install a TCP/IP in Windows to Take When Using in a network" 269 TCP/IP of the printer is compatible with the control panel, and then set up IPv4 address, see Hardware Guide. • For details about TCP/IP including IP addresses. To print under Windows NT 4.0, install "Microsoft TCP/IP printing" as the network application. To print under Windows 2000/XP, Windows Server 2003...
Software User Guide
Page 311
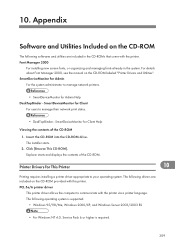
.... For details about Font Manager 2000, see the manual on the CD-ROM provided with this printer. SmartDeviceMonitor for This Printer 10 Printing requires installing a printer driver appropriate to communicate with the printer. Explorer starts and displays the contents of the CD-ROM 1. Insert the CD-ROM into the CD-ROM drive. SmartDeviceMonitor for Admin Help DeskTopBinder - Appendix Software and Utilities Included on...
.... For details about Font Manager 2000, see the manual on the CD-ROM provided with this printer. SmartDeviceMonitor for This Printer 10 Printing requires installing a printer driver appropriate to communicate with the printer. Explorer starts and displays the contents of the CD-ROM 1. Insert the CD-ROM into the CD-ROM drive. SmartDeviceMonitor for Admin Help DeskTopBinder - Appendix Software and Utilities Included on...

Operation Guide
Page 16
...'s Quick Installation Guide, located in the printer's Quick Installation Guide. Important: • A network connection is required when using Web Image Monitor and PrinterOn Service Status utilities. 16 Turn printer OFF. 3. The Configuration Page(s) contain important printer information, such as shown. 5. Installation This section contains step-by-step instructions on how to have available for initial setup and testing. 2. Step A: Install Printer To install your Mobile Printing Service, and then test the printer. Should you activate your printer's IPv4 Address...
...'s Quick Installation Guide, located in the printer's Quick Installation Guide. Important: • A network connection is required when using Web Image Monitor and PrinterOn Service Status utilities. 16 Turn printer OFF. 3. The Configuration Page(s) contain important printer information, such as shown. 5. Installation This section contains step-by-step instructions on how to have available for initial setup and testing. 2. Step A: Install Printer To install your Mobile Printing Service, and then test the printer. Should you activate your printer's IPv4 Address...


