
Operating Instructions
Page 14
... Alert Indicator Lights up when a paper tray is not available for the SP C220N model printer. The configuration page will then print out. 5. Load Paper Indicator Lights up whenever a printer error occurs. LED color corresponds to the Printer Control Panel 1 ASH021S 1. Press the {Stop/Start} key again to... return to check the error. 2. Note ❒ To print the configuration page using the {Stop/Start} key is ...
... Alert Indicator Lights up when a paper tray is not available for the SP C220N model printer. The configuration page will then print out. 5. Load Paper Indicator Lights up whenever a printer error occurs. LED color corresponds to the Printer Control Panel 1 ASH021S 1. Press the {Stop/Start} key again to... return to check the error. 2. Note ❒ To print the configuration page using the {Stop/Start} key is ...

Operating Instructions
Page 25
stallation. 15 Align them with the holes on both sides of the printer, and then carefully lower the printer. C Remove the adhesive tape from the wall outlet. ASH003S F After installing the option, print the configuration page to confirm the in- Installing Options B Turn off the printer's power switch, and then unplug the printer's power cord from the optional paper feed unit. 2 ASH025S D Lift the printer using the inset grips on the underside of the printer. ASH051S E There are three upright pins on the optional paper feed unit.
stallation. 15 Align them with the holes on both sides of the printer, and then carefully lower the printer. C Remove the adhesive tape from the wall outlet. ASH003S F After installing the option, print the configuration page to confirm the in- Installing Options B Turn off the printer's power switch, and then unplug the printer's power cord from the optional paper feed unit. 2 ASH025S D Lift the printer using the inset grips on the underside of the printer. ASH051S E There are three upright pins on the optional paper feed unit.

Operating Instructions
Page 26
..., contact your sales or service representative. A Turn off the printer's power switch and un- Important ❒ Before touching the memory unit, ground yourself by touching something metal to physical shocks. Reference For printing the configuration page, see Software Guide. plug the power cable. If you... can install the memory unit in the column of configuration options, then it has been properly installed. 2 ❒ If the optional paper feed unit is listed in the SP C221N and SP C222DN model printers. ❒ Do not subject the memory unit to discharge any static...
..., contact your sales or service representative. A Turn off the printer's power switch and un- Important ❒ Before touching the memory unit, ground yourself by touching something metal to physical shocks. Reference For printing the configuration page, see Software Guide. plug the power cable. If you... can install the memory unit in the column of configuration options, then it has been properly installed. 2 ❒ If the optional paper feed unit is listed in the SP C221N and SP C222DN model printers. ❒ Do not subject the memory unit to discharge any static...

Operating Instructions
Page 28
...service representative. stallation. Note ❒ Before using the new memory unit, make settings in - I After installing the option, print the configuration page to confirm the in the printer driver. ❒ If the memory unit is installed properly, the memory capacity will appear under "Total Memory" on the.... If you cannot install it is not properly installed, repeat this procedure. Reference For printing the configuration page, see Software Guide. 18 Installing the Printer and Options F Keeping the module at an angle, press it down until it clicks into place. 2 ASH030S G Attach the ...
...service representative. stallation. Note ❒ Before using the new memory unit, make settings in - I After installing the option, print the configuration page to confirm the in the printer driver. ❒ If the memory unit is installed properly, the memory capacity will appear under "Total Memory" on the.... If you cannot install it is not properly installed, repeat this procedure. Reference For printing the configuration page, see Software Guide. 18 Installing the Printer and Options F Keeping the module at an angle, press it down until it clicks into place. 2 ASH030S G Attach the ...

Operating Instructions
Page 36
...printer driver or Smart Organizing Monitor to specify the paper type you want to use . Types of paper Paper Type Thickness (g/m2) Duplex Tray 1 Enabled paper feeding tray Tray 2 Note Thin Paper (60-75g/m2) Plain Paper Plain Paper (90-105g/m2) Recycled Paper Color... If the paper thickness is approximately half that of paper supported by this printer and cautions for [Tray 1] and/or [Tray 2]. Paper and Other Media...then select the paper type from the [Paper Type:] list for use . ❖ Printer driver On the printer driver screen, click the [Paper] tab, and then select a paper type under ...
...printer driver or Smart Organizing Monitor to specify the paper type you want to use . Types of paper Paper Type Thickness (g/m2) Duplex Tray 1 Enabled paper feeding tray Tray 2 Note Thin Paper (60-75g/m2) Plain Paper Plain Paper (90-105g/m2) Recycled Paper Color... If the paper thickness is approximately half that of paper supported by this printer and cautions for [Tray 1] and/or [Tray 2]. Paper and Other Media...then select the paper type from the [Paper Type:] list for use . ❖ Printer driver On the printer driver screen, click the [Paper] tab, and then select a paper type under ...

Operating Instructions
Page 37
... the envelopes becoming creased, go to rotate the print object 180 degrees. • Load envelopes print side up in the opposite direction. ASH120S 27 Also, configure the printer driver to the [Setup] tab and select [Rotate by 180 degrees] for [Orientation:] when printing. • If printed envelopes come out badly creased, load...
... the envelopes becoming creased, go to rotate the print object 180 degrees. • Load envelopes print side up in the opposite direction. ASH120S 27 Also, configure the printer driver to the [Setup] tab and select [Rotate by 180 degrees] for [Orientation:] when printing. • If printed envelopes come out badly creased, load...

Operating Instructions
Page 88
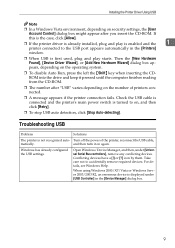
...fastener, fasten it with the store where the printer was purchased for information about checking the port connection, see p.79 "When the Printer is correct. terface cable Check the port connection setting is Di- Can you cannot print a configuration page, it probably indicates a tion page?... Is the interface cable con- Troubleshooting Printer Does Not Print Possible Cause Solutions Is the power on the Smart Organizing Monitor dialog ...
...fastener, fasten it with the store where the printer was purchased for information about checking the port connection, see p.79 "When the Printer is correct. terface cable Check the port connection setting is Di- Can you cannot print a configuration page, it probably indicates a tion page?... Is the interface cable con- Troubleshooting Printer Does Not Print Possible Cause Solutions Is the power on the Smart Organizing Monitor dialog ...

Operating Instructions
Page 114
...10070; Configuration Desktop ❖ Print Process Laser beam scanning & Electrophotographic printing 4 drums tandem method ❖ First Print Speed Monochrome: 14 sec or less (A4K/8 1/2 × 11K) Color: 14 sec or less (A4K/8 1/2 × 11K) Note ❒ If the printer has not...delay before the first page starts printing. ❖ Printing Speed • SP C220N: Monochrome: maximum 16 pages per minute (A4K/8 1/2 × 11K) Color: maximum 16 pages per minute (A4K/8 1/2 × 11K) 9 • SP C221N/SP C222DN: Monochrome: maximum 20 pages per minute (A4K), 21 pages per minutes...
...10070; Configuration Desktop ❖ Print Process Laser beam scanning & Electrophotographic printing 4 drums tandem method ❖ First Print Speed Monochrome: 14 sec or less (A4K/8 1/2 × 11K) Color: 14 sec or less (A4K/8 1/2 × 11K) Note ❒ If the printer has not...delay before the first page starts printing. ❖ Printing Speed • SP C220N: Monochrome: maximum 16 pages per minute (A4K/8 1/2 × 11K) Color: maximum 16 pages per minute (A4K/8 1/2 × 11K) 9 • SP C221N/SP C222DN: Monochrome: maximum 20 pages per minute (A4K), 21 pages per minutes...

Operating Instructions
Page 1
For safe and correct use this machine and keep it handy for future reference. Operating Instructions Software Guide 1 Preparing for Printing 2 Setting Up the Printer Driver 3 Other Print Operations 4 Monitoring and Configuring the Printer 5 Using a Print Server 6 Special Operations under Windows 7 Mac OS Configuration 8 Appendix Read this manual carefully before you use , be sure to read "Safety Information" before using the machine.
For safe and correct use this machine and keep it handy for future reference. Operating Instructions Software Guide 1 Preparing for Printing 2 Setting Up the Printer Driver 3 Other Print Operations 4 Monitoring and Configuring the Printer 5 Using a Print Server 6 Special Operations under Windows 7 Mac OS Configuration 8 Appendix Read this manual carefully before you use , be sure to read "Safety Information" before using the machine.
Operating Instructions
Page 7
... Monitor 61 Displaying the Smart Organizing Monitor Dialog Box 61 Displaying the Printer Status 62 Displaying the Printer Information 62 Printer Configuration 64 v Mac OS Configuration Installing the Printer Driver 55 Specifying the Printer 56 Using USB...56 Using TCP/IP ...56 Setting Up Options 58... 52 Printing Commands 53 7. Monitoring and Configuring the Printer Using Web Image Monitor 29 Displaying Top Page 30 Displaying the Printer Status 31 About Menu and Mode 31 Access in the Administrator Mode 33 Configuring the Printer Settings 33 Changing the Login Information 35...
... Monitor 61 Displaying the Smart Organizing Monitor Dialog Box 61 Displaying the Printer Status 62 Displaying the Printer Information 62 Printer Configuration 64 v Mac OS Configuration Installing the Printer Driver 55 Specifying the Printer 56 Using USB...56 Using TCP/IP ...56 Setting Up Options 58... 52 Printing Commands 53 7. Monitoring and Configuring the Printer Using Web Image Monitor 29 Displaying Top Page 30 Displaying the Printer Status 31 About Menu and Mode 31 Access in the Administrator Mode 33 Configuring the Printer Settings 33 Changing the Login Information 35...

Operating Instructions
Page 14
... port settings A On the [Start] menu, open the [Printers] window. Before reconfiguring the settings, print a test page to obtain the printer's IP address, and then configure the necessary settings. ❖ Reconfigure the printer's IP address For details about reconfiguring the printer's IP address, see p.6 "If the network printer search fails". C Click the [Ports] tab, and then...
... port settings A On the [Start] menu, open the [Printers] window. Before reconfiguring the settings, print a test page to obtain the printer's IP address, and then configure the necessary settings. ❖ Reconfigure the printer's IP address For details about reconfiguring the printer's IP address, see p.6 "If the network printer search fails". C Click the [Ports] tab, and then...

Operating Instructions
Page 15
... following settings, you must configure this printer as the default printer, and then click [Next >]. G Select whether or not to use this printer as a Windows network printer. D Select [A network printer, or printer attached to this printer], and then click [Next >]. F Select this printer from the list of the shared printers, and then click [Next >]. Installing the Printer Driver in a Network Environment...
... following settings, you must configure this printer as the default printer, and then click [Next >]. G Select whether or not to use this printer as a Windows network printer. D Select [A network printer, or printer attached to this printer], and then click [Next >]. F Select this printer from the list of the shared printers, and then click [Next >]. Installing the Printer Driver in a Network Environment...
Operating Instructions
Page 17
...ROM. For details, see Windows Help. If this is the case, click [Allow]. ❒ If the printer driver is already installed, plug and play starts. Installing the Printer Driver Using USB Note ❒ In a Windows Vista environment, depending on security settings, the [User Account ...] in the [Printers] window. ❒ When USB is not recognized auto- Take care not to on again. When using Windows 2000/XP/Vista or Windows Server 2003/2003 R2, an erroneous device is turned to accidentally remove required devices. Windows has already configured the USB settings...
...ROM. For details, see Windows Help. If this is the case, click [Allow]. ❒ If the printer driver is already installed, plug and play starts. Installing the Printer Driver Using USB Note ❒ In a Windows Vista environment, depending on security settings, the [User Account ...] in the [Printers] window. ❒ When USB is not recognized auto- Take care not to on again. When using Windows 2000/XP/Vista or Windows Server 2003/2003 R2, an erroneous device is turned to accidentally remove required devices. Windows has already configured the USB settings...

Operating Instructions
Page 21
... [Properties]. B Click the icon of the Administrators and Power Users groups have Manage Printers permission by default. ❒ You cannot change the printer default settings including option configuration settings, log on using an account that has Manage Printers permission. Setting Up the Printer Driver DDST - Accessing the Printer Properties This section explains about settings, see the...
... [Properties]. B Click the icon of the Administrators and Power Users groups have Manage Printers permission by default. ❒ You cannot change the printer default settings including option configuration settings, log on using an account that has Manage Printers permission. Setting Up the Printer Driver DDST - Accessing the Printer Properties This section explains about settings, see the...

Operating Instructions
Page 23
..., and then click [OK]. Members of the Admin- 2 istrators and Power Users groups have Manage Printers permission by default. ❒ You cannot change the printer default settings including option configuration settings, log on using an account that has Manage Printers permission. C On the [File] menu, click [Properties]. Reference For details about settings, see the...
..., and then click [OK]. Members of the Admin- 2 istrators and Power Users groups have Manage Printers permission by default. ❒ You cannot change the printer default settings including option configuration settings, log on using an account that has Manage Printers permission. C On the [File] menu, click [Properties]. Reference For details about settings, see the...

Operating Instructions
Page 25
...-click the icon of the Admin- 2 istrators and Power Users groups have Manage Printers permission by default. ❒ You cannot change the printer default settings including option configuration settings, log on using an account that has Manage Printers permission. DDST - Accessing the Printer Properties Windows Vista- D Make the necessary settings, and then click [OK]. The...
...-click the icon of the Admin- 2 istrators and Power Users groups have Manage Printers permission by default. ❒ You cannot change the printer default settings including option configuration settings, log on using an account that has Manage Printers permission. DDST - Accessing the Printer Properties Windows Vista- D Make the necessary settings, and then click [OK]. The...

Operating Instructions
Page 37
...Making input tray settings • Printing a test page • Making network protocol settings ❖ Configuring the printer To perform the operations from Web Image Monitor, TCP/IP is configured to update the printer information. ❒ We recommend using Web Image Monitor in the main area to use TCP/IP... and operation problems may occur. ❒ If you can be established. 29 Monitoring and Configuring the Printer Using Web Image Monitor Using Web Image Monitor, you are using the printer under DHCP, the IPv4 address may not appear even after the back button of the Web...
...Making input tray settings • Printing a test page • Making network protocol settings ❖ Configuring the printer To perform the operations from Web Image Monitor, TCP/IP is configured to update the printer information. ❒ We recommend using Web Image Monitor in the main area to use TCP/IP... and operation problems may occur. ❒ If you can be established. 29 Monitoring and Configuring the Printer Using Web Image Monitor Using Web Image Monitor, you are using the printer under DHCP, the IPv4 address may not appear even after the back button of the Web...

Operating Instructions
Page 38
...and its Top Page. If the printer's host name has been registered on the DNS server, you are logged into the following areas: ASH102S 1. Top Page of Web Image Monitor A Start your Web browser. Monitoring and Configuring the Printer Displaying Top Page This section explains ...how to log on the main area. 2. Note ❒ Contents of the [Configuration] page appears on in the menu area.
...and its Top Page. If the printer's host name has been registered on the DNS server, you are logged into the following areas: ASH102S 1. Top Page of Web Image Monitor A Start your Web browser. Monitoring and Configuring the Printer Displaying Top Page This section explains ...how to log on the main area. 2. Note ❒ Contents of the [Configuration] page appears on in the menu area.

Operating Instructions
Page 39
The available menus on the [Configuration] page differ depending on the mode you are two modes available with Web Image Monitor: user mode and administrator mode. Using Web Image Monitor Displaying the Printer Status Top page of Web Image Monitor contains two tabs: the [Status] tab and [Counter] tab. ❖ [Status] tab You...] tab You can check the total number of pages printed to date. The following counter information is displayed. • Total • Black & White • Full Color • 2 Sided (Two Sided Print) About Menu and Mode There are logging on. 31
The available menus on the [Configuration] page differ depending on the mode you are two modes available with Web Image Monitor: user mode and administrator mode. Using Web Image Monitor Displaying the Printer Status Top page of Web Image Monitor contains two tabs: the [Status] tab and [Counter] tab. ❖ [Status] tab You...] tab You can check the total number of pages printed to date. The following counter information is displayed. • Total • Black & White • Full Color • 2 Sided (Two Sided Print) About Menu and Mode There are logging on. 31

Operating Instructions
Page 40
Paper Click to display the [Network] page. Network Click to display the [Paper] page. 2. Help Source File Setting Click to display the [Paper] page. 2. Paper Click to specify the Help source file. 32 Change Login Password Click to display the [Network] page. ❖ Administrator Mode In this mode, users can make input tray and network settings. 1. Monitoring and Configuring the Printer ❖ User Mode In this mode, users can view settings but cannot change the login password. 4. ASH104S 3. Network Click to change them. 4 ASH103S 1.
Paper Click to display the [Network] page. Network Click to display the [Paper] page. 2. Help Source File Setting Click to display the [Paper] page. 2. Paper Click to specify the Help source file. 32 Change Login Password Click to display the [Network] page. ❖ Administrator Mode In this mode, users can make input tray and network settings. 1. Monitoring and Configuring the Printer ❖ User Mode In this mode, users can view settings but cannot change the login password. 4. ASH104S 3. Network Click to change them. 4 ASH103S 1.


