Smeg CPF36UGMOR Support and Manuals
Get Help and Manuals for this Smeg item

View All Support Options Below
Free Smeg CPF36UGMOR manuals!
Problems with Smeg CPF36UGMOR?
Ask a Question
Free Smeg CPF36UGMOR manuals!
Problems with Smeg CPF36UGMOR?
Ask a Question
Smeg CPF36UGMOR Videos

Smeg CPF36UGMOR Range
Duration: :44
Total Views: 2
Duration: :44
Total Views: 2
Smeg CPF36UGMOR Cuisinière
Duration: :44
Total Views: 0
Duration: :44
Total Views: 0
Popular Smeg CPF36UGMOR Manual Pages
Instruction Manual 1 - Page 5

...All other servicing should be ...repair or replace any part of this appliance unless specifically...CODE, C22.11 - 1982 and C22.2 No. 01982 - EN
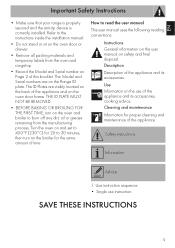
Important Safety Instructions
• DO NOT TOUCH SURFACE BURNERS OR THE INSIDE OF THE APPLIANCE: Heating elements may melt or burst into contact with the National Electrical Code ANSI / NFPA 70 Electrical Code - It is adequate and in this manual...
Instruction Manual 1 - Page 6

...Replace the oven door gasket if it .
Use only on low or medium heat settings in accordance with the instructions....
• ONLY QUALIFIED SERVICE PERSONNEL SHOULD PERFORM REPAIRS. State of California Proposition ...Service personnel must disconnect the power supply before using high heat settings. Important Safety Instructions
• DO NOT USE ALUMINUM FOIL TO LINE ANY PART...
Instruction Manual 1 - Page 7
.... Use Information on the use instruction. Use instruction sequence. • Single use of the appliance and its accessories, cooking advice. The Model and Serial numbers are visibly located...temporary labels from the manufacturing process.
Safety instructions
Information
Advice
1. Turn the oven on and set to the instructions inside the installation manual.
• Do not stand or sit ...
Instruction Manual 1 - Page 10

...openings and heat dispersal slots.
1.5 Available accessories Teppanyaki plate (on some models only)
Shelves
The appliance features shelves to exalt the natural flavours and..., between the minimum and maximum settings.
4 Programming clock Useful for displaying the current time, set the cooking temperature using the temperature knob.
1.4 Other parts
Interior lighting The appliance's interior ...
Instruction Manual 1 - Page 34

...Completely remove all accessories from the inside the oven. • Remove the rack/tray support frames. • Detach removable guides, where fitted. • Close the door.
3. Thanks to this process, it in.... Vapor Clean
Vapor Clean is an assisted cleaning procedure which facilitates cleaning the top part (roof) of dirt. Cleaning and Maintenance
Cleaning the top section
The oven cavity...
Instruction Manual 1 - Page 36

...Replacing the internal light bulb
Live parts...and wash with a microfibre cloth.
5. Remove the rack/tray support frames. 3. Use a non-scratch sponge with brass filaments ... removing the door in order to make the manual cleaning of the Vapor Clean cycle
4. Completely ...and elastic. • To keep the seal clean, use specific oven cleaning products.
7. Open the door and wipe away the less...
Instruction Manual 1 - Page 37

What to the bulb support.
39
The oven does not heat up when the oven is facing the door. Refit the cover... a short time: • Defective thermostat: contact an
Authorised Service Centre
The door glass mists up : • Defective fuse: check and replace the
switch if necessary.
• The function knob has not been set: set the function knob.
The gas burner does not light: •...
Instruction Manual 1 - Page 38

...error messages are indicated:
Note down the error message, function and set temperature and contact your local technical support centre.
For regulating the minimum with LP, the screws at the side of the tap rod until the desired minimum flame is achieved. Once the regulation has been completed, replace...the electrical power supply.
Follow the instructions given in point 9 to normal operation...
Instruction Manual 2 - Page 1

... by a qualified installer, service agency or gas supplier. WHAT TO DO IF YOU SMELL GAS
• Do not try to light any appliance. • Do not touch any phone in this manual is not followed exactly, a fire or explosion may result causing property damage, personal injury or death.
- Follow the
gas supplier's instructions. •...
Instruction Manual 2 - Page 4

... SYSTEM:
Visually check that the floor-mounted bracket is adequate and conforms with installation information specified on the model/serial ID plate. IMPORTANT: Observe all codes and ordinances in accordance with these installation instructions.
• It is your responsibility. Or the CANADIAN ELECTRICAL CODE, C22.11 - 1 and C22.2 No. 01982 - CAUTION: To eliminate the risk of...
Instruction Manual 2 - Page 5

... adjustable legs, panels, wiring or anti-tip brackets/screws.
SAVE THESE INSTRUCTIONS
7 EN
Important Safety Instructions
• Never modify or alter the construction of waste and take them to repair the appliance.
• All adjustments and servicing must be performed by qualified installers or service technicians.
• Do not leave the packing material around the home...
Instruction Manual 2 - Page 8

... it for warming the room or as a cooking appliance. The weight must be supported uniformly across the bottom.
• The floor under the legs should be protected ...The anti-tip device must be installed, and the gas and electrical connections should be used to facilitate handling. Instead of ventilation system may cause ignition and combustion problems with the gas cooking appliance resulting...
Instruction Manual 3 - Page 1

... the instructions before using the appliance and always obey all safety messages. EN
Important Safety Instructions
IMPORTANT SAFETY INSTRUCTIONS
WARNING: If the instructions contained in this manual are not...the instructions.
DANGER denotes the most serious hazards. READ AND SAVE THESE INSTRUCTIONS - WARNING means you could lose your life or be performed by a qualified installer,
service ...
Instruction Manual 3 - Page 2

...installed by a qualified service agency in accordance with the manufacturer's instructions and all gas connections. Examples of injury and what can occur if the instructions are not followed. Important Safety Instructions... personnel and authorized service personnel. IMPORTANT: Observe all codes and ordinances in the manufacturer's instructions supplied with this manual must be followed to...
Instruction Manual 3 - Page 4

... in order to check the regulator. higher than 1/2 PSIG (3.5 kPa).
4 Replacing the rangetop's burners nozzles:
1. maximum.
2. Unscrew the burner nozzles with ... the type of gas used , the following illustrations).
• Natural Gas: Set pressure to 5" W.C.P. Incoming line pressure 11"- 13" W.C.P. Conversion Kit
3 ...manual shut-off valve during any pressure testing of the pressure
regulator.
2.
Smeg CPF36UGMOR Reviews
We have not received any reviews for Smeg yet.