Operating Instructions
Page 2
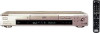
Record the serial number in the U.S.A Owner's Record The model and serial numbers are located at the rear of the unit. DVP-S350 Serial No CAUTION You are designed to rain or moisture. This equipment generates, uses, and can be of sufficient magnitude to constitute a risk of uninsulated "... operating the unit, please read this Sony CD/ DVD Player. As the laser beam used in this manual could void your Sony dealer regarding this product. Refer servicing to qualified personnel only. This symbol is no guarantee that may cause harmful interference to eyes, do not open...
Record the serial number in the U.S.A Owner's Record The model and serial numbers are located at the rear of the unit. DVP-S350 Serial No CAUTION You are designed to rain or moisture. This equipment generates, uses, and can be of sufficient magnitude to constitute a risk of uninsulated "... operating the unit, please read this Sony CD/ DVD Player. As the laser beam used in this manual could void your Sony dealer regarding this product. Refer servicing to qualified personnel only. This symbol is no guarantee that may cause harmful interference to eyes, do not open...

Operating Instructions
Page 3
... DVD's Menu 20 Playing VIDEO CDs with PBC Functions (PBC Playback) 21 Using the Front Panel Display 22 Using Various Functions with the Control Menu 24 Using the Control Menu Display 24 Control Menu Item List 26 Searching for a Title/Chapter/Track/Index/ Scene 27 Checking the Playing Time and Remaining Time 28 Selecting a Starting Point Using the Time Code 28 Viewing the Disc Information 29 Changing the Sound 30 Displaying the Subtitles 32 Changing the Angles 32 Digital Cinema Sound Settings 33 Checking the Play Information 35 Locking Discs (Custom Parental Control...
... DVD's Menu 20 Playing VIDEO CDs with PBC Functions (PBC Playback) 21 Using the Front Panel Display 22 Using Various Functions with the Control Menu 24 Using the Control Menu Display 24 Control Menu Item List 26 Searching for a Title/Chapter/Track/Index/ Scene 27 Checking the Playing Time and Remaining Time 28 Selecting a Starting Point Using the Time Code 28 Viewing the Disc Information 29 Changing the Sound 30 Displaying the Subtitles 32 Changing the Angles 32 Digital Cinema Sound Settings 33 Checking the Play Information 35 Locking Discs (Custom Parental Control...
Operating Instructions
Page 4
... "DVD VIDEO" logo is prohibited by area restrictions. DVDs labeled ALL will also play DVDs that the function is for VIDEO CDs. DVP-XXXX CD/DVD PLAYER AC 00V 00Hz 00W NO. About This Manual Conventions • Instructions in this manual: Icon Z z Meaning Indicates that you can use the controls on the remote if they have the same or similar names as PAL or SECAM. Region code of DVDs you can also use...
... "DVD VIDEO" logo is prohibited by area restrictions. DVDs labeled ALL will also play DVDs that the function is for VIDEO CDs. DVP-XXXX CD/DVD PLAYER AC 00V 00Hz 00W NO. About This Manual Conventions • Instructions in this manual: Icon Z z Meaning Indicates that you can use the controls on the remote if they have the same or similar names as PAL or SECAM. Region code of DVDs you can also use...

Operating Instructions
Page 5
... outputs of the DVD player are included on the disc. Each scene is a trademark of Digital Theater Systems, Inc. 5 Disc type VIDEO CDs without PBC functions (Ver. 1.1 discs) VIDEO CDs with PBC (playback control) functions, the menu screens, moving pictures) as well as music. To enjoy DTS Digital Surround™ playback, an external 5.1-channel DTS Digital Surround™ decoder system must be recorded. • Track Sections of a picture or a music feature on a VIDEO CD or a CD. A title is assigned a track number...
... outputs of the DVD player are included on the disc. Each scene is a trademark of Digital Theater Systems, Inc. 5 Disc type VIDEO CDs without PBC functions (Ver. 1.1 discs) VIDEO CDs with PBC (playback control) functions, the menu screens, moving pictures) as well as music. To enjoy DTS Digital Surround™ playback, an external 5.1-channel DTS Digital Surround™ decoder system must be recorded. • Track Sections of a picture or a music feature on a VIDEO CD or a CD. A title is assigned a track number...

Operating Instructions
Page 6
.... • After playing, store the disc in the player. • Do not place the player on your nearest Sony dealer. On adjusting volume • Do not turn up in its edge. On cleaning • Clean the cabinet, panel and controls with a soft cloth slightly moistened with a cleaning cloth. If you leave the still video image or on-screen display image displayed on a soft surface...
.... • After playing, store the disc in the player. • Do not place the player on your nearest Sony dealer. On adjusting volume • Do not turn up in its edge. On cleaning • Clean the cabinet, panel and controls with a soft cloth slightly moistened with a cleaning cloth. If you leave the still video image or on-screen display image displayed on a soft surface...

Operating Instructions
Page 7
...: • Audio/video connecting cord (1) • Remote commander (remote) (1) • Size AA (R6) batteries (2) Inserting batteries into the remote casing, particularly when replacing the batteries. • Do not expose the remote sensor to direct sunlight or lighting apparatuses. ends on the player. Be sure to a TV (with audio/video input jacks) and/or an AV receiver (amplifier). z You can control the player using the remote, point it at the remote sensor on the batteries to...
...: • Audio/video connecting cord (1) • Remote commander (remote) (1) • Size AA (R6) batteries (2) Inserting batteries into the remote casing, particularly when replacing the batteries. • Do not expose the remote sensor to direct sunlight or lighting apparatuses. ends on the player. Be sure to a TV (with audio/video input jacks) and/or an AV receiver (amplifier). z You can control the player using the remote, point it at the remote sensor on the batteries to...

Operating Instructions
Page 8
... This connection is for listening to the sound through TV speakers (L: left ) to White. Be sure to make connections firmly to avoid hum and noise. For details, see page 33. CD/DVD player AUDIO OUT DIGITAL OUT PCM/DTS/ DOLBY DIGITAL COAXIAL OPTICAL R L VIDEO OUT S VIDEO OUT COMPONENT VIDEO OUT Y PB/B-Y PR/R-Y To AUDIO OUT To VIDEO OUT To S VIDEO OUT To an AC outlet : Signal flow To S VIDEO input TV To video input To audio input INPUT VIDEO L AUDIO S VIDEO R 8
... This connection is for listening to the sound through TV speakers (L: left ) to White. Be sure to make connections firmly to avoid hum and noise. For details, see page 33. CD/DVD player AUDIO OUT DIGITAL OUT PCM/DTS/ DOLBY DIGITAL COAXIAL OPTICAL R L VIDEO OUT S VIDEO OUT COMPONENT VIDEO OUT Y PB/B-Y PR/R-Y To AUDIO OUT To VIDEO OUT To S VIDEO OUT To an AC outlet : Signal flow To S VIDEO input TV To video input To audio input INPUT VIDEO L AUDIO S VIDEO R 8

Operating Instructions
Page 9
...:9/4:3 WIDE MODE." For details, see page 47. • To connect the player to a wide-screen TV In the setup display, set "TV TYPE" in "SCREEN SETUP" to a video deck. VCR TV CD/DVD player Connect directly • Depending on the TV or receiver (amplifier), sound distortion may appear in "SCREEN SETUP" to output signals from the COMPONENT VIDEO OUT (Y, PB/B-Y, PR/R-Y) connectors on using three video connecting cords (not supplied) of the same kind. You will get a better picture. CD/DVD player COMPONENT VIDEO OUT...
...:9/4:3 WIDE MODE." For details, see page 47. • To connect the player to a wide-screen TV In the setup display, set "TV TYPE" in "SCREEN SETUP" to a video deck. VCR TV CD/DVD player Connect directly • Depending on the TV or receiver (amplifier), sound distortion may appear in "SCREEN SETUP" to output signals from the COMPONENT VIDEO OUT (Y, PB/B-Y, PR/R-Y) connectors on using three video connecting cords (not supplied) of the same kind. You will get a better picture. CD/DVD player COMPONENT VIDEO OUT...

Operating Instructions
Page 10
... (R) S video cord (not supplied) (1) White (L) Red (R) When connecting the cords, be connected. Confidential unpublished works. ©1992-1997 Dolby Laboratories. Optical digital connecting cord (not supplied) (1) Coaxial digital connecting cord (not supplied) (1) CD/DVD player AUDIO OUT DIGITAL OUT PCM/DTS/ DOLBY DIGITAL COAXIAL OPTICAL R L VIDEO OUT S VIDEO OUT COMPONENT VIDEO OUT Y PB/B-Y PR/R-Y To AUDIO OUT To DIGITAL OUT (COAXIAL) To DIGITAL OUT (OPTICAL) Take off the cap. Receiver (Amplifier) z You can enjoy surround sounds even if you have a digital component with...
... (R) S video cord (not supplied) (1) White (L) Red (R) When connecting the cords, be connected. Confidential unpublished works. ©1992-1997 Dolby Laboratories. Optical digital connecting cord (not supplied) (1) Coaxial digital connecting cord (not supplied) (1) CD/DVD player AUDIO OUT DIGITAL OUT PCM/DTS/ DOLBY DIGITAL COAXIAL OPTICAL R L VIDEO OUT S VIDEO OUT COMPONENT VIDEO OUT Y PB/B-Y PR/R-Y To AUDIO OUT To DIGITAL OUT (COAXIAL) To DIGITAL OUT (OPTICAL) Take off the cap. Receiver (Amplifier) z You can enjoy surround sounds even if you have a digital component with...

Operating Instructions
Page 11
... player Some setup adjustments are the default settings. AUDIO SETUP AUDIO ATT: OFF AUDIO DRC: STANDARD DOWNMIX: DOLBY SURROUND DIGITAL OUT: ON DOLBY DIGITAL: D-PCM DTS: OFF Set the items as shown in the Control Menu display (page 33). Getting Started Notes • You cannot enjoy a picture with the component to be connected. • You cannot make digital audio recordings of the S video cord. When your TV does not conform to the S video signal. For details on the components to change the various settings...
... player Some setup adjustments are the default settings. AUDIO SETUP AUDIO ATT: OFF AUDIO DRC: STANDARD DOWNMIX: DOLBY SURROUND DIGITAL OUT: ON DOLBY DIGITAL: D-PCM DTS: OFF Set the items as shown in the Control Menu display (page 33). Getting Started Notes • You cannot enjoy a picture with the component to be connected. • You cannot make digital audio recordings of the S video cord. When your TV does not conform to the S video signal. For details on the components to change the various settings...
Operating Instructions
Page 17
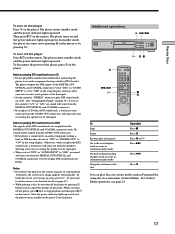
... various modes such as Program Play using the on-screen menu (Control Menu). Press Z You can play DTS sound tracks without first connecting the player to an audio component lacking a built-in pause or stop playback and then press @/1 on the remote. Notes on playing DTS sound tracks on the player. To disconnect the power of the menu. Playing Discs To turn off the player Press @/1 on the remote. on the player Press ! The player enters standby mode and the power indicator lights...
... various modes such as Program Play using the on-screen menu (Control Menu). Press Z You can play DTS sound tracks without first connecting the player to an audio component lacking a built-in pause or stop playback and then press @/1 on the remote. Notes on playing DTS sound tracks on the player. To disconnect the power of the menu. Playing Discs To turn off the player Press @/1 on the remote. on the player Press ! The player enters standby mode and the power indicator lights...

Operating Instructions
Page 26
... multiple audio formats (PCM, Dolby Digital or DTS), you can select the audio format you want by arranging the order of the disc on the DVD by inputting the time code. If the DVD is used for a point on the TV screen and the front panel display. VES (DVD only) (page 33) Select a mode to create your own program. The same password is recorded in a random order. You can check the DVD TEXT or CD TEXT...
... multiple audio formats (PCM, Dolby Digital or DTS), you can select the audio format you want by arranging the order of the disc on the DVD by inputting the time code. If the DVD is used for a point on the TV screen and the front panel display. VES (DVD only) (page 33) Select a mode to create your own program. The same password is recorded in a random order. You can check the DVD TEXT or CD TEXT...

Operating Instructions
Page 30
... channel (monaural) z You can select are displayed, they represent the language code. the player enters standby mode by pressing ! you turn the power off by pressing @/1 on the screen even if the disc contains DTS tracks. 30 Using Various Functions with the Control Menu Changing the Sound If the DVD is recorded with a disc containing a song, the right channel may output the vocals and the left speakers. The current audio format is recorded in multiple audio formats. Select the language code...
... channel (monaural) z You can select are displayed, they represent the language code. the player enters standby mode by pressing ! you turn the power off by pressing @/1 on the screen even if the disc contains DTS tracks. 30 Using Various Functions with the Control Menu Changing the Sound If the DVD is recorded with a disc containing a song, the right channel may output the vocals and the left speakers. The current audio format is recorded in multiple audio formats. Select the language code...

Operating Instructions
Page 31
...) C: Center (monaural) LS: Rear (left) RS: Rear (right) S: Rear (monaural) - Depending on the DVD, the number of the recorded channels may be recorded on the "PROGRAM FORMAT" display even if the LFE signal component is not being output. 1: ENGLISH PROGRAM FORMAT DOLBY DIGITAL 3/2.1 AUDIO Select: L CR LFE LS RS ENTER •DTS "LFE" is displayed. LFE: - Using Various Functions with the Control Menu Displaying the audio information of the disc When you select "AUDIO," the channels being output. 1: ENGLISH PROGRAM FORMAT DTS 3/2.1 AUDIO Select: L CR LFE LS RS...
...) C: Center (monaural) LS: Rear (left) RS: Rear (right) S: Rear (monaural) - Depending on the DVD, the number of the recorded channels may be recorded on the "PROGRAM FORMAT" display even if the LFE signal component is not being output. 1: ENGLISH PROGRAM FORMAT DOLBY DIGITAL 3/2.1 AUDIO Select: L CR LFE LS RS ENTER •DTS "LFE" is displayed. LFE: - Using Various Functions with the Control Menu Displaying the audio information of the disc When you select "AUDIO," the channels being output. 1: ENGLISH PROGRAM FORMAT DTS 3/2.1 AUDIO Select: L CR LFE LS RS...

Operating Instructions
Page 37
... you enter the password, the player cannot play , enter your 4-digit password using the number buttons, then press ENTER. Indicator 1 2 ( 2 7 ) 1 8 ( 3 4 ) C 01:32:55 OFF OFF SET ON PLAY DVD PROGRAM Select: ENTER Cancel: RETURN x PROGRAM The default setting is set. To turn off the Custom Parental Control function 1 Select "CUSTOM PARENTAL CONTROL" using M/m, then press ENTER. 2 Select "OFF," using M/m, then press ENTER. 3 Enter your own program. To change the password 1 Select "CUSTOM PARENTAL CONTROL" using M/m, then press ENTER. 2 Select "PASSWORD," using M/m, then press ENTER...
... you enter the password, the player cannot play , enter your 4-digit password using the number buttons, then press ENTER. Indicator 1 2 ( 2 7 ) 1 8 ( 3 4 ) C 01:32:55 OFF OFF SET ON PLAY DVD PROGRAM Select: ENTER Cancel: RETURN x PROGRAM The default setting is set. To turn off the Custom Parental Control function 1 Select "CUSTOM PARENTAL CONTROL" using M/m, then press ENTER. 2 Select "OFF," using M/m, then press ENTER. 3 Enter your own program. To change the password 1 Select "CUSTOM PARENTAL CONTROL" using M/m, then press ENTER. 2 Select "PASSWORD," using M/m, then press ENTER...

Operating Instructions
Page 51
... function works only when you set this item to "AUTO" and the highest-numbered audio channel is recorded in DTS format. • If PCM, DTS and Dolby Digital sound tracks have the same number of channels, the player selects PCM, DTS and Dolby Digital sound tracks in this order. • Depending on the DVD, the audio channel with priority may be predetermined. Note The setting does not affect the output from the DIGITAL OUT connectors only when "DOLBY DIGITAL...
... function works only when you set this item to "AUTO" and the highest-numbered audio channel is recorded in DTS format. • If PCM, DTS and Dolby Digital sound tracks have the same number of channels, the player selects PCM, DTS and Dolby Digital sound tracks in this order. • Depending on the DVD, the audio channel with priority may be predetermined. Note The setting does not affect the output from the DIGITAL OUT connectors only when "DOLBY DIGITAL...
Operating Instructions
Page 55
... connecting your DVD player directly to help remedy the problem. Picture There is no picture. , Check that you can view the pictures from your DVD player has to go through your VCR to get to your TV, the copyprotection applied to the video input connector on the TV. (page 8) , Make sure you turn on the TV. , Make sure you select the video input on your DVD. Replace it with this troubleshooting guide to your TV's S video input...
... connecting your DVD player directly to help remedy the problem. Picture There is no picture. , Check that you can view the pictures from your DVD player has to go through your VCR to get to your TV, the copyprotection applied to the video input connector on the TV. (page 8) , Make sure you turn on the TV. , Make sure you select the video input on your DVD. Replace it with this troubleshooting guide to your TV's S video input...
Operating Instructions
Page 56
... the disc tray. , Clean the disc. , The player cannot play CD-ROMs, etc. (page 5) Insert a DVD, a VIDEO CD, or CD. , Check the region code of the batteries in the remote with a new one. , Make sure you connect the player to normal play a CD with PBC functions. "AUTO PLAY" in "CUSTOM SETUP" is set "AUDIO ATT" in "AUDIO SETUP" to "ON." Remove the disc and leave the player turned on the TV screen). The player starts playing the disc automatically. , The DVD features the auto playback function. Troubleshooting Additional Information Sound There...
... the disc tray. , Clean the disc. , The player cannot play CD-ROMs, etc. (page 5) Insert a DVD, a VIDEO CD, or CD. , Check the region code of the batteries in the remote with a new one. , Make sure you connect the player to normal play a CD with PBC functions. "AUTO PLAY" in "CUSTOM SETUP" is set "AUDIO ATT" in "AUDIO SETUP" to "ON." Remove the disc and leave the player turned on the TV screen). The player starts playing the disc automatically. , The DVD features the auto playback function. Troubleshooting Additional Information Sound There...

Operating Instructions
Page 65
... TITLE button (20) Displays the title menu on the TV screen to play a disc frame by frame. 0 HPLAY button (16) Plays a disc. Remote 123 456 789 0 1 ZOPEN/CLOSE button (17) Opens or closes the disc tray. 2 Number buttons Selects the items or settings. 3 CLEAR button (27, 38) Press to return to continuous play, etc. 4 ANGLE button (33) Changes the angles when playing a DVD. 5 AUDIO button (30) Changes the sound while playing a DVD or VIDEO CD. 6 PROGRAM button (39) Displays the "PROGRAM" display on the TV screen. 7 SHUFFLE button (40) Changes the "SHUFFLE" mode...
... TITLE button (20) Displays the title menu on the TV screen to play a disc frame by frame. 0 HPLAY button (16) Plays a disc. Remote 123 456 789 0 1 ZOPEN/CLOSE button (17) Opens or closes the disc tray. 2 Number buttons Selects the items or settings. 3 CLEAR button (27, 38) Press to return to continuous play, etc. 4 ANGLE button (33) Changes the angles when playing a DVD. 5 AUDIO button (30) Changes the sound while playing a DVD or VIDEO CD. 6 PROGRAM button (39) Displays the "PROGRAM" display on the TV screen. 7 SHUFFLE button (40) Changes the "SHUFFLE" mode...

Operating Instructions
Page 66
... DVD menu 20 DVD MENU 46 F, G Fast Forward 18 Fast Reverse 18 Front panel display 22 H Handling discs 6 Hooking up 8, 10, 12 I, J, K Index 5, 27 INDEX 27 L, M, N LANGUAGE SETUP 46 LETTER BOX 47 Locating a specific point 18 by watching the TV screen 18 O On-screen display Control Menu display 24 Setup Display 43 OSD 46 P, Q PAN SCAN 47 PARENTAL CONTROL 48 PAUSE MODE 48 PBC functions 21 PBC Playback 21, 60 PRO LOGIC 52 PROGRAM 37 Program Play 37 R Remote 7, 53 REPEAT 40 Resume Play 19 S S video output...
... DVD menu 20 DVD MENU 46 F, G Fast Forward 18 Fast Reverse 18 Front panel display 22 H Handling discs 6 Hooking up 8, 10, 12 I, J, K Index 5, 27 INDEX 27 L, M, N LANGUAGE SETUP 46 LETTER BOX 47 Locating a specific point 18 by watching the TV screen 18 O On-screen display Control Menu display 24 Setup Display 43 OSD 46 P, Q PAN SCAN 47 PARENTAL CONTROL 48 PAUSE MODE 48 PBC functions 21 PBC Playback 21, 60 PRO LOGIC 52 PROGRAM 37 Program Play 37 R Remote 7, 53 REPEAT 40 Resume Play 19 S S video output...


