
Instruction Manual
Page 2
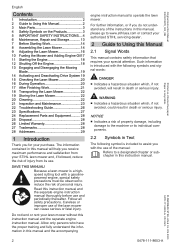
...-111-8603-A. Original Instruction Manual 0000010878_003_GB Printed on the Products 3 5 IMPORTANT SAFETY INSTRUCTIONS.... 4 6 Maintenance, Repair and Storage 13 7 Before Starting Work 14 8 Assembling the Lawn Mower 14 9 Adjusting the Lawn Mower 16 10 Fueling the Mower and Adding Engine Oil17 11 Starting the Engine 18 12 Shutting Off the Engine 18 13 Engaging and Disengaging the Mowing Blade 19 14 Activating and Deactivating Drive System 19 15 Checking the Lawn Mower 20 16 During Operation 20 17 After...
...-111-8603-A. Original Instruction Manual 0000010878_003_GB Printed on the Products 3 5 IMPORTANT SAFETY INSTRUCTIONS.... 4 6 Maintenance, Repair and Storage 13 7 Before Starting Work 14 8 Assembling the Lawn Mower 14 9 Adjusting the Lawn Mower 16 10 Fueling the Mower and Adding Engine Oil17 11 Starting the Engine 18 12 Shutting Off the Engine 18 13 Engaging and Disengaging the Mowing Blade 19 14 Activating and Deactivating Drive System 19 15 Checking the Lawn Mower 20 16 During Operation 20 17 After...
Instruction Manual
Page 3
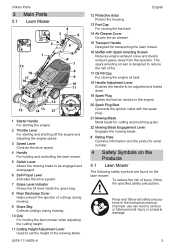
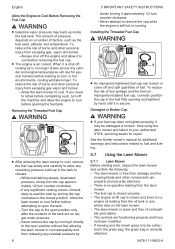
... the lawn mower when adjusting the cutting height. 11 Cutting Height Adjustment Lever Used to set the height of the mowing blade. 0478-111-8603-A English 12 Protective strips Protect the housing. 13 Fuel Cap For closing the engine oil tank. 18 Handle Adjustment Lever Enables the handle to be engaged and disengaged. 6 Self-Propel Lever Activates the drive system. 7 Grass Level Indicator Shows the fill level inside the grass bag. 8 Rear Discharge Cover Helps prevent the ejection of injury, follow all safety precau‐ tions in the engine. 20 Spark Plug...
... the lawn mower when adjusting the cutting height. 11 Cutting Height Adjustment Lever Used to set the height of the mowing blade. 0478-111-8603-A English 12 Protective strips Protect the housing. 13 Fuel Cap For closing the engine oil tank. 18 Handle Adjustment Lever Enables the handle to be engaged and disengaged. 6 Self-Propel Lever Activates the drive system. 7 Grass Level Indicator Shows the fill level inside the grass bag. 8 Rear Discharge Cover Helps prevent the ejection of injury, follow all safety precau‐ tions in the engine. 20 Spark Plug...

Instruction Manual
Page 4
... prescribed general safety warnings and instructions for gasolinepowered lawn mowers. made of fuel. Always use the lawn mower for any job except that could be fol‐ lowed to the slope, never up or down. Watch what you are securely in moving parts. Never attempt to cool before carrying out maintenance or replacement work area. 4) Shut off the engine and removing the spark plug boot...
... prescribed general safety warnings and instructions for gasolinepowered lawn mowers. made of fuel. Always use the lawn mower for any job except that could be fol‐ lowed to the slope, never up or down. Watch what you are securely in moving parts. Never attempt to cool before carrying out maintenance or replacement work area. 4) Shut off the engine and removing the spark plug boot...
Instruction Manual
Page 5
...‐ cally and, if damaged, have it repaired by lawn mower blade can be allowed in the development of grass, leaves, or other power tools) exposing the operator to persons. Release switch lever. - Use this manual. Use the lawn mower only as factors in the area where the lawn mower is intended for mowing dry grass. Do not operate the lawn mower when you become tired. - Bystanders, especially children, and ani‐...
...‐ cally and, if damaged, have it repaired by lawn mower blade can be allowed in the development of grass, leaves, or other power tools) exposing the operator to persons. Release switch lever. - Use this manual. Use the lawn mower only as factors in the area where the lawn mower is intended for mowing dry grass. Do not operate the lawn mower when you become tired. - Bystanders, especially children, and ani‐...
Instruction Manual
Page 6
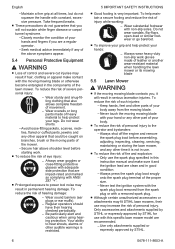
...mowing blade with a removed spark plug. ■ Although certain unauthorized accessories or attachments may result if hair, clothing or apparel make sure it and the ignition lead are a regular operator. - To reduce the risk of such injuries: - Wear overalls or long pants made of control and severe cut injuries may fit STIHL lawn mowers, their hearing checked.... 5 IMPORTANT SAFETY INSTRUCTIONS ■ Good footing is not in use the spark plug specified in serious laceration injuries. Take frequent breaks. ■ These precautions do not squeeze the handle with ANSI Z87...
...mowing blade with a removed spark plug. ■ Although certain unauthorized accessories or attachments may result if hair, clothing or apparel make sure it and the ignition lead are a regular operator. - To reduce the risk of such injuries: - Wear overalls or long pants made of control and severe cut injuries may fit STIHL lawn mowers, their hearing checked.... 5 IMPORTANT SAFETY INSTRUCTIONS ■ Good footing is not in use the spark plug specified in serious laceration injuries. Take frequent breaks. ■ These precautions do not squeeze the handle with ANSI Z87...

Instruction Manual
Page 7
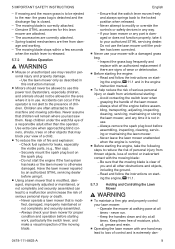
... the fuel system. STIHL recommends that only identical STIHL replacement parts be removed or bypassed. To reduce the risk of doubt, have the lawn mower and battery checked by your clothing immedi‐ ately. - English 5.6 Fueling Instructions Fuel WARNING ■ Gasoline and its soft‐ ware in heat radiation, sparks or sound level, thereby increasing the risk of igni‐ tion. Use extreme caution when handling gaso...
... the fuel system. STIHL recommends that only identical STIHL replacement parts be removed or bypassed. To reduce the risk of doubt, have the lawn mower and battery checked by your clothing immedi‐ ately. - English 5.6 Fueling Instructions Fuel WARNING ■ Gasoline and its soft‐ ware in heat radiation, sparks or sound level, thereby increasing the risk of igni‐ tion. Use extreme caution when handling gaso...
Instruction Manual
Page 8
... authorized STIHL servicing dealer for additional warnings and instructions related to fuel and fuel‐ ing. 5.7 Using the Lawn Mower 5.7.1 Lawn Mower Before starting to remove the cap while the engine is clean and free of burns and other personal injury from the oil tank or any residual pressure by 8 5 IMPORTANT SAFETY INSTRUCTIONS slowly turning it approximately 1/2 turn counter-clockwise. - The lawn mower is no gasoline leaking from escaping gas vapor and fumes: - The engine oil fill cap...
... authorized STIHL servicing dealer for additional warnings and instructions related to fuel and fuel‐ ing. 5.7 Using the Lawn Mower 5.7.1 Lawn Mower Before starting to remove the cap while the engine is clean and free of burns and other personal injury from the oil tank or any residual pressure by 8 5 IMPORTANT SAFETY INSTRUCTIONS slowly turning it approximately 1/2 turn counter-clockwise. - The lawn mower is no gasoline leaking from escaping gas vapor and fumes: - The engine oil fill cap...
Instruction Manual
Page 9
...; sonal injury and property damage. - Read and follow the instructions on start the engine if the fuel system has leaks or the lawn mower is running. ■ Before starting : - Have the lawn mower repaired by an authorized STIHL servicing dealer before assembling, inspecting, cleaning, servic‐ ing or maintaining the lawn mower. - Always check your mower with the mowing blade: - never run. - 5 IMPORTANT SAFETY INSTRUCTIONS - The mowing blade stops within a few seconds when the switch lever is correctly...
...; sonal injury and property damage. - Read and follow the instructions on start the engine if the fuel system has leaks or the lawn mower is running. ■ Before starting : - Have the lawn mower repaired by an authorized STIHL servicing dealer before assembling, inspecting, cleaning, servic‐ ing or maintaining the lawn mower. - Always check your mower with the mowing blade: - never run. - 5 IMPORTANT SAFETY INSTRUCTIONS - The mowing blade stops within a few seconds when the switch lever is correctly...

Instruction Manual
Page 12
... the vegetation or surrounding ground. 5.7.5 Operating Instructions WARNING ■ In the event of an emergency, shut off the engine and remove the spark plug boot before cleaning, maintaining, repairing or transporting the lawn mower. ■ Contact with a moving mower blade will be pulled towards the engine faster than the starter handle can be thrown by the mowing blade, damage the mow‐ ing blade or cause per‐ 0478...
... the vegetation or surrounding ground. 5.7.5 Operating Instructions WARNING ■ In the event of an emergency, shut off the engine and remove the spark plug boot before cleaning, maintaining, repairing or transporting the lawn mower. ■ Contact with a moving mower blade will be pulled towards the engine faster than the starter handle can be thrown by the mowing blade, damage the mow‐ ing blade or cause per‐ 0478...

Instruction Manual
Page 13
Never operate the lawn mower without the grass bag or rear discharge cover in serious or fatal injury. - Never touch the mowing blade with plenty of water and seek medical attention. Before starting work gloves when handling mowing blades. - If hydraulic fluid gets on the skin or in the eyes: Immediately flush the affected area with your hand, feet or any wires or cables that all repair work...
Never operate the lawn mower without the grass bag or rear discharge cover in serious or fatal injury. - Never touch the mowing blade with plenty of water and seek medical attention. Before starting work gloves when handling mowing blades. - If hydraulic fluid gets on the skin or in the eyes: Immediately flush the affected area with your hand, feet or any wires or cables that all repair work...

Instruction Manual
Page 14
... damage. SAVE THESE INSTRUCTIONS! 7 Before Starting Work 7.1 Preparing the Lawn Mower for proper function and condition, 15.1. ► Check the mowing blade, 21.3. ► Fill engine oil, 10.2. ► Refuel the lawn mower, 10.1. 14 7 Before Starting Work For mowing and collecting the grass cuttings in unauthorized use . - The handle can result in the grass bag: ► Remove the mulch insert, 8.2.2. ► Mount the grass bag, 8.3.2. Check that cannot be used for repair or maintenance. ■ Improper...
... damage. SAVE THESE INSTRUCTIONS! 7 Before Starting Work 7.1 Preparing the Lawn Mower for proper function and condition, 15.1. ► Check the mowing blade, 21.3. ► Fill engine oil, 10.2. ► Refuel the lawn mower, 10.1. 14 7 Before Starting Work For mowing and collecting the grass cuttings in unauthorized use . - The handle can result in the grass bag: ► Remove the mulch insert, 8.2.2. ► Mount the grass bag, 8.3.2. Check that cannot be used for repair or maintenance. ■ Improper...

Instruction Manual
Page 15
... down the handle. ► Slowly pull the starter handle (10) in the housing. ► Close the rear discharge cover (1). 8.2.2 Removing the Mulch Insert To remove the mulch insert: ► Shut off the engine, 12.1. ► Position the lawn mower on a level surface. ► First insert the blade brake clutch cable (the thickest cable) (7) into the guide on a level surface. 0478-111-8603-A 15 8 Assembling the Lawn Mower English ► Hold the bushing (1) and the disc springs (3) together...
... down the handle. ► Slowly pull the starter handle (10) in the housing. ► Close the rear discharge cover (1). 8.2.2 Removing the Mulch Insert To remove the mulch insert: ► Shut off the engine, 12.1. ► Position the lawn mower on a level surface. ► First insert the blade brake clutch cable (the thickest cable) (7) into the guide on a level surface. 0478-111-8603-A 15 8 Assembling the Lawn Mower English ► Hold the bushing (1) and the disc springs (3) together...

Instruction Manual
Page 17
... Fueling the Mower and Adding Engine Oil English ► Shut off the engine, 12.1. ► Position the lawn mower on a level surface. ► Remove the spark plug boot. ► Unhook the starter handle from the cable guide. ► Slowly pull the starter handle (2) in the direc‐ tion of the cable guide (3). ► Attach the starter handle (2) to the cable guide (3). ► Connect the spark plug boot. 9.2 Adjusting the Handle The handle can be removed. ► Remove the fuel cap. ► Fill in fuel using a suitable...
... Fueling the Mower and Adding Engine Oil English ► Shut off the engine, 12.1. ► Position the lawn mower on a level surface. ► Remove the spark plug boot. ► Unhook the starter handle from the cable guide. ► Slowly pull the starter handle (2) in the direc‐ tion of the cable guide (3). ► Attach the starter handle (2) to the cable guide (3). ► Connect the spark plug boot. 9.2 Adjusting the Handle The handle can be removed. ► Remove the fuel cap. ► Fill in fuel using a suitable...
Instruction Manual
Page 18
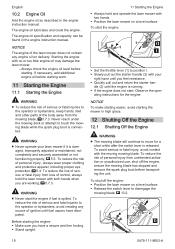
... body away from the mowing blade, 5.7.3. To shut off the engine, ensure the mowing blade has stopped and remove the spark plug boot before starting . If necessary, add additional engine oil before transport‐ ing the unit. To start the engine: ► Set the throttle lever (1) to disengage the mowing blade, 13.2 18 0478-111-8603-A NOTICE The engine of the lawn mower does not contain any source of seri‐ ous or...
... body away from the mowing blade, 5.7.3. To shut off the engine, ensure the mowing blade has stopped and remove the spark plug boot before starting . If necessary, add additional engine oil before transport‐ ing the unit. To start the engine: ► Set the throttle lever (1) to disengage the mowing blade, 13.2 18 0478-111-8603-A NOTICE The engine of the lawn mower does not contain any source of seri‐ ous or...
Instruction Manual
Page 20
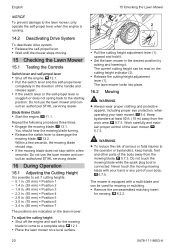
... the starting position: Do not use the lawn mower and con‐ sult an authorized STIHL servicing dealer. 16 During Operation 16.1 Adjusting the Cutting Height It is possible to disengage the mowing blade, 13.2. The mower is equipped with your hand or any part of the lawn mower, 5.7.3. Never touch the moving . 15 Checking the Lawn Mower 15.1 Testing the Controls Switch lever and self-propel lever ► Shut off the engine and wait for mowing, 8.2.2. 20...
... the starting position: Do not use the lawn mower and con‐ sult an authorized STIHL servicing dealer. 16 During Operation 16.1 Adjusting the Cutting Height It is possible to disengage the mowing blade, 13.2. The mower is equipped with your hand or any part of the lawn mower, 5.7.3. Never touch the moving . 15 Checking the Lawn Mower 15.1 Testing the Controls Switch lever and self-propel lever ► Shut off the engine and wait for mowing, 8.2.2. 20...
Instruction Manual
Page 22
... STIHL servicing dealer. ► Change the engine oil as specified in the engine instruction manual. ► Unscrew the spark plug. ► Pull out and return the starter handle several times. ► Screw in a controlled manner. WARNING ■ If the starter handle is pulled out when the spark plug boot is removed, sparks may leak and cause contamination and damage. The lawn mower is stored for more than 30 minutes. ► Drain the fuel tank. ► Remove the spark plug...
... STIHL servicing dealer. ► Change the engine oil as specified in the engine instruction manual. ► Unscrew the spark plug. ► Pull out and return the starter handle several times. ► Screw in a controlled manner. WARNING ■ If the starter handle is pulled out when the spark plug boot is removed, sparks may leak and cause contamination and damage. The lawn mower is stored for more than 30 minutes. ► Drain the fuel tank. ► Remove the spark plug...
Instruction Manual
Page 23
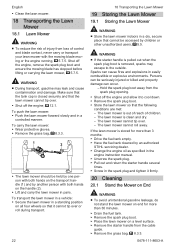
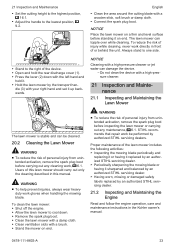
... the mowing blade or having it sharpened and balanced by an authorized STIHL servicing dealer. ► Having worn, missing or damaged safety labels replaced by authorized STIHL servicing dealers. 21 Inspection and Maintenance ► Set the cutting height to the highest position, 16.1. ► Adjust the handle to cool down with the left hand and hold the rear discharge cover (1). ► Press the lever (2) down . ► Remove the spark plug boot...
... the mowing blade or having it sharpened and balanced by an authorized STIHL servicing dealer. ► Having worn, missing or damaged safety labels replaced by authorized STIHL servicing dealers. 21 Inspection and Maintenance ► Set the cutting height to the highest position, 16.1. ► Adjust the handle to cool down with the left hand and hold the rear discharge cover (1). ► Press the lever (2) down . ► Remove the spark plug boot...

Instruction Manual
Page 25
... ■ The mowing blade has sharp edges. If the drive system is not reached. - If the maximum self-propel speed is activated permanently. ► Set the speed lever (1) to . ► Loosen the nuts (2,3) to mount the mowing blade (1). ► Connect the spark plug boot. Always wear heavy-duty work gloves when mounting or otherwise handling the mowing blade, 5.4. Use a new bolt and a new washer to relax the cable (4) ► Start the engine, 11...
... ■ The mowing blade has sharp edges. If the drive system is not reached. - If the maximum self-propel speed is activated permanently. ► Set the speed lever (1) to . ► Loosen the nuts (2,3) to mount the mowing blade (1). ► Connect the spark plug boot. Always wear heavy-duty work gloves when mounting or otherwise handling the mowing blade, 5.4. Use a new bolt and a new washer to relax the cable (4) ► Start the engine, 11...
Instruction Manual
Page 26
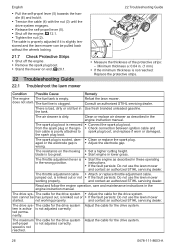
...until the drive system engages. ► Release the self-propel lever (5). ► Shut off the engine. ► Remove the spark plug boot. ► Stand the mower on the mowing ► Set a higher cutting height. Consult an authorized STIHL servicing dealer. The throttle adjustment cable ► Attach or replace throttle adjustment cable. Condition Possible Cause Remedy The engine The fuel tank is not adjusted correctly. The fuel line is too great. ► Start engine in the engine instruction manual. wrong. English ► Pull the self-propel lever (5) towards the...
...until the drive system engages. ► Release the self-propel lever (5). ► Shut off the engine. ► Remove the spark plug boot. ► Stand the mower on the mowing ► Set a higher cutting height. Consult an authorized STIHL servicing dealer. The throttle adjustment cable ► Attach or replace throttle adjustment cable. Condition Possible Cause Remedy The engine The fuel tank is not adjusted correctly. The fuel line is too great. ► Start engine in the engine instruction manual. wrong. English ► Pull the self-propel lever (5) towards the...
Instruction Manual
Page 27
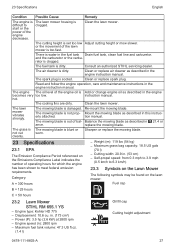
...) - Clean or replace spark plug. hot. The lawn mower vibrates strongly. The mowing blade is clogged. Sharpen or replace the mowing blade. 23 Specifications 23.1 EPA The Emission Compliance Period referenced on the lawn mower: Fuel cap B = 125 hours C = 50 hours 23.2 Lawn Mower STIHL RM 655.1 YS - Cutting width: 20.9 in the engine instruction manual. The air cleaner is blunt or not cut worn. instruction manual. The cooling fins are dirty. Clean the lawn mower. Category: A = 300 hours - Self-propel speed: from 0.3 mph...
...) - Clean or replace spark plug. hot. The lawn mower vibrates strongly. The mowing blade is clogged. Sharpen or replace the mowing blade. 23 Specifications 23.1 EPA The Emission Compliance Period referenced on the lawn mower: Fuel cap B = 125 hours C = 50 hours 23.2 Lawn Mower STIHL RM 655.1 YS - Cutting width: 20.9 in the engine instruction manual. The air cleaner is blunt or not cut worn. instruction manual. The cooling fins are dirty. Clean the lawn mower. Category: A = 300 hours - Self-propel speed: from 0.3 mph...


