

Instruction Manual
Page 3
... Roll Bar 21 6.4 Rear Trailer Hitch 21 6.5 Start the Mower 21 6.6 Stop the Mower 22 6.7 LED Display Screen 22 6.8 APP Operation Tips 27 6.9 Zero-turn-riding-mower Driving Practice 27 6.10 Mowing 28 6.11 Mowing Patterns 29 6.12 Mowing Recommendations 29 6.13 Transportation 30 6.14 Storage 31 7 Maintenance and Care 32 7.1 Maintenance Safety 32 7.2 Battery Maintenance 32 7.3 Recommended Maintenance Secdules 34 7.4 Check Tire Pressures 34 7.5 Torque Values 34 7.6 Lubrication 34 7.7 Servicing the Mower Blades 35 7.8 Adjusting the Motion Control Handles 36 8 Troubleshooting...
... Roll Bar 21 6.4 Rear Trailer Hitch 21 6.5 Start the Mower 21 6.6 Stop the Mower 22 6.7 LED Display Screen 22 6.8 APP Operation Tips 27 6.9 Zero-turn-riding-mower Driving Practice 27 6.10 Mowing 28 6.11 Mowing Patterns 29 6.12 Mowing Recommendations 29 6.13 Transportation 30 6.14 Storage 31 7 Maintenance and Care 32 7.1 Maintenance Safety 32 7.2 Battery Maintenance 32 7.3 Recommended Maintenance Secdules 34 7.4 Check Tire Pressures 34 7.5 Torque Values 34 7.6 Lubrication 34 7.7 Servicing the Mower Blades 35 7.8 Adjusting the Motion Control Handles 36 8 Troubleshooting...
Instruction Manual
Page 5
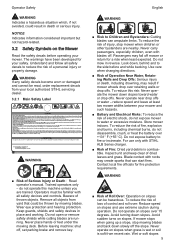
... yard that can be familiar with blades off , set parking brake and remove key. Trained operators only - To reduce the risk of injury, stop mowing blades and back down , behind and to reduce the risk of Serious Injury or Death:Read operator's manual. Use care when changing directions. ■■ Risk of dried leaves and grass. Store mower indoors. Inspect unit and keep clear...
... yard that can be familiar with blades off , set parking brake and remove key. Trained operators only - To reduce the risk of injury, stop mowing blades and back down , behind and to reduce the risk of Serious Injury or Death:Read operator's manual. Use care when changing directions. ■■ Risk of dried leaves and grass. Store mower indoors. Inspect unit and keep clear...

Instruction Manual
Page 6
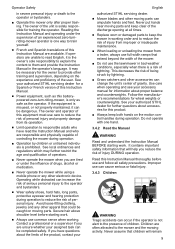
... REMOVED. -- To maintain operator protection and ROPS certification: Replace damaged or missing ROPS. TO REDUCE RISK OF SERIOUS INJURY OR 6 do NOT use seat belt. -- Do not mow on wet grass. ROLL-OVER PROTECTIVE STRUCTURE Mower was originally equipped with ROPS, consisting of control. Operate only in raised position during operation and use seat belt. -- Keep bystanders away. -- Keep roll bar in daylight or good artificial light...
... REMOVED. -- To maintain operator protection and ROPS certification: Replace damaged or missing ROPS. TO REDUCE RISK OF SERIOUS INJURY OR 6 do NOT use seat belt. -- Do not mow on wet grass. ROLL-OVER PROTECTIVE STRUCTURE Mower was originally equipped with ROPS, consisting of control. Operate only in raised position during operation and use seat belt. -- Keep bystanders away. -- Keep roll bar in daylight or good artificial light...

Instruction Manual
Page 8
Such preventive safety measures reduce the risk of starting the mower accidentally. ■■ Store idle mowers out of the reach of parts and any repairs or changing blades, or storing mowers. If damaged, have the mower repaired before use the mower if the switch does not turn it away from those intended could result Use of any other battery may cause explosion. ■■ Follow all charging instructions and...
Such preventive safety measures reduce the risk of starting the mower accidentally. ■■ Store idle mowers out of the reach of parts and any repairs or changing blades, or storing mowers. If damaged, have the mower repaired before use the mower if the switch does not turn it away from those intended could result Use of any other battery may cause explosion. ■■ Follow all charging instructions and...
Instruction Manual
Page 9
If operators are tired or under the supervision of injury DURING operation. The owner and operator of this batterypowered zero-turn-riding-mower, is only as safe as the operator. See your authorized STIHL dealer for further questions about accessories for information about the limits of the product, contact your authorized STIHL servicing dealer for a Spanish or French version of the user. lmproper use can cause serious...
If operators are tired or under the supervision of injury DURING operation. The owner and operator of this batterypowered zero-turn-riding-mower, is only as safe as the operator. See your authorized STIHL dealer for further questions about accessories for information about the limits of the product, contact your authorized STIHL servicing dealer for a Spanish or French version of the user. lmproper use can cause serious...

Instruction Manual
Page 10
... fire when used with another battery. ■■ Use the mower only with safe operation. Always stop on public roads. Disengage the PTO, set the parking brake, switch off the power and remove the key before changing directions or backing up from the mowing area, emptying the grass catcher or unblocking the discharge chute. ■■ Never direct discharge material toward the operator. Avoid discharging material against a wall or obstruction. Stop the blade(s) when...
... fire when used with another battery. ■■ Use the mower only with safe operation. Always stop on public roads. Disengage the PTO, set the parking brake, switch off the power and remove the key before changing directions or backing up from the mowing area, emptying the grass catcher or unblocking the discharge chute. ■■ Never direct discharge material toward the operator. Avoid discharging material against a wall or obstruction. Stop the blade(s) when...
Instruction Manual
Page 11
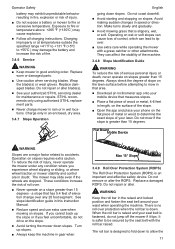
... where wheel traction or mower stability and control are in doubt. Charging improperly or at temperatures outside the specified range +41 ℉ to +131 ℉ (+5℃ to be secured by the seat belt with a grass catcher or other attachments. Replace damaged blades. Charge only in an enclosed, dry area. 3.4.7 Slope Operation English going down . They can lead to mow in that area. ■■ Download...
... where wheel traction or mower stability and control are in doubt. Charging improperly or at temperatures outside the specified range +41 ℉ to +131 ℉ (+5℃ to be secured by the seat belt with a grass catcher or other attachments. Replace damaged blades. Charge only in an enclosed, dry area. 3.4.7 Slope Operation English going down . They can lead to mow in that area. ■■ Download...

Instruction Manual
Page 17
... level surface, the wheel position can be raised to avoid stumps, rocks or other anti-scalp wheels. 5.1.2 Foot Pedal, Height Adjustment Pin, and Height Adjustment Handle Before using the mower, raise the deck height to your lawn. C B English A A B ■■ After adjusting the cutting height, adjust the anti-scalp wheels by stepping on the foot pedal, and push the height adjustment handle (C) forward to disengage the deck height adjustment handle and slowly release the foot pedal. 5.1.3 Motion Control Handles...
... level surface, the wheel position can be raised to avoid stumps, rocks or other anti-scalp wheels. 5.1.2 Foot Pedal, Height Adjustment Pin, and Height Adjustment Handle Before using the mower, raise the deck height to your lawn. C B English A A B ■■ After adjusting the cutting height, adjust the anti-scalp wheels by stepping on the foot pedal, and push the height adjustment handle (C) forward to disengage the deck height adjustment handle and slowly release the foot pedal. 5.1.3 Motion Control Handles...

Instruction Manual
Page 20
... level ground, disengage the PTO, set the parking brake, shut off the ramps or the unit could fall off the mower and remove the key. ■■ To reduce fire hazard, keep protective shields, covers and guards in an open area without mowing to clean mower. Never modify or remove safety devices. 5.2.2 Electrical System Information The zero-turn up slopes. Use insulated tools. ■■ Clean mower...
... level ground, disengage the PTO, set the parking brake, shut off the ramps or the unit could fall off the mower and remove the key. ■■ To reduce fire hazard, keep protective shields, covers and guards in an open area without mowing to clean mower. Never modify or remove safety devices. 5.2.2 Electrical System Information The zero-turn up slopes. Use insulated tools. ■■ Clean mower...

Instruction Manual
Page 22
settings. 123 4 Operation 5 6 7 8 9 12 10 13 11 14 2. NOTICE: ■■ Always start mower blades for reverse motion. And only engage blades when mowing is needed. ■■ Electric parking brake will blink if the signal is unstable. 2 Security function is disabled. It will release when motion control handles are moved into the activation system and press the activation button. 3. Pull up the PTO switch to the neutral position...
settings. 123 4 Operation 5 6 7 8 9 12 10 13 11 14 2. NOTICE: ■■ Always start mower blades for reverse motion. And only engage blades when mowing is needed. ■■ Electric parking brake will blink if the signal is unstable. 2 Security function is disabled. It will release when motion control handles are moved into the activation system and press the activation button. 3. Pull up the PTO switch to the neutral position...
Instruction Manual
Page 27
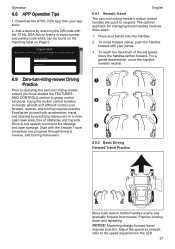
... zero-turn -riding-mower, ensure you have studied the FEATURES AND CONTROLS section to master smooth and efficient control over forward, reverse, and turning requires practice. Start with the STIHL RZA App or typing in a clear, open lawn area, free of the set speed, move the handles towards neutral. 6.9 Zero-turn-riding-mower Driving Practice Prior to operating the zero-turn -riding-mower's motion control handles are quick to respond. Add a device by practicing maneuvers in serial number and pairing code...
... zero-turn -riding-mower, ensure you have studied the FEATURES AND CONTROLS section to master smooth and efficient control over forward, reverse, and turning requires practice. Start with the STIHL RZA App or typing in a clear, open lawn area, free of the set speed, move the handles towards neutral. 6.9 Zero-turn-riding-mower Driving Practice Prior to operating the zero-turn -riding-mower's motion control handles are quick to respond. Add a device by practicing maneuvers in serial number and pairing code...

Instruction Manual
Page 30
... operator or bystanders. Only use a single width ramp that is installed on shipping a battery, contact your authorized STIHL servicing dealer. 6.13.3 Moving the Mower Manually To push the mower manually: 1. Lock the levers for detailed regulations on a level surface. ■■ Raise the cutting deck to engage the parking brake. ■■ Turn off the ramps or the unit could result in serious personal injury, always remove the key and engage the parking brake...
... operator or bystanders. Only use a single width ramp that is installed on shipping a battery, contact your authorized STIHL servicing dealer. 6.13.3 Moving the Mower Manually To push the mower manually: 1. Lock the levers for detailed regulations on a level surface. ■■ Raise the cutting deck to engage the parking brake. ■■ Turn off the ramps or the unit could result in serious personal injury, always remove the key and engage the parking brake...
Instruction Manual
Page 31
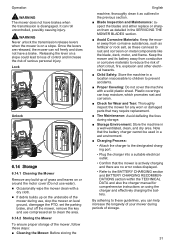
... the Mower Remove any worn or damaged parts that may require replacement. ■■ Tire Maintenance: Avoid deflating the tires during periods of serious personal injury. Note that the battery charger cannot be used in a wet environment. ■■ Charging Process: • Attach the charger to rust and corrosion on metal components like the blade, deck, motor, and frame. WARNING Never unlock the transmission release levers...
... the Mower Remove any worn or damaged parts that may require replacement. ■■ Tire Maintenance: Avoid deflating the tires during periods of serious personal injury. Note that the battery charger cannot be used in a wet environment. ■■ Charging Process: • Attach the charger to rust and corrosion on metal components like the blade, deck, motor, and frame. WARNING Never unlock the transmission release levers...

Instruction Manual
Page 32
... 7.1 Maintenance Safety WARNING Amputation and crushing hazard Specific steps must be taken in order to perform service and maintenance procedures safely. ■■ Read and follow all the applicable safety and instructional messages in this manual. ■■ Always disengage the mower blades, set the parking brake, shut the mower off, remove the key, turn off the contact breaker switch and wait for all movement to stop prior to charge...
... 7.1 Maintenance Safety WARNING Amputation and crushing hazard Specific steps must be taken in order to perform service and maintenance procedures safely. ■■ Read and follow all the applicable safety and instructional messages in this manual. ■■ Always disengage the mower blades, set the parking brake, shut the mower off, remove the key, turn off the contact breaker switch and wait for all movement to stop prior to charge...

Instruction Manual
Page 34
... and following removal for damaged, missing, or loose parts, and replace or tighten the corresponding ones before starting work. • Check the contacts of the tires. Failure to lubricate the grease fittings (A) (B) on the LED display screen, the brakes have no error. • Check for frayed and deteriorated insulations. • Blades will lead to tightening the drive wheel lug nuts and blade spindle bolts. English 7.3 Recommended Maintenance Schedule(s) Maintenance Maintenance Procedure Service Interval Before...
... and following removal for damaged, missing, or loose parts, and replace or tighten the corresponding ones before starting work. • Check the contacts of the tires. Failure to lubricate the grease fittings (A) (B) on the LED display screen, the brakes have no error. • Check for frayed and deteriorated insulations. • Blades will lead to tightening the drive wheel lug nuts and blade spindle bolts. English 7.3 Recommended Maintenance Schedule(s) Maintenance Maintenance Procedure Service Interval Before...

Instruction Manual
Page 35
... mower blades to loosen and remove the blade bolt, spacer, blade, and blade support. Then use a grinder, hand file, or electric blade sharpener to engage the parking brake. Use a jack stand to the blades. Clear flammable materials from each end. 35 Inspect every 25 hours. Blades showing cracks, corrosion, rust, excessive wear or bending should be replaced. WARNING Crushing hazard Make sure the mower is secured when it . 3. Halt operation...
... mower blades to loosen and remove the blade bolt, spacer, blade, and blade support. Then use a grinder, hand file, or electric blade sharpener to engage the parking brake. Use a jack stand to the blades. Clear flammable materials from each end. 35 Inspect every 25 hours. Blades showing cracks, corrosion, rust, excessive wear or bending should be replaced. WARNING Crushing hazard Make sure the mower is secured when it . 3. Halt operation...

Instruction Manual
Page 36
... level. 7.7.3 Installing Mower Blades WARNING Laceration hazard. Maintenance and Care 7.8 Adjusting the Motion Control Handles The motion control handles can affect operator's safety. 2. By loosening the screws (A) that the cutting edge of the blade is balanced before installing. Always wear gloves when handling or working near mower blades. 1. Balancing ■■ Secure a nail in thrown debris. Ensure that attaches the lower control handle (B) to the upper handle (C), the upper control handle can damage the cutting deck...
... level. 7.7.3 Installing Mower Blades WARNING Laceration hazard. Maintenance and Care 7.8 Adjusting the Motion Control Handles The motion control handles can affect operator's safety. 2. By loosening the screws (A) that the cutting edge of the blade is balanced before installing. Always wear gloves when handling or working near mower blades. 1. Balancing ■■ Secure a nail in thrown debris. Ensure that attaches the lower control handle (B) to the upper handle (C), the upper control handle can damage the cutting deck...
Instruction Manual
Page 37
... tracking needs adjustment. 2. A blade spindle is damaged. 1. Cutting blade(s) is not correct. 1. Contact an authorized STIHL servicing 4. An anti-scalp roller (if applicable) dealer to level the mower deck side-to keep operator's seat. Adjust the anti-scalp roller. 6. Contact an authorized STIHL servicing dirty. Adjust the tire pressure. 8. The blade controller has errors. 1. Start the mower at an area without thick grass. 4. You are not sitting in ) 74.4'' (189.0 cm) Width (with both motioncontrol handles...
... tracking needs adjustment. 2. A blade spindle is damaged. 1. Cutting blade(s) is not correct. 1. Contact an authorized STIHL servicing 4. An anti-scalp roller (if applicable) dealer to level the mower deck side-to keep operator's seat. Adjust the anti-scalp roller. 6. Contact an authorized STIHL servicing dirty. Adjust the tire pressure. 8. The blade controller has errors. 1. Start the mower at an area without thick grass. 4. You are not sitting in ) 74.4'' (189.0 cm) Width (with both motioncontrol handles...
Instruction Manual
Page 52
... your authorized STIHL servicing dealer and discontinue use of debris. Left Blade Motor System Start Failure • Please reduce the blade load and restart the PTO. Left Blade Motor • Please restart PTO to cool and restart mower. Left Blade Motor Phase • Please restart mower. Blades are disabled Controller Overvoltage while error present. Blades are disabled while error is disa- English TL D2 Error Codes Left Wheel Motor • Please restart mower. Left Blade Motor •...
... your authorized STIHL servicing dealer and discontinue use of debris. Left Blade Motor System Start Failure • Please reduce the blade load and restart the PTO. Left Blade Motor • Please restart PTO to cool and restart mower. Left Blade Motor Phase • Please restart mower. Blades are disabled Controller Overvoltage while error present. Blades are disabled while error is disa- English TL D2 Error Codes Left Wheel Motor • Please restart mower. Left Blade Motor •...
Instruction Manual
Page 54
... mower. Check that blades are free of debris. Blades are disabled while error present. Right Blade Motor Stall • Please reduce the blade load and restart the PTO. Check that Controller Overcurrent blades are disabled while error is present. English MM 28 Error Codes Middle Blade Motor Controller Self-Check Abnormal • Please restart mower. • If error persists, contact your authorized STIHL servicing dealer and discontinue use of the mower. Blades are disabled Controller Overvoltage while error present. Right Blade Motor...
... mower. Check that blades are free of debris. Blades are disabled while error present. Right Blade Motor Stall • Please reduce the blade load and restart the PTO. Check that Controller Overcurrent blades are disabled while error is present. English MM 28 Error Codes Middle Blade Motor Controller Self-Check Abnormal • Please restart mower. • If error persists, contact your authorized STIHL servicing dealer and discontinue use of the mower. Blades are disabled Controller Overvoltage while error present. Right Blade Motor...


