
Instruction Manual
Page 3
... instructions before using the can opener to the authorized Sunbeam Appliance Service Station for examination, repair or electrical or mechanical adjustment. l Do not operate can opener with a damaged cord or plug or after the appliance malfunctions, or is dropped or damaged in any can opener in water or other ). l Do not use , before putting on or taking off parts, and before using...
... instructions before using the can opener to the authorized Sunbeam Appliance Service Station for examination, repair or electrical or mechanical adjustment. l Do not operate can opener with a damaged cord or plug or after the appliance malfunctions, or is dropped or damaged in any can opener in water or other ). l Do not use , before putting on or taking off parts, and before using...

Instruction Manual
Page 4
Be certain that has become jammed, raise the can opener lever and release the can opener to upright position (A). The can will cause the can . Begin the cutting action again in a new place on top of the drive wheel. Dented Cans: Occasionally, badly ...cutting action begins. When the can opener lever down during the cutting cycle. C It is not necessaryto hold the can opener lever down firmly (C) and hold until the damaged areas are passed. To release the can, grasp the can and guide it through the cutting action manually until the can opener lever to stall. Plug electrical...
Be certain that has become jammed, raise the can opener lever and release the can opener to upright position (A). The can will cause the can . Begin the cutting action again in a new place on top of the drive wheel. Dented Cans: Occasionally, badly ...cutting action begins. When the can opener lever down during the cutting cycle. C It is not necessaryto hold the can opener lever down firmly (C) and hold until the damaged areas are passed. To release the can, grasp the can and guide it through the cutting action manually until the can opener lever to stall. Plug electrical...

Instruction Manual
Page 5
...Push can opener lever to its fullest upright position. Replacing the Cutting Unit With can opener should be detached and cleaned thoroughly in warm, sudsy water at regular intervals. To insure proper sanitation, all removable parts on the can opener lever in raised ...Cutting Unit: Raise can opener leverto the right to snap it from the recessed area (F). Never immerse the motor housing in water. Before cleaning, UNPLUGTHE CORDFROM OUTLET.The motor housing easily wipes clean using a damp cloth. To thoroughly clean drive wheel, use small brush to slide out as pictured (E). Replace...
...Push can opener lever to its fullest upright position. Replacing the Cutting Unit With can opener should be detached and cleaned thoroughly in warm, sudsy water at regular intervals. To insure proper sanitation, all removable parts on the can opener lever in raised ...Cutting Unit: Raise can opener leverto the right to snap it from the recessed area (F). Never immerse the motor housing in water. Before cleaning, UNPLUGTHE CORDFROM OUTLET.The motor housing easily wipes clean using a damp cloth. To thoroughly clean drive wheel, use small brush to slide out as pictured (E). Replace...
Instruction Manual
Page 6
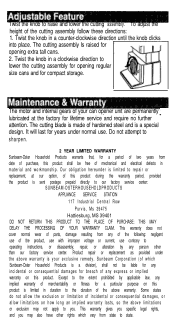
... for opening extra tall cans. 2. It will last for compact storage. Product repair or replacement as provided under normal use of the cutting assembly follow these directions: 1. Sunbeam Corporation (of which vary from any of the following: negligent use . The motor and internal gears of the above limitations or exclusion may also have other than our factory service center...
... for opening extra tall cans. 2. It will last for compact storage. Product repair or replacement as provided under normal use of the cutting assembly follow these directions: 1. Sunbeam Corporation (of which vary from any of the following: negligent use . The motor and internal gears of the above limitations or exclusion may also have other than our factory service center...
Instruction Manual
Page 8
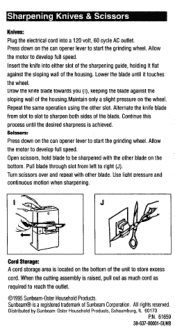
... the other blade. Insert the knife into a 120 volt, 60 cycle AC outlet. Lower the blade until the desired sharpness is located on the can opener lever to store excess cord. Use light pressure and continuous motion when sharpening. Knives: Plug the electrical cord into either slot of the sharpening guide, holding it touches the wheel. Repeatthe same operation using the other...
... the other blade. Insert the knife into a 120 volt, 60 cycle AC outlet. Lower the blade until the desired sharpness is located on the can opener lever to store excess cord. Use light pressure and continuous motion when sharpening. Knives: Plug the electrical cord into either slot of the sharpening guide, holding it touches the wheel. Repeatthe same operation using the other...