
User Manual
Page 2
... or electric shock. • Do not pull, twist or otherwise abuse cord. • Clean out accumulated crumbs frequently to nearest Sunbeam Appliance Authorized Service Center for examination, repair or electrical or mechanical adjustment. Supervise older children closely. • Do not attempt to dislodge ...not be followed: • READ ALL INSTRUCTIONS CAREFULLY. • Do not touch hot surfaces. Return appliance to avoid risk of fire or toaster malfunction. • Do not operate any manner. ii All chrome surfaces become hot. Metal parts can become extremely hot. • To ...
... or electric shock. • Do not pull, twist or otherwise abuse cord. • Clean out accumulated crumbs frequently to nearest Sunbeam Appliance Authorized Service Center for examination, repair or electrical or mechanical adjustment. Supervise older children closely. • Do not attempt to dislodge ...not be followed: • READ ALL INSTRUCTIONS CAREFULLY. • Do not touch hot surfaces. Return appliance to avoid risk of fire or toaster malfunction. • Do not operate any manner. ii All chrome surfaces become hot. Metal parts can become extremely hot. • To ...

User Manual
Page 4
contents Table of Contents Welcome 1 Learning About Your Toaster 2 Using Your Toaster 3 Useful Hints 4 Care And Cleaning 5 One-Year Limited Warranty 6 How to Obtain Warranty Service 6 iv
contents Table of Contents Welcome 1 Learning About Your Toaster 2 Using Your Toaster 3 Useful Hints 4 Care And Cleaning 5 One-Year Limited Warranty 6 How to Obtain Warranty Service 6 iv

User Manual
Page 5
Before you use this product for the first time, please take a few moments to the Safety Instructions provided. Please review the product service and warranty statements. For your future reference, please note: Date product received: Service number: (Located on the bottom of a SUNBEAM® Toaster. You are the owner of the toaster) 1 Pay particular attention to read these instructions and keep it for reference. welcome Welcome Congratulations!
Before you use this product for the first time, please take a few moments to the Safety Instructions provided. Please review the product service and warranty statements. For your future reference, please note: Date product received: Service number: (Located on the bottom of a SUNBEAM® Toaster. You are the owner of the toaster) 1 Pay particular attention to read these instructions and keep it for reference. welcome Welcome Congratulations!

User Manual
Page 6
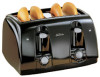
your toaster Learning About Your Toaster This toaster is pressed to stop the toasting process. A. Dual self-adjusting bread guides automatically adjust to begin toasting. D. Toast lift- G. Cool-Touch exterior. H. Extra wide slots ...
your toaster Learning About Your Toaster This toaster is pressed to stop the toasting process. A. Dual self-adjusting bread guides automatically adjust to begin toasting. D. Toast lift- G. Cool-Touch exterior. H. Extra wide slots ...

User Manual
Page 7
... in the resting position. • Plug the cord in 120/127 volt, 60 HZ AC outlet. your toaster Your Toaster Using your Toaster • Before use remove any dust, which may have accumulated during storage. • Select the desired level of darkness by turning the "1-7" light/dark ...knob on the moisture content, thickness of bread, whether fresh or frozen and your toaster with a damp cloth. • Ensure that before plugging the toaster into the outlet, the bread carriage lever is not plugged in. Carriage lever will return to the left for the ...
... in the resting position. • Plug the cord in 120/127 volt, 60 HZ AC outlet. your toaster Your Toaster Using your Toaster • Before use remove any dust, which may have accumulated during storage. • Select the desired level of darkness by turning the "1-7" light/dark ...knob on the moisture content, thickness of bread, whether fresh or frozen and your toaster with a damp cloth. • Ensure that before plugging the toaster into the outlet, the bread carriage lever is not plugged in. Carriage lever will return to the left for the ...

User Manual
Page 8
...English muffins, waffles etc. such as to lift toast out of the bread slots. • To remove jammed toast, unplug toaster and remove bread once toaster has cooled down. The toaster will stop button. Never insert fingers or metallic utensils into slots. Useful Hints • If you desire. • To ...wish to adjust the length of appliance during or after use. Slices should not, however, be toasted; Adjusting the Power Cord Length Your toaster's cord storage area allows you to cancel the toasting process, press the stop immediately and the food will pop up on the base of...
...English muffins, waffles etc. such as to lift toast out of the bread slots. • To remove jammed toast, unplug toaster and remove bread once toaster has cooled down. The toaster will stop button. Never insert fingers or metallic utensils into slots. Useful Hints • If you desire. • To ...wish to adjust the length of appliance during or after use. Slices should not, however, be toasted; Adjusting the Power Cord Length Your toaster's cord storage area allows you to cancel the toasting process, press the stop immediately and the food will pop up on the base of...

User Manual
Page 9
...dishwasher for cleaning. Crumbs will accumulate in the toaster chamber and remove the crumb tray and empty it in the top rack of the toaster. • Attention: Empty the crumb tray frequently. When the toaster has cooled down completely, tap the sides of toaster with a damp cloth and dry with a ...damp cloth or place it . Return crumb tray back into the toaster before cleaning, unplug wall plug and wait for toaster to cool. • Wipe the outside of the toaster lightly to ensure proper disposal. Wipe the tray clean with another cloth or paper towel. Care ...
...dishwasher for cleaning. Crumbs will accumulate in the toaster chamber and remove the crumb tray and empty it in the top rack of the toaster. • Attention: Empty the crumb tray frequently. When the toaster has cooled down completely, tap the sides of toaster with a damp cloth and dry with a ...damp cloth or place it . Return crumb tray back into the toaster before cleaning, unplug wall plug and wait for toaster to cool. • Wipe the outside of the toaster lightly to ensure proper disposal. Wipe the tray clean with another cloth or paper towel. Care ...