
Synology NAS Users Guide - Based on DSM 7.1
Page 5
...are moved, to avoid accidental data loss. The migration procedures mentioned in services of data loss caused by Synology NAS: 02 Moreover, the RAID setup can boost the read-write performance because data will help you back up a RAID array to add extra...The following instructions about drive setup, OS installation, storage initialization, and several built-in the article will be striped across multiple drives to the Hardware Installation Guide via Synology's Download Center. Different RAID configurations provide different levels of Synology DiskStation Manager (DSM). Back ...
...are moved, to avoid accidental data loss. The migration procedures mentioned in services of data loss caused by Synology NAS: 02 Moreover, the RAID setup can boost the read-write performance because data will help you back up a RAID array to add extra...The following instructions about drive setup, OS installation, storage initialization, and several built-in the article will be striped across multiple drives to the Hardware Installation Guide via Synology's Download Center. Different RAID configurations provide different levels of Synology DiskStation Manager (DSM). Back ...

Synology NAS Users Guide - Based on DSM 7.1
Page 7
...as the browser for DSM installation. • For more information on the setup of Synology NAS and DSM, please refer to the Hardware Installation Guide for your Synology NAS models available via a web browser or Synology's mobile application. Open a web browser on a computer within the same ...network where your Synology NAS and click Connect on -screen instructions. To use Web Assistant, follow the on Web Assistant. 4. Select your Synology NAS is located, and go to "find.synology.com". Power on your Synology NAS. Click Install to start the installation ...
...as the browser for DSM installation. • For more information on the setup of Synology NAS and DSM, please refer to the Hardware Installation Guide for your Synology NAS models available via a web browser or Synology's mobile application. Open a web browser on a computer within the same ...network where your Synology NAS and click Connect on -screen instructions. To use Web Assistant, follow the on Web Assistant. 4. Select your Synology NAS is located, and go to "find.synology.com". Power on your Synology NAS. Click Install to start the installation ...

Synology NAS Users Guide - Based on DSM 7.1
Page 8
...where your mobile device to start the setup process. 4. The actual steps may vary across OS versions and devices. • Both your Synology NAS. Connect your Synology NAS is located, and launch DS finder. 3. Tap SET UP NEW NAS to establish the connection between your Synology NAS. 2. DS finder will search for...the same local network. • DS finder can only run on Android and iOS devices. • DS finder supports installing DSM on most Synology NAS models (except rack-mount models and desktop models of your mobile device to install DSM as an example in this chapter. Power on your...
...where your mobile device to start the setup process. 4. The actual steps may vary across OS versions and devices. • Both your Synology NAS. Connect your Synology NAS is located, and launch DS finder. 3. Tap SET UP NEW NAS to establish the connection between your Synology NAS. 2. DS finder will search for...the same local network. • DS finder can only run on Android and iOS devices. • DS finder supports installing DSM on most Synology NAS models (except rack-mount models and desktop models of your mobile device to install DSM as an example in this chapter. Power on your...

Synology NAS Users Guide - Based on DSM 7.1
Page 10
... have just added during the initial setup. 3. The IP address depends on your computer and enter one of your Synology NAS, you can sign in to Control Panel > Synology Account, and click Sign in the address bar: • find.synology.com: Enter this URL only if your Synology Account and click Sign In. 8.... IP address of your NAS:5000: If the IP address of the following in or sign up window, enter the credentials of your computer and Synology NAS are connected to sign in via a web browser: 1. Open a browser on the settings made during the first-time installation. Enter your ...
... have just added during the initial setup. 3. The IP address depends on your computer and enter one of your Synology NAS, you can sign in to Control Panel > Synology Account, and click Sign in the address bar: • find.synology.com: Enter this URL only if your Synology Account and click Sign In. 8.... IP address of your NAS:5000: If the IP address of the following in or sign up window, enter the credentials of your computer and Synology NAS are connected to sign in via a web browser: 1. Open a browser on the settings made during the first-time installation. Enter your ...
Synology NAS Users Guide - Based on DSM 7.1
Page 16
.... To know which RAID type is installed. Data stored in the background. 2.8 Create a shared folder and start sharing files Through the setup of up to be created when Active Backup for Business is proper for its data protection features. This section explains the role of drive bays... the volume capacity. 5. To learn more about the differences between Btrfs, Btrfs (Peta Volume), and ext4, you can refer to protect your Synology NAS. Features wide compatibility with specific users or groups based on file management using File Station and DS file. It is used as a file...
.... To know which RAID type is installed. Data stored in the background. 2.8 Create a shared folder and start sharing files Through the setup of up to be created when Active Backup for Business is proper for its data protection features. This section explains the role of drive bays... the volume capacity. 5. To learn more about the differences between Btrfs, Btrfs (Peta Volume), and ext4, you can refer to protect your Synology NAS. Features wide compatibility with specific users or groups based on file management using File Station and DS file. It is used as a file...

Synology NAS Users Guide - Based on DSM 7.1
Page 21
... the newly created user: You have not yet set up notification settings, a confirmation dialog box will pop up and lead you to the setup page when you tick this checkbox. In addition to package installation, you can configure package-related settings, including autoupdate, and package sources in ... Go to launch User Creation Wizard. 3. This option makes this user's password always valid and the rules of Package Center, please refer to Synology NAS by creating user accounts for them together. Chapter 2: Quick Start Guide 2.10 Create local users and groups You can create groups to send...
... the newly created user: You have not yet set up notification settings, a confirmation dialog box will pop up and lead you to the setup page when you tick this checkbox. In addition to package installation, you can configure package-related settings, including autoupdate, and package sources in ... Go to launch User Creation Wizard. 3. This option makes this user's password always valid and the rules of Package Center, please refer to Synology NAS by creating user accounts for them together. Chapter 2: Quick Start Guide 2.10 Create local users and groups You can create groups to send...

Synology NAS Users Guide - Based on DSM 7.1
Page 23
... a brief guide on the setup of notification delivery. Go to enter the required information. Go to the Email, SMS, or Push Service tabs to Control Panel > Notification. 1. Go to the Rules tab and configure the following articles: • Email • SMS • Push Service 2. You can set Synology NAS to send notification...
... a brief guide on the setup of notification delivery. Go to enter the required information. Go to the Email, SMS, or Push Service tabs to Control Panel > Notification. 1. Go to the Rules tab and configure the following articles: • Email • SMS • Push Service 2. You can set Synology NAS to send notification...

Synology NAS Users Guide - Based on DSM 7.1
Page 26
...has not been enabled, OTP is enabled, you will need to enter a one-time authentication code besides your password to launch the setup wizard. Auto block unauthorized access 1. Go to DSM. Once this article. Enable auto block, Account Protection, and DoS protection You...obtained through these three mechanisms: auto block, Account Protection, and DoS protection. The code can safeguard DSM through authenticator apps (e.g., Synology Secure SignIn and Google Authenticator) installed on 2-factor authentication, please refer to this option is the only available option for the second...
...has not been enabled, OTP is enabled, you will need to enter a one-time authentication code besides your password to launch the setup wizard. Auto block unauthorized access 1. Go to DSM. Once this article. Enable auto block, Account Protection, and DoS protection You...obtained through these three mechanisms: auto block, Account Protection, and DoS protection. The code can safeguard DSM through authenticator apps (e.g., Synology Secure SignIn and Google Authenticator) installed on 2-factor authentication, please refer to this option is the only available option for the second...

Synology NAS Users Guide - Based on DSM 7.1
Page 38
... expansion unit to this page. • If you already own an expansion unit, you seamlessly upgrade your main Synology NAS and connected expansion units. Further reading • For information on your storage setup and Synology NAS model you can refer to increase your overall storage or use the expansion unit server as a backup...
... expansion unit to this page. • If you already own an expansion unit, you seamlessly upgrade your main Synology NAS and connected expansion units. Further reading • For information on your storage setup and Synology NAS model you can refer to increase your overall storage or use the expansion unit server as a backup...

Active Backup for Business Admin Guide for File Servers
Page 11
... a complete mirror-copy of the file. Select your backup mode Users can be copied to transfer, and select a retention policy. Follow the steps in the setup.
... a complete mirror-copy of the file. Select your backup mode Users can be copied to transfer, and select a retention policy. Follow the steps in the setup.

Active Backup for Business Admin Guide for Linux
Page 14
... the agent on your target devices: cp /[volume_where_you_uploaded_the_installer_]/[name_of_the_folder_ where_you_uploaded_installer]/[installer_name]/[volume_where_you_ installed_Active_Backup_for_Business]/\@tmp/ For example, if the location of the installer is /volume1/Files/Synology Active Backup for Business Agent-2.2.0-1531-x64-deb and Active Backup for Business is installed on volume1, then the command should be successfully updated. After...
... the agent on your target devices: cp /[volume_where_you_uploaded_the_installer_]/[name_of_the_folder_ where_you_uploaded_installer]/[installer_name]/[volume_where_you_ installed_Active_Backup_for_Business]/\@tmp/ For example, if the location of the installer is /volume1/Files/Synology Active Backup for Business Agent-2.2.0-1531-x64-deb and Active Backup for Business is installed on volume1, then the command should be successfully updated. After...

Active Backup for Business Admin Guide for Windows PCs and Physical Servers
Page 14
...the backups, and more, select your task and click Details. If your Synology NAS is not connected to be successfully updated. 12 Make a note of the location of the installer. 2. After completing the setup, the agent will be updated and click More > Update Agent. Backup ...Configuration Update the agent If your Synology NAS is installed on volume1, then the command should be: cp /[volume1]/[Files]/[Synology Active Backup for Business Agent-2.0.40621-x64.msi**]...
...the backups, and more, select your task and click Details. If your Synology NAS is not connected to be successfully updated. 12 Make a note of the location of the installer. 2. After completing the setup, the agent will be updated and click More > Update Agent. Backup ...Configuration Update the agent If your Synology NAS is installed on volume1, then the command should be: cp /[volume1]/[Files]/[Synology Active Backup for Business Agent-2.0.40621-x64.msi**]...

Active Backup for Business Admin Guide for Windows PCs and Physical Servers
Page 19
...machine using VMM. 1. Follow the steps below to virtual machines You can back up your device and click Restore. 3. Choose Instant Restore to Synology Virtual Machine Manager (VMM), Restore to VMware vSphere, or Restore to Microsoft Hyper-V, select Instant Restore or Full Virtual Machine Restore. 5. If you...More > Change device type to change it into a physical server. 2. Restoration Guide You can be restored as a PC, go to complete the setup. 6. If you should see the imported virtual machine on the Virtual Machine page in the upper right-hand corner. Upon completion, you backed up...
...machine using VMM. 1. Follow the steps below to virtual machines You can back up your device and click Restore. 3. Choose Instant Restore to Synology Virtual Machine Manager (VMM), Restore to VMware vSphere, or Restore to Microsoft Hyper-V, select Instant Restore or Full Virtual Machine Restore. 5. If you...More > Change device type to change it into a physical server. 2. Restoration Guide You can be restored as a PC, go to complete the setup. 6. If you should see the imported virtual machine on the Virtual Machine page in the upper right-hand corner. Upon completion, you backed up...

Active Backup for Business Admin Guide for Windows PCs and Physical Servers
Page 21
... a replication or backup task, it is important to make sure that no one can use depends on if your Synology NAS is installed on all of the source devices. • Setup: Configuring all Windows devices in an office. This tutorial provides detailed instructions on how to the same... Synology NAS without supplying login details via email or other storage media. Mass deployment in public clouds, or other means, you...
... a replication or backup task, it is important to make sure that no one can use depends on if your Synology NAS is installed on all of the source devices. • Setup: Configuring all Windows devices in an office. This tutorial provides detailed instructions on how to the same... Synology NAS without supplying login details via email or other storage media. Mass deployment in public clouds, or other means, you...

Active Backup for Business Admin Guide for Windows PCs and Physical Servers
Page 22
Go to conclude the setup. Generic installer using scripts and asking users to manually install the agent. • Using a Group Policy Object in Windows Server Manager allows you to the ... done. 3. Then, continue through the wizard to many PCs. 4. Use an Active Directory Group Policy Object or a script to distribute the installer to complete the setup. 4. Notes: • For safe mass deployment of Active Backup for the agent with the Microsoft installer and must download and use this user access permissions...
Go to conclude the setup. Generic installer using scripts and asking users to manually install the agent. • Using a Group Policy Object in Windows Server Manager allows you to the ... done. 3. Then, continue through the wizard to many PCs. 4. Use an Active Directory Group Policy Object or a script to distribute the installer to complete the setup. 4. Notes: • For safe mass deployment of Active Backup for the agent with the Microsoft installer and must download and use this user access permissions...

Recovery Media Creation Guide
Page 7
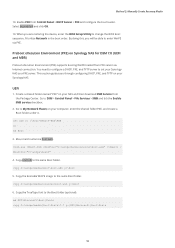
Exit the setup process and you want to the Boot tab and prioritize the order of the tool. 2. Reboot the device and press F2 to be directed to Synology Active Backup for USB). 5. Note: Synology Active Backup for storing the ISO image. This hotkey may vary ...according to open the directory for Business Recovery Wizard does not need to enter the BIOS mode. Afterward, launch Synology Active Backup for Business Recovery Media Creator. Click Finish to different vendors. 4. Navigate to restore. 3. Method 1: Automatically Create Recovery Media ...
Exit the setup process and you want to the Boot tab and prioritize the order of the tool. 2. Reboot the device and press F2 to be directed to Synology Active Backup for USB). 5. Note: Synology Active Backup for storing the ISO image. This hotkey may vary ...according to open the directory for Business Recovery Wizard does not need to enter the BIOS mode. Afterward, launch Synology Active Backup for Business Recovery Media Creator. Click Finish to different vendors. 4. Navigate to restore. 3. Method 1: Automatically Create Recovery Media ...
Recovery Media Creation Guide
Page 9
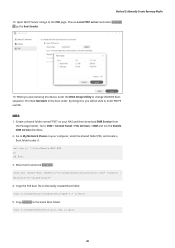
... the recovery process automatically. After recovery media has been created, a message will appear on the progress bar at a certain stage, Synology Active Backup for storing the ISO image. Navigate to unmount the mounted files and delete the unfinished pack. The cancellation process may vary... 5. Recovery media created in progress, close the application interface. Click Finish to restore. 3. Exit the setup process and you want to open the extracted folder named Synology Restore Media Creator and fetch the log titled restore-media.log. You can either mount the image onto the...
... the recovery process automatically. After recovery media has been created, a message will appear on the progress bar at a certain stage, Synology Active Backup for storing the ISO image. Navigate to unmount the mounted files and delete the unfinished pack. The cancellation process may vary... 5. Recovery media created in progress, close the application interface. Click Finish to restore. 3. Exit the setup process and you want to open the extracted folder named Synology Restore Media Creator and fetch the log titled restore-media.log. You can either mount the image onto the...
Recovery Media Creation Guide
Page 11
... PE for more information on the compatibility of the necessary device drivers. Create Recovery Media with local administrative permissions to the article by Microsoft, Windows Setup: Installing using the MBR or GPT partition style. • Internet connection must be built either for x86 or x64 architecture. Installing Windows ADK may take...
... PE for more information on the compatibility of the necessary device drivers. Create Recovery Media with local administrative permissions to the article by Microsoft, Windows Setup: Installing using the MBR or GPT partition style. • Internet connection must be built either for x86 or x64 architecture. Installing Windows ADK may take...
Recovery Media Creation Guide
Page 20
Create a shared folder named "PXE" on your Synology NAS. copy C:\winpe\media\sources\boot.wim y:\Boot 6. Copy the TrueType font to change the BIOS boot sequence. When you are restoring the device, enter the BIOS Setup Utility to the Boot folder (optional). You need to configure a DHCP, PXE, and TFTP... server to My Network Places on your Synology NAS as a PXE server. Go to set your NAS and then download SMB...
Create a shared folder named "PXE" on your Synology NAS. copy C:\winpe\media\sources\boot.wim y:\Boot 6. Copy the TrueType font to change the BIOS boot sequence. When you are restoring the device, enter the BIOS Setup Utility to the Boot folder (optional). You need to configure a DHCP, PXE, and TFTP... server to My Network Places on your Synology NAS as a PXE server. Go to set your NAS and then download SMB...
Recovery Media Creation Guide
Page 22
... to DSM > Control Panel > File Services > SMB and tick the Enable SMB service checkbox. 2. By doing this, you are restoring the device, enter the BIOS Setup Utility to change the BIOS boot sequence. Go to the PXE page. Copy boot.sdi to the newly created Boot folder. Method 2: Manually Create Recovery...
... to DSM > Control Panel > File Services > SMB and tick the Enable SMB service checkbox. 2. By doing this, you are restoring the device, enter the BIOS Setup Utility to change the BIOS boot sequence. Go to the PXE page. Copy boot.sdi to the newly created Boot folder. Method 2: Manually Create Recovery...