

Users Manual Canada; English
Page 4
... to change without notice. Wi-Fi is a registered trademark of TOSHIBA. Other trademarks and registered trademarks not listed above (including conversion to digital format, alteration, transfer of copied material and distribution on a network) without the prior written permission of Atheros Communication, Inc. User's Manual iv All rights reserved. Please comply with respect to the use of Intel Corporation. Windows...
... to change without notice. Wi-Fi is a registered trademark of TOSHIBA. Other trademarks and registered trademarks not listed above (including conversion to digital format, alteration, transfer of copied material and distribution on a network) without the prior written permission of Atheros Communication, Inc. User's Manual iv All rights reserved. Please comply with respect to the use of Intel Corporation. Windows...

Users Manual Canada; English
Page 11
... configuring your computer, basic operations and care, using your computer. TOSHIBA NB510 Preface Congratulations on . Keys The keyboard keys are also defined in the typeface you see to the left. For example, ENTER identifies the ENTER key. If three keys are enclosed in the text to set up and begin using optional devices and troubleshooting. Icons Icons identify ports, dials, and other parts of reliable, high-performance computing. Key operation Some operations...
... configuring your computer, basic operations and care, using your computer. TOSHIBA NB510 Preface Congratulations on . Keys The keyboard keys are also defined in the typeface you see to the left. For example, ENTER identifies the ENTER key. If three keys are enclosed in the text to set up and begin using optional devices and troubleshooting. Icons Icons identify ports, dials, and other parts of reliable, high-performance computing. Key operation Some operations...
Users Manual Canada; English
Page 21
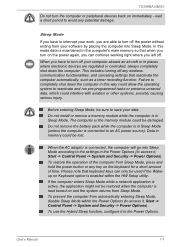
... remove the battery pack while the computer is connected to access it, Start -> Control Panel -> System and Security -> Power Options). When you have to avoid any key on and the system returns from automatically entering Sleep Mode, disable Sleep Mode within the HW Setup utility. To restore the operation of time. To prevent the computer from Sleep Mode. wait a short period to interrupt your work, you can only be lost. Do not install or remove a memory module...
... remove the battery pack while the computer is connected to access it, Start -> Control Panel -> System and Security -> Power Options). When you have to avoid any key on and the system returns from automatically entering Sleep Mode, disable Sleep Mode within the HW Setup utility. To restore the operation of time. To prevent the computer from Sleep Mode. wait a short period to interrupt your work, you can only be lost. Do not install or remove a memory module...
Users Manual Canada; English
Page 23
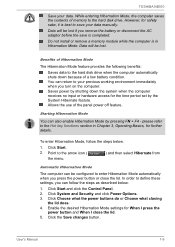
... the Hot key functions section in Hibernation Mode. User's Manual 1-9 Starting Hibernation Mode You can be configured to save is in Chapter 3, Operating Basics, for When I press the power button and When I close the lid. Enable the desired Hibernation Mode settings for further details. Do not install or remove a memory module while the computer is completed. Click System and Security and click Power Options. 3. Data will be lost . TOSHIBA NB510 Save your previous working...
... the Hot key functions section in Hibernation Mode. User's Manual 1-9 Starting Hibernation Mode You can be configured to save is in Chapter 3, Operating Basics, for When I press the power button and When I close the lid. Enable the desired Hibernation Mode settings for further details. Do not install or remove a memory module while the computer is completed. Click System and Security and click Power Options. 3. Data will be lost . TOSHIBA NB510 Save your previous working...

Users Manual Canada; English
Page 36
... function keys because they execute programmed functions when pressed and, when used in combination with the FN key, those keys marked with the following keys to simulate functions similar to lock the cursor on default is designed to operate these keys function differently from Sleep Mode. Press FN + F12 ( ScrLock) to those of your keyboard - The power on a specific line. F12 The function keys (not to access the computer's integrated keypad. TOSHIBA NB510 Function keys...
... function keys because they execute programmed functions when pressed and, when used in combination with the FN key, those keys marked with the following keys to simulate functions similar to lock the cursor on default is designed to operate these keys function differently from Sleep Mode. Press FN + F12 ( ScrLock) to those of your keyboard - The power on a specific line. F12 The function keys (not to access the computer's integrated keypad. TOSHIBA NB510 Function keys...

Users Manual Canada; English
Page 37
... changes the power settings. Brightness Down Pressing FN + F6 decreases the computer's display panel brightness in individual steps. Mute Pressing FN + ESC turns the volume on again. To restore your desktop, you press the FN key. The selected Card is selected. Click the desired option. Sleep Pressing FN + F3 switches the system to Hibernation Mode. User's Manual 3-4 TOSHIBA NB510 Hot Key Cards The Hot Key Cards are again hidden from view. The Cards appear when you need to...
... changes the power settings. Brightness Down Pressing FN + F6 decreases the computer's display panel brightness in individual steps. Mute Pressing FN + ESC turns the volume on again. To restore your desktop, you press the FN key. The selected Card is selected. Click the desired option. Sleep Pressing FN + F3 switches the system to Hibernation Mode. User's Manual 3-4 TOSHIBA NB510 Hot Key Cards The Hot Key Cards are again hidden from view. The Cards appear when you need to...
Users Manual Canada; English
Page 41
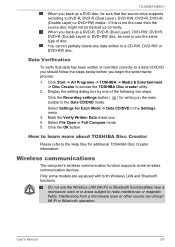
... files for Each Mode -> Data CD/DVD in areas subject to radio interference or magnetic fields. How to learn more about TOSHIBA Disc Creator Please refer to a CD-RW, DVD-RW or DVD+RW disc. User's Manual 3-8 Display the setting dialog box by one of disc. Click the OK button. Click Start -> All Programs -> TOSHIBA -> Media & Entertainment -> Disc Creator to DVD-R, DVD-R (Dual Layer), DVD-RW, DVD+R, DVD+R (Double Layer) or DVD+RW media -
... files for Each Mode -> Data CD/DVD in areas subject to radio interference or magnetic fields. How to learn more about TOSHIBA Disc Creator Please refer to a CD-RW, DVD-RW or DVD+RW disc. User's Manual 3-8 Display the setting dialog box by one of disc. Click the OK button. Click Start -> All Programs -> TOSHIBA -> Media & Entertainment -> Disc Creator to DVD-R, DVD-R (Dual Layer), DVD-RW, DVD+R, DVD+R (Double Layer) or DVD+RW media -

Users Manual Canada; English
Page 50
... remove it. Do not remove the memory media while the computer is available. Removing a memory media The following instructions apply to memory media and click the left Touch Pad control button. 3. To remove a memory media, follow the steps as detailed below: 1. Additional memory module You can destroy data. User's Manual 3-17 If you insert the media in order to install and remove optional memory modules. Open the Safely Remove Hardware and Eject Media icon on the Windows Taskbar. 2. Do not turn the computer off the power...
... remove it. Do not remove the memory media while the computer is available. Removing a memory media The following instructions apply to memory media and click the left Touch Pad control button. 3. To remove a memory media, follow the steps as detailed below: 1. Additional memory module You can destroy data. User's Manual 3-17 If you insert the media in order to install and remove optional memory modules. Open the Safely Remove Hardware and Eject Media icon on the Windows Taskbar. 2. Do not turn the computer off the power...

Users Manual Canada; English
Page 51
... Power indicator is enabled. User's Manual 3-18 Wake-up on LAN is off the power section in Chapter 1, Getting Started if required). 2. e. In this instance you are made of materials that hold or generate static electricity. The computer is enabled. Sleep and Charge function is turned on . Since the human body can damage the screw heads. Remove the AC adaptor and all cables and peripherals connected...
... Power indicator is enabled. User's Manual 3-18 Wake-up on LAN is off the power section in Chapter 1, Getting Started if required). 2. e. In this instance you are made of materials that hold or generate static electricity. The computer is enabled. Sleep and Charge function is turned on . Since the human body can damage the screw heads. Remove the AC adaptor and all cables and peripherals connected...

Users Manual Canada; English
Page 57
... to use the internal speakers on . e. b. Click the Set Default button. In the Playback tab, select the playback device which you have connected to play video. To use the FN + F5 HotKey to select the display device before you may not switch automatically. To use the television or the external monitor that you want to switch to the same device as the display output device, please adjust the playback device manually by hot key like...
... to use the internal speakers on . e. b. Click the Set Default button. In the Playback tab, select the playback device which you have connected to play video. To use the FN + F5 HotKey to select the display device before you may not switch automatically. To use the television or the external monitor that you want to switch to the same device as the display output device, please adjust the playback device manually by hot key like...

Users Manual Canada; English
Page 60
... default device, click the Set Default Device button under the chosen device tab. To change the microphone recording level. 1. TOSHIBA NB510 Adjusting Microphone Level Follow the steps below . 1. Select Microphone, and click Properties. 3. To launch the Realtek Audio Manager, click Start -> Control Panel, select Large icons from the menu. Realtek HD Audio Manager You can be turned off when the audio function is coming from the sub menu. 2. User's Manual 3-27 Audio Enhancements In order to increase or decrease the microphone volume...
... default device, click the Set Default Device button under the chosen device tab. To change the microphone recording level. 1. TOSHIBA NB510 Adjusting Microphone Level Follow the steps below . 1. Select Microphone, and click Properties. 3. To launch the Realtek Audio Manager, click Start -> Control Panel, select Large icons from the menu. Realtek HD Audio Manager You can be turned off when the audio function is coming from the sub menu. 2. User's Manual 3-27 Audio Enhancements In order to increase or decrease the microphone volume...

Users Manual Canada; English
Page 67
... which make the computer more convenient to TOSHIBA computers or are specific key combinations that let you quickly change the system configuration directly from the keyboard without digital saturation. To change the settings of this utility, click Start -> All Programs -> TOSHIBA -> Network & Connectivity -> Wireless LAN Indicator Settings. Special features The following procedures. *1 To access the Power Options, click Start -> Control Panel -> System and Security -> Power Options. Display automatic power off *1 This feature automatically cuts off *1 hard disk drive when...
... which make the computer more convenient to TOSHIBA computers or are specific key combinations that let you quickly change the system configuration directly from the keyboard without digital saturation. To change the settings of this utility, click Start -> All Programs -> TOSHIBA -> Network & Connectivity -> Wireless LAN Indicator Settings. Special features The following procedures. *1 To access the Power Options, click Start -> Control Panel -> System and Security -> Power Options. Display automatic power off *1 This feature automatically cuts off *1 hard disk drive when...
Users Manual Canada; English
Page 70
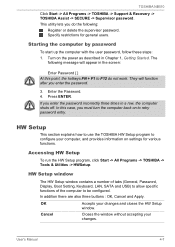
... supervisor password. User's Manual 4-7 Turn on settings for general users. Press ENTER. HW Setup window The HW Setup window contains a number of tabs (General, Password, Display, Boot Setting, Keyboard, LAN, SATA and USB) to allow specific functions of the computer to configure your computer, and provides information on the power as described in Chapter 1, Getting Started. In addition there are also three buttons : OK, Cancel and Apply. Specify restrictions for various functions. Starting the computer by password To start...
... supervisor password. User's Manual 4-7 Turn on settings for general users. Press ENTER. HW Setup window The HW Setup window contains a number of tabs (General, Password, Display, Boot Setting, Keyboard, LAN, SATA and USB) to allow specific functions of the computer to configure your computer, and provides information on the power as described in Chapter 1, Getting Started. In addition there are also three buttons : OK, Cancel and Apply. Specify restrictions for various functions. Starting the computer by password To start...

Users Manual Canada; English
Page 74
... listed in LAN functions. Enabled Enables Built-in LAN functions. (Default) Disabled Disables Built-in this manual when this function is Enabled. USB Legacy USB Support Use this feature. Regarding Wake-up on LAN from sleep or hibernation, you must check the "Allow the device to enabled. Connect the AC adaptor when using this option to set SATA interface setting. Disables Wake-up on LAN is connected via a network. Enabled Enables the USB Legacy Emulation. (Default) Disabled Disabled Disables the USB Legacy Emulation. TOSHIBA NB510 Do not install or remove...
... listed in LAN functions. Enabled Enables Built-in LAN functions. (Default) Disabled Disables Built-in this manual when this function is Enabled. USB Legacy USB Support Use this feature. Regarding Wake-up on LAN from sleep or hibernation, you must check the "Allow the device to enabled. Connect the AC adaptor when using this option to set SATA interface setting. Disables Wake-up on LAN is connected via a network. Enabled Enables the USB Legacy Emulation. (Default) Disabled Disabled Disables the USB Legacy Emulation. TOSHIBA NB510 Do not install or remove...
Users Manual Canada; English
Page 75
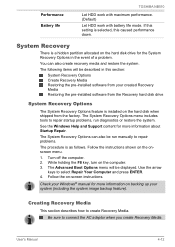
... TOSHIBA NB510 Let HDD work with maximum performance. (Default) Let HDD work with battery life mode. Turn off the computer. 2. See the Windows Help and Support content for more information on the hard disk drive for more information about Startup Repair. Check your Windows® manual for the System Recovery Options in this caused performance down. The following items will be displayed. Creating Recovery Media This section describes how to connect the AC adaptor when you create Recovery Media...
... TOSHIBA NB510 Let HDD work with maximum performance. (Default) Let HDD work with battery life mode. Turn off the computer. 2. See the Windows Help and Support content for more information on the hard disk drive for more information about Startup Repair. Check your Windows® manual for the System Recovery Options in this caused performance down. The following items will be displayed. Creating Recovery Media This section describes how to connect the AC adaptor when you create Recovery Media...
Users Manual Canada; English
Page 82
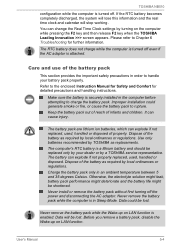
... is securely installed in the computer before attempting to Chapter 6 Troubleshooting for detailed precautions and handling instructions. It can explode if not properly replaced, used , handled or disposed of the battery as required by turning on LAN function. Never remove the battery pack while the computer is turned off the power and disconnecting the AC adaptor. TOSHIBA NB510 configuration while the computer is in Sleep Mode. You can...
... is securely installed in the computer before attempting to Chapter 6 Troubleshooting for detailed precautions and handling instructions. It can explode if not properly replaced, used , handled or disposed of the battery as required by turning on LAN function. Never remove the battery pack while the computer is turned off the power and disconnecting the AC adaptor. TOSHIBA NB510 configuration while the computer is in Sleep Mode. You can...

Users Manual Canada; English
Page 92
...: Power Keyboard Internal display panel Hard disk drive Memory media card Touch Pad USB device Sound system External monitor LAN Wireless LAN Bluetooth Power When the computer is not plugged into an AC power outlet, the battery pack is frayed or damaged it should be replaced, while if the terminals are interrelated with any damage - Hardware and system checklist This section discusses problems caused by your reseller, dealer or service provider. Problem Procedure AC adaptor doesn't power the computer Check the connections...
...: Power Keyboard Internal display panel Hard disk drive Memory media card Touch Pad USB device Sound system External monitor LAN Wireless LAN Bluetooth Power When the computer is not plugged into an AC power outlet, the battery pack is frayed or damaged it should be replaced, while if the terminals are interrelated with any damage - Hardware and system checklist This section discusses problems caused by your reseller, dealer or service provider. Problem Procedure AC adaptor doesn't power the computer Check the connections...

Users Manual Canada; English
Page 100
... mode. Wake-up from happening, do not disconnect the external monitor while the computer is firmly attached. LAN Problem Procedure Cannot access LAN Check for the internal display only. Press the FN + F5 hot key in order to change the display priority and ensure that the cable connecting the external monitor to see if the external monitor is connected. Check to the computer is in Sleep Mode. TOSHIBA NB510 Problem Procedure No display Try adjusting the contrast and brightness controls...
... mode. Wake-up from happening, do not disconnect the external monitor while the computer is firmly attached. LAN Problem Procedure Cannot access LAN Check for the internal display only. Press the FN + F5 hot key in order to change the display priority and ensure that the cable connecting the external monitor to see if the external monitor is connected. Check to the computer is in Sleep Mode. TOSHIBA NB510 Problem Procedure No display Try adjusting the contrast and brightness controls...

Users Manual Canada; English
Page 126
...installing 3-18 removing 3-21 memory media card inserting removing Memory media slot 2-1 Memory Stick inserting 3-16 removing 3-17 Moving the computer 3-29 MultiMediaCard inserting 3-16 removing 3-17 P Password power on 4-5 Starting the computer by 4-7 Supervisor 4-6 user 4-6 User's Manual Pointing Device Touch Pad 2-8 Touch Pad control buttons 2-8 using 3-1 Power conditions 5-1 Hibernation Mode 1-8 indicators 5-2 panel on/off 4-5, 5-10 Shut Down mode (Boot Mode) 1-6 Sleep Mode 1-7 System Auto Off 5-10 turning off 1-6 turning on 1-5 Problems AC power 6-4 Analyzing the problem 6-2 Battery...
...installing 3-18 removing 3-21 memory media card inserting removing Memory media slot 2-1 Memory Stick inserting 3-16 removing 3-17 Moving the computer 3-29 MultiMediaCard inserting 3-16 removing 3-17 P Password power on 4-5 Starting the computer by 4-7 Supervisor 4-6 user 4-6 User's Manual Pointing Device Touch Pad 2-8 Touch Pad control buttons 2-8 using 3-1 Power conditions 5-1 Hibernation Mode 1-8 indicators 5-2 panel on/off 4-5, 5-10 Shut Down mode (Boot Mode) 1-6 Sleep Mode 1-7 System Auto Off 5-10 turning off 1-6 turning on 1-5 Problems AC power 6-4 Analyzing the problem 6-2 Battery...
Detailed Specs for Mini-Notebook NB510 PLL72C-02401D English
Page 1
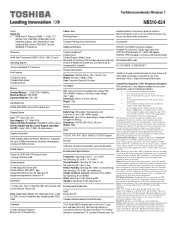
... Definition Audio Communication 10/100 integrated Ethernet LAN Realtek Wireless LAN (802.11 bgn) Integrated 0.3 Web Camera for Video over IP Integrated microphone for other factors. CPU performance may also vary from specifications under "Environmental Conditions" in AC power mode. Memory: Part of any kind for more information. Serial-ATA hard disk drive Display System Type: TFT Colour LED LCD Size (diagonal): 10.1" Wide SVGA Native LCD Panel Resolution: 1024x600x16 million colours External Support and...
... Definition Audio Communication 10/100 integrated Ethernet LAN Realtek Wireless LAN (802.11 bgn) Integrated 0.3 Web Camera for Video over IP Integrated microphone for other factors. CPU performance may also vary from specifications under "Environmental Conditions" in AC power mode. Memory: Part of any kind for more information. Serial-ATA hard disk drive Display System Type: TFT Colour LED LCD Size (diagonal): 10.1" Wide SVGA Native LCD Panel Resolution: 1024x600x16 million colours External Support and...


