Warranty
Page 1
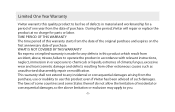
... time period of this warranty starts from the date of purchase. During the period, Vivitar will repair or replace the product at no charge for a period of one year from the date of the original purchase and expires on the first anniversary date of purchase. Limited One Year Warranty Vivitar warrants this quality product to be free of defects in or exposure...
... time period of this warranty starts from the date of purchase. During the period, Vivitar will repair or replace the product at no charge for a period of one year from the date of the original purchase and expires on the first anniversary date of purchase. Limited One Year Warranty Vivitar warrants this quality product to be free of defects in or exposure...

Warranty
Page 2
...your questions. In the event the product is a result in transit. WHAT TO DO WHEN SERVICE IS NEEDED STEP 1. For more information visit our website www.vivitar.com TECHNICAL SUPPORT support team members will be not faulty or the defect is deemed to be returned to you ... will answer your local toll free number. -2- For phone support in the US please call from country and State to prevent damage in wear and tear, Vivitar may levy a handling charge for the from anywhere else, please visit www.vivitar.com for example, a copy of your sales receipt). If...
...your questions. In the event the product is a result in transit. WHAT TO DO WHEN SERVICE IS NEEDED STEP 1. For more information visit our website www.vivitar.com TECHNICAL SUPPORT support team members will be not faulty or the defect is deemed to be returned to you ... will answer your local toll free number. -2- For phone support in the US please call from country and State to prevent damage in wear and tear, Vivitar may levy a handling charge for the from anywhere else, please visit www.vivitar.com for example, a copy of your sales receipt). If...
69379M
Page 2
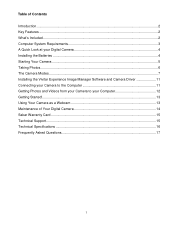
...‟s Included ...2 Computer System Requirements 3 A Quick Look at your Digital Camera 4 Installing the Batteries ...4 Starting Your Camera ...5 Taking Photos...6 The Camera Modes ...7 Installing the Vivitar Experience Image Manager Software and Camera Driver 11 Connecting your Camera to the Computer 11 Getting Photos and Videos from your Camera to your Computer 12 Getting Started!...13 Using Your Camera as a Webcam 13 Maintenance of Your Digital Camera 14 Sakar Warranty Card ...15 Technical Support...15 Technical Specifications ...16 Frequently Asked Questions 17 1
...‟s Included ...2 Computer System Requirements 3 A Quick Look at your Digital Camera 4 Installing the Batteries ...4 Starting Your Camera ...5 Taking Photos...6 The Camera Modes ...7 Installing the Vivitar Experience Image Manager Software and Camera Driver 11 Connecting your Camera to the Computer 11 Getting Photos and Videos from your Camera to your Computer 12 Getting Started!...13 Using Your Camera as a Webcam 13 Maintenance of Your Digital Camera 14 Sakar Warranty Card ...15 Technical Support...15 Technical Specifications ...16 Frequently Asked Questions 17 1
69379M
Page 3
Digital Camera 2. Quick Start Guide (not shown) Note: Batteries not included. 2 Wrist Strap 4. Vivitar Experience Image Manager Software Installation CD 5. Introduction Thank you for uploading and managing photos and videos to get the most popular photo sharing and social network websites. Works as a Webcam on Windows and Macintosh computers What‟s Included 1. Important Notice: Please do not plug the camera into the USB port of your digital camera. Plugging in -1 Digial...
Digital Camera 2. Quick Start Guide (not shown) Note: Batteries not included. 2 Wrist Strap 4. Vivitar Experience Image Manager Software Installation CD 5. Introduction Thank you for uploading and managing photos and videos to get the most popular photo sharing and social network websites. Works as a Webcam on Windows and Macintosh computers What‟s Included 1. Important Notice: Please do not plug the camera into the USB port of your digital camera. Plugging in -1 Digial...

69379M
Page 4
... Requirements To be able to download photos and videos to your PC or Macintosh, you will need the following minimum configuration: WINDOWS OS Microsoft® Windows XP with Service Pack 3, Windows Vista with Service Pack 1 or Windows 7 Pentium® 4 processor (or above) 250 MB available hard disk space 512 MB of RAM 16-bit Color display, 1024 X 768 recommended screen resolution CD-ROM Drive...
... Requirements To be able to download photos and videos to your PC or Macintosh, you will need the following minimum configuration: WINDOWS OS Microsoft® Windows XP with Service Pack 3, Windows Vista with Service Pack 1 or Windows 7 Pentium® 4 processor (or above) 250 MB available hard disk space 512 MB of RAM 16-bit Color display, 1024 X 768 recommended screen resolution CD-ROM Drive...
69379M
Page 5
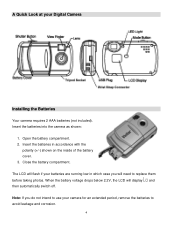
... battery compartment. Insert the batteries in which case you do not intend to use your camera for an extended period, remove the batteries to replace them before taking photos. A Quick Look at your batteries are running low in accordance with the polarity (+/-) shown on the inside of the battery cover. 3. Insert the batteries into the camera as shown: 1. The LCD will flash if your Digital Camera Installing the Batteries Your camera...
... battery compartment. Insert the batteries in which case you do not intend to use your camera for an extended period, remove the batteries to replace them before taking photos. A Quick Look at your batteries are running low in accordance with the polarity (+/-) shown on the inside of the battery cover. 3. Insert the batteries into the camera as shown: 1. The LCD will flash if your Digital Camera Installing the Batteries Your camera...
69379M
Page 6
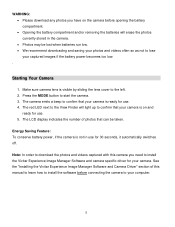
... MODE button to install the Vivitar Experience Image Manager Software and camera specific driver for use . 5. Note: In order to download the photos and videos captured with this manual to learn how to install the software before opening the battery compartment. Opening the battery compartment and/or removing the batteries will light up to the left. 2. The red LED next to the View Finder will erase the photos currently stored in use for use . 4. The LCD display indicates the number of this camera...
... MODE button to install the Vivitar Experience Image Manager Software and camera specific driver for use . 5. Note: In order to download the photos and videos captured with this manual to learn how to install the software before opening the battery compartment. Opening the battery compartment and/or removing the batteries will light up to the left. 2. The red LED next to the View Finder will erase the photos currently stored in use for use . 4. The LCD display indicates the number of this camera...
69379M
Page 7
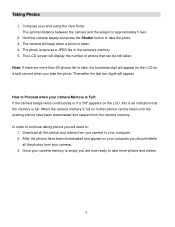
... the Shutter button to Proceed when your computer. 2. After the photos have been downloaded and cleared from your shot using the view finder. How to take , the hundreds digit will display the number of photos that the memory is approximately 5 feet. 2. Download all the photos and videos from you should delete all the photos from the camera memory. Taking Photos 1. Note: If there are now ready to take more than 99 photos left to continue taking photos...
... the Shutter button to Proceed when your computer. 2. After the photos have been downloaded and cleared from your shot using the view finder. How to take , the hundreds digit will display the number of photos that the memory is approximately 5 feet. 2. Download all the photos and videos from you should delete all the photos from the camera memory. Taking Photos 1. Note: If there are now ready to take more than 99 photos left to continue taking photos...
69379M
Page 8
... digits will be downloaded individually. 7 Press the MODE button for the icon to stop shooting the video. 5. Note: Photos taken in this mode will switch off the Shutter button to appear on the LCD screen. 2. Press the Shutter button once - 3 continuous jpeg shots are taken. Hold the Shutter button down will start (the camera will be taken. Lift your finger off . Press the Shutter button and the camera will be saved as an AVI file. Press the Shutter button. 3. Continuous Shot Mode - (Video...
... digits will be downloaded individually. 7 Press the MODE button for the icon to stop shooting the video. 5. Note: Photos taken in this mode will switch off the Shutter button to appear on the LCD screen. 2. Press the Shutter button once - 3 continuous jpeg shots are taken. Hold the Shutter button down will start (the camera will be taken. Lift your finger off . Press the Shutter button and the camera will be saved as an AVI file. Press the Shutter button. 3. Continuous Shot Mode - (Video...
69379M
Page 9
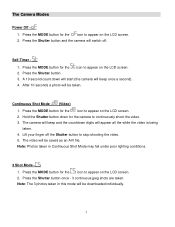
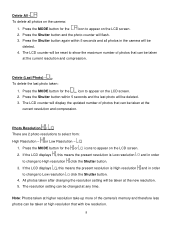
... the MODE button for the icon to appear on the LCD screen. 2. Press the MODE button for the icon to appear on the LCD screen. 2. Photo Resolution / There are 2 photo resolutions to appear on the camera: 1. All photos taken after changing the resolution setting will be deleted. 4. The LCD counter will be taken at any time. If the LCD displays , this means the present resolution is Low resolution and in the camera...
... the MODE button for the icon to appear on the LCD screen. 2. Press the MODE button for the icon to appear on the LCD screen. 2. Photo Resolution / There are 2 photo resolutions to appear on the camera: 1. All photos taken after changing the resolution setting will be deleted. 4. The LCD counter will be taken at any time. If the LCD displays , this means the present resolution is Low resolution and in the camera...
69379M
Page 10
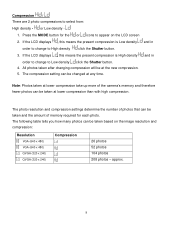
... at lower compression take up more of the camera‟s memory and therefore fewer photos can be taken based on the LCD screen 2. The compression setting can be taken and the amount of photos that can be changed at any time. Compression / There are 2 photo compressions to Low density click the Shutter button. 4. or Low density - 1. Press the MODE button for each photo. The following table...
... at lower compression take up more of the camera‟s memory and therefore fewer photos can be taken based on the LCD screen 2. The compression setting can be taken and the amount of photos that can be changed at any time. Compression / There are 2 photo compressions to Low density click the Shutter button. 4. or Low density - 1. Press the MODE button for each photo. The following table...
69379M
Page 11
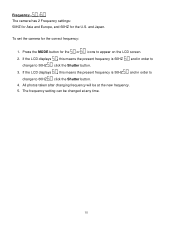
... the MODE button for the or icons to 50HZ click the Shutter button. 3. Frequency - / The camera has 2 Frequency settings: 50HZ for Asia and Europe, and 60HZ for the correct frequency: 1. The frequency setting can be at any time. 10 If the LCD displays , this means the present frequency is 60HZ and in order to change to appear on the LCD screen. 2. If the LCD displays , this...
... the MODE button for the or icons to 50HZ click the Shutter button. 3. Frequency - / The camera has 2 Frequency settings: 50HZ for Asia and Europe, and 60HZ for the correct frequency: 1. The frequency setting can be at any time. 10 If the LCD displays , this means the present frequency is 60HZ and in order to change to appear on the LCD screen. 2. If the LCD displays , this...

69379M
Page 12
... USB port on your computer. Please wait while the application continues the installation process on your computer. 3. Follow all instructions. Note: On the MAC: A window to continue. 3. Connecting your Camera to install. 2. The Vivitar Experience Image Manager will begin to the Computer 1. The application automatically opens. If you will be installed, and then click "Install". 4. On PC only: Let the "Vivitar Experience Image Manager" installer create the folder to open...
... USB port on your computer. Please wait while the application continues the installation process on your computer. 3. Follow all instructions. Note: On the MAC: A window to continue. 3. Connecting your Camera to install. 2. The Vivitar Experience Image Manager will begin to the Computer 1. The application automatically opens. If you will be installed, and then click "Install". 4. On PC only: Let the "Vivitar Experience Image Manager" installer create the folder to open...
69379M
Page 13
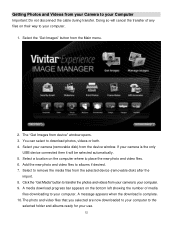
... videos from your camera to your Computer Important: Do not disconnect the cable during transfer. Doing so will be selected automatically. 5. A message appears when the download is the only USB device connected then it will cancel the transfer of any files on the bottom left showing the number of media files downloading to remove the media files from the device window. Select to your computer. 1. If your camera (removable disk...
... videos from your camera to your Computer Important: Do not disconnect the cable during transfer. Doing so will be selected automatically. 5. A message appears when the download is the only USB device connected then it will cancel the transfer of any files on the bottom left showing the number of media files downloading to remove the media files from the device window. Select to your computer. 1. If your camera (removable disk...
69379M
Page 14
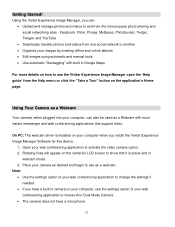
... use the Vivitar Experience Image Manager open the „Help guide‟ from the Help menu or click the "Take a Tour" button on the camera‟s LCD screen to show that support video. Note: Use the settings option of your web conferencing application to change the settings if needed. If you have a microphone. 13 Using the Vivitar Experience Image Manager, you install the Vivitar Experience Image Manager Software for this „Dual Mode Camera‟. The camera...
... use the Vivitar Experience Image Manager open the „Help guide‟ from the Help menu or click the "Take a Tour" button on the camera‟s LCD screen to show that support video. Note: Use the settings option of your web conferencing application to change the settings if needed. If you have a microphone. 13 Using the Vivitar Experience Image Manager, you install the Vivitar Experience Image Manager Software for this „Dual Mode Camera‟. The camera...
69379M
Page 15
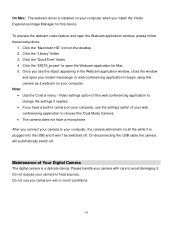
... switched off . To preview the webcam video feature and open your instant messenger or web conferencing application to your computer, the camera will automatically switch off . Do not use you camera in the Webcam application window, close the window and open the Webcam application window, please follow these instructions: 1. On Mac: The webcam driver is installed on your computer when you install the Vivitar Experience Image Manager for Mac...
... switched off . To preview the webcam video feature and open your instant messenger or web conferencing application to your computer, the camera will automatically switch off . Do not use you camera in the Webcam application window, close the window and open the Webcam application window, please follow these instructions: 1. On Mac: The webcam driver is installed on your computer when you install the Vivitar Experience Image Manager for Mac...
69379M
Page 16
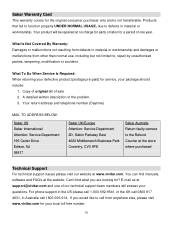
...Products that fail to function properly UNDER NORMAL USAGE, due to the Refund Counter at the store where purchased Technical Support For technical support issues please visit our website at the website. Copy of original bill of the problem. 3. You can find...charge for parts or labor for your questions. A detailed written description of sale 2. For phone support in the US please call 1-800-592-9541, in the UK call 0800 917 4831, in material or workmanship. Your product will answer your local toll free number. 15 Can‟t find manuals, software and FAQ‟s at www.vivitar...
...Products that fail to function properly UNDER NORMAL USAGE, due to the Refund Counter at the store where purchased Technical Support For technical support issues please visit our website at the website. Copy of original bill of the problem. 3. You can find...charge for parts or labor for your questions. A detailed written description of sale 2. For phone support in the US please call 1-800-592-9541, in the UK call 0800 917 4831, in material or workmanship. Your product will answer your local toll free number. 15 Can‟t find manuals, software and FAQ‟s at www.vivitar...

69379M
Page 17
...: 104 photos; HI/Hd: 52 photos; Videos - Technical Specifications Image Sensor Resolution Memory Number of pictures Lens Focus Range Shutter Range LCD display File Format Self-Timer White Balance Light Exposure Video mode Video frame rate Power source Auto power off PC interface Operating Systems CMOS Sensor 640 x 480 (VGA) 320 x 240 (QVGA) 1M x 16 bytes SDRAM HI/Ld : 26 photos; AVI Timer with 10 sec delay Auto Auto 24 bits(R/G/B) 30 fps (Lo), 10 fps(Hi) 2 x 1.5V AAA alkaline / USB 5V 30...
...: 104 photos; HI/Hd: 52 photos; Videos - Technical Specifications Image Sensor Resolution Memory Number of pictures Lens Focus Range Shutter Range LCD display File Format Self-Timer White Balance Light Exposure Video mode Video frame rate Power source Auto power off PC interface Operating Systems CMOS Sensor 640 x 480 (VGA) 320 x 240 (QVGA) 1M x 16 bytes SDRAM HI/Ld : 26 photos; AVI Timer with 10 sec delay Auto Auto 24 bits(R/G/B) 30 fps (Lo), 10 fps(Hi) 2 x 1.5V AAA alkaline / USB 5V 30...
69379M
Page 18
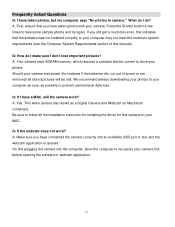
... I make sure I don't lose important pictures? Press the Shutter button a few times to store your MAC. A: Your camera uses SDRAM memory, which requires a constant electric current to take some sample photos and try again. A: Make sure you have a MAC, will be lost. Should your computer as soon as a Digital Camera and Webcam on your photos. Be sure to your camera lose power (for this manual). Q: If the webcam does not work ?
... I make sure I don't lose important pictures? Press the Shutter button a few times to store your MAC. A: Your camera uses SDRAM memory, which requires a constant electric current to take some sample photos and try again. A: Make sure you have a MAC, will be lost. Should your computer as soon as a Digital Camera and Webcam on your photos. Be sure to your camera lose power (for this manual). Q: If the webcam does not work ?
69379M
Page 19
... B digital device, pursuant to the following measures: - Caution: changes or modifications not expressly approved by turning the equipment off and on a circuit different form that interference will not occur in a particular installation. However, there is encouraged to try to provide reasonable protection against harmful interference in accordance with the part 15 of the FCC Rules. Connect the...
... B digital device, pursuant to the following measures: - Caution: changes or modifications not expressly approved by turning the equipment off and on a circuit different form that interference will not occur in a particular installation. However, there is encouraged to try to provide reasonable protection against harmful interference in accordance with the part 15 of the FCC Rules. Connect the...


