
English Manual
Page 1
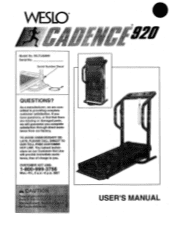
... trained technicians on our Customer Hot Line will guarantee you . CUST0O0MER HOT L3INE:5 6 l 8 9997 Mon.-Fri., 6 a.m.-6 p.m. WLTL92065 Serial No. If you have questions, or find that there are missing or damaged parts, we are committed to you complete satisfaction through direct assistance from our factory. WESLD „..„ 11 21,1 •el Model No. MST USER'S MANUAL...
... trained technicians on our Customer Hot Line will guarantee you . CUST0O0MER HOT L3INE:5 6 l 8 9997 Mon.-Fri., 6 a.m.-6 p.m. WLTL92065 Serial No. If you have questions, or find that there are missing or damaged parts, we are committed to you complete satisfaction through direct assistance from our factory. WESLD „..„ 11 21,1 •el Model No. MST USER'S MANUAL...

English Manual
Page 2
Save the EXPLODED DRAWING and PART LIST for future reference. ure MA, e 0at 9 e the treadmill oft as describp e: Ire shot cleans Ye. on..optitioctrii e .4. sr. Wit no udedj ill . • . 66 e rc uit ... this manual. TABLE OF CONTENTS IMPORTANT PRECAUTIONS BEFORE YOU BEGIN ASSEMBLY OPERATION AND ADJUSTMENT HOW TO FOLD AND MOVE THE TREADMILL TROUBLE-SHOOTING CONDITIONING GUIDELINES ORDERING REPLACEMENT PARTS LIMITED WARRANTY 2 4 5 7 11 12 14 Back Cover Back Cover Note: An EXPLODED DRAWING and a PART LIST are attached to persons ow' end tnfor` before op:e• rating the ...
Save the EXPLODED DRAWING and PART LIST for future reference. ure MA, e 0at 9 e the treadmill oft as describp e: Ire shot cleans Ye. on..optitioctrii e .4. sr. Wit no udedj ill . • . 66 e rc uit ... this manual. TABLE OF CONTENTS IMPORTANT PRECAUTIONS BEFORE YOU BEGIN ASSEMBLY OPERATION AND ADJUSTMENT HOW TO FOLD AND MOVE THE TREADMILL TROUBLE-SHOOTING CONDITIONING GUIDELINES ORDERING REPLACEMENT PARTS LIMITED WARRANTY 2 4 5 7 11 12 14 Back Cover Back Cover Note: An EXPLODED DRAWING and a PART LIST are attached to persons ow' end tnfor` before op:e• rating the ...

English Manual
Page 3
... ... Adjust the.speed small increments to play on or around treadmill. • Storage latch must be fully engaged before per- admdl 40111])tis: rl .a.esris :; If the decal is missing, or if it is intended, only an exercise aid in determining heart rate trends in orde to order a free replacement decal (see ORDERING REPLACEMENT PARTS on your treadmill. B. e treadmill isnot.in the location shown. power .cord before treadmill...
... ... Adjust the.speed small increments to play on or around treadmill. • Storage latch must be fully engaged before per- admdl 40111])tis: rl .a.esris :; If the decal is missing, or if it is intended, only an exercise aid in determining heart rate trends in orde to order a free replacement decal (see ORDERING REPLACEMENT PARTS on your treadmill. B. e treadmill isnot.in the location shown. power .cord before treadmill...

English Manual
Page 4
..., please review the drawing using the treadmill. The model number of this manual carefully before calling. Console Speed Control Accessory Tray z77 ,.65 72F Storage Latch Key/Clip Towel Rack Water Bottle Holder (Water Bottle is WLTL92065. The serial number can be found on a decal attached to let you have additional questions, below and familiarize yourself with the labeled parts. FRONT Circuit Breaker Power Cord BACK Rear Roller Adjustment Bolt 0 Incline Leg. Cushioned Walking Platform...
..., please review the drawing using the treadmill. The model number of this manual carefully before calling. Console Speed Control Accessory Tray z77 ,.65 72F Storage Latch Key/Clip Towel Rack Water Bottle Holder (Water Bottle is WLTL92065. The serial number can be found on a decal attached to let you have additional questions, below and familiarize yourself with the labeled parts. FRONT Circuit Breaker Power Cord BACK Rear Roller Adjustment Bolt 0 Incline Leg. Cushioned Walking Platform...

English Manual
Page 5
.... Set the treadmill in the indicated locations. Next, the treadmill should be included. 57 57 2. Assembly requires two adjustable wrenches (not included). Note: One extra Base Pad may also be needed. 1. Firmly hold the left side of the Frame (23). A phillips screwdriver (not included) may be raised to the storage posi-\tion. Raise the 2 handrails until assembly is a Frame Guide...
.... Set the treadmill in the indicated locations. Next, the treadmill should be included. 57 57 2. Assembly requires two adjustable wrenches (not included). Note: One extra Base Pad may also be needed. 1. Firmly hold the left side of the Frame (23). A phillips screwdriver (not included) may be raised to the storage posi-\tion. Raise the 2 handrails until assembly is a Frame Guide...

English Manual
Page 6
... Clip onto the Rear Roller Cover (78) 8 in the locations shown at the right, and hold the treadmill firmly. Raise the treadmill until the Frame Guide (52) is past the Storage Latch. Make sure that all parts are tightened before you use the treadmill. Before moving the treadmill, see the inset drawing). Using your right hand to the left. Hold the treadmill with two Stabilizer Bolts (62) and...
... Clip onto the Rear Roller Cover (78) 8 in the locations shown at the right, and hold the treadmill firmly. Raise the treadmill until the Frame Guide (52) is past the Storage Latch. Make sure that all parts are tightened before you use the treadmill. Before moving the treadmill, see the inset drawing). Using your right hand to the left. Hold the treadmill with two Stabilizer Bolts (62) and...

English Manual
Page 7
... used to connect the surge protector to a permanent ground such as a properly grounded outlet box cover • Your treadmill, like any other type of your home's power. cause excessive wear. Grounded Outlet Grounded Outlet Box Adapter Grounding Pin 0 .44 % s,„,. If it :,,,: re indoubt as shown in place by sudden voltage changes in drawing 2 may be p t ep: to the walking belt...
... used to connect the surge protector to a permanent ground such as a properly grounded outlet box cover • Your treadmill, like any other type of your home's power. cause excessive wear. Grounded Outlet Grounded Outlet Box Adapter Grounding Pin 0 .44 % s,„,. If it :,,,: re indoubt as shown in place by sudden voltage changes in drawing 2 may be p t ep: to the walking belt...

English Manual
Page 8
alkaline batteries are recommended. To install batteries, open the battery cover as shown in the drawing below. DIAGRAM OF THE CONSOLE Monitor Displays Speed Control WED "zoiwd.1.4.mily THUMB PULSE," TIME PULSE CAL/FAT CAL ler Far baol IA W NING: I • Road ON/RESET die Pulse Sensor DIST i E SP ED 3q BPM HEART RATE TRAINING ZONES V NMOOOO MOM 0 NENM O CI:Sjan Aie Ng O z$W MAN OO 114i'' ;fix::`:ENO OOO :ilAW MEM O O OO...
alkaline batteries are recommended. To install batteries, open the battery cover as shown in the drawing below. DIAGRAM OF THE CONSOLE Monitor Displays Speed Control WED "zoiwd.1.4.mily THUMB PULSE," TIME PULSE CAL/FAT CAL ler Far baol IA W NING: I • Road ON/RESET die Pulse Sensor DIST i E SP ED 3q BPM HEART RATE TRAINING ZONES V NMOOOO MOM 0 NENM O CI:Sjan Aie Ng O z$W MAN OO 114i'' ;fix::`:ENO OOO :ilAW MEM O O OO...

English Manual
Page 9
... just installed batteries, the displays will automatically change from one number to move at slow speed. Carefully step onto the walking belt and begin exercising. plays. STEP BY STEP CONSOLE OPERATION Before operating the console, make sure that you have PULSE rsztri U •L CAL/FAT CAL. TIME 1712:39 • DISTANCE This display shows the total distance you have turned the speed control to operate the console. 11 Insert the key fully into the power switch...
... just installed batteries, the displays will automatically change from one number to move at slow speed. Carefully step onto the walking belt and begin exercising. plays. STEP BY STEP CONSOLE OPERATION Before operating the console, make sure that you have PULSE rsztri U •L CAL/FAT CAL. TIME 1712:39 • DISTANCE This display shows the total distance you have turned the speed control to operate the console. 11 Insert the key fully into the power switch...

English Manual
Page 10
... walking belt is about five minutes. The incline will not be about 5%. Step onto the foot rails, stop the walking belt and remove the key. The pulse sensor is re- /I\ moved, the displays will automatically turn off the sensor and allow the display to be PULSE shown. Press down the pulse sensor. Note: Any time that your thumb off . 10 Hold your pulse, if desired. Hold the Rear Roller Cover in these locations Incline Leg Hold the rear roller cover...
... walking belt is about five minutes. The incline will not be about 5%. Step onto the foot rails, stop the walking belt and remove the key. The pulse sensor is re- /I\ moved, the displays will automatically turn off the sensor and allow the display to be PULSE shown. Press down the pulse sensor. Note: Any time that your thumb off . 10 Hold your pulse, if desired. Hold the Rear Roller Cover in these locations Incline Leg Hold the rear roller cover...

English Manual
Page 11
... TREADMILL FOR STORAGE Before folding the treadmill, unplug the power cord. Make sure that the storage latch is resting in the locations shown at the right, and hold the treadmill firmly. Keep the treadmill out of the treadmill with your legs rather than your left thumb, slide open the storage latch. Make sure that the storage latch closes fully over the frame guide. 1. Hold the upper end of direct sunlight. Using...
... TREADMILL FOR STORAGE Before folding the treadmill, unplug the power cord. Make sure that the storage latch is resting in the locations shown at the right, and hold the treadmill firmly. Keep the treadmill out of the treadmill with your legs rather than your left thumb, slide open the storage latch. Make sure that the storage latch closes fully over the frame guide. 1. Hold the upper end of direct sunlight. Using...

English Manual
Page 12
... legs and keep your back straight. ( TROUBLE-SHOOTING Most treadmill problems can be solved by following the steps below. Make sure that the power cord is plugged into a surge protector, and that the key is needed, please call our Customer Service Department, toll-free. After the power cord has been plugged in . Make sure that applies, and follow the steps listed. Reinsert the key fully into the console. (See step...
... legs and keep your back straight. ( TROUBLE-SHOOTING Most treadmill problems can be solved by following the steps below. Make sure that the power cord is plugged into a surge protector, and that the key is needed, please call our Customer Service Department, toll-free. After the power cord has been plugged in . Make sure that applies, and follow the steps listed. Reinsert the key fully into the console. (See step...

English Manual
Page 13
... power cord, insert the key and run the treadmill for a few minutes. SYMPTOM: THE TREADMILL SITS UNEVENLY ON THE FLOOR a. Check the batteries in the incline system. 13 If necessary, loosen the Screw (19) and move the'Reed Switch slightly. b. Using the alien wrench, turn . b. Most problems are attached to the left rear roller adjustment bolt counterclockwise 1/4 of the hood. 3. SYMPTOM: THE DISPLAYS OF THE CONSOLE DO NOT FUNCTION PROPERLY a. If the walking belt...
... power cord, insert the key and run the treadmill for a few minutes. SYMPTOM: THE TREADMILL SITS UNEVENLY ON THE FLOOR a. Check the batteries in the incline system. 13 If necessary, loosen the Screw (19) and move the'Reed Switch slightly. b. Using the alien wrench, turn . b. Most problems are attached to the left rear roller adjustment bolt counterclockwise 1/4 of the hood. 3. SYMPTOM: THE DISPLAYS OF THE CONSOLE DO NOT FUNCTION PROPERLY a. If the walking belt...

English Manual
Page 14
... first few months of your training zone in the table Warming up mum possible heart rate. You can find your training zone as a guide. Training zones are general guide- Remember-these are listed ac- Exercise for exercise by using the pulse sensor. This increases the demand WORKOUT GUIDELINES on the heart to pump blood to the muscles, and on the console to PERFORMANCE to oxygenate the...
... first few months of your training zone in the table Warming up mum possible heart rate. You can find your training zone as a guide. Training zones are general guide- Remember-these are listed ac- Exercise for exercise by using the pulse sensor. This increases the demand WORKOUT GUIDELINES on the heart to pump blood to the muscles, and on the console to PERFORMANCE to oxygenate the...

English Manual
Page 15
...of the opposite foot toward your hips. Stretches: Hamstrings, lower back and groin. 3 3. Keep your back leg straight and your extended leg. Stretches: Quadriceps and hip muscles. SUGGESTED STRETCHES The correct form for both legs. Hold for 15 counts, then relax. Reach toward your... exercise program, do not keep your pulse in the drawings below. Move slowly as you and rest it against a wail for 15 counts, then relax. Allow your back and shoulders to prevent post-exercise problems. Exercise Frequency To maintain or improve your condition, complete three workouts ...
...of the opposite foot toward your hips. Stretches: Hamstrings, lower back and groin. 3 3. Keep your back leg straight and your extended leg. Stretches: Quadriceps and hip muscles. SUGGESTED STRETCHES The correct form for both legs. Hold for 15 counts, then relax. Reach toward your... exercise program, do not keep your pulse in the drawings below. Move slowly as you and rest it against a wail for 15 counts, then relax. Allow your back and shoulders to prevent post-exercise problems. Exercise Frequency To maintain or improve your condition, complete three workouts ...

English Manual
Page 16
... specifically set forth herein. This warranty extends only to state. No other rights which warranty claim is authorized by ICON. Accordingly, the above is made must be prepared to give the following information: • The MODEL NUMBER OF THE PRODUCT (WLTL92065). • The NAME OF THE PRODUCT (WESLO® CADENCE 920 treadmill). • The SERIAL NUMBER OF THE PRODUCT (see the front cover of this manual...
... specifically set forth herein. This warranty extends only to state. No other rights which warranty claim is authorized by ICON. Accordingly, the above is made must be prepared to give the following information: • The MODEL NUMBER OF THE PRODUCT (WLTL92065). • The NAME OF THE PRODUCT (WESLO® CADENCE 920 treadmill). • The SERIAL NUMBER OF THE PRODUCT (see the front cover of this manual...

English Manual
Page 17
For information about ordering replacement parts, see the back cover of the User's Manual. REMOVE THIS EXPLODED DRAWING AND PART LIST FROM THE MANUAL Save this EXPLODED DRAWING and PART LIST for future reference. -\ O O Note: Specifications are subject to change without notice.
For information about ordering replacement parts, see the back cover of the User's Manual. REMOVE THIS EXPLODED DRAWING AND PART LIST FROM THE MANUAL Save this EXPLODED DRAWING and PART LIST for future reference. -\ O O Note: Specifications are subject to change without notice.

English Manual
Page 19
... Cover Screw Incline Leg Spacer (long) Console Plate Speed Knob Speed Potentiometer Right Console Attachment Reed Switch Clip Key/Clip Motor Belt Power Cord Motor Tension Washer Star Washer Incline Wheel Nut Motor Tension Nut Motor Hood Small Screw Motor Pivot Bolt Choke Ground Wire Bolt Frame Cover Screw Wire Harness Cover Washer Cover Clip Hood Anchor Ground Wire Circuit Breaker Grommet Wire Clip Right Foot Rail Motor/Pulley/Flywheel/Fan Pulley/FlywheeVFan Motor Latch Pad Reed Switch Magnet 4" Cable Tie Ground Wire Nut Front Roller Adj. Qty. Qty. WLTL92065 R1297A Key No. PART LIST...
... Cover Screw Incline Leg Spacer (long) Console Plate Speed Knob Speed Potentiometer Right Console Attachment Reed Switch Clip Key/Clip Motor Belt Power Cord Motor Tension Washer Star Washer Incline Wheel Nut Motor Tension Nut Motor Hood Small Screw Motor Pivot Bolt Choke Ground Wire Bolt Frame Cover Screw Wire Harness Cover Washer Cover Clip Hood Anchor Ground Wire Circuit Breaker Grommet Wire Clip Right Foot Rail Motor/Pulley/Flywheel/Fan Pulley/FlywheeVFan Motor Latch Pad Reed Switch Magnet 4" Cable Tie Ground Wire Nut Front Roller Adj. Qty. Qty. WLTL92065 R1297A Key No. PART LIST...


